So I've had this 1991 745ti since about 1997. Love the car madly. I'd done most of the usual mods, IPD suspension, 15g, MBC, Thelostartof chips, RSI Stage II cam and adjustable cam gear, Unorthodox Racing aluminum crank pulley, etc. Finally put an M90 in the car about a year ago and loved that, then my trusty old B230FT went all soft and squishy (read: leak down that would make a porn star blush). My wife’s car is a yellow T5-R, and I LOVE that motor, but just don't like the FWD platform (read: hopeless smoke-bombing of tires rather than forward progress). I have been threatening this conversion for years, but as life works, I had the time, but never the $$ to get the job done right.
Well, I finally got to a place where I have the $$, but absolutely 0 time (I work between 80-120 hours per week), so enter R-Sport, International (RSI), a Portland-based Volvo performance shop with some really demented ideas about appropriate uses for old Swedish steel .
The project’s requirements:
A reliable DD that uses as many OEM Volvo parts as possible (ancillary bits at least, hoses, sensors, etc.) With the hood down, the car should look like something a sporty grandpa would drive Power under the curve before peak - it's a daily driver after all As much power and torque as we can possibly stuff under the 400 WHP Curve
The plan:
Stage I - Mule motor phase Transplant a stock, running 5-Cylinder white block into said '91 745 For convenience and cost, we're using a white block M90 (European market true 5-speed offered in late model Volvo 960’s) New header, turbo, IC, intake, fuel rail, injectors, COP ignition (all being set up for a later built motor), 960 cooling system Standalone EMS See what breaks/fix
Stage II - Stupid Slick Stuff: Teach EMS how to run Volvo's variable cam timing (I got your V-Tec right here, yo!) Run the variable exhaust cam timing from a +T car and the variable intake cam from an N/A car since they share the same head design (if you're gonna do stupid stuff, you should be really stupid) Set up EMS to run a Ford Flex Fuel sensor (hey, E85 is green fuel and lets you build really really stupid motors) See what breaks/fix
Catch up: Need better suspension - convert the car to coil overs, roll center / bump steer correction, Need moar brakes…a LOT more brakes! (“Hello Wilwood?”) Selecting braking points by zip code = not cool! Starch and press drive line - as soon as the car has more than 225 rubber under it, PARTS WILL FLY - not sure what rout we're taking here yet, but the car will want bigger drive shafts and some sort of rear-end modification (possibly a Ford 8.8) Daily driver style cage to remove flexy-flier quotient and add safety More rubber under the car See what breaks/fix
Stage III - Stupid motor build RSI internals Darton sleeves? Head work Custom cams Balanced within an inch of its life Richmond Gear 5 or 6 speed See what breaks/fix
That's the nickel tour of the project that's only been in the works for about the last 12 years.
The following images may be inappropriate for younger viewers, however, be assured that the vehicle in question is over 18 years of age, and is subsequently a legal, consenting adult.
What it is:
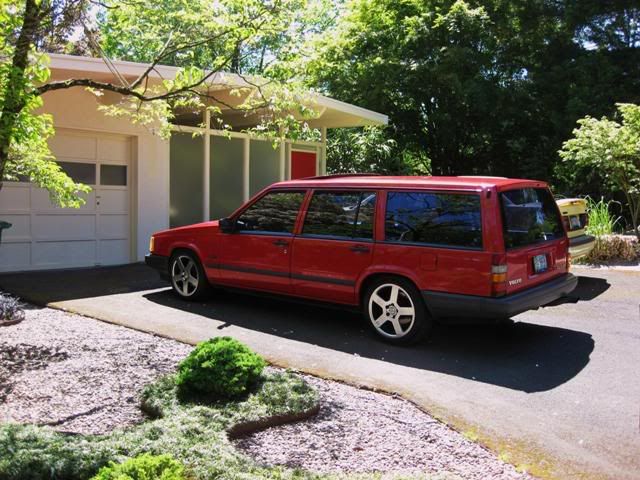
What it was:

What it shall be:
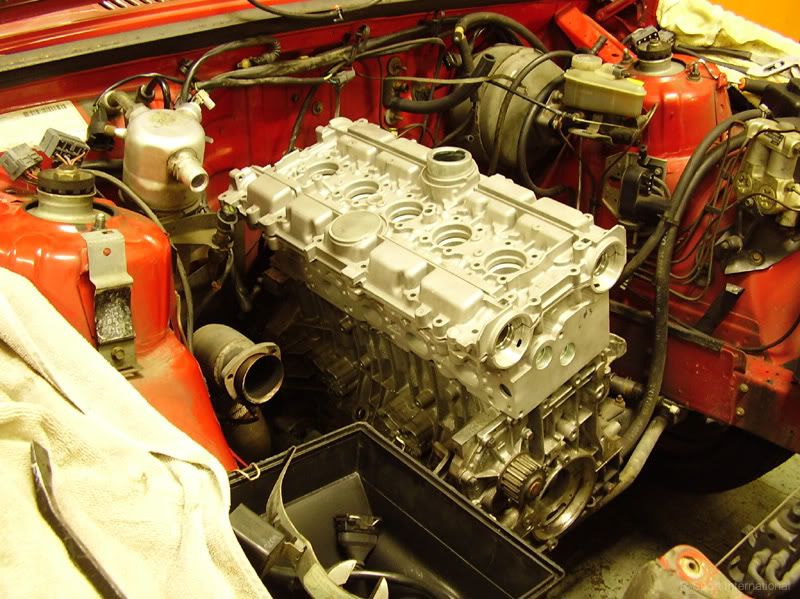
Step 1 - Remove defunkt Soviet-era tractor motor:
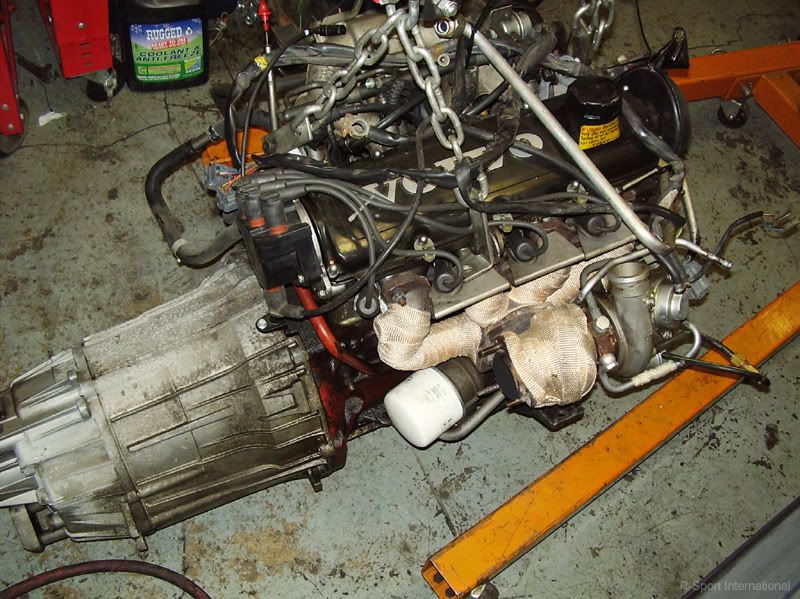
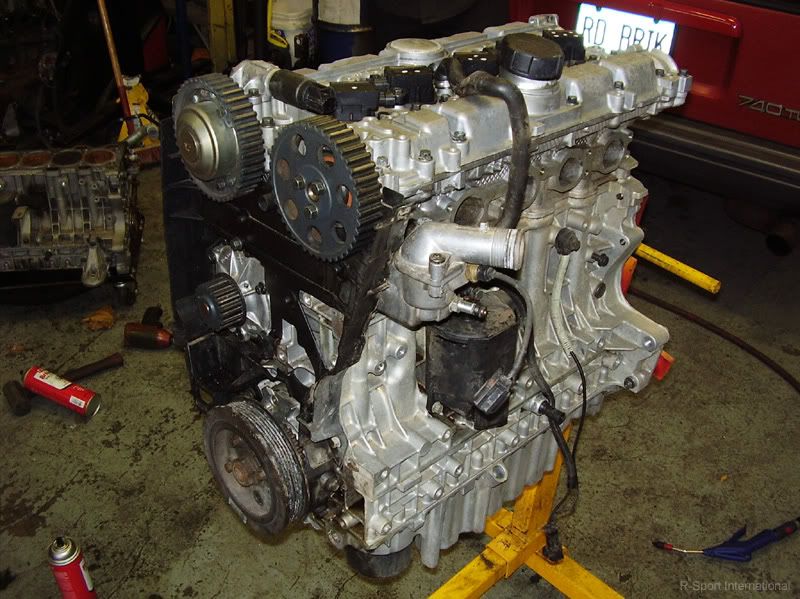
Step 2 - Start with a good boneyard white block - Part A:
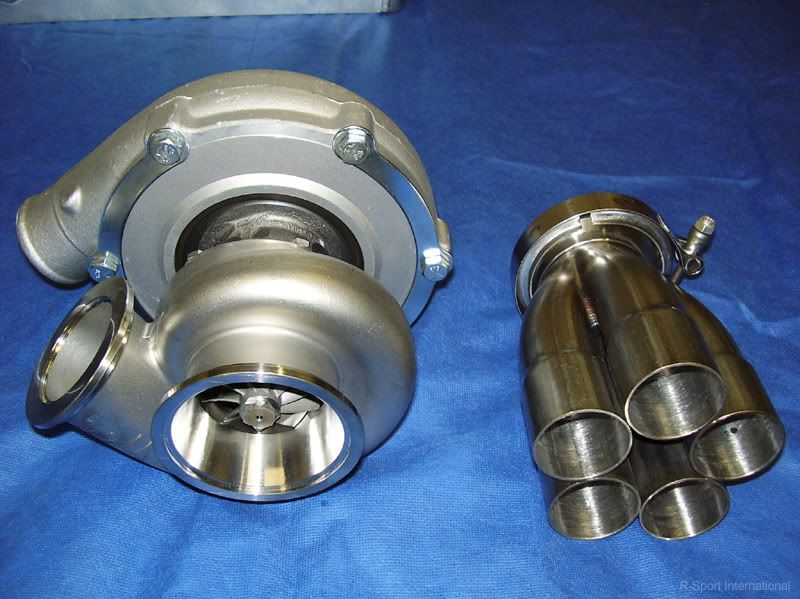
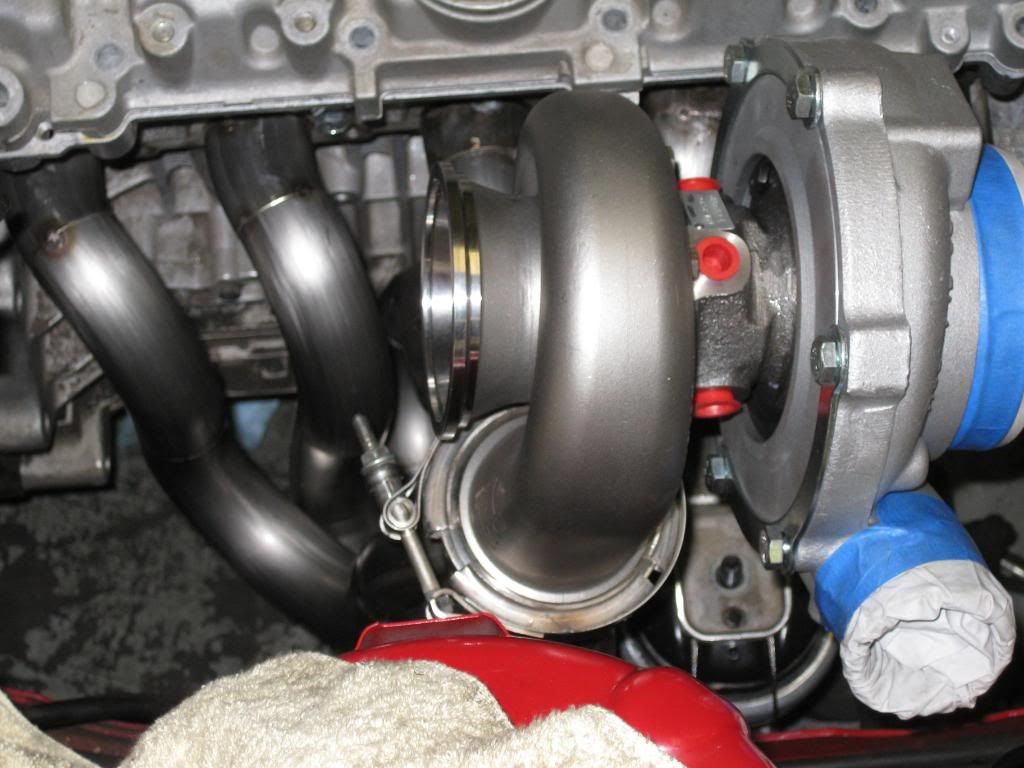
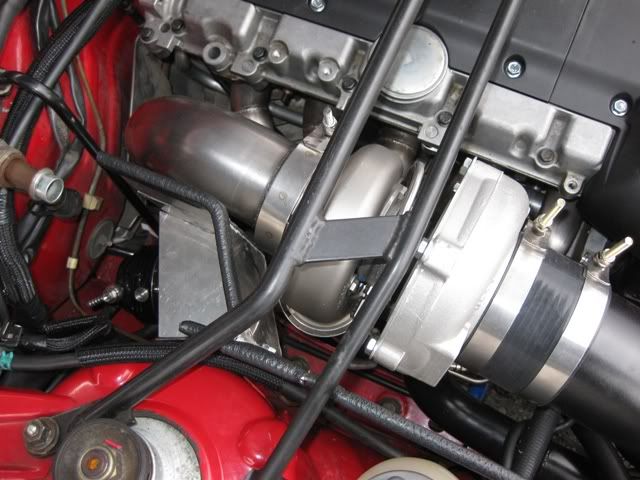
Step 3 - Select additional parts: .60 A/R GT30-R with a new ubersexxay Tial cast stainless hot section - sexy enough to give the dead wood. Yes, that's V-band everywhere since there's no serious pulse pairing joy with a 5-lunger.
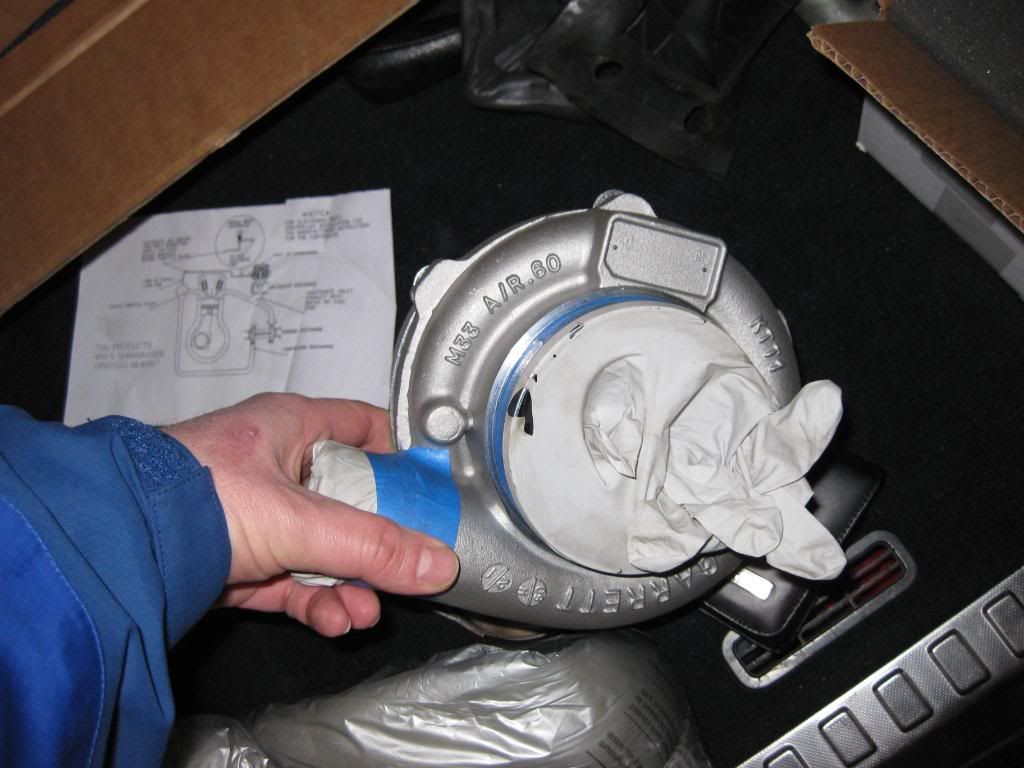
Step 4 - Use protection to keep love stains out of said turbo:
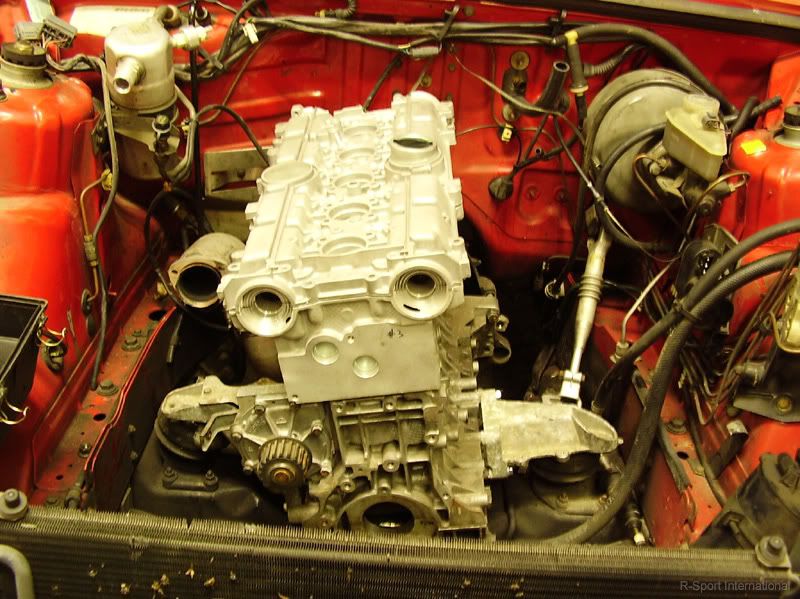
Step 5 - Insert part A into Brick:
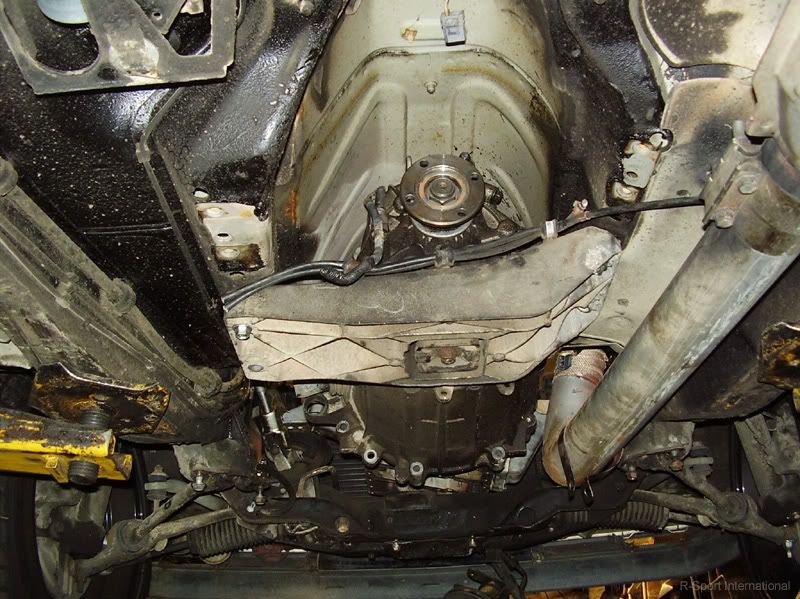
Step 6 - Enjoy convenience of weak-sauce OEM M90 transmission and chassis that has factory mounting points for EVERY transmission option ever conceived, even if Volvo never put in the car:
Step 7 - Employ highly skilled fabricator to channel the Fab-fu of Jah hisself:
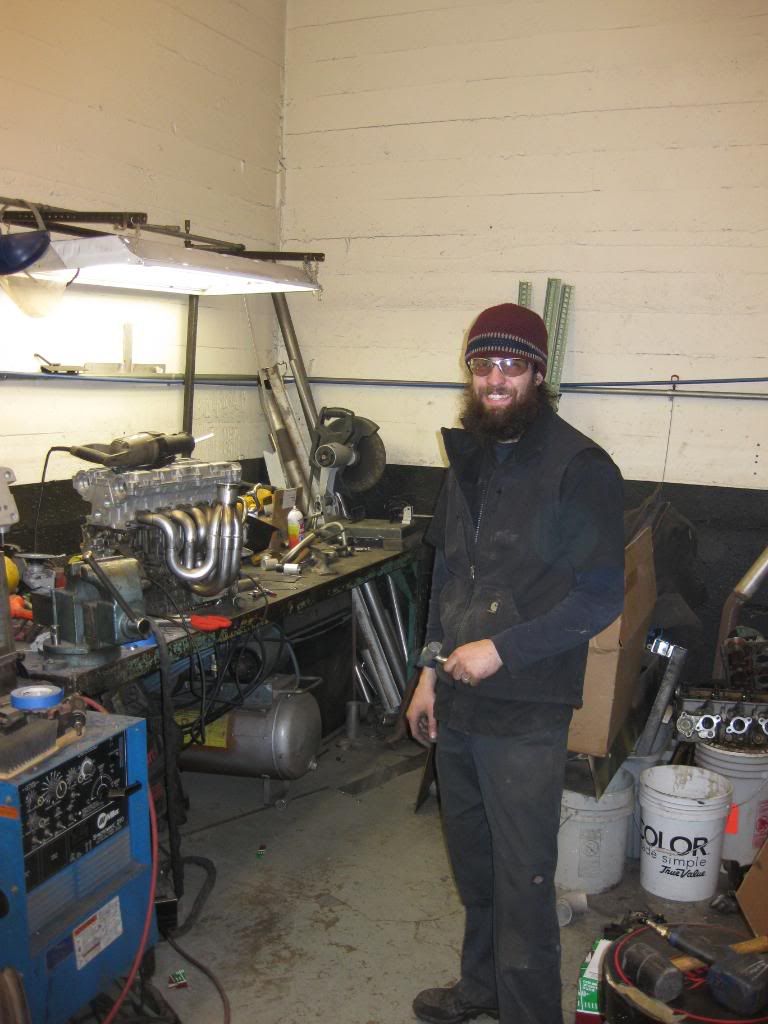
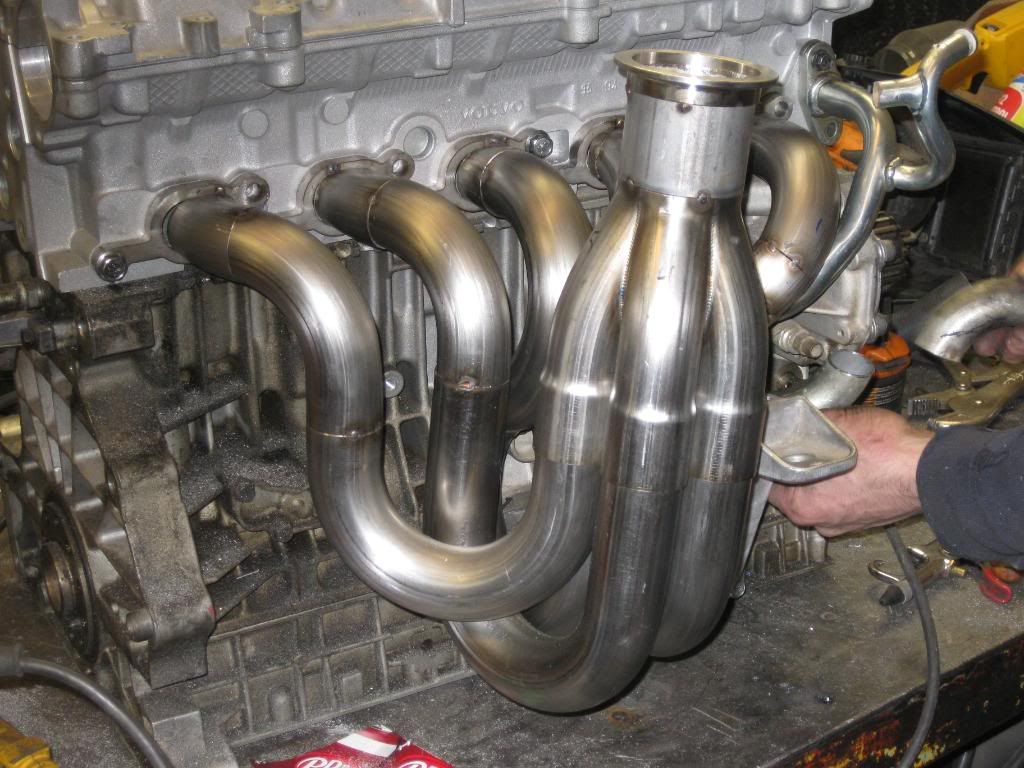
Step 8 - Figure out a nice way to introduce part A to part B - tacked together at this point, some minor tweaks still to be done, but you get the idea:
Step 9 - Introduce parts A, B, and C to brick to see if they like each other - its love at first sight:

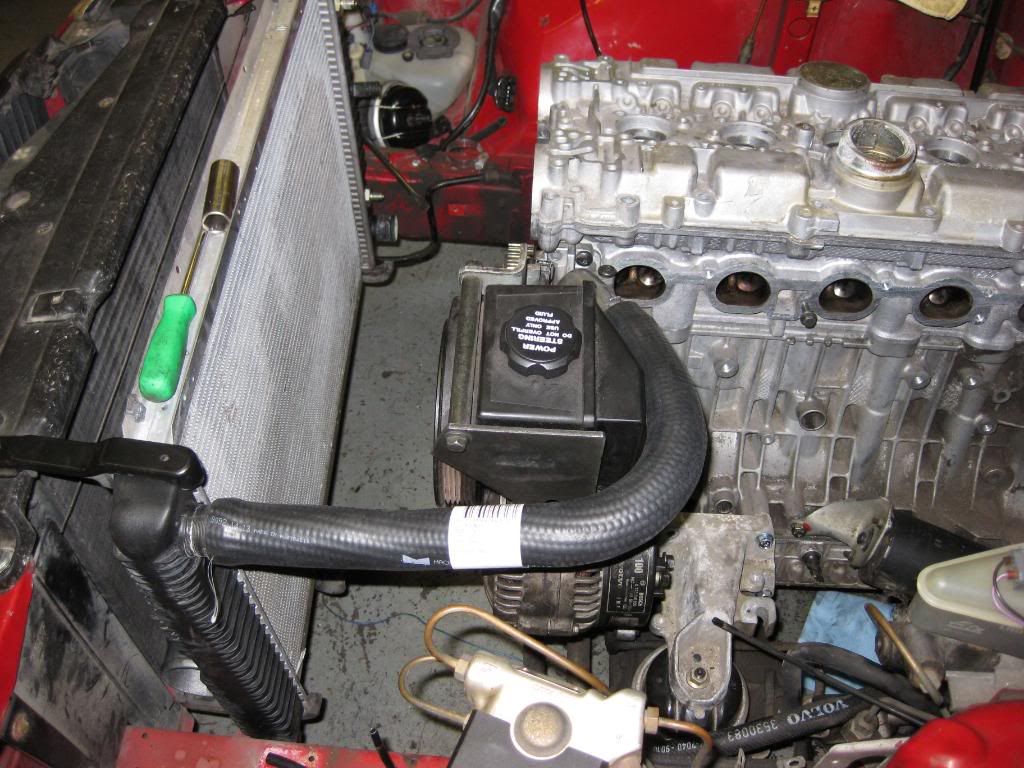
Step 10 - Realize that this intercooler (invisible in this picture cause it's too smaaallll) won't fit around new-ish 960 radiator - order bigger intercooler, 'cause hey! (Observe that 5-cylinder goodness only hangs 1-1/2 cylinders ahead of front axle line - so close to front-mid engine goodness!):
Step 11 - Decide that even though the 5-cylinder is only .2 liters bigger than the old red block, it needs a 75mm throttle body:
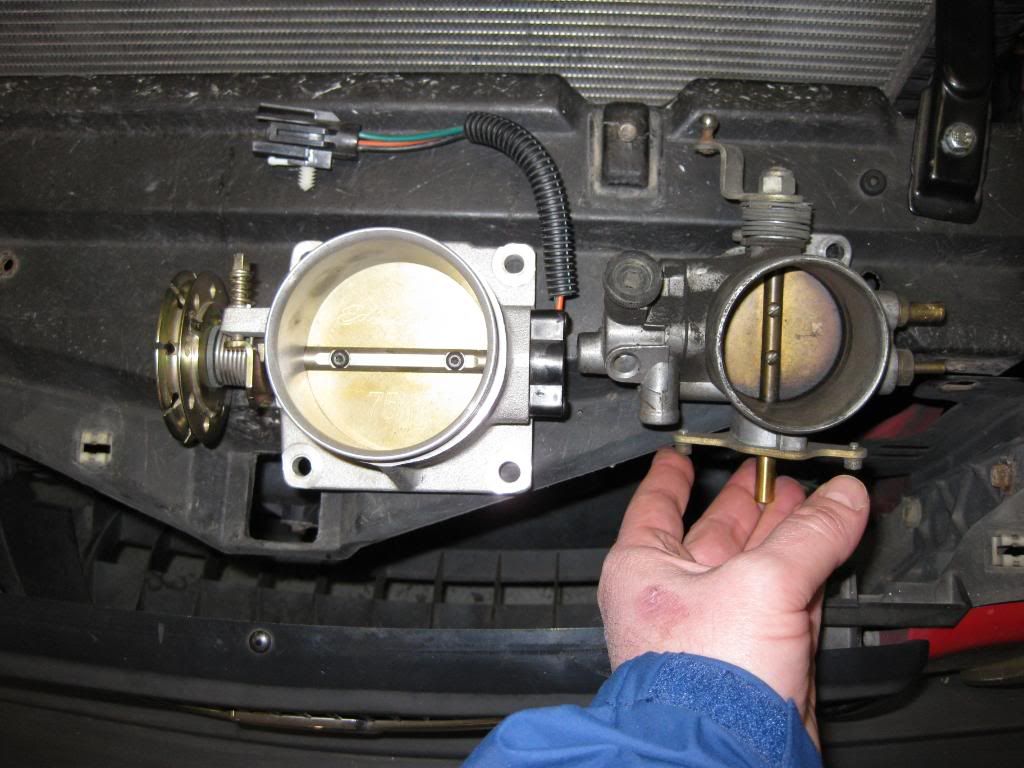
Step 12 - decide that numbering steps is complicated, confusing, and depressing when you still have 456,678,234 steps remaining.
OK, more progress photos:
Got the 960 radiator and I/C installed - note that I/C is now large enough to actually be seen! Woohooo! Still need to trim back the inlet and outlet and weld in some cast 90's.

Header is welded up and external wastegate is hung (and its attached to the header![]() )
)

Oil pan has been cut down, welded, resurfaced, and bead blasted. (Since Volvo “white block” motors are modular, you steal the oil pan from a 6-cylinder motor and cut it down for the 5-cylinder to get the sump into the right position and dodge the cross member.)

More progress:
Thar be a real motor in the car! Since the "real" motor's mounting bosses were about 3/4 inch further forward on the block than the test blocks, it tucked back into the firewall PERFECTLY! Still have a ton of work to do, but now it gets done with a real, soon to be functioning motor in the car.
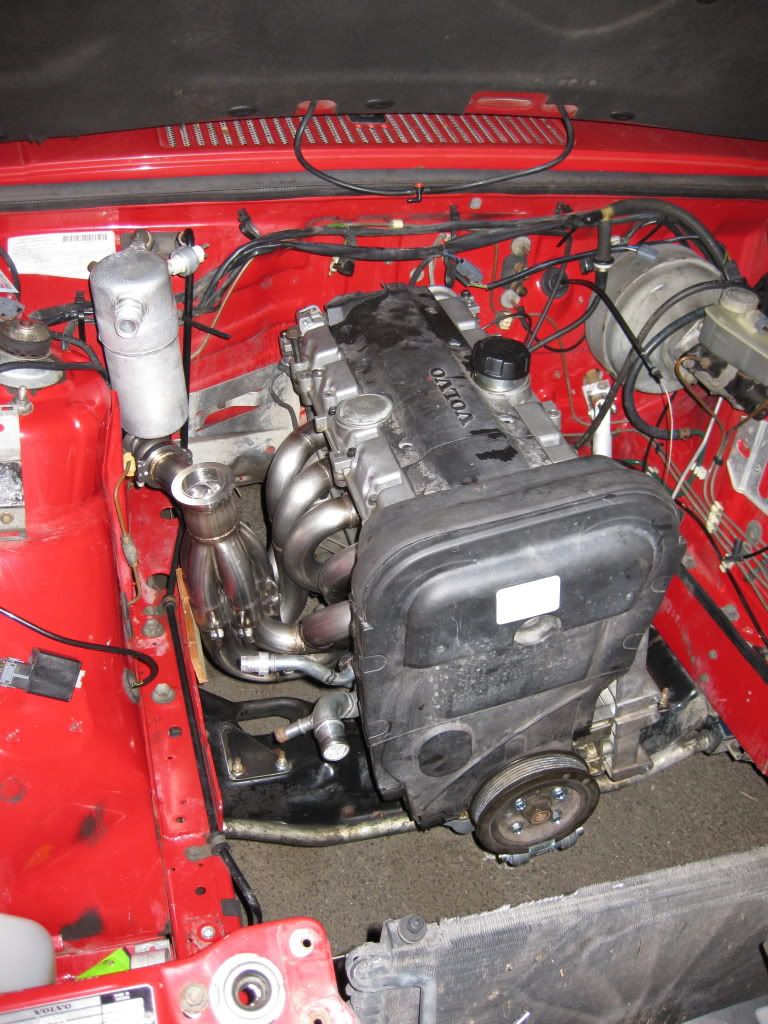
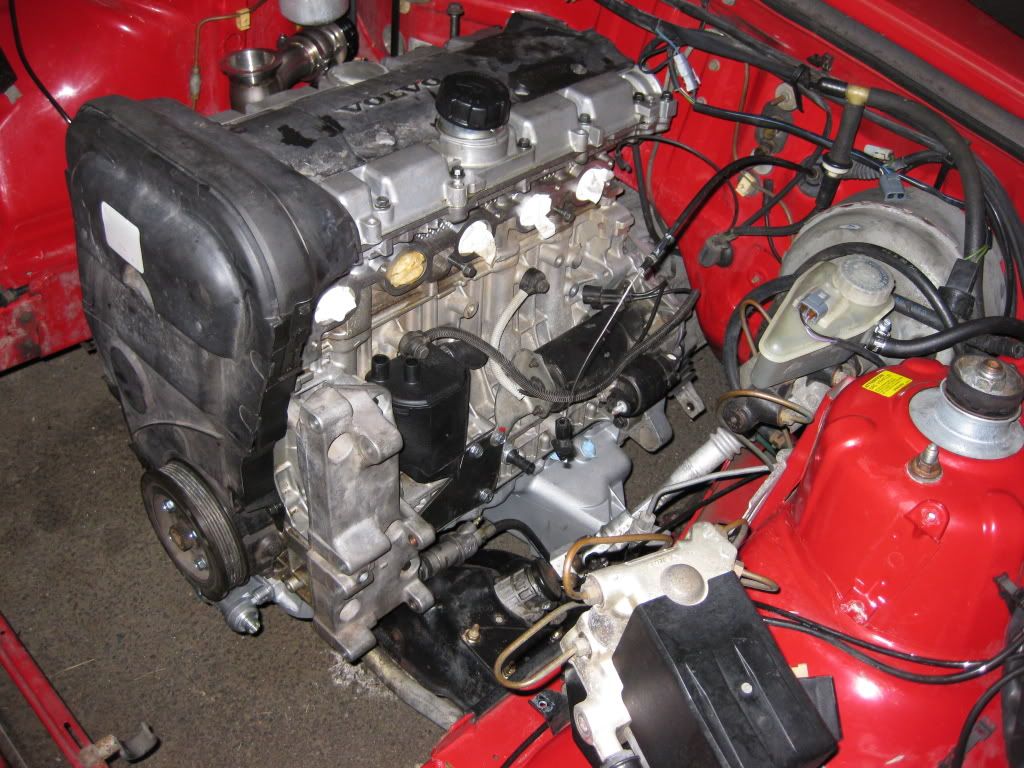

More stuff on the project...It's starting to look like a real motor now....or at least more like a motor that will run under its own power in the foreseeable future!
Intercooler in its final resting place...
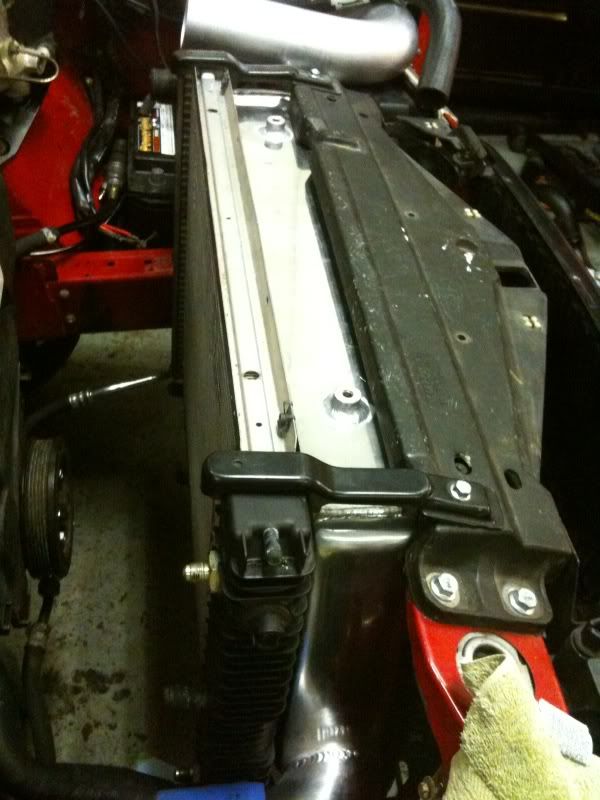
That means plumbing time!
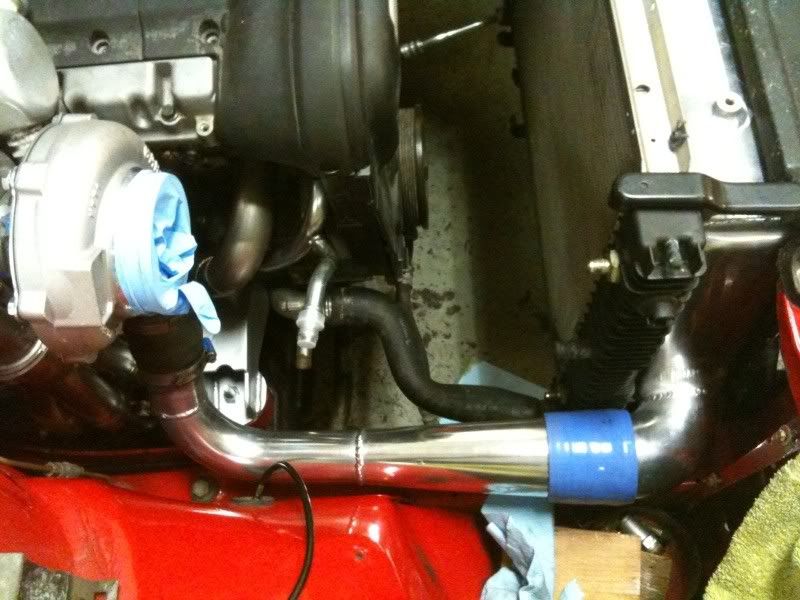
...and new motor mounts that cure the accessory positioning issues! Woohoo for da meaty motor mountzes!
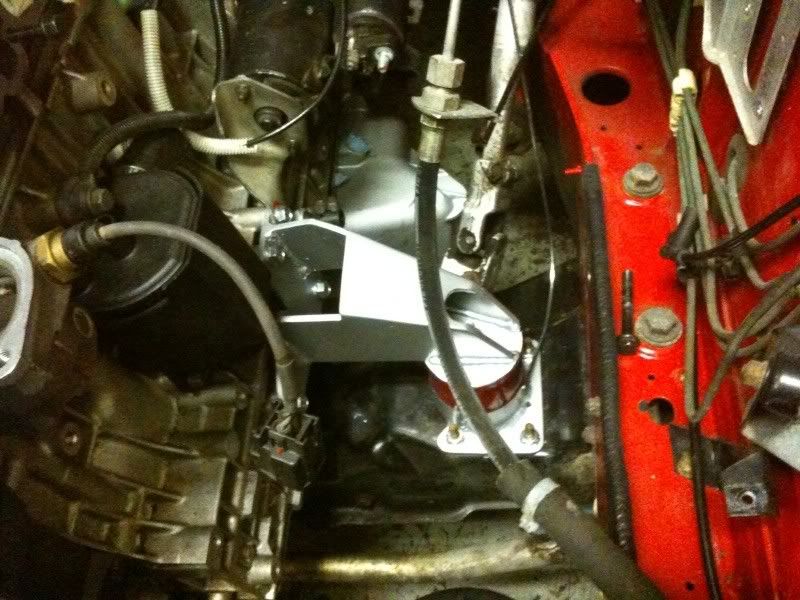
The downpipe is also done and plumbed to the waste gate, but no pictures of that just yet, but we're moving ahead!
More stuff:
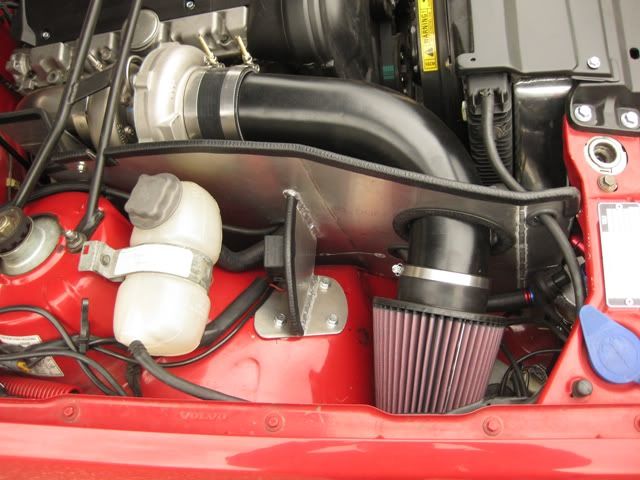
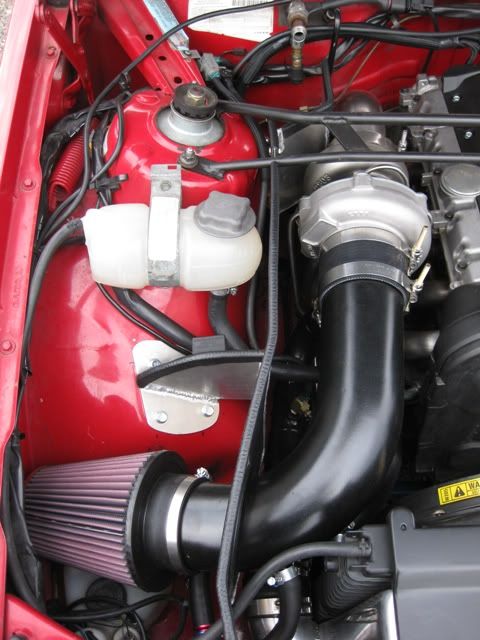
Heat shield for cold air intake and coolant reservoir/ A/C survival. Out with the old wiring, in with the new! 4" plumbing into the turbo - none of that pesky 3" stuff here!

Can't figure out where to put your air box? Make the whole side of your engine compartment into one!

Catch can in and head-on view of accessory goodness. (later moved to behind passenger-side headlight)

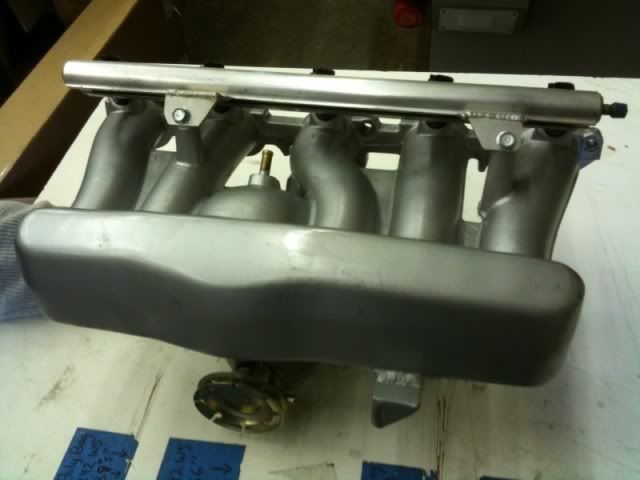
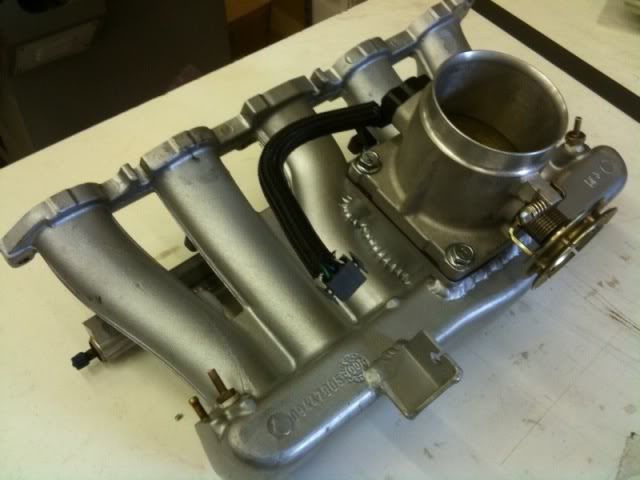
Mas Pikchas of progress! At this point I wasn’t sure if I wanted to drive the car or date it! The RSI pimp my manifold special, "Uber-Stealth Throttle-Body" edition. (TB coming to a manifold near you soon!) Temporary blingatude was necessary for welding up throttle cable holder and flange for 75mm throttle body.
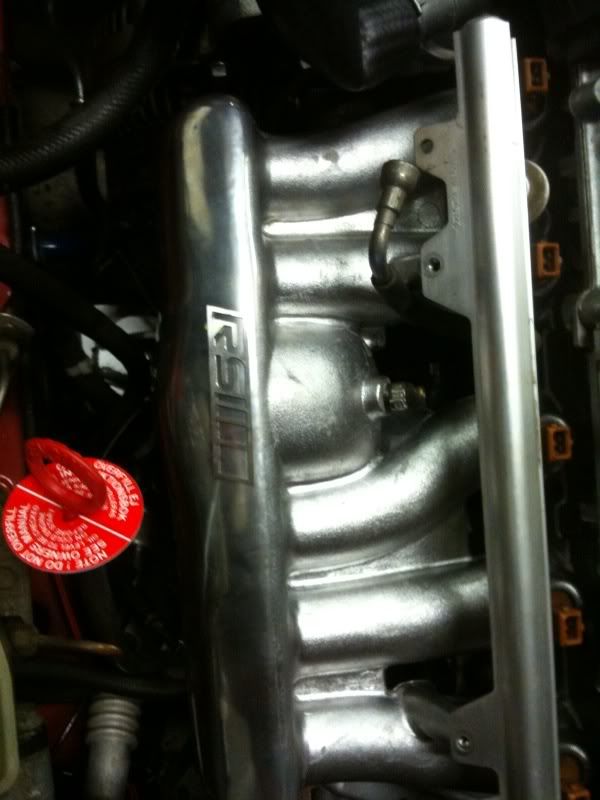
New intake in its new home (we tried using the stock rail, but returnless was a major PITA.) Stock injectors in there are just keeping the funk out.
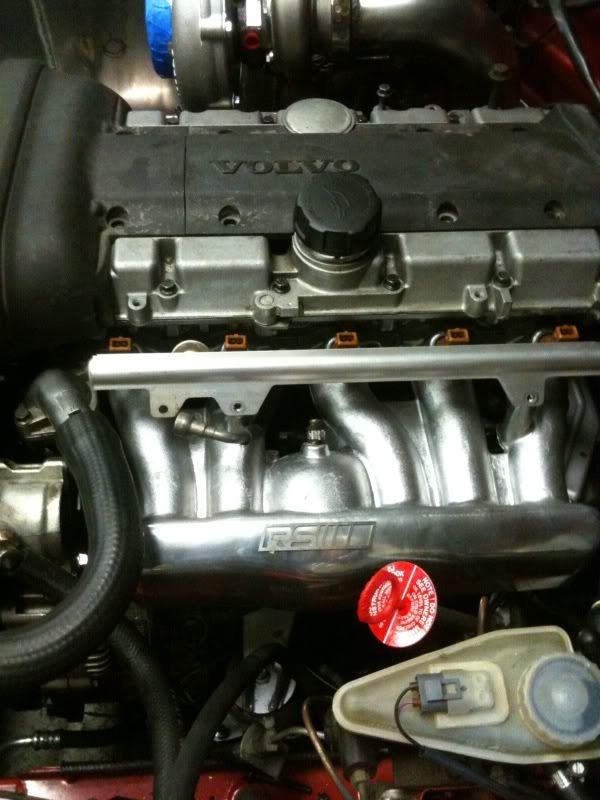
A rare shot of the new downpipe in place. Be afraid little A/C components....Be very afraid!
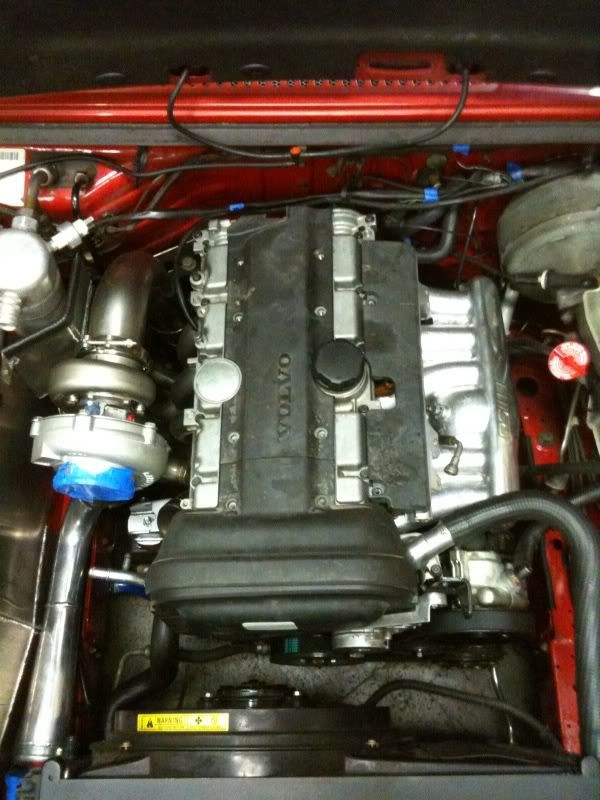
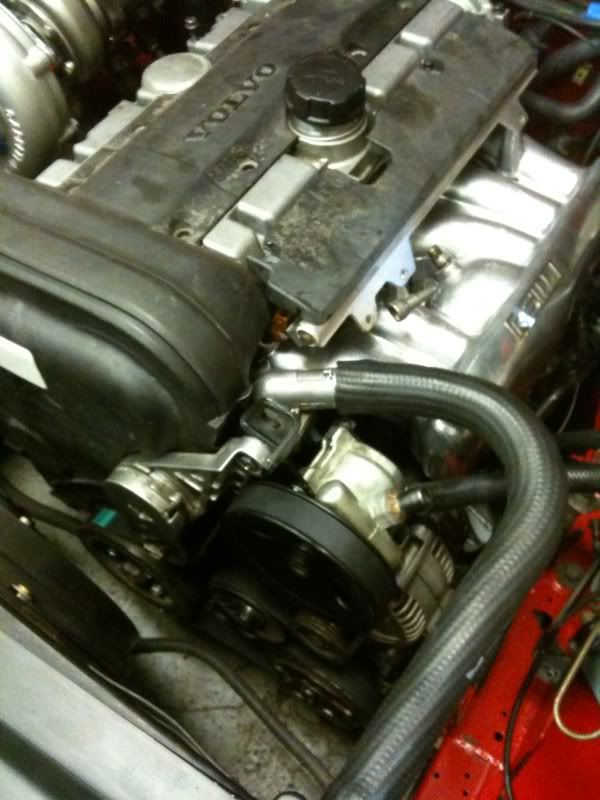
Accessories all living together in OEM-looking harmony with new intake.
Heat-shield almost complete.
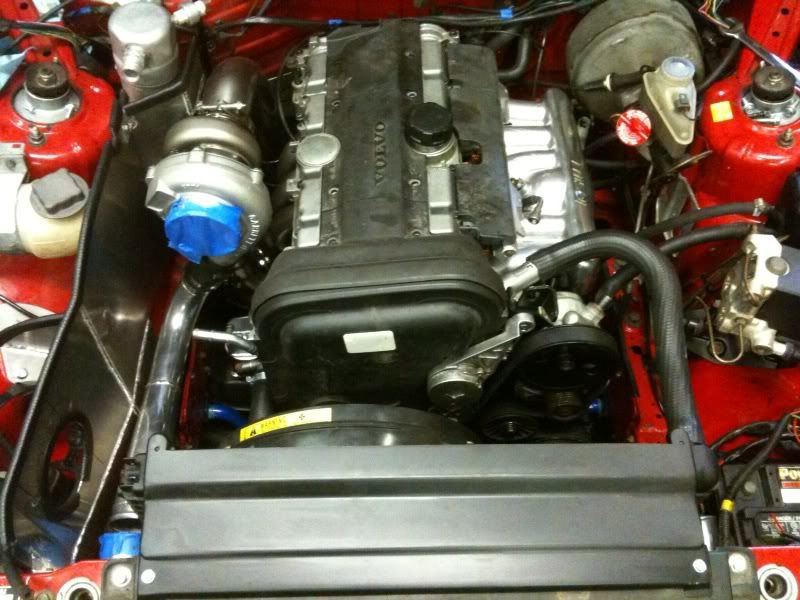
...and the whole ensemble (with the new intercooler/Radiator mount/shroud looking all OEM-ish!
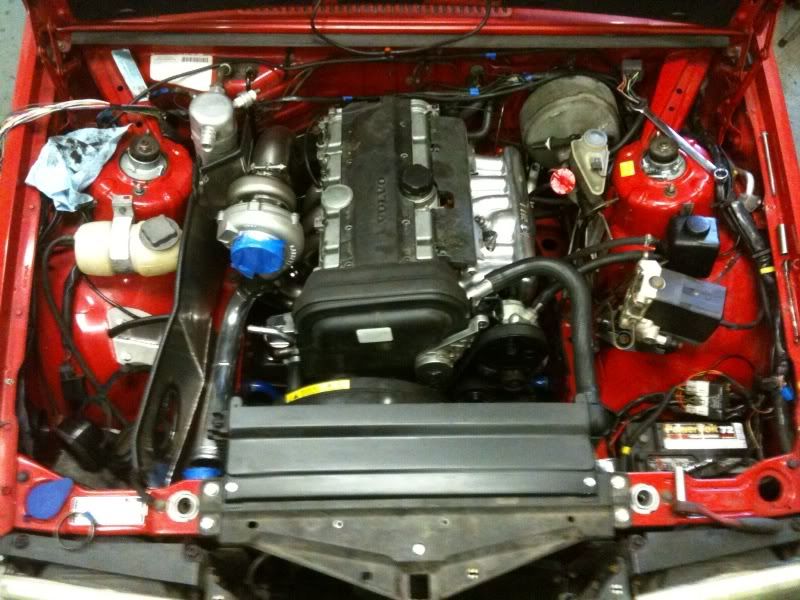
More photos:
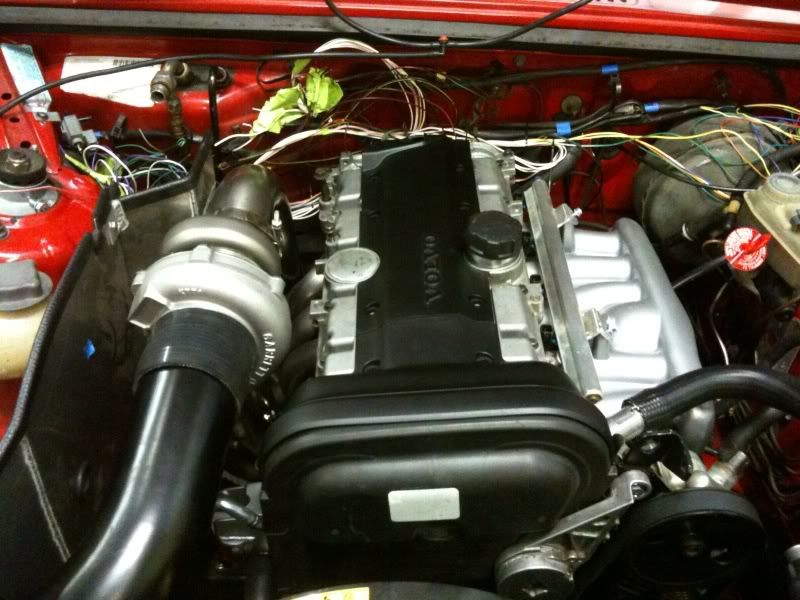
Powder coating FTW! Volvo should re-issue 740's, and this is what the engine compartments should look like!
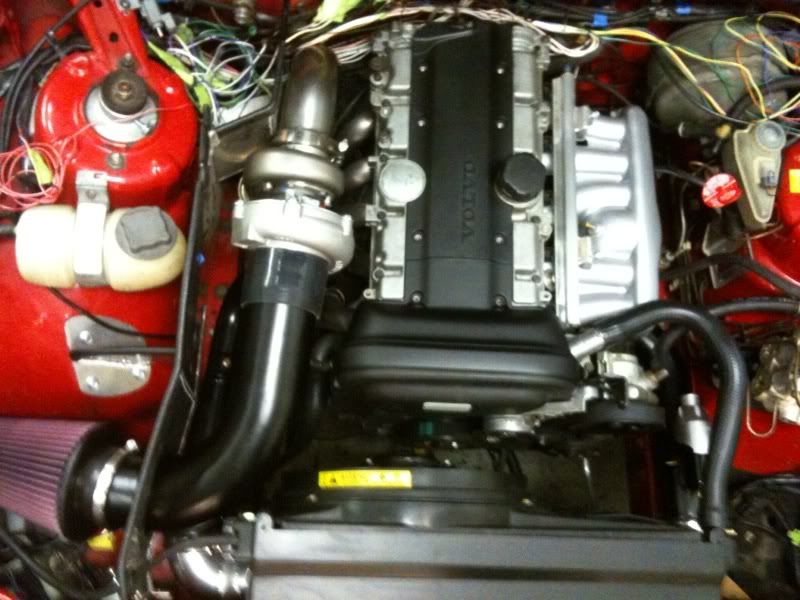
…and the wet-look low angle shot!
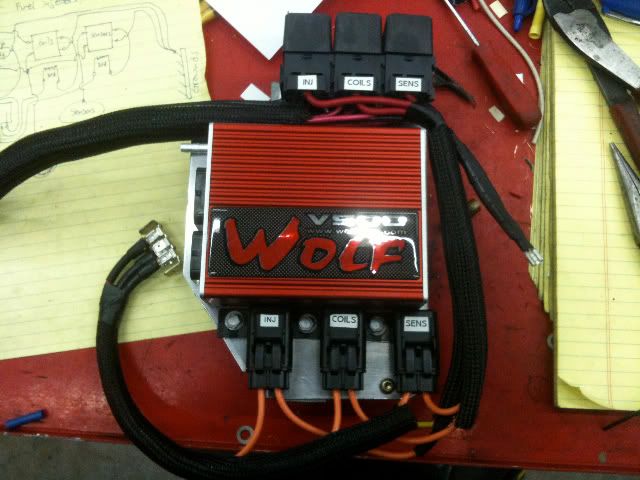
Wolf V500 set up for mounting in the factory ECU location with relay block and wiring solution:
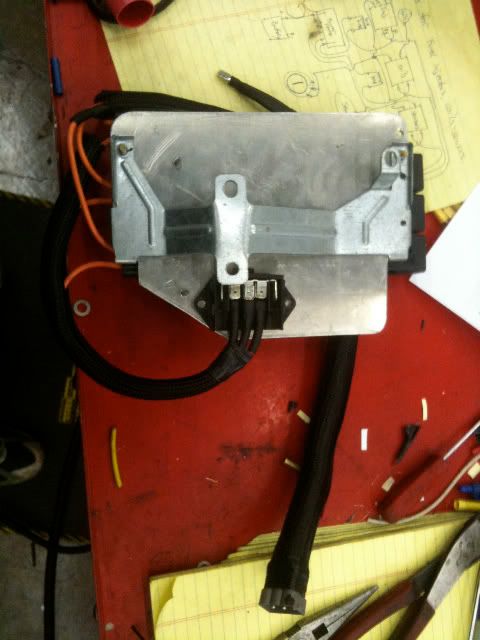
and lookie....it's even on a factory-esque bracket!
OK, so my first V500 had flaky firmware, and was replaced by Wolf. In the meantime, I figured I'd throw up some Pix of the completed (but still not detailed) engine compartment.
Pix of the Perversion:
I figure there's already an Overladdad 850T, so this is the Understaated 755
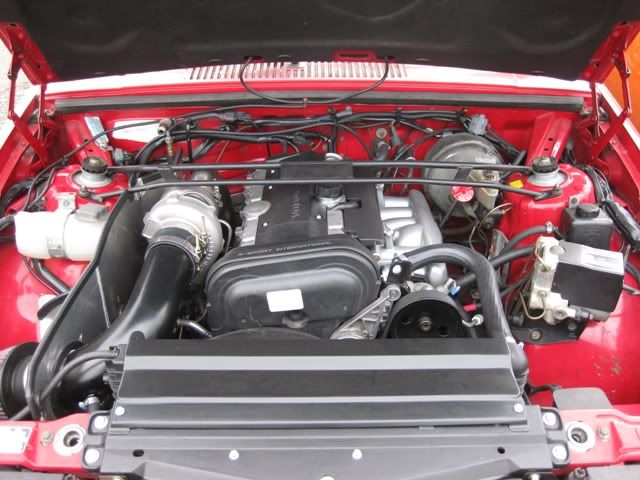
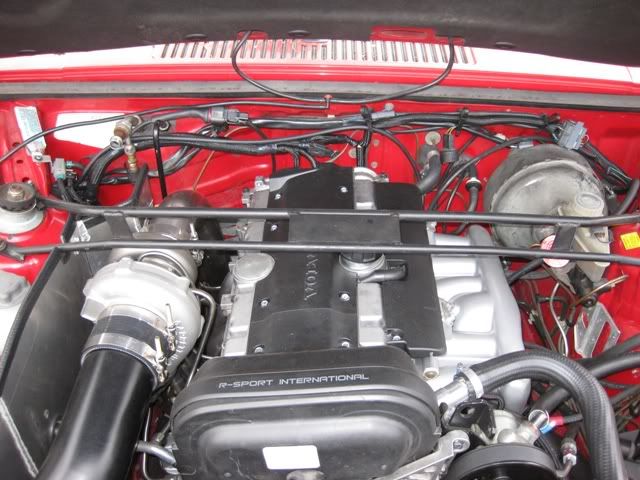
A ho-hum, factory looking engine compartment...
Completed one-size-fits-all cold air intake/keep parts from cooking thingamawhutzits.
Closeup of the heat shield between A/C and hot bits. A/C bits are waiting for new lines to show up.
Attempted closeup of throttle body and throttle cable mounting. Looks like a Volvo part to me!
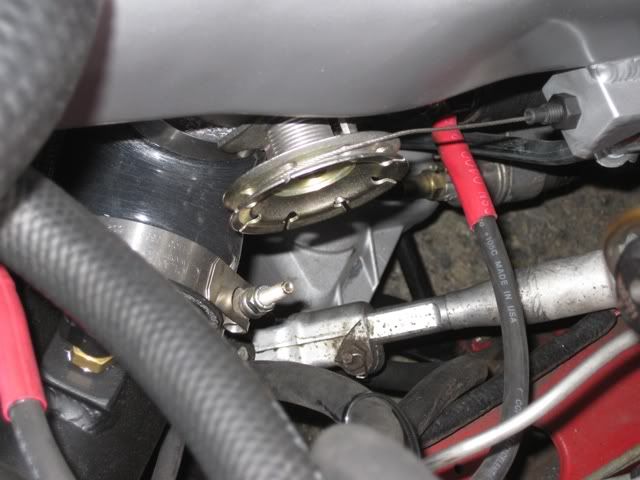
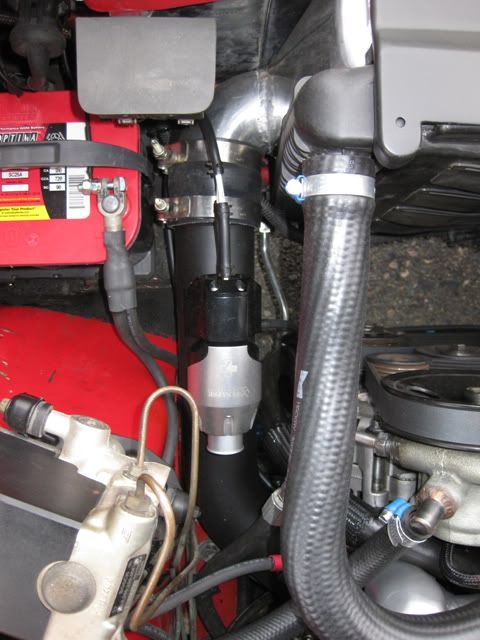
Not quite as stealthy, but equally tasty BOV action
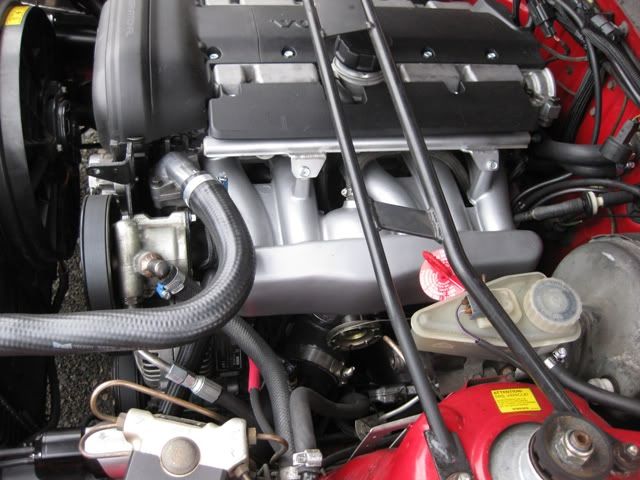
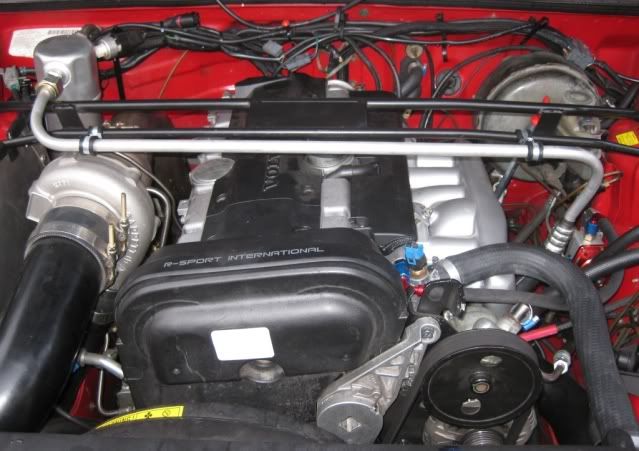
Overview of how the intake side came out (what 750cc injectors?). Need to switch to a tubular strut brace just to make adding oil a bit easier....needs a funnel now. For the built motor, A/C will be routed along the firewall.
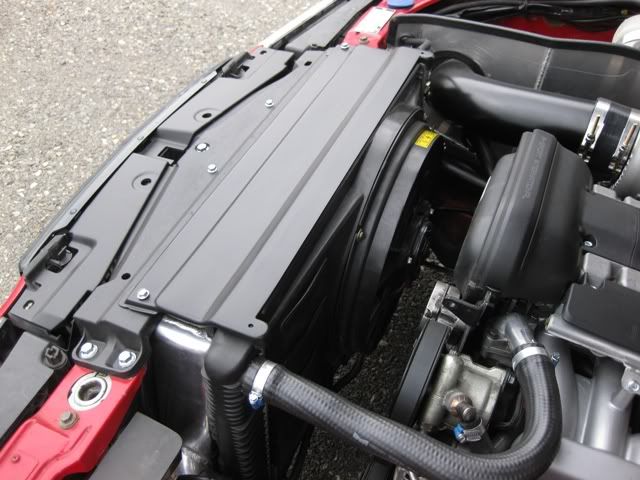
The reason I suffered through the 5-lung rather than going with a 6. Hmmmm...can you say down and back kids? I thought you could.
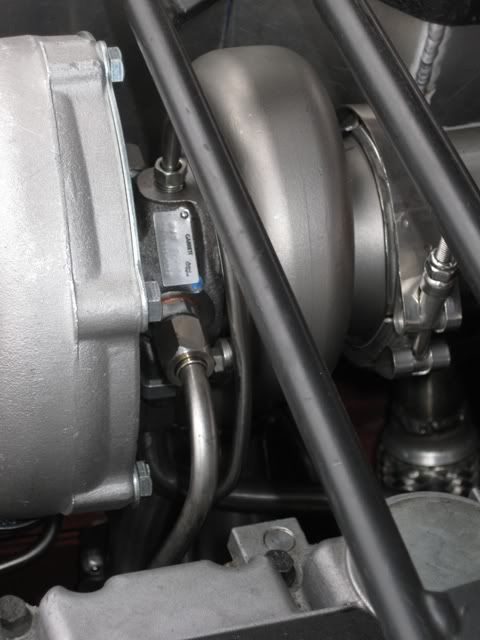
OEM cars have hard lines to their turbos...so should a 755!
Purdy engine bay wiring harness shot and credit where credit is due. (Man, I just had an OCD moment...I realized how crappy my old brake booster looks now and actually considered pulling it and re-coating it.)
What heat shield? This intake + turbo + 3 inch exhaust + WOT...I may as well take the stereo out now!
The important part! Might want to turn down volume at about 38 seconds, poor phone video sound is terrible. This was the first start of the first boneyard motor of unknown origins....turns out it had been abused in a former life.
This part was followed by a trip to the dyno. During some steady-state fuel map tuning we discovered that the boneyard motor wasn’t too happy about its newfound boost – (read: I joined The Brotherhood of the Oily Crossmember)
Post mortem update:
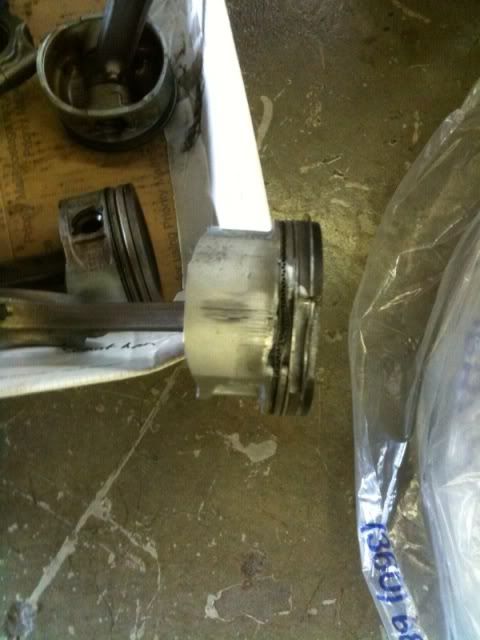
The minus column: Piston sans large chunk (Three of the other slugs also had broken ring lands, but were nice enough to not scatter completely.). Clutch was also found to be hopelessly inadequate.
The plus column: The busted off chunk was considerate enough to gall itself to the cylinder wall, rather than letting the piston/valves/turbo try to gargle hot aluminum.
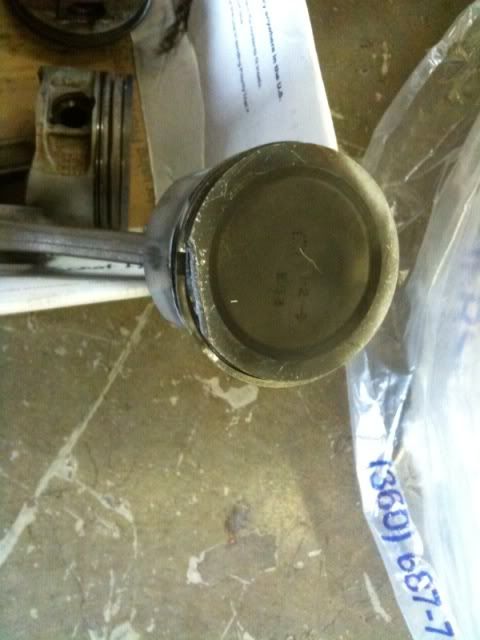
Giving a new meaning to ring "pack". Break happened right above where the ring gap used to be.
Got clean and straight parts back from the machine shop. Oil passages looked like the motor's PO had thought "original Penzoil" was a selling point. Much better now, but I'll still Seafoam the oil once the rings have found their happy place. Sourced a new, starchier 6-puck clutch disk.
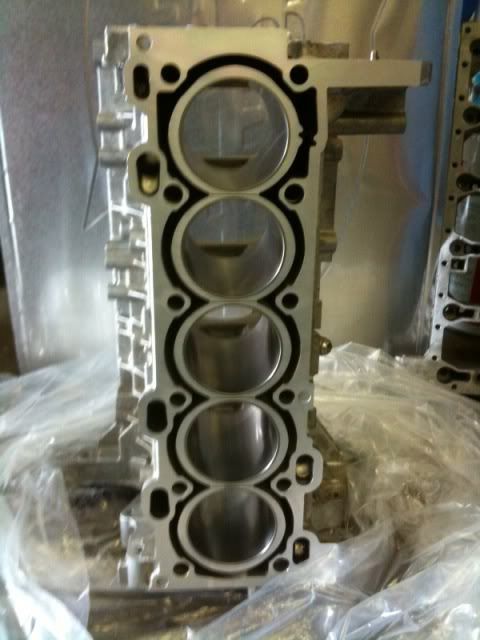
Genuine Aluminum colored white block! Cleanup passes on the bores, deck and head were all that was done - sourced a set of used stock pistons to replace the crunched ones.
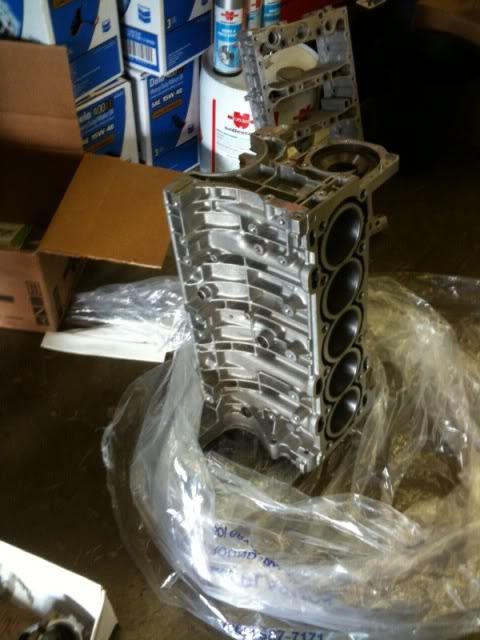
Hey, what's 50g out at each end between friends? The crank in the block can now go 'round and 'round following balancing:
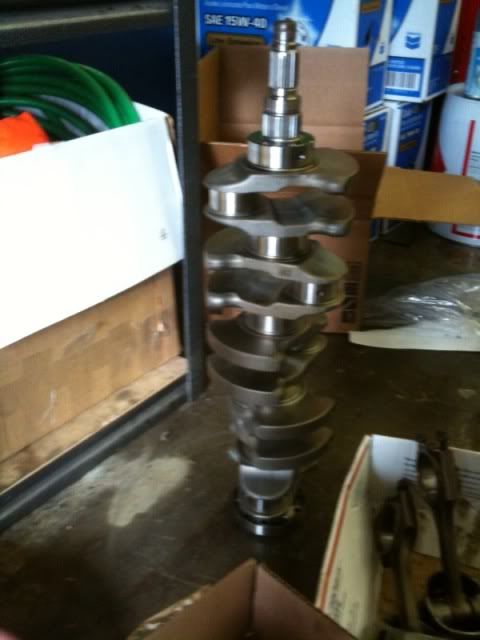
Some pretty pix for those who were interested in how the intake was put together.
Throttle cable holder:
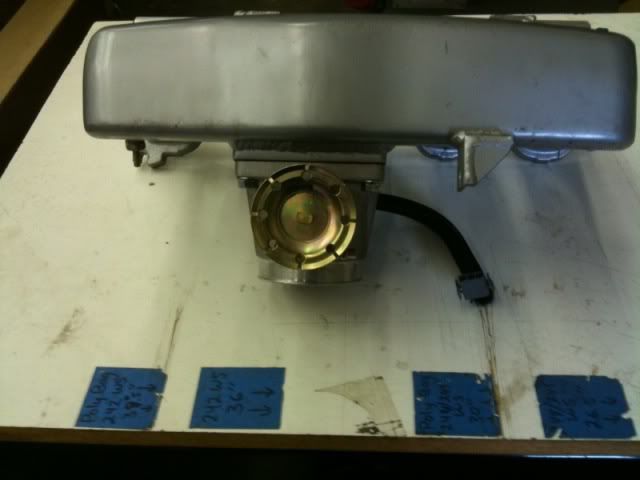
Lightly modified stock rail for the new injectors (we tried, but oddly enough, fuel pumps that aren’t made for it don’t like being deadheaded – once we put in the Bosch 044, we pegged a 160PSI fuel pressure gauge and thought a return might be a good idea…DOH!:
75mm throttle body attached to enlarged stock orifice. Very clean.
A little clean-up machining, resurfaced deck and head, fresh rings (with bigger than stock end gaps...heh), and some new bearings later and it was back to the dyno!
The dyno sheet:
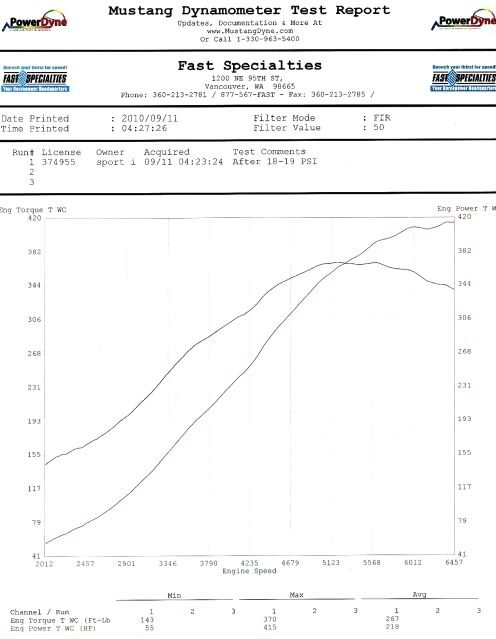
We’re really holding low-PRM boost down with the EBC to protect the stock bottom-end since these motors are notorious for having skinny, flippy little rods that like to pretzel. The boost map is something like 7PSI to 3500, then 10PSI by 4000, 14PSI at 5000, and finally about 17-18 PSI after 6K. This is a temporary kluge while we get everything else up and running, then the built motor will go together with I-beam rods and some Weisco pistons and we’ll be able to fill in under the curve as intended.
Right now I seem to be friction challenged in both the clutch and rear tire department. Basically, 1st and 2nd gear hopelessly boil the tires, then 3rd gear hopelessly boils the clutch…back to the drawing board on that front!
Daily driver status getting closer. A/C installed!
The crossover pipe will have to be modified a bit later on once the ladder-style strut brace goes away for a tubular. Right now it's forcing the dryer to sit too high so it hits my hood insulation. (the dryer's heat shield isn't installed right now)
Looks clean though!
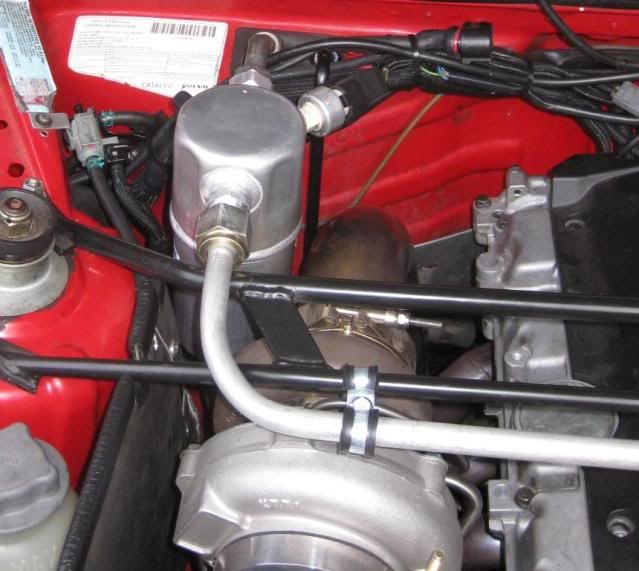
...and the compressor side.
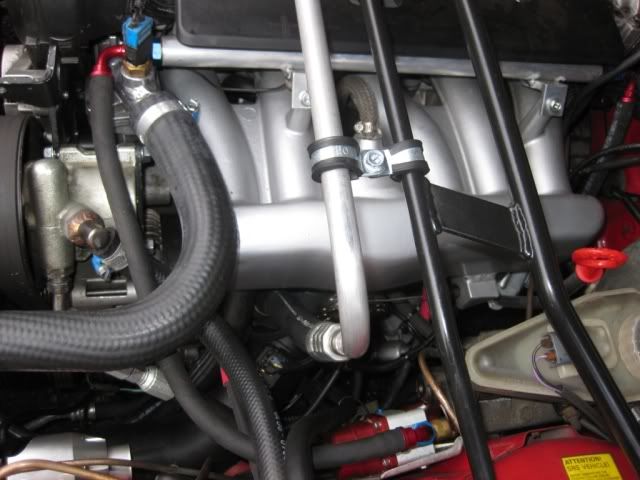
It'll need some final tweaks before the built motor goes in, but for now, we have A/C!
Well, it's not the most thrilling pull, but here's some video of map tuning with a pull at about 10-12PSI at 3:40. Once we started adding boost after this video, we ran into spark blowout at around 4200 RPM's. Swapped the -6 Iridiums that were in the motor for some garden variety -7 NGK's and then got the 415 pull at around 17-18PSI.
Yes, I'm playing backseat tuner watching the analog boost gauge so we could check what it read against what the logs said. Yes, I look like Lurch in this video…
Still have a lot of little driveability tuning to sort out, then we move on to Stage II!
Hope you enjoy the toy!


