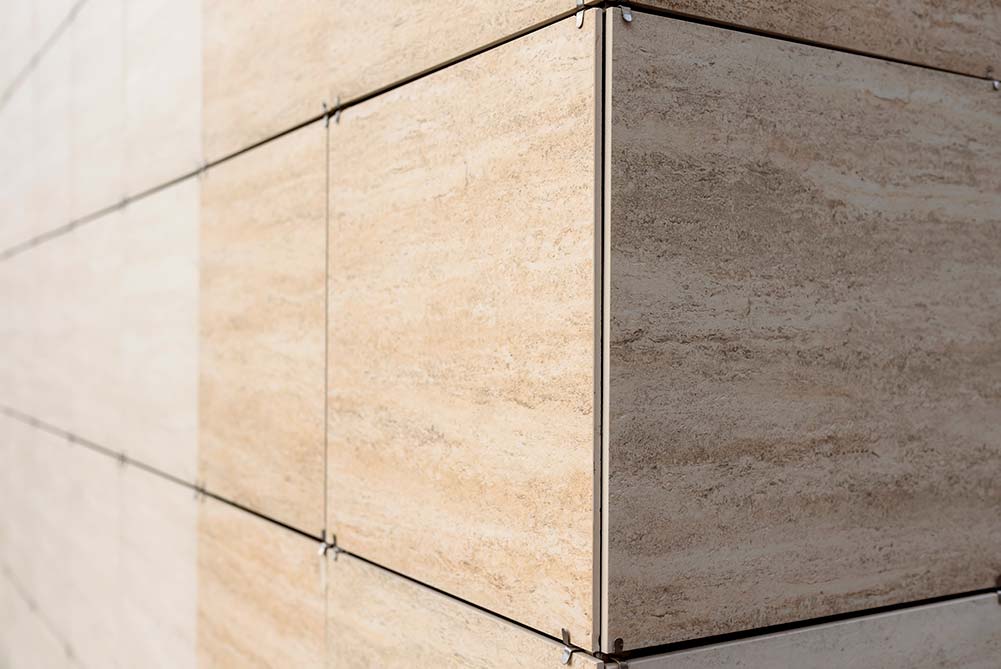
Grout is looking good! I have the whole corner grouted now so the toilet can go in tonight. A functioning toilet upstairs will be nice! Don't mind the fact I haven't put the door on the bathroom yet. 🤣
I'm using FusionPro grout as I saw it recommended online in a tile group. Supposedly never needs sealed, etc. So far I like it, definitely follow their process, and only do small areas at a time, but it looks great. I'm loving how easy the wall tiles are to wipe clean.
Going to add a wood chair rail trim at the top edge of the wall tile later. Likely painted the green of the walls to keep it subtle.

Now, my current trouble spot....
The shower will be the same tiles as the wall tile in the rest of the bathroom. I will have the grout lines level across the room. For the corners here, I guess I'll just do the bullnose Schluter trim, either PVC white, or brushed nickel, but above that I don't know how I want to finish the edge. More Schluter bullnose trim probably, but to have it line up with the drywall instead I think would end up looking weird since it would be set back 1/2" or so compared to the lower part of the wall.
Not sure if that description makes any sense, but any input would be appreciated.


SV reX
MegaDork
3/20/24 12:07 p.m.
In reply to AWSX1686 (Forum Supporter) :
It took me a couple readings, but I actually understood that! 😂😂
Use 2 Schluter strips back to back. Use 1 for the shower wall all the way from floor to ceiling, then a 2nd one just for your lower wainscot area that kills into your wood chair rail.
Alternately you could put a wood outside corner that both sides tile and chair rail could kill into, but I'd be a little concerned about the bottom end of the wood rotting.
Third option.. use the Schluter only on the shower wall above the chair rail. Under the chair rail use no Schluter- use a bull nose tile to make the corner which butts up under the chair rail.
You can still match your level grout lines either way.
SV reX
MegaDork
3/20/24 12:22 p.m.
4th idea...
Use a tile chair rail instead of wood. It can be capped with a Schluter strip, or installed with a Schluter strip both top and bottom.
The advantage to the tile chair rail is that you can turn it directly into the shower and continue the line through the shower, without worrying about the wood rotting.
The you can finish the high part of the shower tile edge with an additional Schluter strip from the chair rail up (and it won't matter that the edge is set back 1/2")

STM317
PowerDork
3/20/24 1:06 p.m.
If you're going to fully wrap the lower part of that wall with tile, can you do an outside corner with no trim? That would let you just have the schluter trim above your chair rail (or whatever divider you choose) where the shower wall tile meets the drywall end of the wall.
In reply to STM317 :
I'm not completely opposed to that, but it feels unfinished. A bead of caulk might help, or might make it look more careless. Maybe I'll take some scraps and mock it up.

No Time
UltraDork
3/21/24 10:17 a.m.
I had a similar wall and I wrapped the wall in tile with a single row on the joining wall to enable me to use the schluter edging (flat and bull nose) to get a clean transition.
I have some painting to do, but these should show what I mean. I didn't realize until looking at the photo that the grout lines didn't line up on that one corner 🙄


Progress is slow, but happening...
Last week I got the wall tile around the tub hung, and the floor grouted. You can't see the tub area here because there was stuff there, but here one shot.

Next up then is the shower... I had to adjust my framing because I changed up where we wanted the niches to be. I have to finish moving the plumbing vent, but it's close. I have two walls of cement board hung as well. Last one will be hung once the plumbing is moved.


What materials are you using in the shower, for the backer board and the niches? Curious about the best methods to waterproof niches and shelves like that.

Duke
MegaDork
4/2/24 2:44 p.m.
In reply to maschinenbau :
I won't speak for AWSX, but in our project we used an Oatey waterproofing membrane as the shower pan. It tucks into the drain piping. Cement wall backer board went down over this, and there was a cement board underlayment too. That was all waterproofed with a roll-on fluid waterproofing membrane, and then the tile was thinset over that. If you scroll down a bit on that linked page you can see the installed products, including the red roll-on stuff in the niches.
In reply to AWSX1686 (Forum Supporter) :
That's looking really good! I'm glad you're making progress. I'm eager to see the final project.
In reply to Duke :
Thanks! I'm iching to be done with it! :)
maschinenbau said:
What materials are you using in the shower, for the backer board and the niches? Curious about the best methods to waterproof niches and shelves like that.
For my setup, I have a fiberglass shower pan, then 1/2" cement board on the walls. The niches are Schluter pre-fab niches, maybe a bit expensive, but they should be good to go waterproof. Once my last bit of cement board is up, and the niches are screwed in, I will be putting the Schluter Kerdi membrane on the walls before the tile. For grout I am using FusionPro, which claims to never need sealed. Corners will get good silicone caulk.
The tile for the shower has taken an embarrassingly long time, but I can finally say the tile is all set. I have some grout joints to clean up, and then it's time to grout. Like the rest of the tile, it's far from perfect, but it'll do I guess. Grout, Caulk, Shower Door, Bathroom door, then it's "semi-done". Still plenty of small stuff left after that, trim, etc that will take a while, but it'll be fully functional at that point.


SV reX
MegaDork
4/29/24 9:41 a.m.
In reply to AWSX1686 (Forum Supporter) :
Looking good!
I like seeing you thinking ahead (like protecting your shower floor drain)
In reply to SV reX :
Thanks! I had tape and paper down during all the tile setting to protect from thinset. I will be putting fresh down before grout. The black grout I got is VERY dark and likes to stain.
Duke
MegaDork
4/29/24 10:38 a.m.
Looks very good! I like that you lined the niche shelves up with tile joints.
In reply to Duke :
Thanks! That just happened to work out on the bigger niche. The top and bottom shelves are big enough for shampoo/bodywash bottles, and left a small shelf for bar soap, etc.
I got the door on and caulking done last week before we had guests for the weekend! Shower is officially in use now.

Next steps will be window trim, electrical finishing, tub cleanup, mirror+Light, and door trim. I am not in any particular rush on those items now that the bathroom is technically fully functional. I don't want to leave it unfinished forever, but I could use a break to take care of other things. Also I'd like to decommission my knob and tube before I finish too much more of the bathroom and the bedroom beside it.
So, it's true that the bathroom is the most expensive square footage in a house? 
Your project is looking really great. Good job.
What material are those niche shelves and where to get them?
VolvoHeretic said:
So, it's true that the bathroom is the most expensive square footage in a house?
Your project is looking really great. Good job.
Oh I don't doubt that. I know kitchens are also up there. I should post my kitchen reno from two years ago...
maschinenbau said:
What material are those niche shelves and where to get them?
Lowes, stone thresholds. The only downside is when you cut them, the face is unsealed so it stains easier. I don't think I'm worried about water with the unsealed faces, they're just not glossy. It seemed to be the cheapest, most flexible way to cut and fit what I needed. I mostly used the wet saw on loan from my friend, plus an angle grinder with some polishing/sanding pads off amazon for some finish work.
https://www.lowes.com/pd/Anatolia-Tile-White-Cotton-4-in-x-36-in-Polished-Floor-Tile/1001028026
In reply to AWSX1686 (Forum Supporter) :
Thanks! This turned out really good. So the niche pieces have a bevel? It was hard to see in pictures.
Just because, here's some before and after of the kitchen at my old house. Loved how this turned out, but then we bought the current house and moved out a year later. 🙃 (We did bring the stove with to the new house though.)
Before:


After:

The ceiling tile lights are dimmable LED, SUPER bright on full brightness if desired. The cabinets all also have dimmable under-cabinet lights I custom fit to all be on one switch. The flooring is a LVP, pretty nice, but shows dirt sooo bad. Cabinets were sanded/painted. Countertops have fresh formica glued down. Cast iron sink, which made the garbage disposal way quieter than on a thin stainless sink.


