


love the rod upgrade

Someday, you’ll tire of us bemoaning the fact that we want to encourage maximum heat transfer out of our 1991 Toyota MR2 Turbo’s engine compartment, but today is not that day. Because today is the day when we let you in on how we spent less than $30 to make a couple slick upgrades to the engine compartment of our classic Toyota sports car.
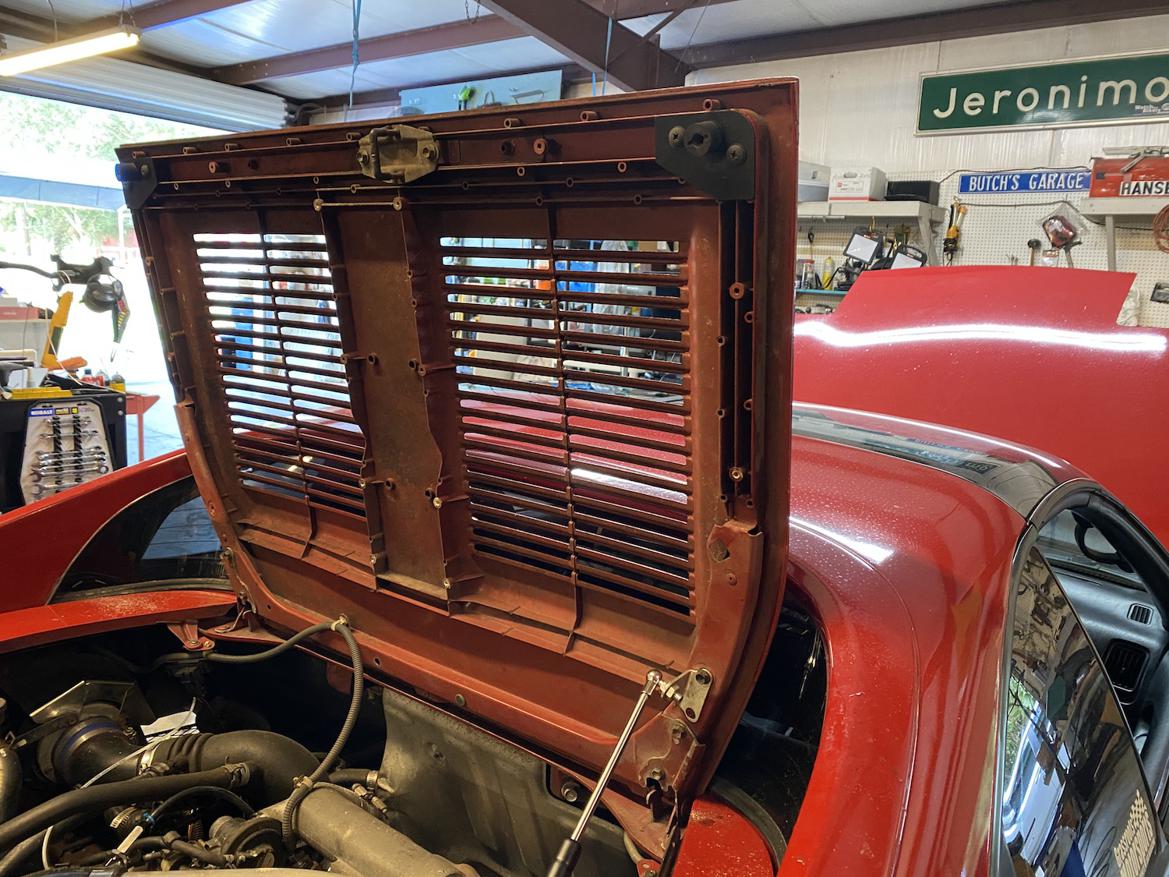
First, we gave the heat a clearer path out of the hot engine compartment by eliminating the stock “rain guard” found beneath the engine lid. This piece of thick black steel prevents rain from falling directly on the engine through the engine lid’s vents, but also prevented heat from easily escaping upward through that lid.

So off it comes, with the removal of about a dozen screws, and the addition of a couple slick rain guard eliminators from Wilhelm Racing.
Alex Wilhelm laser-cuts these aluminum tabs that bolt into the corners of the engine lid. These use the stock mounting points and allow you to reuse the OEM bumpers to properly locate the engine lid when it’s closed. For $20, they fit like a charm, work exactly as intended, look slick, and are a great value. Easy solution to getting rid of a big airflow blocker.


On the downside, removing the rain guard also removes the clip that holds the stock prop rod for the engine lid. That’s fine, because the stock engine lid prop sucks, anyway, and the plastic tabs holding it to the body have probably long since disintegrated on your 30-year-old MR2.
We upgraded to a hydraulic prop rod and did lots of measuring to find an off-the-shelf unit that would fit properly with minimal modifications. We finally sourced these from Amazon, which have a extend/retract range of 14 and 9 inches, and are rated to hold 22.5 pounds.


The brackets perfectly matched two existing bolt holes on the engine lid, and we only needed to drill a single 12mm hole in the center of the other bracket in order to mount it on one of the upper strut mount studs. Now we have a proper self-supporting engine lid, and don’t have to worry about a fiddly prop rod.

Like what you're reading? We rely on your financial support. For as little as $3, you can support Grassroots Motorsports by becoming a Patron today.

love the rod upgrade

So what happens when it rains? :) Does the engine actually care about getting wet?

codrus (Forum Supporter) said:So what happens when it rains? :) Does the engine actually care about getting wet?
I wouldn't let it sit parked in the rain for six hours (although unless you got standing water in the intake tract it would probably still be fine), but on a running engine it'll evaporate before it pools.

Relocate engine bay temperature sensor to ... exhaust manifold?

When we were racing MR2's we removed as much as possible from the engin cover as it is weight that is up high on the car. Then drilled and installed two hood pins at the back edges and completely removed the latch mechanism (all the way back to the drivers compartment. We put pieces of heater core hose over the pins cut to size so with a little pressure o teh engin cover you get the pin in and the cover does not rattle To hold it up there is no substitute for a good bungee cord back to the rear top window net bracket.
Cost less than $5.00 and worked every time.
This was then improved with the addition of two more hood pins with the same custom heater hose set up and ditched the hinges all together. On one car we put a strap through the grate and on another car I mounted a small handle (I think it was for kitchen cabinets) and on a third I just put a u bolt through the back center of the engin cover to let you get a grip on it to lift it on and off. With a bunch of material cut off the underside of teh cover it is amazingly light. This may have added another $5.00 in total cost.
This was by far the best for weight savings as you can cut out allot from the underside of the engine cover as well as getting rid of all the release mechanism stuff and the hinges. You can also ditch the rubber gaskets around the opening as well. IT was also better for working on the car. No prop rods or anything to get in your way while getting to the bac of the motor by the firewall. Hell you can run with it completely off if you want.
Another trick I did was on the MK1 cars that had the intake vent on the passenger side was tp get rid of the fan in there and instead install a piece of aluminum 3" drier vent hose that we ran back over to box I made that enclosed the air filter.
I then decided to take two pieces of the ducting a 3" and a 4" and I put them inside each other and slid 1/2" fire proof foam rod in on 4 sides. I then installed the tube and configured it the way I wanted it and taped it in place. I then took low expansion foam and filled the remaining open spaces between the two tubes and let it set up. I now had a custom fitted extremely well insulated light weight air intake that was getting air forced in to it from the passenger side intake duct that is right behind the passenger side door. It really helped with intake temps.
Thinking about this more I think we also put hood pins in to the rear trunk lid as taking that all the way off give you a great place to sit while you are working on the motor or a place to put tools and parts while you are working on it. It also gave good access to the stock ECU. In the race cars we kept two ECU's mounted in the car so during endurance races if we suspected a ECU problem we could just pull the back lid off and unplug the harness from one and put it in the other. We found that what were supposed to be identical ECU's were actually not. Dyno runs swapping various factory correct ECUs found as much as 10 HP and T differences between them. I attributed this to different markets around the world getting slightly different tunes but I never had any proof. Obviously we would put the best two in the car for a race.
edmagoo said:Relocate engine bay temperature sensor to ... exhaust manifold?
Yeah that fan comes right on now!
I put it back in one of the existing screw bosses on the lid. Just realized is was still dangling in that pic, though. Nice catch.
dean1484 said:
Dyno runs swapping various factory correct ECUs found as much as 10 HP and T differences between them.
Not the first time I've heard this. Even way back in the SCCA Showroom Stock days, "good" computers for SSC MR2s were frequently traded for premium prices.
I was snapping them up off eBay as many as I could find. The other interesting thing was some ECUs liked more static base timing than others. We would put the static timing settings from dyno testing on the ecu with a paint pen. A bad ecu could sometimes be woken up with timing adjustments. I had one that I actually took about four degrees out and it was a spectacularly good ecu.
Displaying 1-10 of 10 commentsView all comments on the GRM forums
You'll need to log in to post.


