robot
robot New Reader
4/14/20 12:06 p.m.

Hi everybody.  A few months ago this 1978 Dodge W150 with a Holley 2245 carb'd 360

followed me home.

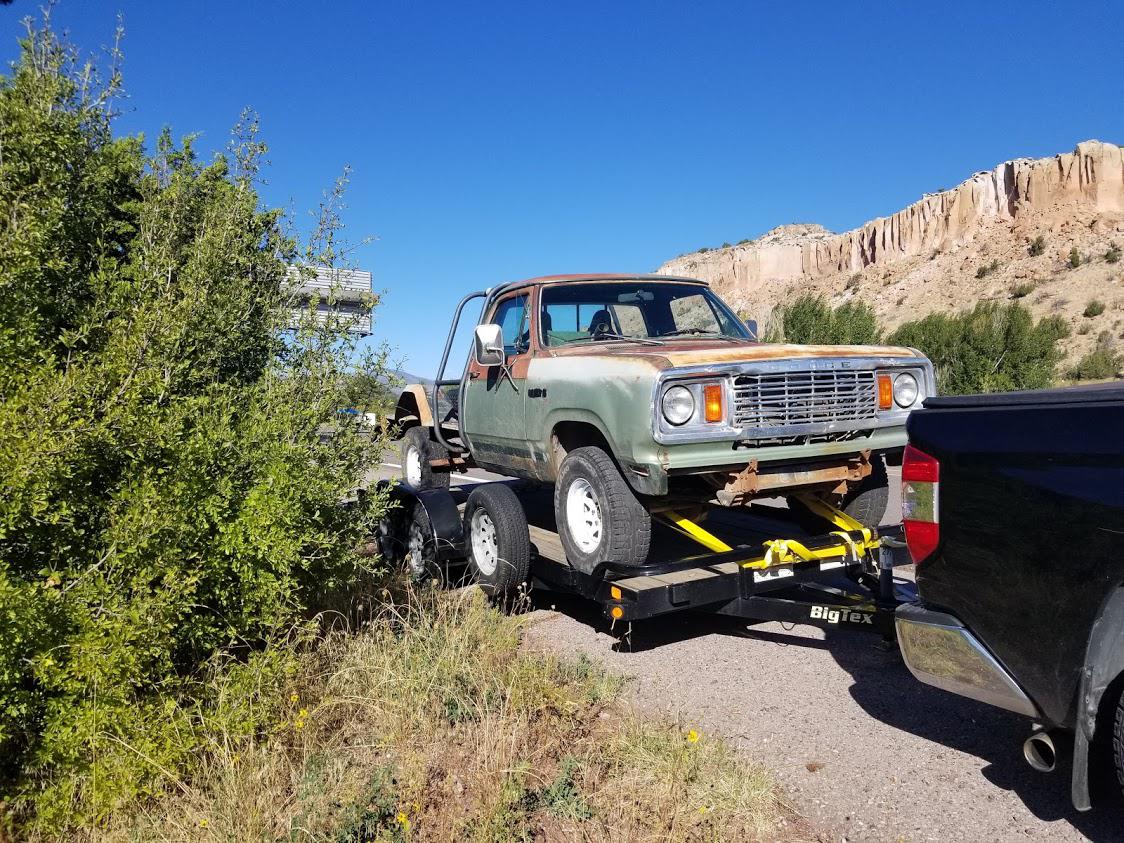
Guy bought it to let his kids thrash around in the woods and arroyos around here.  PO utterly ruined the box by cutting it unevenly with a sawzall and installed some rearward facing seats.  Probably a pretty fun way to explore all of the great roads leading up into the mountains around here.  

Maintenance, or lack thereof, was readily apparent.  The 360 barely ran, died at stops and corners and was completely gutless.  You could literally hear the vacuum leaks.  Valve covers sat in a sad crusty grunge gasket of pathetic indifference.  Everything below the valve covers was coated in 1/2" to 2" of solid gunge. 

Exhaust leaks on both sides.  Suspension was clapped out and steering just on this side of hilarious.  Gas barely on this side of varnish leaked from the filler neck at the tank. 

Though it has a rat rodder's dream of a patina, there is hardly any cancerous rust and none in the usually suspect areas.  There are lots of random wires that connected to nothing on either end (including twist connectors, Scothlocks, wire nuts and other electrical sins) but the wiring harness and firewall connectors are mercifully unmolested.  There was no fluid in the rear diff, leading to a catastrophic failure of the pinion bearing. 

It sat for a couple of months and I've found plenty of time on my hands recently so I've gotten into a bit. 

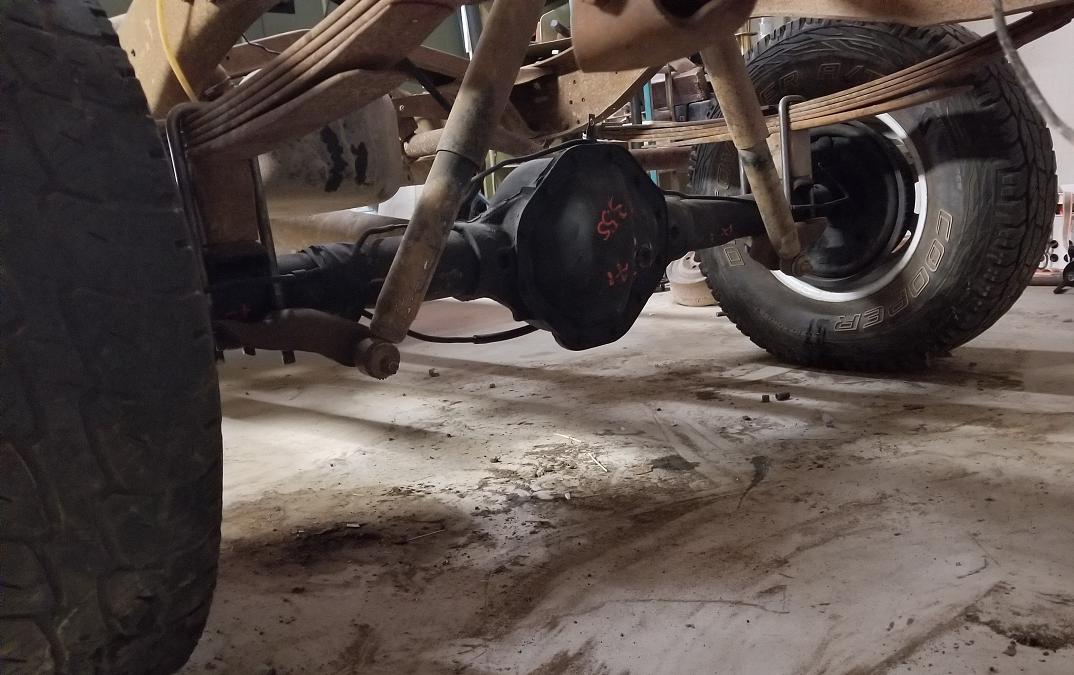
First order of business was to fix the grenaded rear differential.  It is a Chrysler 9.25 geared for 3.55 with a limited slip differential.  Driving with the case in any position resulted in the rear wheels skipping and jumping out of synch with one another at any speed over a walking pace.  I removed what was left of the mutilated bed and removed the booty fabbed turn signal assemblies to ease the way. 
628339
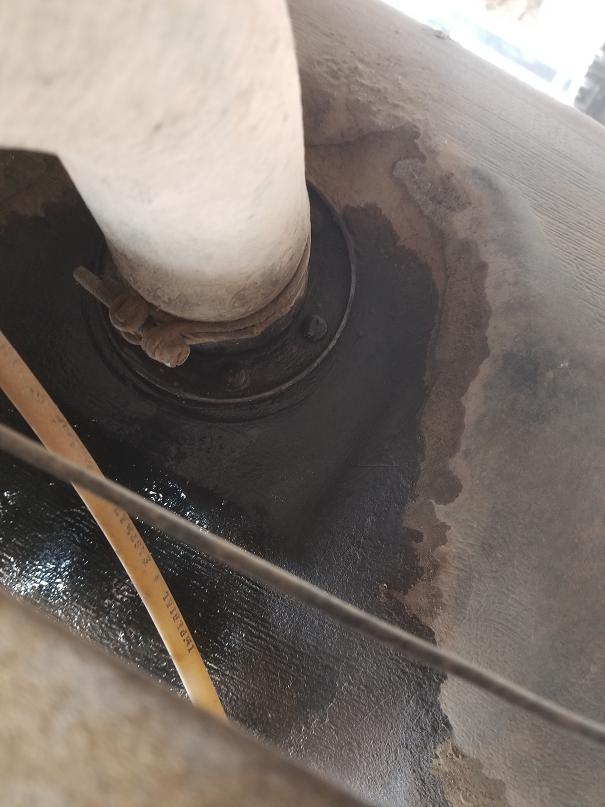
Ah, the differential fluid is low.  I guess it's busy holding all of the dirt to the pumpkin?  There was none in the differential so I hope it was at least good at being grimey.  


The shiny new metal deposits were on rust?  Nope, it was spongy and I could squeeze oil out of it.  

628340
I'm going to be charitable and say that there was not sawdust in there.  (but there was sawdust in there)

The pinion was a disgrace
628341

I ordered a rebuild kit with all new bearings.  I welded up a side bearing adjuster tool and got everything apart except the actual pinion.  Nothing I did could get it out.  I couldn't even get it to move in the carrier.  Starting with normal means, I progressed from air tools, to increasing sizes of hammers to actually removing the rear axle housing so I could wail on it from above.  I tried to press it out only to start bending my press.  At that point I realize that one of the bearings must have overheated from the lack of diff oil and welded itself into the cup.  The search was on for a new axle and I found one almost in Utah.  It was dirty and grungy but the pinion seemed to spin freely.  No limited slip but it was otherwise in good shape.  

Or so I thought.  

I installed it in the truck with new U bolts over the leaf springs and filled it up.  I drove it about a mile and was greeted with a banshee howl from the rear end on coasting.  I babied it home and saw what the military would call a Class III leak coming from the front of the differential. 

I reached down and, with a sinking feeling, realized I could move the pinion in all three dimensions.  Well, crap.  

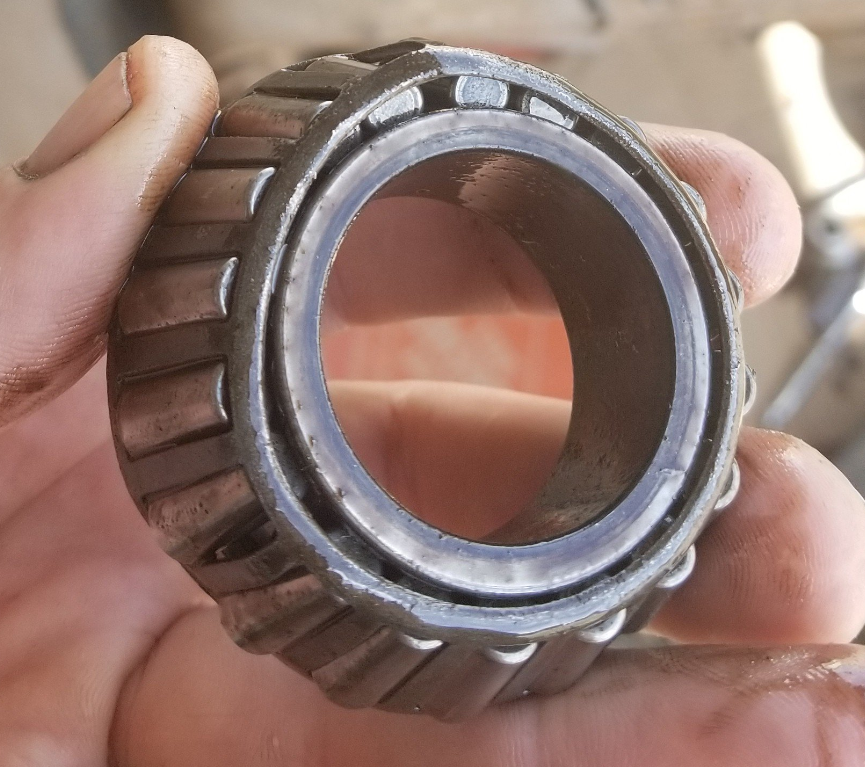
So, out the axle assembly came as I was getting to be an expert at axle removal.  Luckily, this one came apart really easily.  Maybe because whomever put it together didn't understand Chrysler differentials very well? There was no preload on the pinion nut and the crush sleeve was not deformed at all.  That all adds up to an inner bearing that looks like this:
628523
Well, there's your problem. 

The pinion and ring gear in the newly junked rear end were hosed so I ordered a new ring and pinion.  Rebuilding the differential and getting the initial depth of the pinion set requires a press and setup bearings.  I can't imagine how the job can be done otherwise.  I did get really lucky and only needed to change the pinion depth once.  I got backlash set and then torqued the everloving ft/lbs out of the bearing adjusters.  Reports that they can take over 200ft/lbs of torque are absolutely correct.  I got everything put back together and hung the axle assembly back on the truck. 
Measured alignment, rechecked torque and took it for a very successful test drive with no rear end noise on the drive or coast side at all speeds in 5mph increments up to 65, where the steering got to be a little wobblier than I am brave.  

With that taken care of, I set about getting the engine to run.  The carb bowl was emptying and the mechanical fuel pump, though new, would take 3x 10seconds of cranking before it would start.  The hoses on the newish pump were pressed on with no clamps and were leaking away.  That, coupled with a vaccum leak that was more of a series of a vacuum holes than a leak led to some very rough and rich smelling engine operations.  Luckily, as a '78, the 360 is refreshingly devoid of most emissions garbage. 

No EGR.  Other than the PCV and a tiny pump on the passenger side valve cover that was not hooked up, the only other vacuum lines were to the distributor, to the carb thermostat and to the brake booster (which was leaking).  I replaced all of the vacuum lines and switched out a functioning brake booster and MC from my '78 Dodge B300 Sportsman RV.  I also refreshed distributor, wires and plugs.  Though not likely to affect the way the engine ran, I went ahead and replaced the valve cover gaskets as well.  Once that was all done, and without touching the mixture or the timing, the 360 really started to come to life.   Other than a little bog from idle to WOT, it really started to run well... better.  Not great, but better.    

Then I noticed that the front crank seal was leaking merrily and that the front oil pan seal was more of a distant memory suggesting oil retention rather than a seal actually keeping the oil in the pan and off the crossmember.  Since I was going to be into the timing cover anyway, I went ahead and ordered a double roller timing chain and sprockets.  Good thing, the timing chain was a sloppy shadow of what it once was.  There was so much slop I could get the chains within an 1" or so of each other.  Slop is supposed to be <1/8".  Degreasing and repainting everything actually took longer than teardown and rebuild.  
Again, not sure how you'd do this job without a press.  For whatever it's worth, I did not need the special aligning tool for the crankshaft seal.  I seated it lightly and then finger tightened the cover back to the engine to "center" the seal.  The timing chain definitely made a difference, with the engine definitely making more immediate power. 

Since then, I've been into the timing, finding it at 21* advanced at ~750rpm and pulling a steady 15in pressure.  That pressure would be a little low, but I'm at roughly 6000feet so it's pretty close.  The mixture screws were out 6 turns and 1 turn.  Not good so I reseated them and got the carb running really well at about 3 turns out each.  I still have the bog from idle to WOT.  The accelerator jet, while immediate, is also more of a spray than a jet and not entirely consistent.  I have ordered a rebuild kit for the 2bbl but am also giving the Thermoquad in my B300 a pretty strong side eye.  Anybody have strong opinions about a Holley 2245 vs a Carter TQ?  

While I'm waiting on the carb rebuild kit, I've started to get into the steering, suspension and mounts.  The steering is about what you'd expect for a 40 year old truck: aimless, mushy and sloppy.  We live at the end of two miles of dirt road and it is a teeth-jarring experience each time I navigate it.  The tie rod ends are totally shot.  The rest of the steering is remarkably tight and leak free.  All of the engine and transmission mounts, as well as most of the body mounts, need to be replaced.  There appears to be a leak around the hub on the passenger side and there is a deep rhytmic growling between ~60 and 65, making me think that wheel bearings are in my future.  I will probably go ahead and replace everything I can on the hubs while I have them apart.  

Other near term plans are to further tune the carb and engine while refining the timing.  I would like to install a tachometer and get the bulbs in the dash to shine a little brighter than a lightning bug's butt.  Really, I just want to go through and tighten up all of the wiring while figuring out things like replacing the missing transfer case lock switch.  I will also be doing the amp gauge reroute pretty quickly. 

Alright, I know that was a mighty wall of text.  Thanks for hanging in.  I've read some of the other D/W build threads here and am really inspired by what I've seen.  The plan here is to get this up to a reliable daily driver status and then do mostly weekend level projects on it until it's done.  I have dreams of putting a stepside box on the back and painting it black and orange with some very 70s yellow striping.  More than anything, I plan on driving the everloving hell out of it.  


AngryCorvair
AngryCorvair GRM+ Memberand MegaDork
4/14/20 12:17 p.m.

welcome!  nice introductory post.  you could have spread that over a week!  good to see another mopar getting some love.

chandler
chandler PowerDork
4/14/20 12:45 p.m.

Interesting that first gen dodge trucks are probably second to miatas for individual build threads. 
 

Welcome and nice looking truck!

Stefan (Forum Supporter)
Stefan (Forum Supporter) GRM+ Memberand MegaDork
4/14/20 1:23 p.m.

I miss my Grandpa's Dodge truck of that style.  It was a POS (not as bad as this one), but it was the family's whore for whenever you needed a backup ride, move large items/house, etc.  It was only a 318, but it just kept on running.

Dusterbd13-michael
Dusterbd13-michael MegaDork
4/14/20 1:25 p.m.

That all sounds like normal mopar life.

Welcome!

Tony Sestito
Tony Sestito PowerDork
4/14/20 1:31 p.m.

Hey, another one!

Looks like a great start to a cool rig. Wish mine had the 360 and the 9.25" rear, but I also have a bed. laugh Keep up the good work!

Cooter
Cooter UberDork
4/14/20 1:33 p.m.

Is it too soon to ask for a Dodge Truck Sub-Forum?  devil


Welcome to GRM.


Georges1991
Georges1991 Reader
4/14/20 6:46 p.m.

Awesome, welcome! 


I think Cooter is right... laugh

robot
robot New Reader
4/14/20 6:52 p.m.

Cool, thanks everybody!

So, I feel like I have the Holley 2245 running pretty well even before cleaning/rebuilding it.  I also have a Carter TQ off of a CA emissions 360.  The Holley looks silly simple and the Thermoquad doesn't look much more complex.  I've read a couple of opinions about the 2245 versus the TQ and I'm leaning toward just keeping the Holley on it.  Basically, does anyone know of any compelling reason to go with the Thermoquad?


Cooter
Cooter UberDork
4/14/20 9:18 p.m.

I'd stay with the Holley.   The TQ isn't as horrible as people like to make it out to be, but unless you really need a 4bbl, and know the body of the TQ isn't warped or otherwise damaged, I would leave well enough alone.

robot
robot New Reader
4/15/20 7:12 a.m.

Thanks, Cooter.  Will do.   The TQ is off of a running when parked RV.  I didn't do much more than function check, clean and tune it when we got the RV.  Though that RV had a list of problems that is hard to believe, the TQ was not one of them. 

I spent part of last summer bringing a Yamaha XS650 triple back to life, including a total carb rebuild on all three carbs.  Only rebuilding one carb is actually kinda fun!

GIRTHQUAKE
GIRTHQUAKE Dork
4/15/20 9:39 a.m.

I'm gonna second Cooter on keeping the Holley. I would argue that overall the drive of the truck would be better with the TQ, but the Holley seems to be working just fine- so rebuild it and experiment when you have the parts and free time to do so, otherwise leave as-is.

The fact I own no Miata or Dodge truck makes me feel like a GRM poseur.

Cooter
Cooter UberDork
4/15/20 11:01 a.m.

TQs can be really nice, and return better MpG when set up correctly and with a light right foot, but I wouldn't swap a manifold and mess with linkages just to use one.   If I was doing a bit more to the engine at the same time, then maybe.


My MoPars have put me on the fringe for my entire life.   Not sure I am comfortable having the "Answer" to anything at this point.   Nor do I want to know what the question would be.


robot
robot New Reader
4/15/20 11:12 a.m.

Thanks Girthquake and Cooter, my inclination is to leave it bone stock, except that the VIN indicates it had a sweptline box and I really would prefer a utiline.  Otherwise, I have found a lot of success in returning vehicles to as stock a configuration as possible.  There are certainly plenty of improvements to be made in all sorts of engines, carbs and other systems but there is also something to be said to keeping things as close to the way as the teams of engineers intended.  

Cooter, I've always been on the fringes with what I drove, so this should be nothing new.  I had a Fiat 124 when my friends had Chebbys and various Mustangs.  I restored and drove a Saab Bullnose with a 2 stroke 3 banger that made less HP than any of my motorcycles.  Thanks to very little precipitation and no salty roads around here, there are plenty of vintage trucks around here but I have only seen one other W150.  In fact, finding parts for it has been a pain in the butt as there just isn't a lot of relevant MOPAR in the junk yards around here.  I had to drive almost to Utah just to find a rear axle that fit

Cooter
Cooter UberDork
4/15/20 11:22 a.m.

I've picked in the  Santa Fe area when visiting a few years ago and there was a huge JY south of ABQ that I had pretty good luck finding old MoPar stuff in.   Not sure if it is still there anymore.   Didn't get a chance to check the last couple times I passed through.

Tony Sestito
Tony Sestito PowerDork
4/15/20 12:32 p.m.

I'd also keep that Holley on there, at least for now, and especially if it works well. Fix everything else around it, and do that last.

My truck has a Carter 2bbl that was redone back in 2017 by the previous owner. It runs decent, but it always smells like it's just dumping fuel, it floods on startup from time to time, and the truck is particularly gutless with it on there. Granted, I have not touched the thing since I bought the truck, other than replacing the choke thermostat. It just does its thing. 

At some point when I have all the bits and pieces, I will be swapping on a 4bbl myself. I have an Edelbrock 1406 that needs a rebuild, but I don't have a manifold for it yet. Hoping a performance intake will help it run a little better, flood less, and give it a little more power. I might just run it as is until it's Magnum swap time.

robot
robot New Reader
4/20/20 11:11 a.m.

Cooter, that makes sense. The south side of Albuquerque has a bunch of gently used vehicle display yards.  The aftermarket for these D/W trucks is a lot better than most oddball stuff I've driven but I'm still starting to feel like I may be looking for a parts truck with a rebuildable 360 and as straight and unmolested a Utiline box as possible. 

I guess I haven't really shared how I'll use the truck and what I'm looking for.  It will be a rolling "restoration", as opposed to a frame off.  I have a two car garage/workshop but I need the floor space for work and can't afford to give up half of my shop for more than a weekend or so.  I've started getting the driveline, engine and suspension up to snuff.  Once that is done, I will focus on getting as much done cosmetically including finding, or fabricating a replica of, the Utiline box.  After addressing and removing all instances of rust, I'll do a solid 20/20 paint job.... you know, looks good at 20 feet as I roll by at 20mph?  We live down a few miles of moderately crappy washboarded dirt roads about 20 miles from town.  There are two roads to town, one is 55 and the other is 75.  I know better than to expect anything approaching acceptable fuel economy out of a 360 pushing a non-aerodynamic brick through 3.55s.  But I also know that with a light foot and keeping it around 55, I can get sorta relatively okayish mileage.  More importantly, there is no nice way to say it: in an accident at 75 I will die in this truck.  At 55, I may only be mangled.  We live within a few miles of all sorts of great trails and easy rock-crawling to camping areas too.  I will want to do truck stuff and haul a trailer once in a while.  I am always looking out for a period correct pop top or cabover camper.  So, basically, I want to use it like anyone would have used it when it was new.  I know better than to flog the engine or try 40+ year old suspension bouncing down a trail too aggressively, but I also want this truck to live.  I hope my expectations, since they are low, aren't too crazy.

I had a small leak in my passenger side valve cover because I am dumb and a big ape with a poorly calibrated torque arm.  I don't know how I managed this, but I cranked the middle valve cover bolt down enough to ruin the gasket and it was merrily dumping oil onto the exhaust.  As cheap as oil is right now, and as much as I enjoy smokescreening everyone behind me, it would be a shame to burn the truck down now.  So, I replaced the gasket and got the cover back on and while I was waiting for the RTV to cure, I replaced the shocks and the engine mounts.  

Given the overall lack of maintenance on the truck, it would not surprise me if the shocks were original or at least very old.  The bushings were degraded in each of them and only one of them actually worked. 
No wonder the ride has been toothrattling. 

By the way, when I work on the truck, it's in Park, parking brake set, wheels chocked, negative battery lead disconnected and the keys in my pocket unless I am sitting behind the wheel.  I wear a hat, eye protection, mechanics gloves and ear protection when using any powered tool.  If I use jackstands, I place 4x4s under the frame and try to keep my face and chest out from under cross members, the engine and the transmission.  Also, I PB Blast all fasteners the night before and again right before I start.  There, I hopefully don't need to mention safety again and you can always assume that all of that stuff has been done before I start wrenching. 

Getting the shocks off is pretty easy.  Other than safety stuff, all you really need is a 3/4" socket, ratchet and a torque wrench.  The wheels don't have to come off but it does make the job considerably easier.  The top nuts on each of the front shocks needed a small amount of convincing to come off.  

You can see the bump stop has been keeping the leaf spring nice and clean recently.  You can also see where formerly leaky valve cover gaskets have been applying undercoating to the frame. 

The replacements are compressed and retained by a plastic strap.  I was able to hang the bottom part of the shock, loosely put the nut back on and then swing the shock up and lined up with the top shock mount bolt.  Keeping pressure on the top of the shock, I cut the plastic strap and allowed the shock to extend until I could get it on the top shock mount bolt.  Remembering to scavenge the retainer/washer from the old shock, I put it on and then the nuts get torqued to 100ftlbs on the top and 35ftlbs on the upper with Loctite.


Pretty much the same situation in the back.  The bed is off of my truck so I am able to work from above, making this job even easier.  The top mount bolts needed a cheater bar on the ratchet but came off eventually.  Upper is 70ftlbs, lower is 100ftlbs and Loctited.

After checking torque, I took a quick drive.  Our road is really janky out until you hit surface streets or the highway, so it's not usually easy to tell if suspension work has really mattered.  It was immediately obvious that functioning shocks are better than 1/4 not functioning shocks.

Shocks done, I was ready to have a go at the engine and transmission mounts.  They were all quite obviously trashed.  Unfortunately, I did not have the right socket (1") to remove the transmission mounts.  Removing the engine mounts was easy.  Loosen the top nut and remove the bottom nut.  Place a piece of lumber under the edge of the oil pan on one side and get it as perpendicular to floor/ground as possible.  I was able to position my jack so that I could lift from the front while I watched over the top of the radiator.  The mounts were torn in two so the mount separated, rather than sticking with the top.  Pay attention to the mount, as there is a nipple that needs to be oriented properly.  Making sure you have that nipple lined up, install the mount and loosely thread the top nut.  Slowly and carefully, lower the engine.  Resist the temptation to cripple yourself forever and only manipulate the mount with tools that keep your booger hooks from between the engine and frame.  Once the engine is fully mounted, attach and torque both nuts to 30ftlbs.  On the passenger side, the bottom nut wouldn't go to 30ftlbs and I realized it was spinning with the bolt.  I'm guessing the bolt tore loose in the mount.  So, that will need to be replaced.  Driver's side went in and torqued to spec.  The old ones probably weren't doing a lot.  

Since the driver's side was suspect, I very carefully took it on another test drive.  The biggest thing I noticed is that the infamous Dodge CLUNK when I shift into gear was reduced, but not gone.  I'll get a replacement mount and the proper socket for the transmission mounts shortly. 

The carb rebuild kit came in too.  I will probably take the Holley out this week for a rebuild, clean, bench test and then reinstall it to specification.  

One last shot of the truck enjoying a sunset.  Or maybe me enjoying the truck at sunset.

Thanks for reading and the encouragement, folks!

You'll need to log in to post.

Our Preferred Partners
n4oSRN8tLJxgAA9DlQsv2f8aeyvcighZBIlSKBrnv8uFu7w9kdYHm4WcSaaFMfB2