In reply to Opti:
Stop the bus!.... I figured spats were sort of like fender skirts. What you have pictured is interesting.... hmmmm
In reply to Opti:
Stop the bus!.... I figured spats were sort of like fender skirts. What you have pictured is interesting.... hmmmm
fujioko wrote: In reply to alfadriver: Good point! I have also heard that the Chevy Cruze uses shutters. I'll take a look at the neighbor's car this afternoon.
Only the Cruze Eco's have the grill shutters. They have an additional badge on the back of the car denoting that it is the Eco model.
Keith Tanner wrote: For your aero, here's some useful CFD. https://hanchagroup.wordpress.com/2013/01/29/splitter-or-air-dam-which-design-is-best/
Thank you for posting that Keith, it was eye opening.
Although the Miata and the dyno projects are related, they do not share the same DNA. Transferring the original MSII between the projects required a fair bit of fiddling and in the end it was just too much time wasted. First world problem?... perhaps.
Anyway, for the time being, the difference between the engines was going to expand and a each project needed a stable common denominator. Keeping each project separate but also on the same path required a second MegaSquirt and laptop.
Let's look at some pictures...
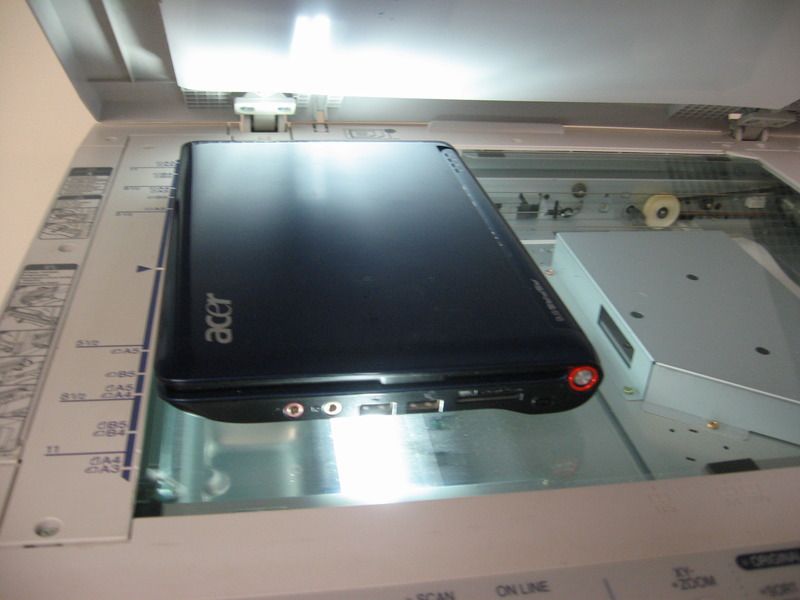 Making a backup copy of the laptop....Well, actually just getting a copy of the Windows license. I have learned that hauling a laptop around tends to obliterate the silly Windows key code. Its good to have a copy of the code in the event the operating system needs to be nuked.
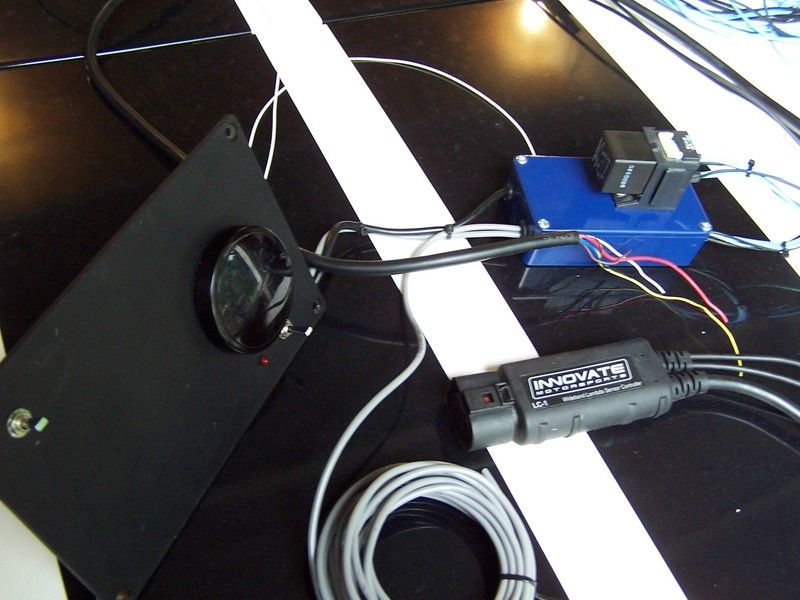 The wide band controller wiring was a mess. I tidied up the wiring by mounting a terminal block inside a little box. I also added a power relay that I originally omitted. Now the wideband gets power directly from the fuse box and the signal drift issue seems to have been solved.
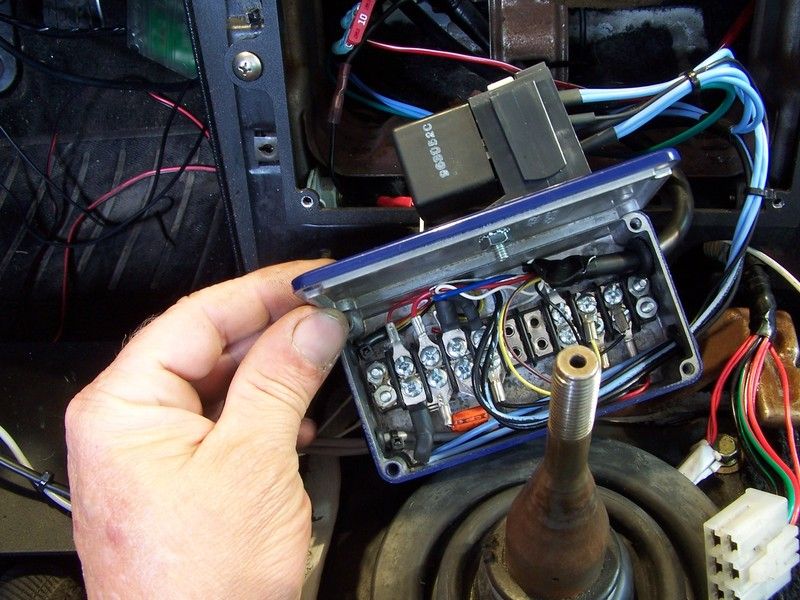 Inside the little box is where all the connections are made. This cleaned up a huge rats nest.
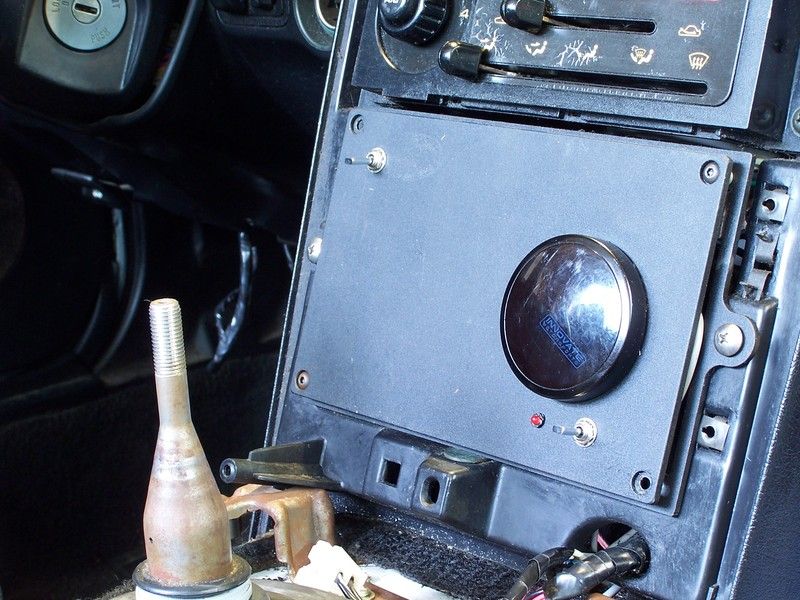 The wideband junction box resides behind the radio delete panel. I added a momentary toggle switch and LED for easy calibration. The wideband need to be calibrated every few months. I also added a manual cooling fan switch(upper left on panel).
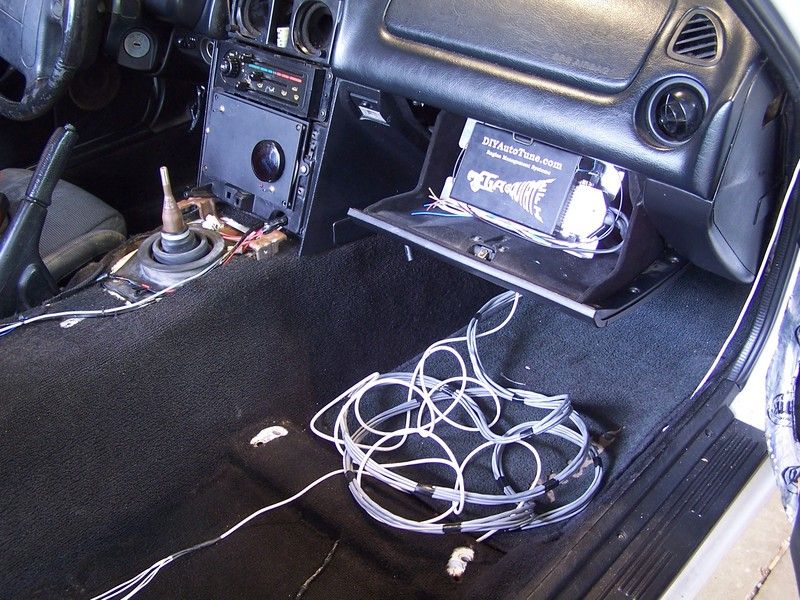 The new megasquirt is mounted behind the passenger seat, but eventually it will get moved to the glove box. I'm putting the finishing touches on a complete standalone harness as we speak. I'll eliminate the custom ignition interface board and wire the Miata CAS directly into the megasquirt. The megasquirt will need some modes to handle the direct signal from CAS but is fairly simple.
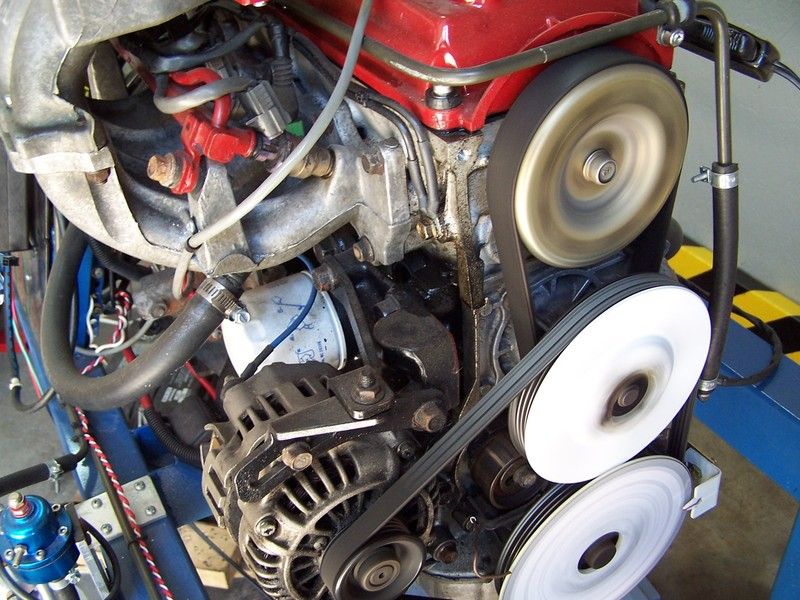 The B3 dyno was dusted off and started today. Sadly, its been a few months since the dyno has been used. Everything seemed ok so I figured it was time to swap in a matching cam sprocket.
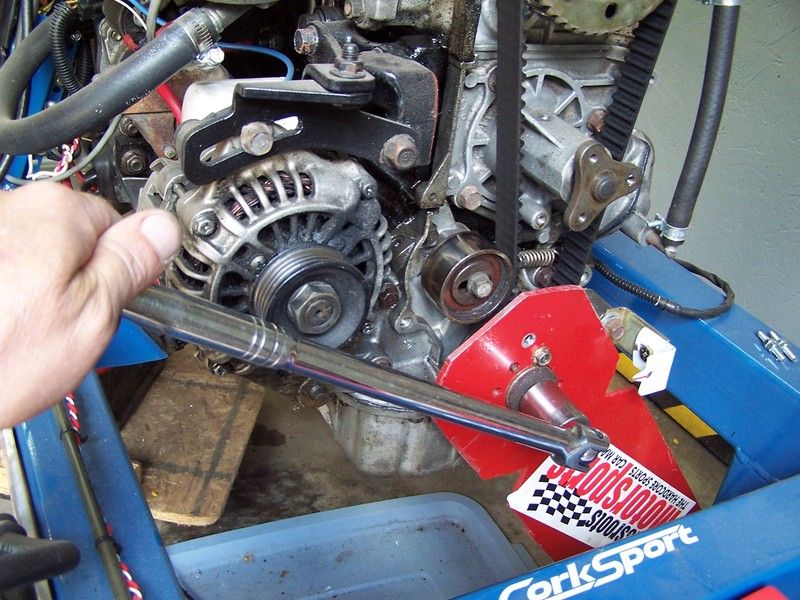 Totaly awesome cam/crank tool gets used once again.
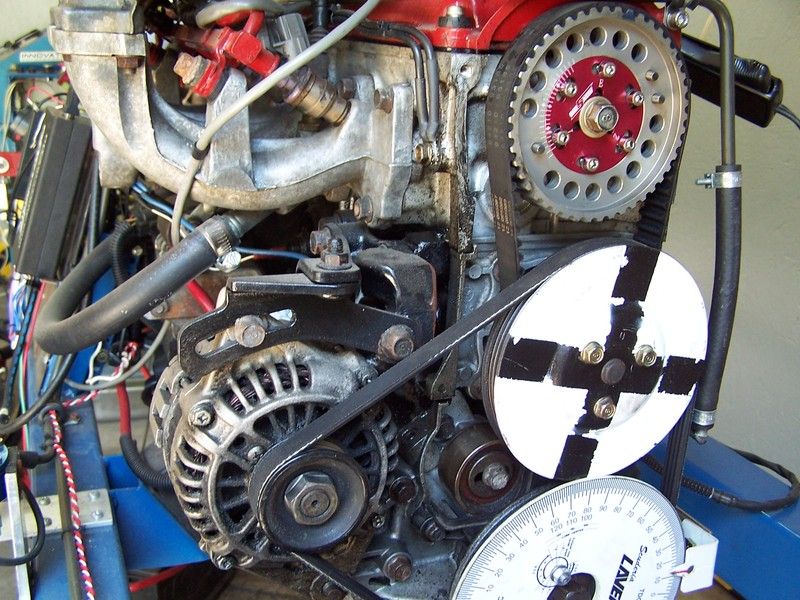 Sprocket swap finished in record time!
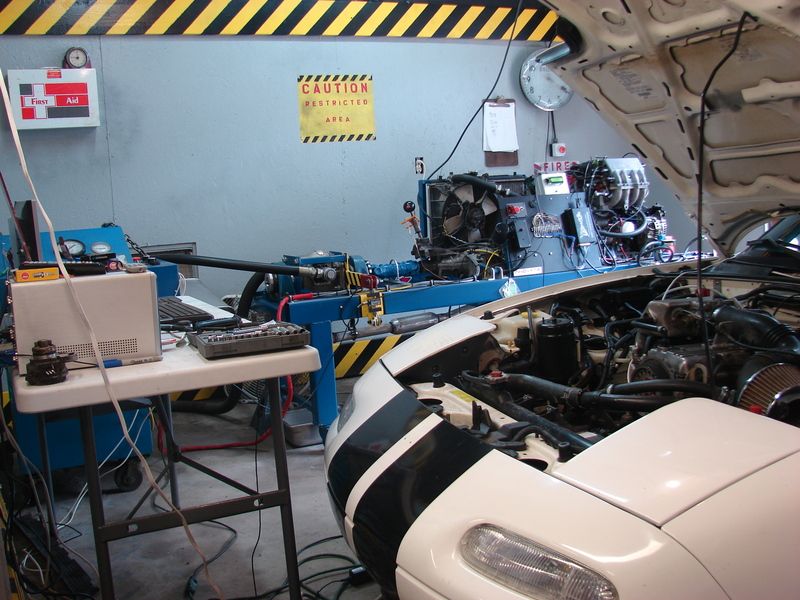 The Miata and the dyno in the same room... both capable of running without the hassle of transferring the Megasquirt.
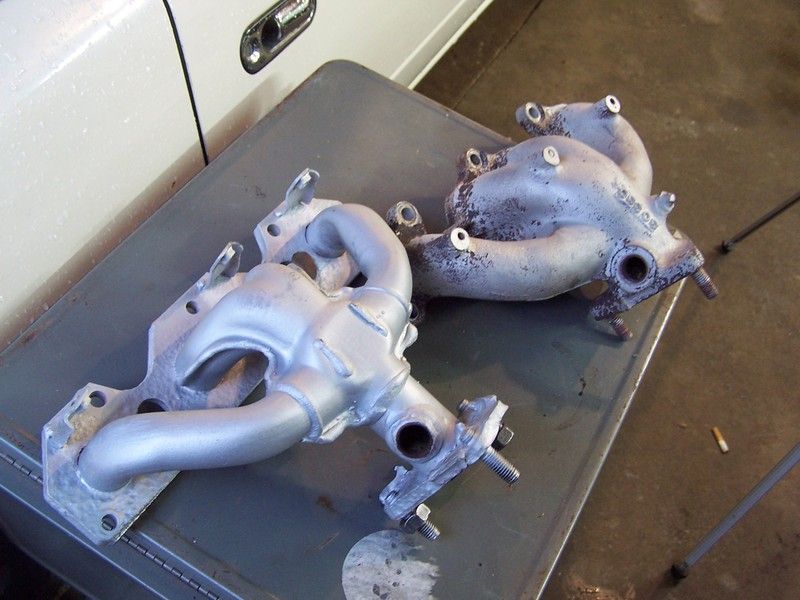 This week I'll do some cam tuning on the dyno and then evaluate exhaust manifolds. Should be interesting.
Stay tuned!
Whelp, looking back at past post, it appears I was much more motivated when I wrote them. The bottom line is nothing really happened with the Miata... other than enjoying the car for the summer![]() .
.
Anyway, I recently had a chance to compare the B3 Miata to a stock 1.8 car...Surprisingly enough the B3 has better low and mid range throttle response.... or in other words the B3 is faster than a 1.8... I'll give you a moment to think about that...
While the B3 is impressive in the low to mid range, it doesn't have the top end power of the 1.8...so in the end the B3 Miata would loose in a drag race, but around town it kicks a$$.
And now an actual project update...
The original injectors have nearly 300K miles on them and they seem fine but it was time for another experiment. Let's take a look.....
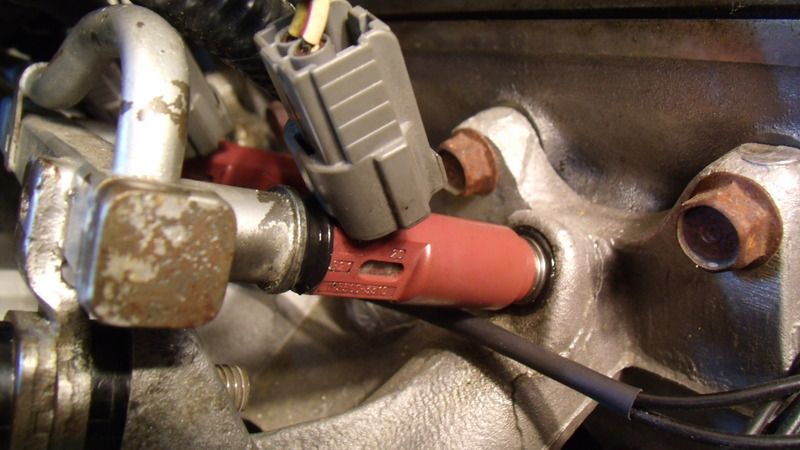
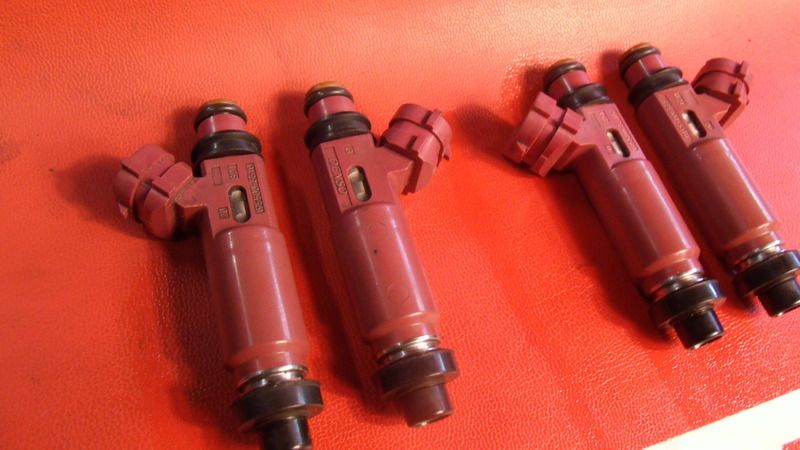 A set of EV6 injectors from a 99-00 Miata. These injectors will replace the origional EV1 injectors.
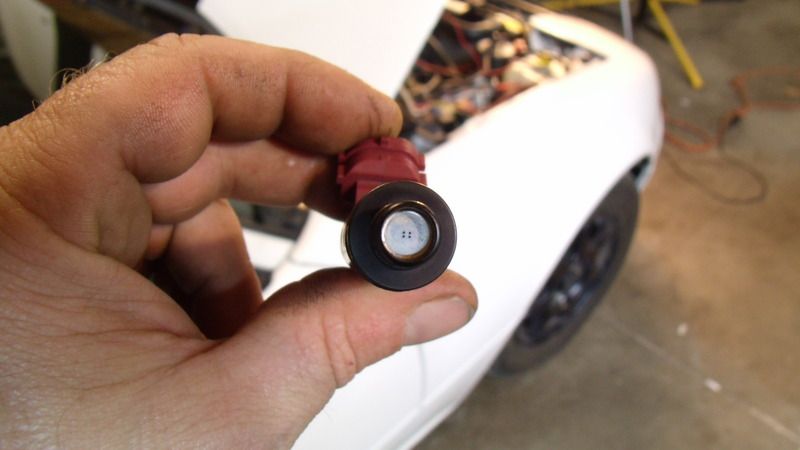 These EV6 injectors have four little holes that may atomize fuel better... the jury is still out on this.
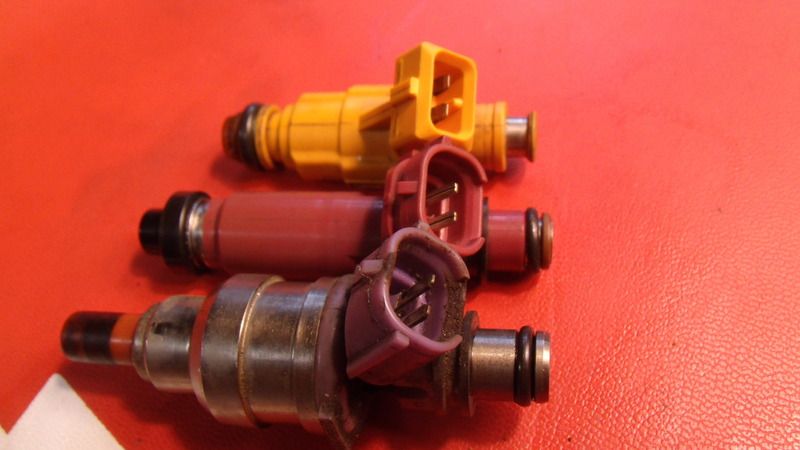 Bottom injector is an stock Festiva EV1, Middle injector is the 99-00 Miata EV6. The top injector is an EV6 from a Ford product. The beauty of the 99-00 Miata EV6 is it is the exact same size and has the same electrical connection as the EV1. This is Almost a plug and play modification.
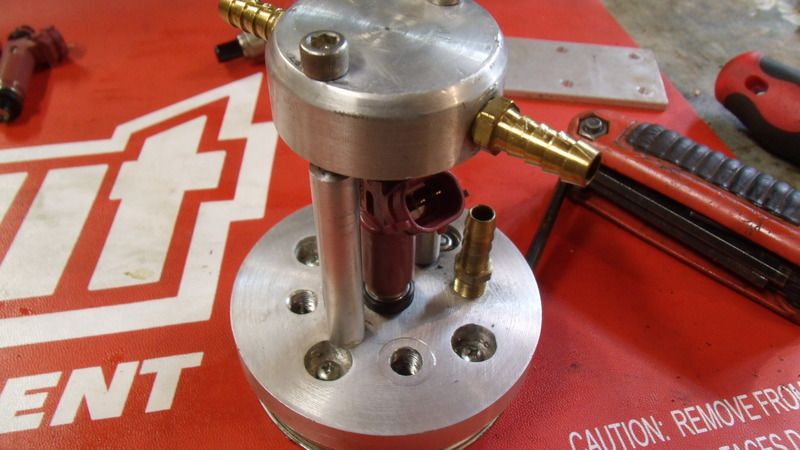 The EV6 is loaded up into the device formally known as Mr Fusion so some profile data can be collected. I'll need to know the flow and lag time for the Megasquirt.
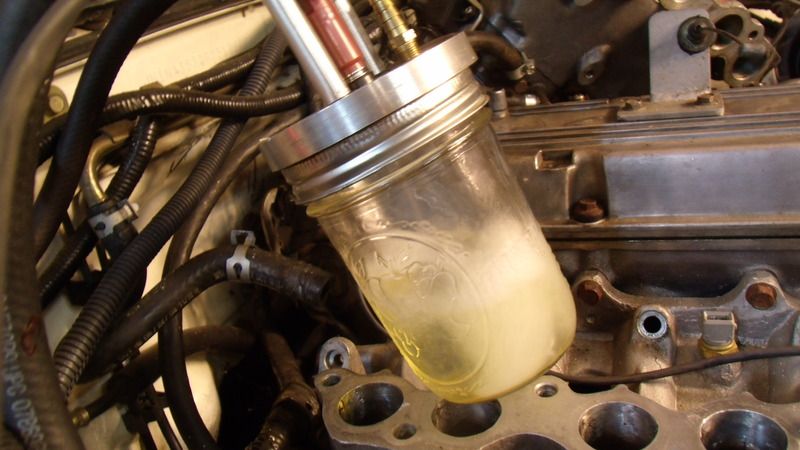 The device formally known as Mr Fusion is plumbed into the B3 Miata fuel system. The fuel pressure was dialed down to 40 PSI. This will provide the flow rate of the injector. Normally the 99-00 EV6 injector is pressurized somewhere in the 60 PSI neighborhood.
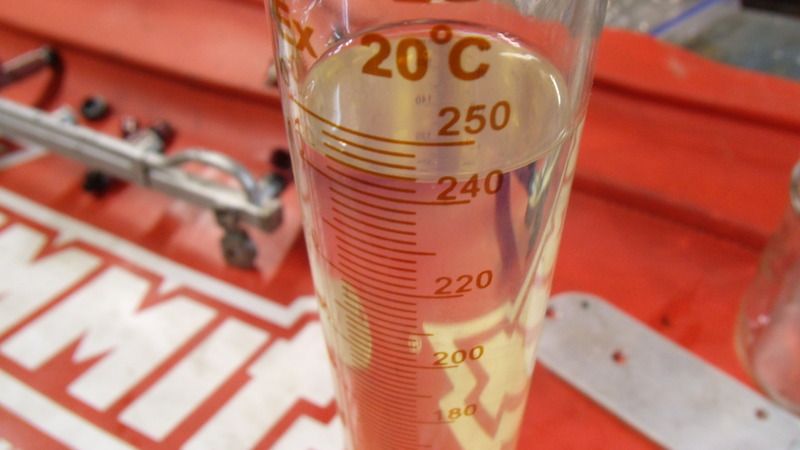 Looks like about 240 cc per min. The Stock Festiva injectors flowed somewhere around 135 cc per min. Obviously I don't need the increased fuel flow, I'm after the better atomization.
Stay tuned!
So with the pressure cut back to 40 from 60 psi, you're still flowing 240cc/min? Looks like you've got some fuel maps to remake... What was the pulse width with the old injectors at idle? Are you confident you'll be able to go low enough to get a smooth idle with the bigger injectors?
Why are you swapping injectors again? Do you have evidence that you're wetting the intake tract or some other reason to believe you're not atomizing adequately? I'm worried the new injectors might be too big, but dropping the fuel pressure as you have should help. Of course, that will also detract from their ability to atomize...
FWIW, the better atomization will only be noticeable for a little while- once the rail and injectors warm up, it will be injecting vapor anyway.
Also, the pattern of the new injectors is certainly for a wide port- supporting two intake valves. So it's pretty likely that the outer cones of the pattern will be hitting the walls.
I assume that MS just means a simple injector characterization change instead of redoing the entire map. that would make sense. But transient fuel will change, as will the cold start fuel- which isn't a lot to mess with.
In reply to Mezzanine:
You are 100% correct, the current fuel map is NFG.... but easily re-written with megasquirt.
The car was reassembled last night and started. As expected the engine was running pig rich, so I had to pull back on some numbers in the VE table to get it to idle. It looks like I have enough overhead to increase the fuel pressure if it comes to that.
The idle was smooth and the A/F was stable...so at least the car will run with the EV6 injectors.
The purpose of the experiment is to see if the EV6 injectors can provide better atomization, thus more power and better fuel economy.
Stay tuned!
alfadriver wrote: the pattern of the new injectors is certainly for a wide port- supporting two intake valves. So it's pretty likely that the outer cones of the pattern will be hitting the walls.
WOW, that is a really good point!....this should be interesting. Megasquirt has a feature to compensate for wall wetting, I'll have to read up on that.
A quick update...
The fuel map was hastily re-written to get the car moving again. Once the engine was fully warmed up I engaged the autotune feature and let megaquirt sort out the fuel map. Overall the car runs great and the new injectors seemed to solve a minor high speed flutter. Unfortunately its way too soon to consider the injector transplant a success... especially since Alfadriver pointed out some potential drawbacks.
Stay tuned.
In reply to El Cheapo:
I'm not familiar with MS to tell you HOW to calibrate it, but it sounds like there's some kind of transient fuel compensation, what MS calls wall wetting.
The only "drawback" to it is that you have to calibrate it- it's not a big deal to get around.
The big key to it is 1) understand how it works, and then 2) take good and fast data with transients and a WB (UEGO) sensor. One thing that may help- you can figure roughly .4 seconds from when you see a transient input to the intake to when you see it in the WB- that way you can back track to what started the transient.
Here's how I would go about doing it- once you are happy with the base map- which it sounds like you get getting there pretty quickly- then do a fully warmed up transient fuel calibration. Once you are happy with that, then start recording every time you start the car- which will give you various time/temps to fill in the warm up part. And that will also give you decent basic start data as well.
One of these days, I suppose I need to calibrate an MS system.
My head is swimming a bit about how the ECU can correct a physical geometry problem with (what I assume) is a modification to the fuel map behaviour which, to the best of my knowledge, only affects injector pulsewidth.
Is the idea that at low RPM you can lean it out a bit more so the fuel has time to "droop" more instead of "splash?"
edit: After looking at it a bit, I guess the idea is that since you're splashing the walls of the cylinder, some of the fuel you hit the wall with will stick and get combusted and some of it will be in liquid form on the cylinder wall during the spark hit and stick around as vapour before the next injector event comes through.
So you have to kind of anticipate the vapour otherwise you get weird rich/lean swings because the cylinder isn't reset to a "totally empty of fuel vapour" state between each injector hit. So the ECU has a concept of how long it takes for "walled" fuel to evaporate, and has a general idea of how likely fuel from X injector is to puddle, so as the speed of the engine changes it can anticipate how much vapour is probably in the cylinder based on how much time it's been since the last injection.
And it's especially important on partial-throttle acceleration because a bunch of variables are changing all at once, especially when the cylinder is cold and warming up (since the vaporization behaviour and likelihood of puddling changes depending on what temperature the cylinder wall is).
I probably got a bunch of that wrong but that sounds pretty interesting. I bet it has a big impact on emissions as well.
In reply to ssswitch:
It's not too hard to compensate for- one can use throttle position changes, or pressure changes. And using a speed/load table for gains and time constants, plus some compensation for engine temp and time since start. One can get really accurate doing that.
Just looking up a little- I found this in the megamanual- http://www.megamanual.com/ms2/xtau.htm
What's really interesting- I posted a think about injecting fuel on a cold engine to injecting vapor on a hot one. And the person who wrote an SAE paper back in the early 80's- CF Aquino- is the person who took the video that I got to see this change from fuel to vapor. One of the most interesting videos I've seen- it was taken looking at the injector stream in the intake manifold.
Anyway- I hope you have this X-Tau compensation- it works really well.
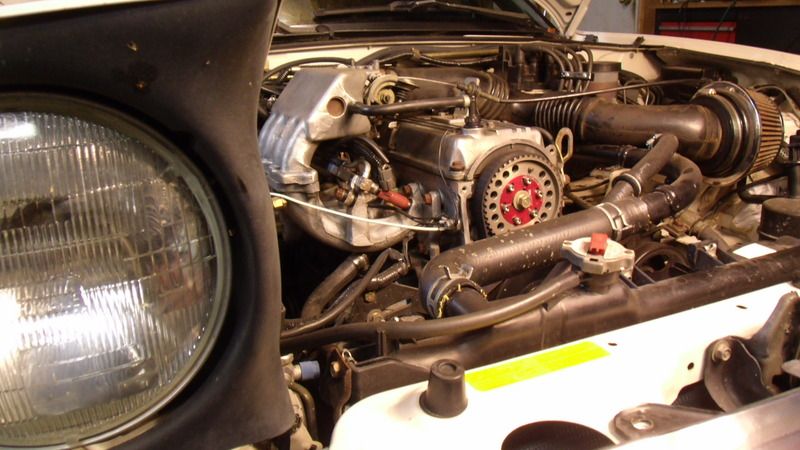
Sixty five miles on the EV6 injectors and all is well. The car runs about the same or better...its hard to determine. The fuel map is more or less complete as far as the automatic correction is concerned but I still have untouched cells in the margins. I'll have to manually correct them with a close guesstimate in the unlikely event the cells actually get used. I also enabled a recalibration of the warm-up enrichment.
I'm sort of fast tracking this experiment and I'll try to get some solid numbers in the next few days. In a week or so I'll finally pull the 4.10 Torsen and screw in the 3.90 open diff. Oddly enough I have grown fond of the Torsen and will miss it.
Stay tuned!
In reply to alfadriver:
I'm running a license version of tuner studio and I don't see X-Tau compensation in any of the menus but there is a host of EAE corrections under the Accel Enrich tab. I'll do some more reading and see if this is the same thing.
Nearly every component of this project is carefully chosen for weight and practicality. The ignition key for example is a single key and its sole purpose is to start the car. No additional keys are allowed on the key-ring. Admittedly this is a silly rule but that is just the way it is.
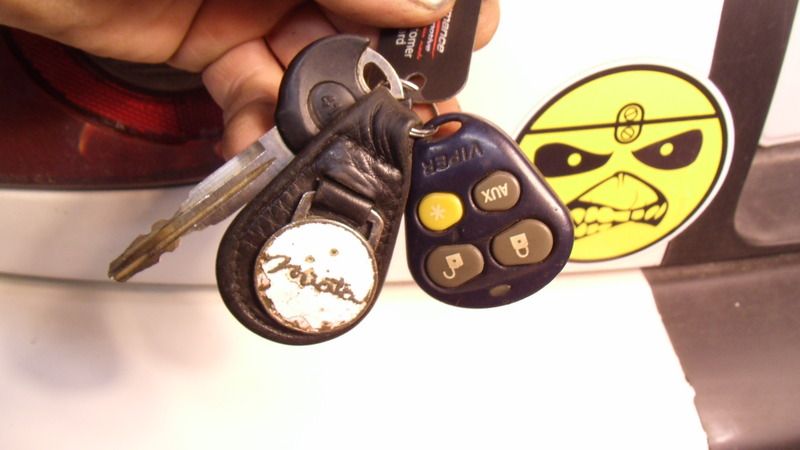 When the power door locks, alarm and remote starter were removed, the associated fob on the keyring became dead weight. Something had to be done....
 I dont know why, but when I saw this key fob and had to have it. A grim scene depicted with ISO symbols is almost too absurd to believe.
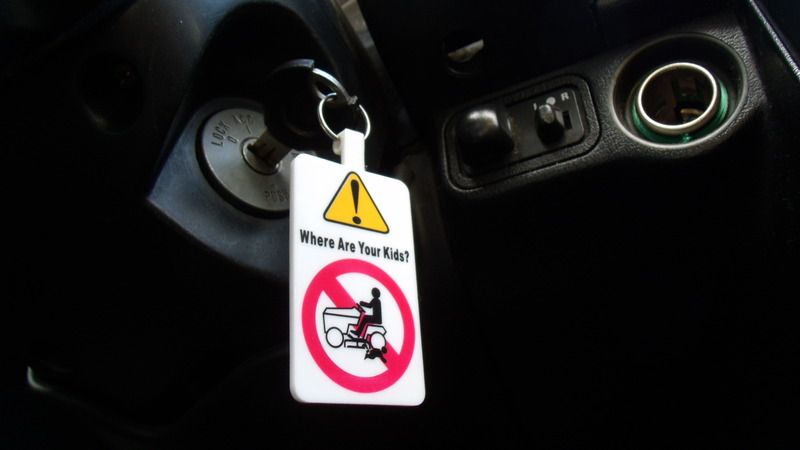 Perfect!
injectors and gadgets.....
A figure of 44.73 MPG was recorded yesterday after 140 real world miles. The driving was mostly typical with a handful of 0-60 full power blasts. In a few days I can provide some daily driver commuter numbers.
The differential swap is becoming more of a reality every day. I'm currently waiting for a few parts to arrive before I take the swap to the next level.
The 3.90 ring and pinion will certainly upset the speedometer/odometer so todays project is to install a multifunction gadget called MPGuino.
The MPGuino is an arduino based device used by folks to get performance and instant miles per gallon readout on non OBDII cars. Its a fairly simple gadget that can be built in the workshop or purchased. I elected to purchase a semi assembled unit from an individual in Europe for $61.00
Among the many features is a programmable speedometer and odometer. This should help track the progress of the B3 Miata after the ring and pinion swap.
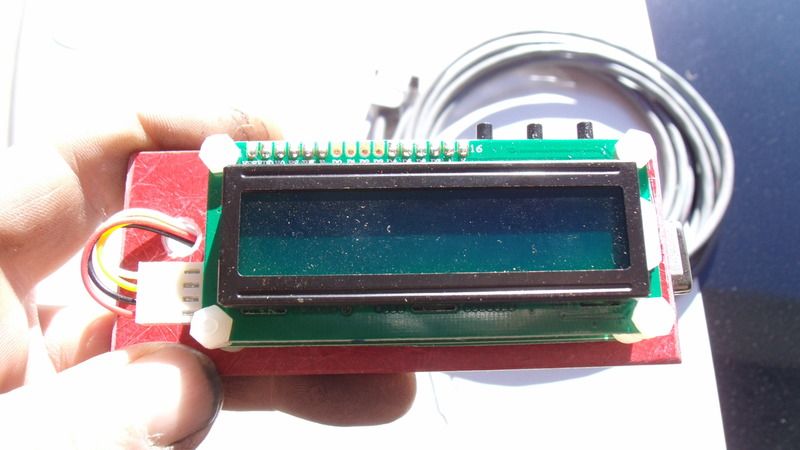
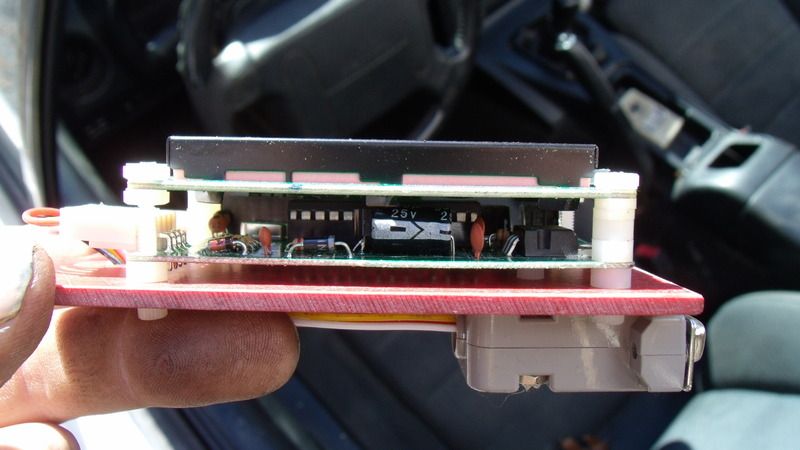 The MPGuino is mostly an Atmel microprocessor with a display. The red fiberglass base is something I put together to hold the circuit boards together... at some point I'll figure out how to permanently mount this thing.
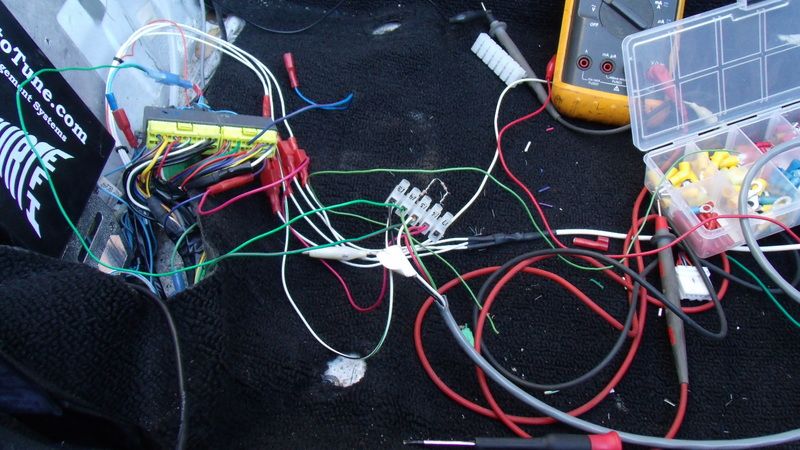 I'm truly embarrassed how hacked up the megasquirt harness has become. A brand new harness is already installed in the car and sometime this winter i'll sort everything out. Anyway, the MPGuino connects to the car with only four wires. Power, ground, Speed sensor (VSS), and and injector lead. Some astute readers will realize that early Miata's don't have a VSS per-say but they do have an electronic speed signal generated by the mechanical speedometer.
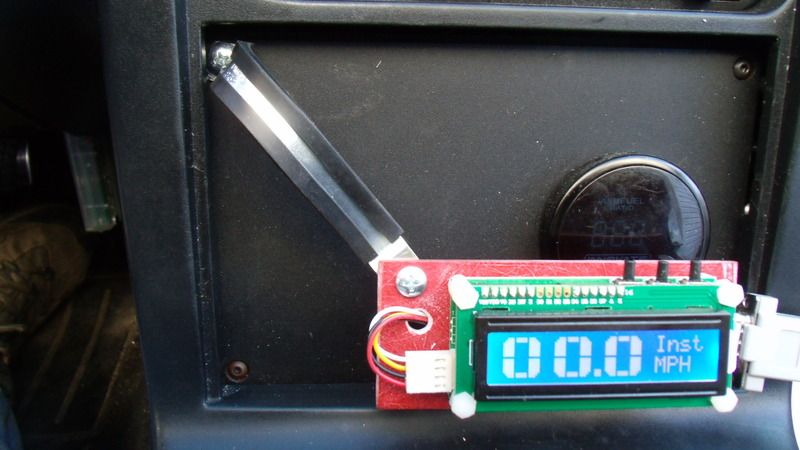 MPGuino sort of mounted for the time being.
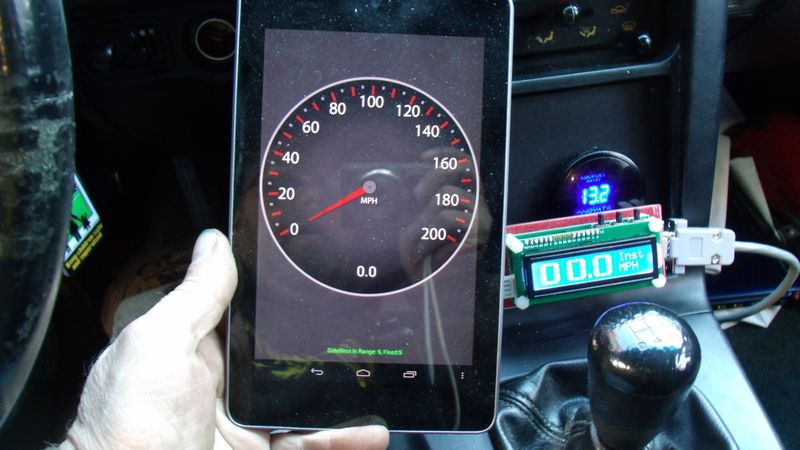 A Nexus 7 with a speedometer app was used to calibrate the new speedometer.
stay tuned!
For flattening the underside, I always thought that leftover campaign signs would make a nice testing material... We just had elections around here and there are still signs floating around. Not the most heat resistant, so you have to be picky about where you use them, but could be good around the non-exhaust areas.
JamesMcD wrote: How about a custom gauge face to adjust your speedo scale?
So I did some checking and sure enough custom gauge faces are available for the Miata. Something I would never thought of. The custom faces would solve the display issue but unfortunately the ODO will still record the wrong mileage. Not a big deal and a correction could be factored in when calculating MPG.... I like it!
LifeIsStout wrote: For flattening the underside, I always thought that leftover campaign signs would make a nice testing material... We just had elections around here and there are still signs floating around. Not the most heat resistant, so you have to be picky about where you use them, but could be good around the non-exhaust areas.
Since day one I have been avoiding areo mods and wanted to do this project 100% engine. three years, 50+ K miles and a well sorted dyno tune later I'm still falling short of my 50 MPG goal. So its time to play with some aero...
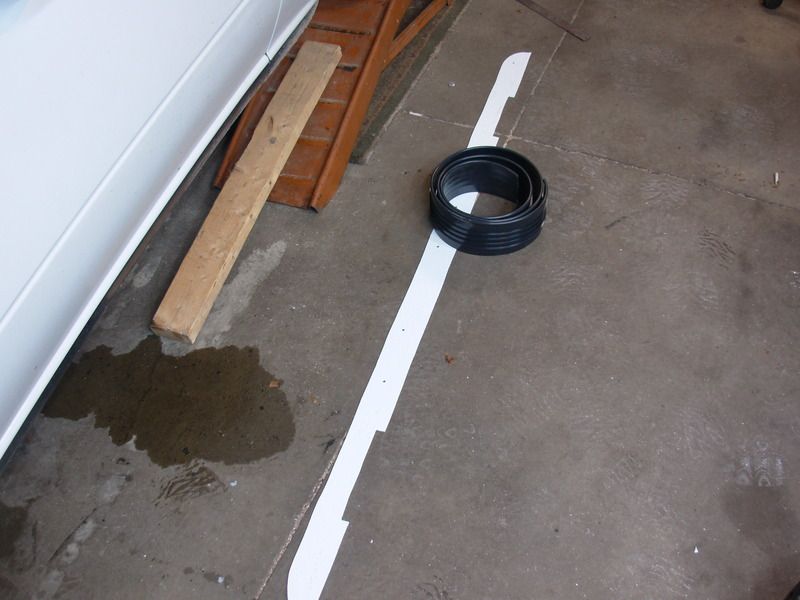 The already lowered Miata needed additional aero enhancements to get the front lower to the road. Some fiberglass reinforced plastic (FRP) and some garden edging was cobbled together to test how livable this setup would be on the street.
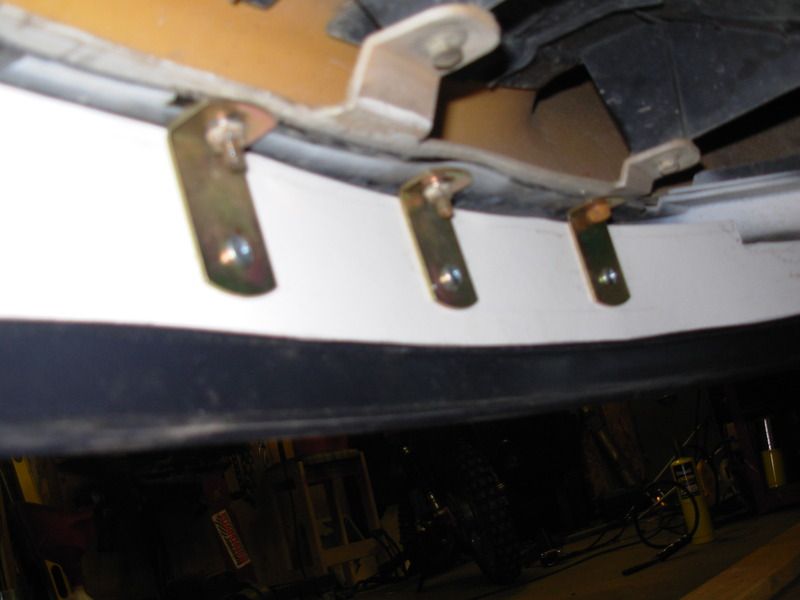 The FRP and edging were attached the the car using brackets that were salvaged from some industrial equipment.
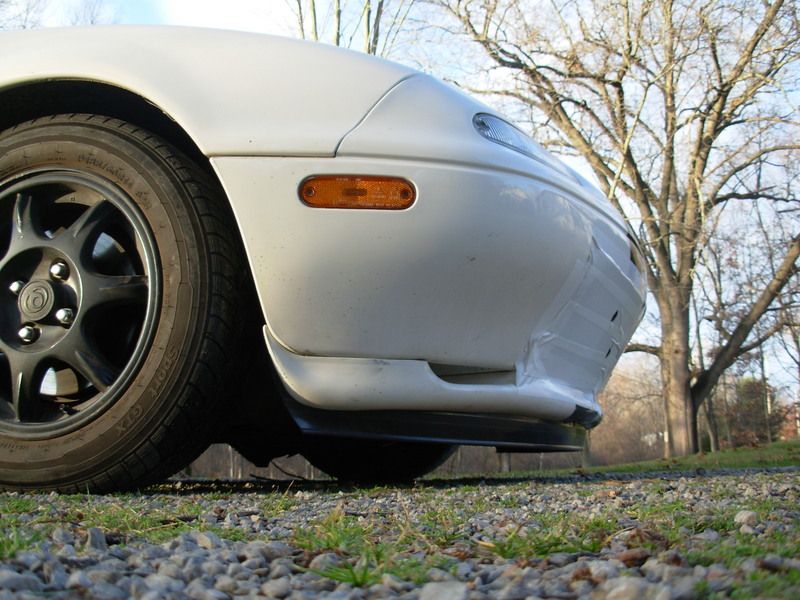 A profile view of the air dam. Also notice the grill was blocked off.
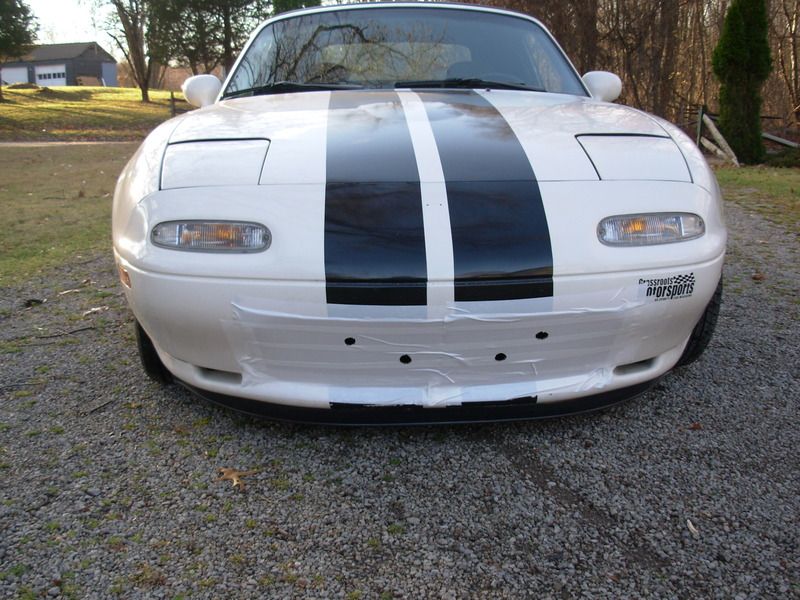 The four little holes in the grill were not enough to keep the tiny 1.3 engine happy. The temperature climbed well over 200F in a few miles. The heater was cranked up to 11 and the radiator cooling fan was switched on to get the temp down a tick below 200F.
After a brief discussion on the main forum it was agreed that a single opening would probably be better.
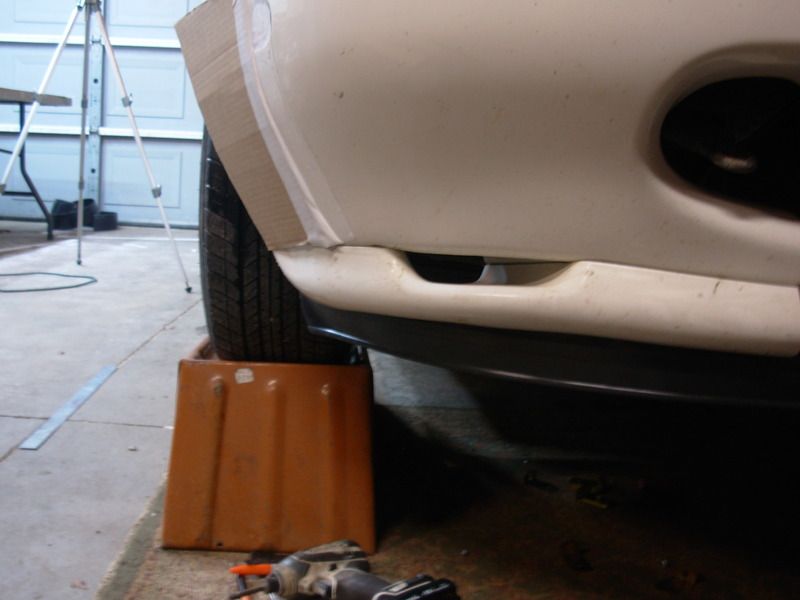 A previous suggestion of using wheel spats is being worked out in cardboard. This is going to be a complex problem to solve.
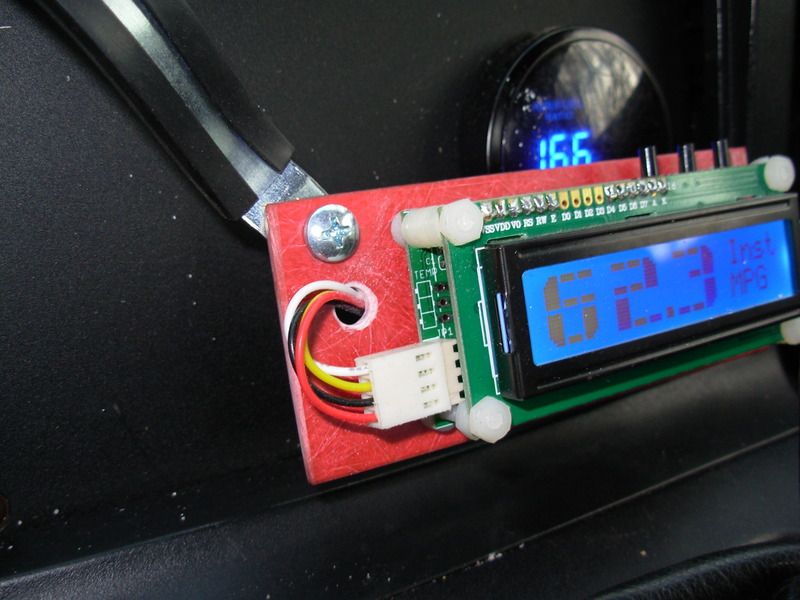 The fuel economy normally drops off in colder weather, however with the hotter running engine paired with subtle aero mods the average jumped to 46 MPG. At this point I'm not certain what made the biggest difference but it seems like this project is finally making some progress.
Simplifying the ignition....
Due to space limitations, the B3 Miata uses a bizarre custom built ignition system. The ignition has more or less been trouble free for nearly 60,000 miles but it takes an electronics engineering degree to service it. I figure its time to sort out the crazy and build something mechanically complicated but electronically simple.
Lets take a look......
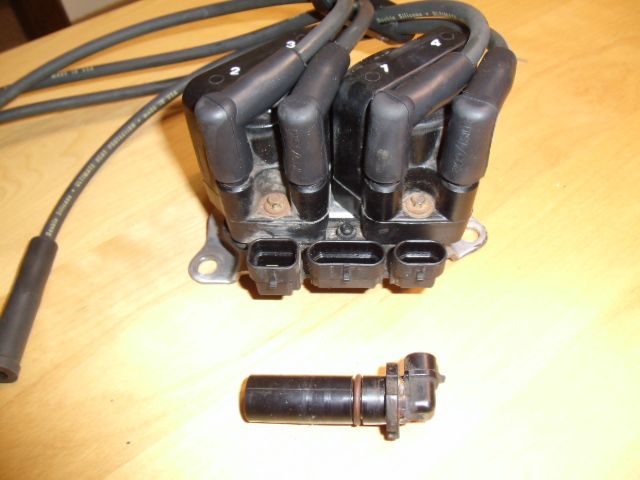 The GM DIS ignition system is a nicely packaged all in one unit that can be modified to work on any 4 cylinder motor. The module was engineered to handle baseline ignition timing and will actually fire the coil packs without an ECM. A safe ignition curve is preprogrammed into the module to allow a sort of limp home mode. Using the module without an ECM is possible but pointless.
How it works..
When the ignition is switched on and the engine is cranked over, the module will track the cranks position sensor and synch. Once it automatically synchronizes it will enable the coil packs to fire. Typically at this point the ECM will switch the bypass line and start sending calculated timing signals.
But why use this?
Looking at the big picture, the GM DIS system electronically looks like a solid shaft distributor. Just like a distributor, it sends a signal to the ECM and will wait for the ECM to send a fire command back. If you currently have a solid shaft distributor then the GM DIS will more or less wire in using the same input and output of your ECM. In most cases the GM DIS voltage levels are compatible but due diligence is required to make sure. The only oddball signal the 7X system needs that your ECU cannot supply is the bypass command. This signal can be easily faked with a relay connected to the starter solenoid.
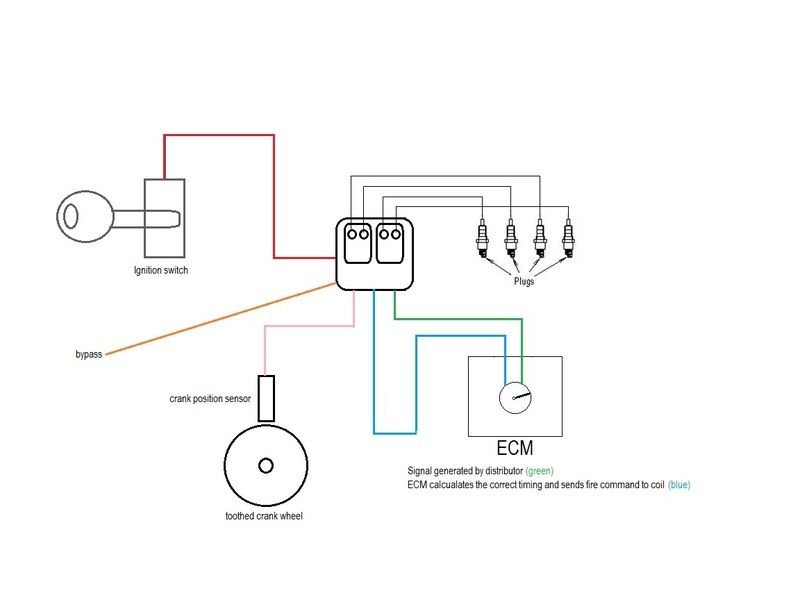 A simplified diagram of the new ignition system. The GM DIS system is self contained and only need the correct crank signal and power for basic operation. This system will even work without the ECM connection...A backup ignition timing map is built into the unit.
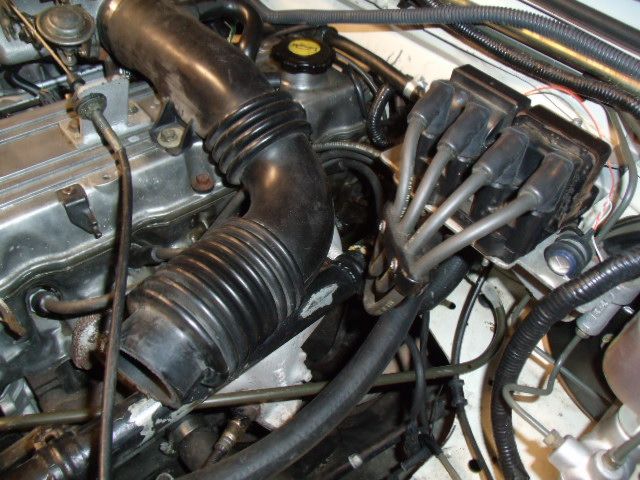 The current B3 ignition uses a Miata crank angle sensor (CAS) that is actually connected to the camshaft
![]() ... Anyway the CAS is heavily modified and is basically as unique as a snowflake. Oh but there is more... The Modified CAS sends its signals to a custom built circuit board that flip flops the signals to fire a second generation Saturn coil pack. The system is overly complicated and un-serviceable.
... Anyway the CAS is heavily modified and is basically as unique as a snowflake. Oh but there is more... The Modified CAS sends its signals to a custom built circuit board that flip flops the signals to fire a second generation Saturn coil pack. The system is overly complicated and un-serviceable.![]()
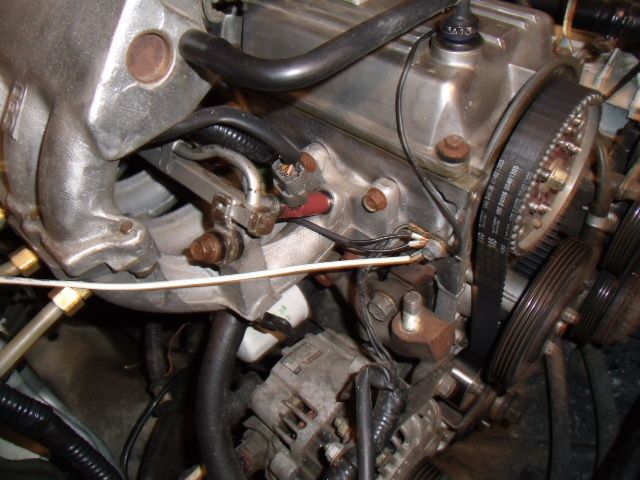 After several cups of delicious Tim Hortons coffee and some head scratching, the location of the new ignition system was determined.
Time to build something......
Stay tuned!
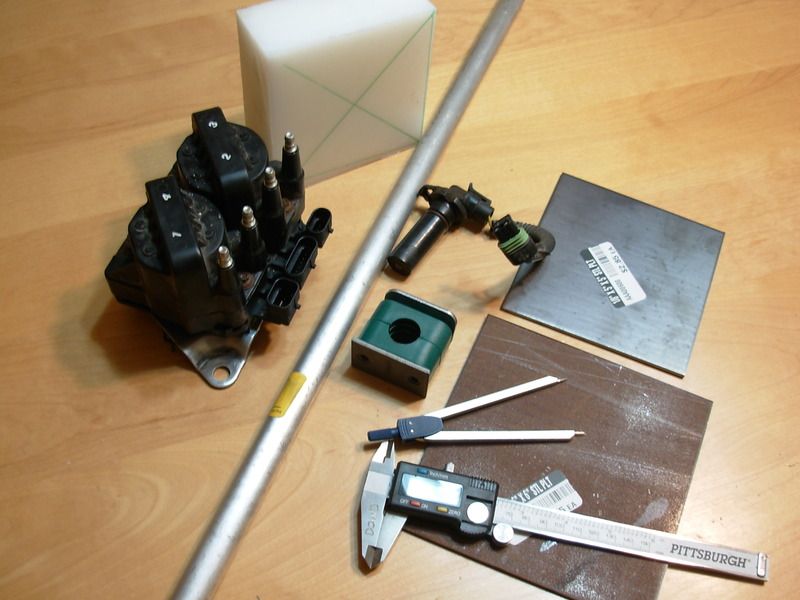 After a short scavenger hunt, enough junk was collected to start the build.
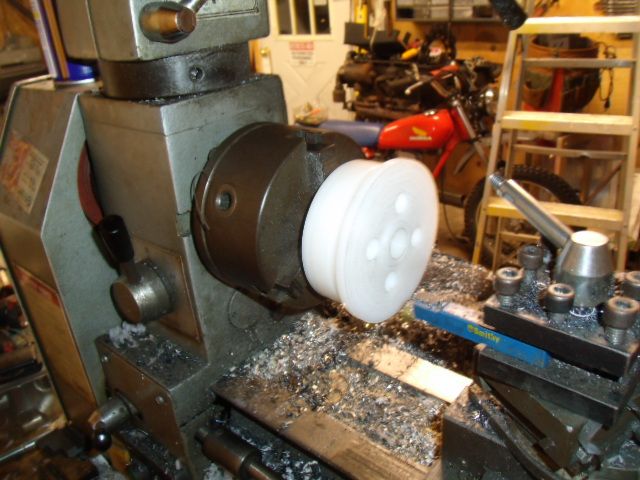 The chunk of Delrin was mounted to the lathe and painstakingly carved into a light weight spacer that will eventually hold the toothed crank wheel.
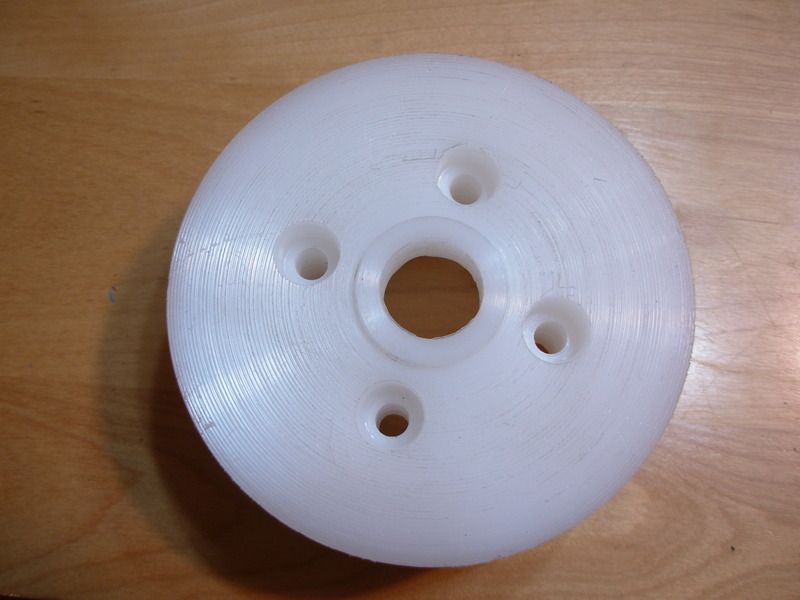 The finished spacer is feather light
![]()
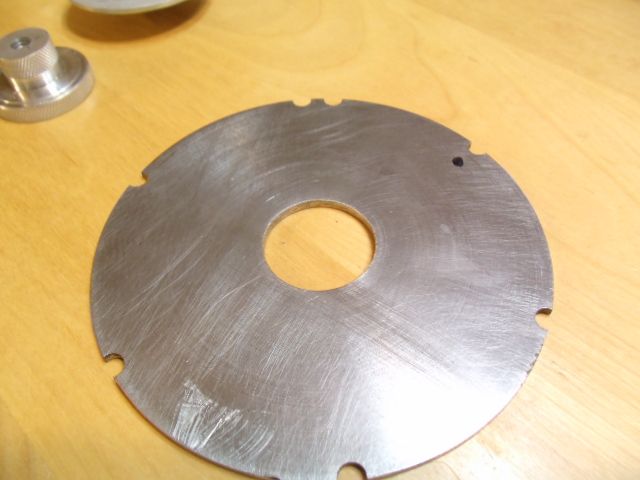 The toothed crank wheel was made from a slab of eighth inch thick steel. This was actually real simple to build. The spacing of the teeth are super critical. I'll get into the details of how to build the crank wheel in a latter post.
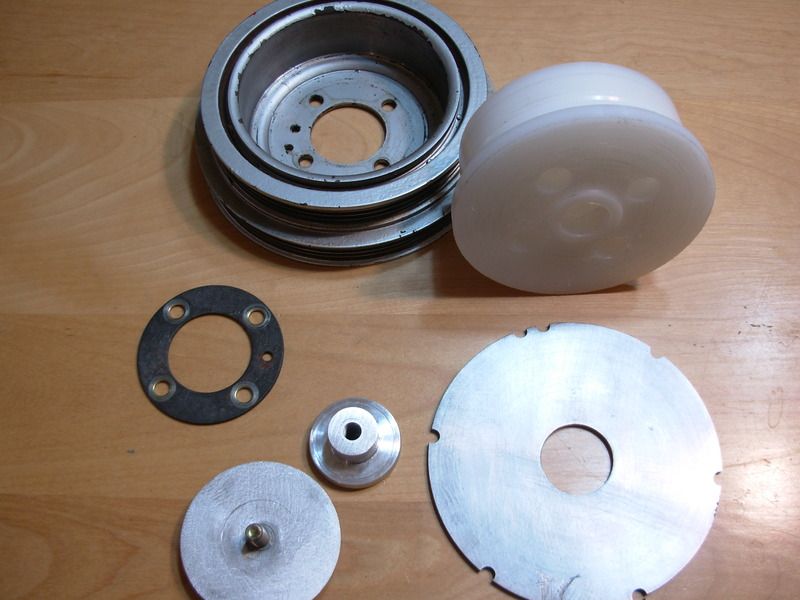 Fast forward a bit and enough stuff was fabricated to finish the crank wheel assembly.
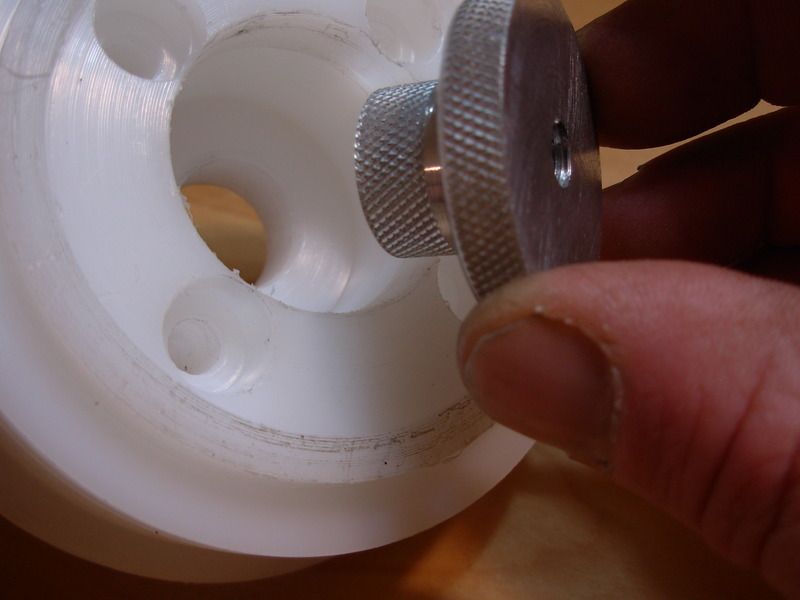 An aluminum hub fits inside the Delrin spacer and is used as an anchor point for the crank wheel bolt. This system is more or less a prototype with infinite adjustments.
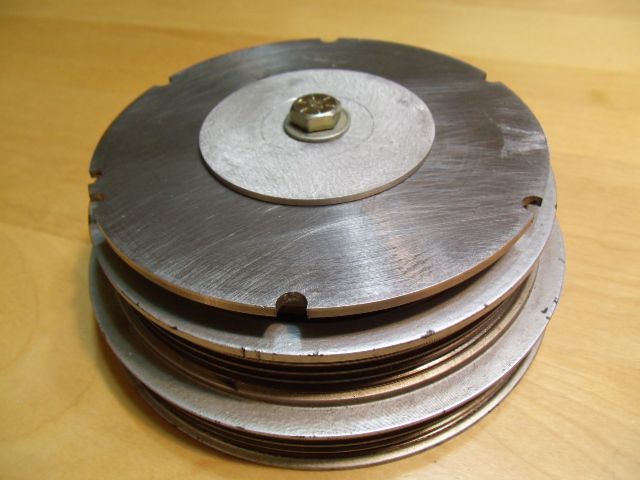 The whole lot is assembled and fits snugly inside the damper pulley
![]()
Moar in just a moment....
You'll need to log in to post.