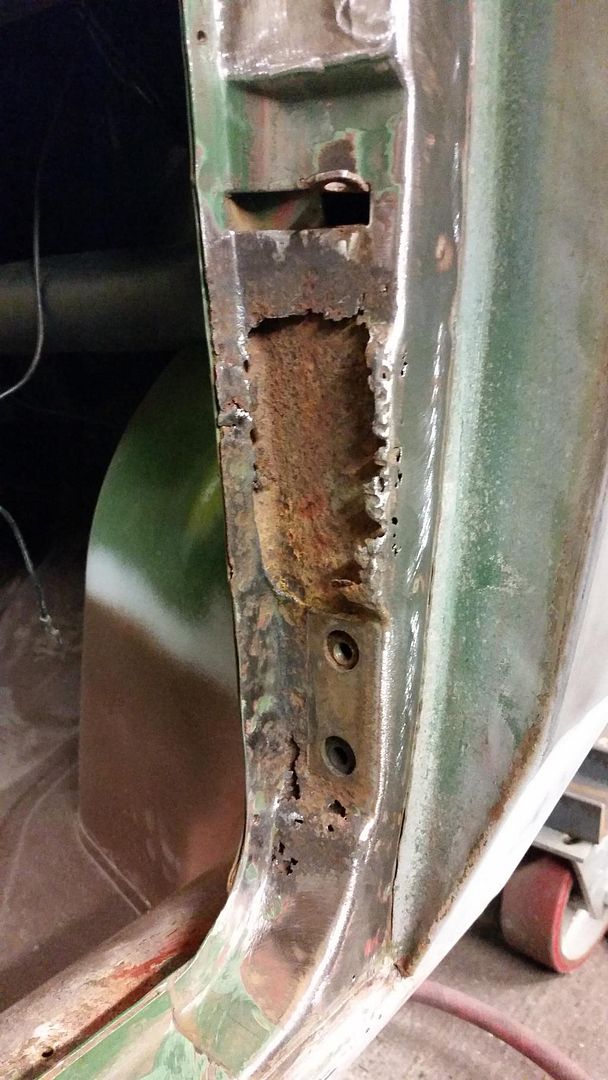
I snuck down to the shop while the better half ran off for some errands this afternoon, despite being sick and told to stay on the couch. Only a few minutes, but better than nothing.
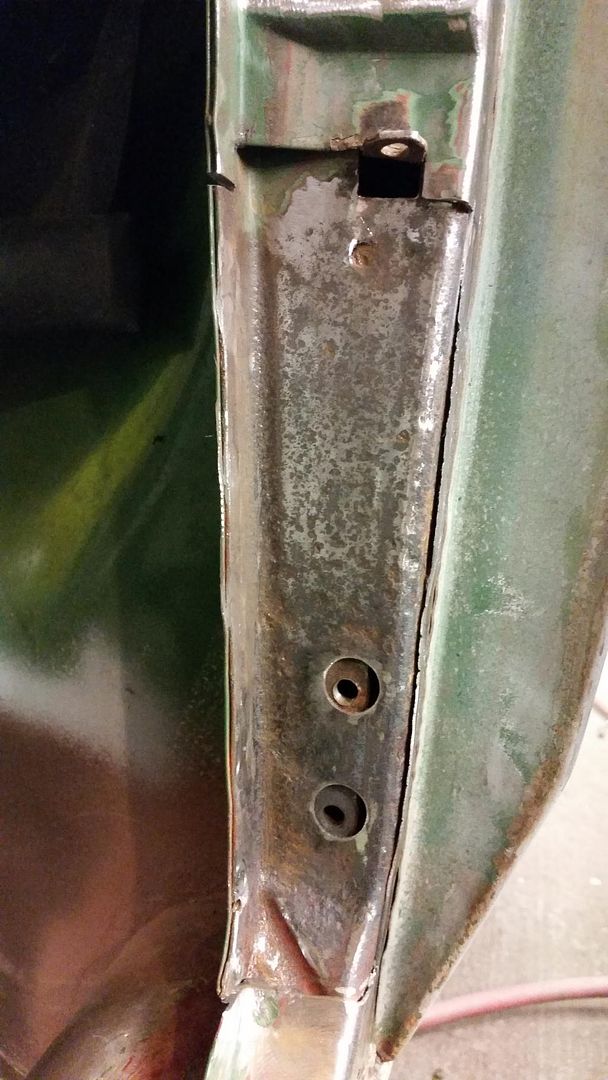
Here's what remains of what I need to recreate.
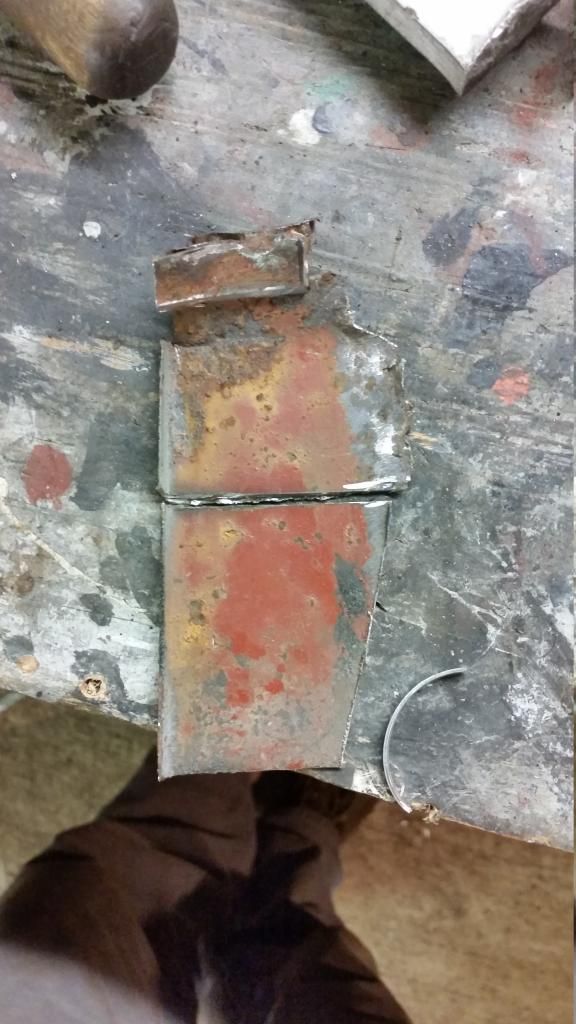
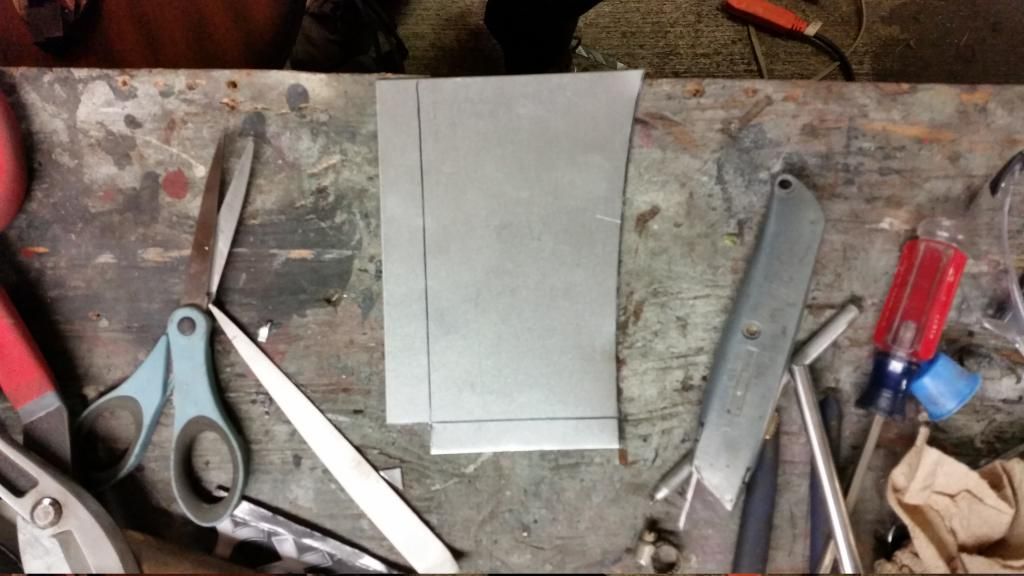
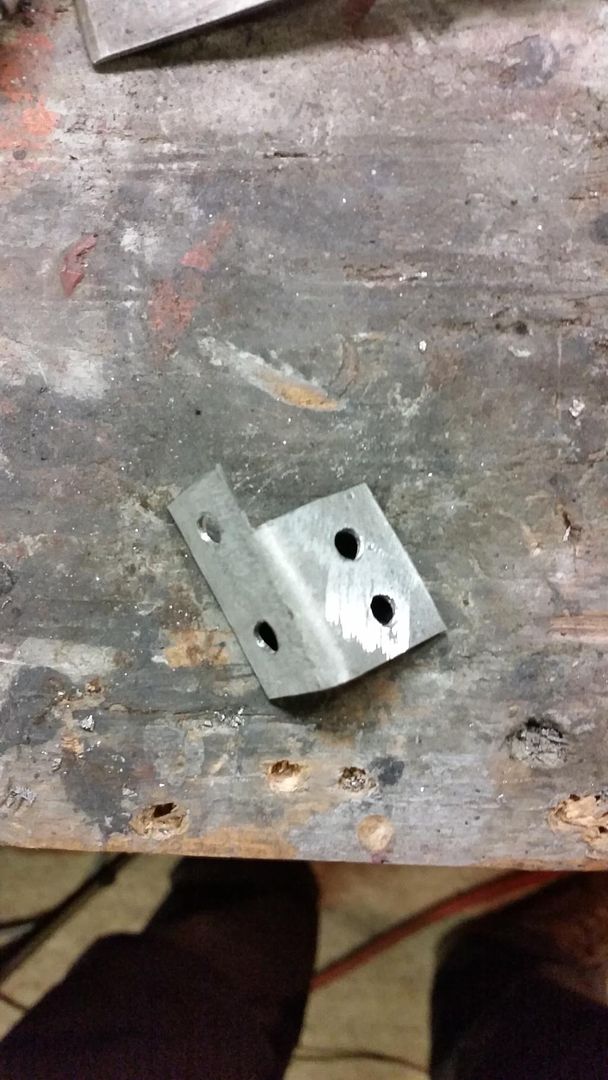
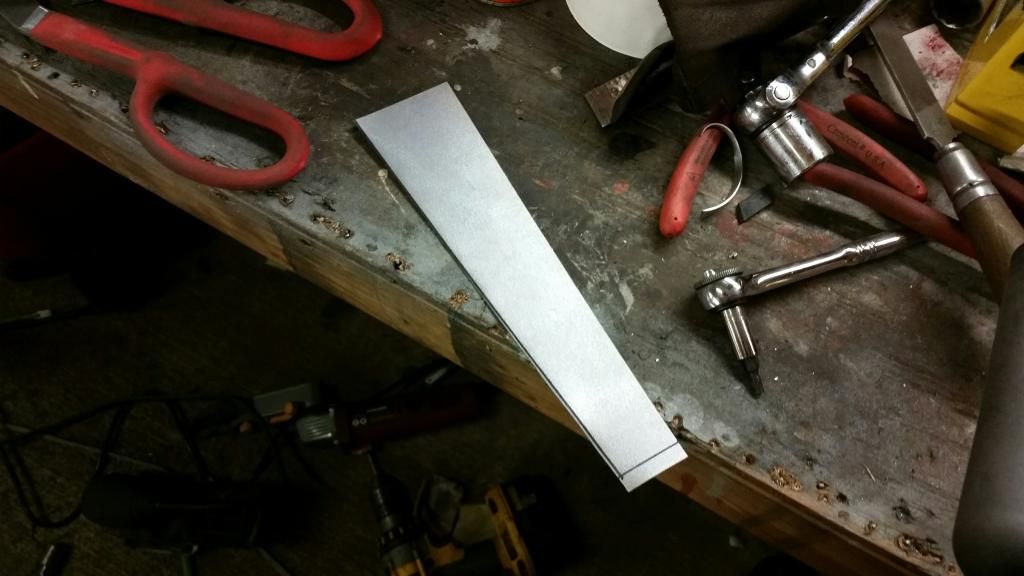
Knocked out a quick template out of what must be my favorite card stock...
After a little cutting, bending, and trimming I have a part that vaguely resembles the original piece.
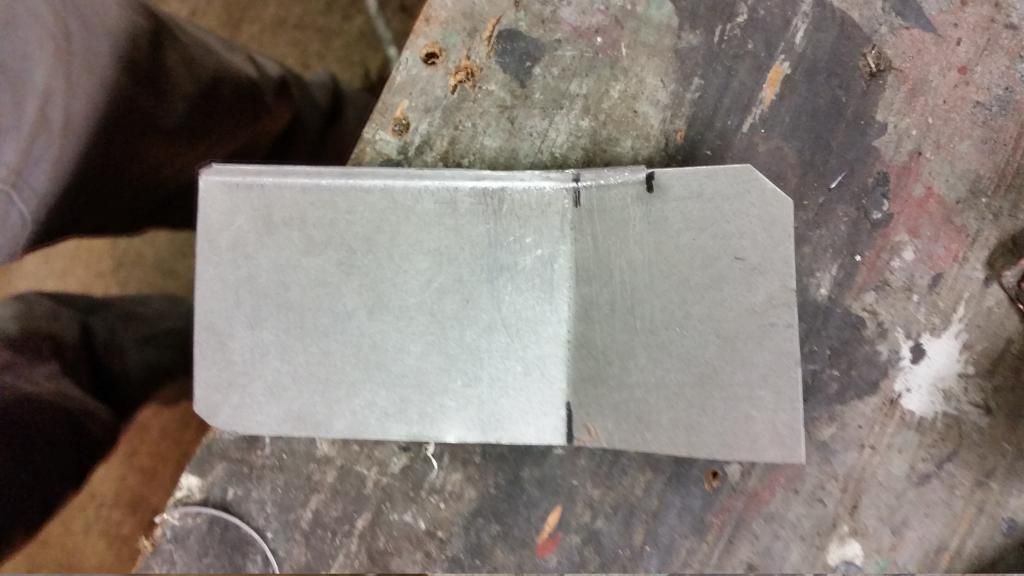
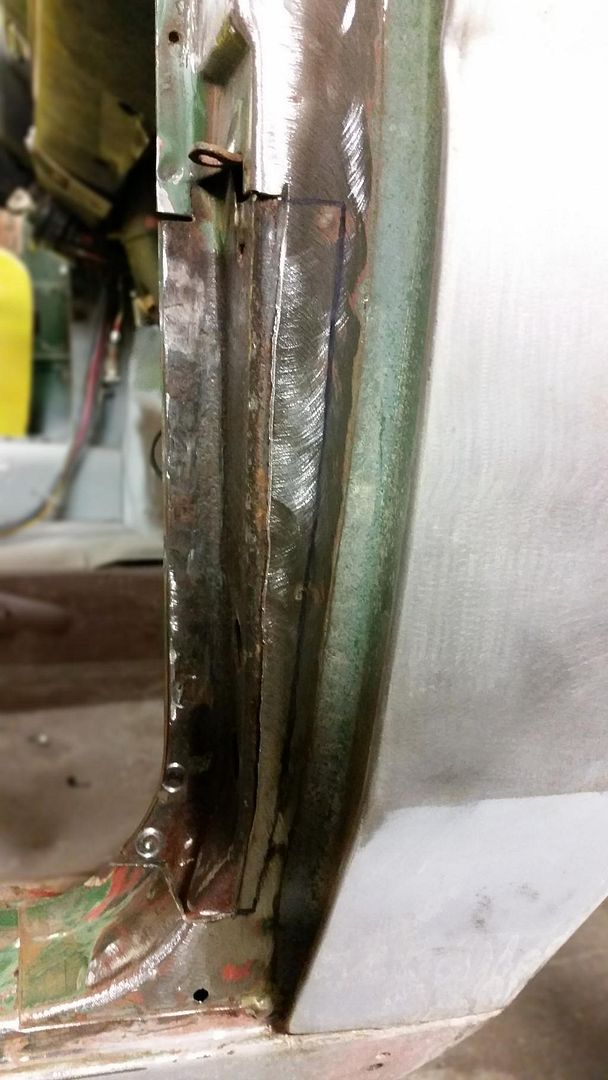
It'll sit something like this.

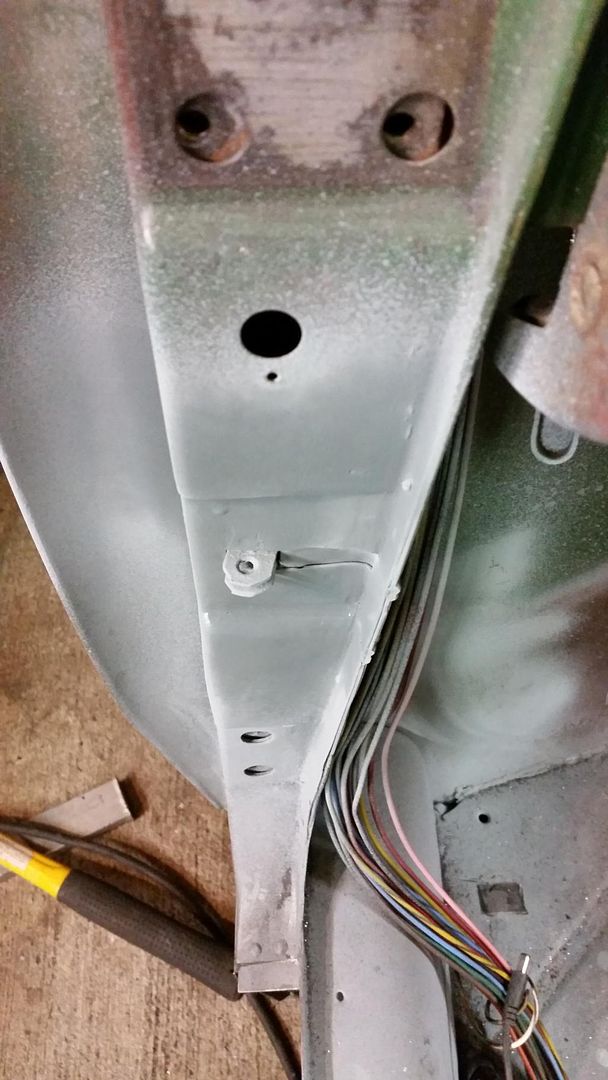
90% of this part will be hidden from view by the inner sill, so it isn't super critical.
Managed to push through my cold and get some stuff done today.
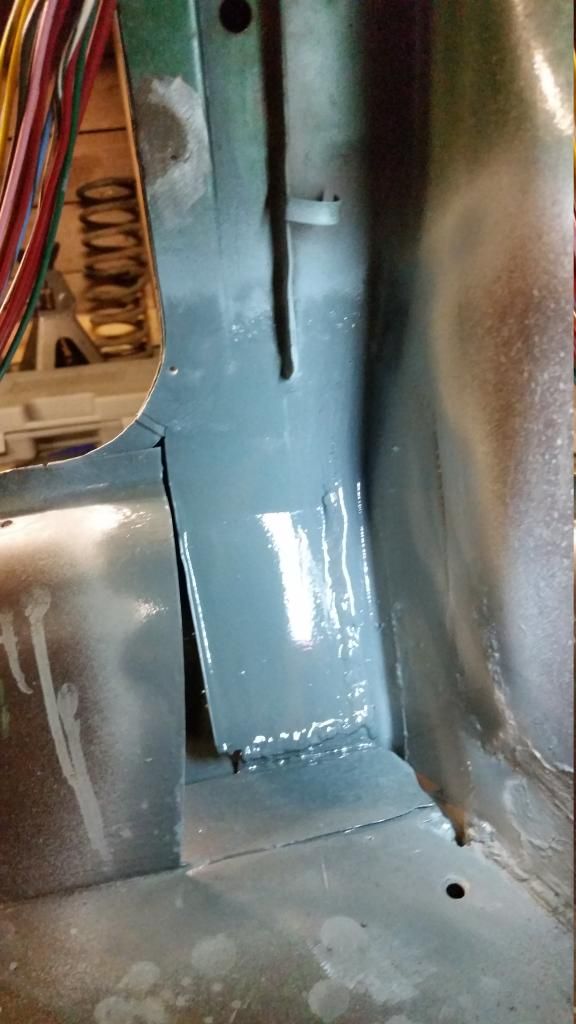
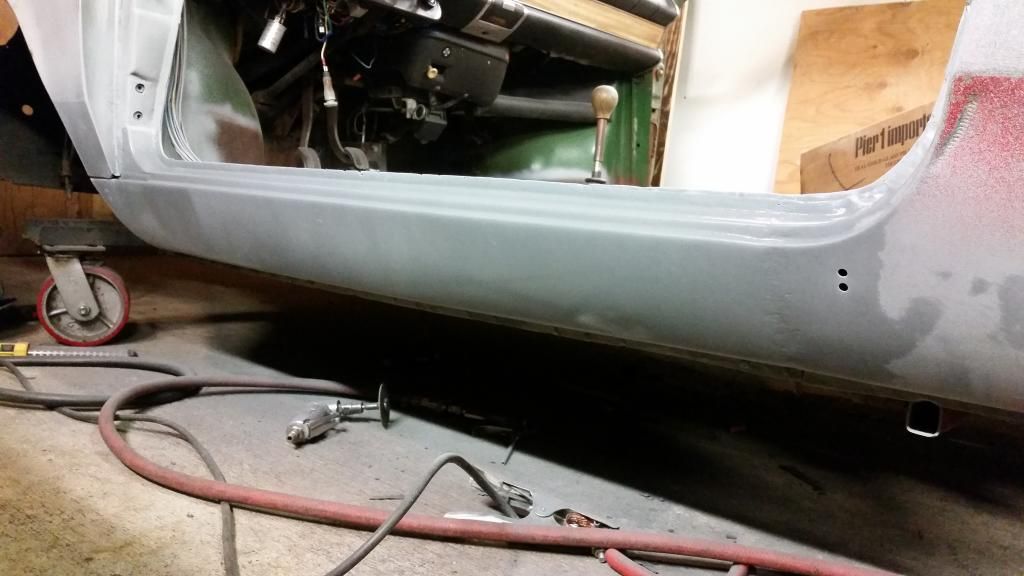
Started off by welding in the panel I made yesterday. Here it is all ground off with a lick of zinc primer.
I then made up a quick paper template for the inner sill.

And then cut my patch.
Threw a quick 90 in it with the ghetto scrap-bin engineered brake.
Then a little trip through the shrinker and a little hammer forming.
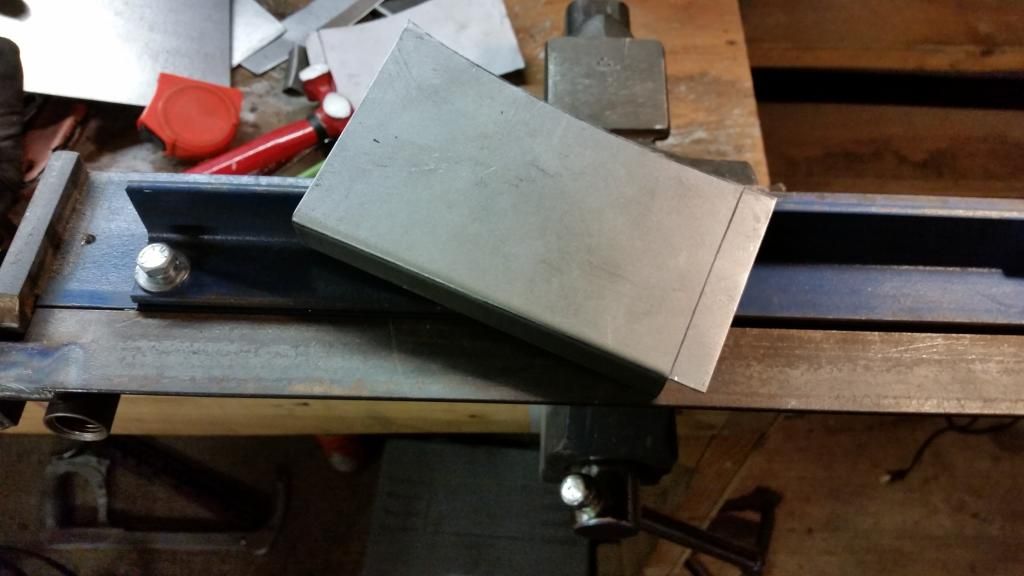
Needs some trimming, but looking pretty sharp.
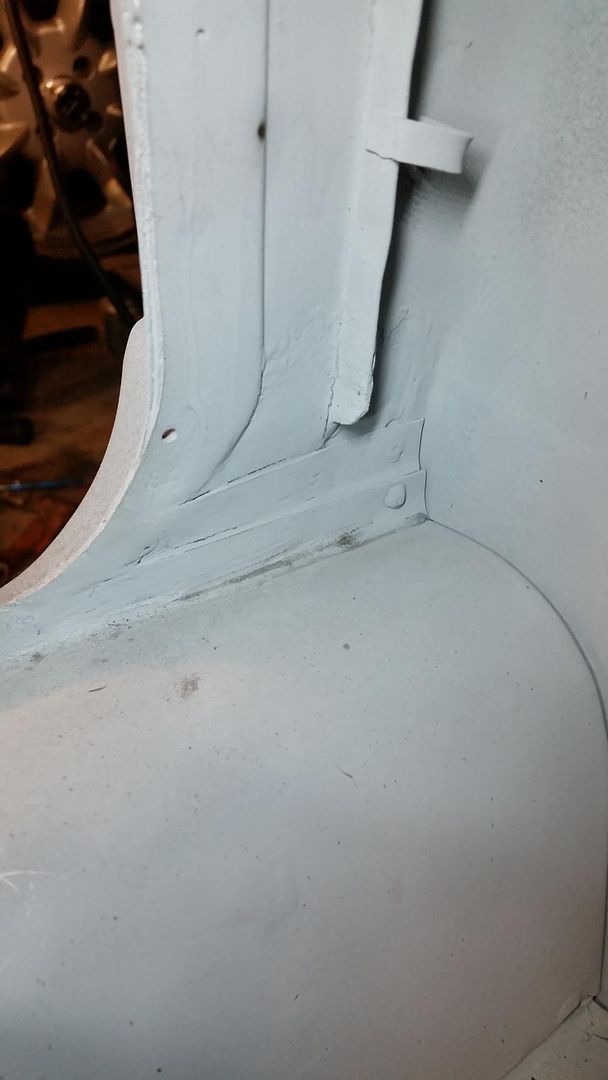
Now that I have a patch made, I needed to turn my attention to how I'm going to mount it.
So that should be that.
That pretty much left me with drilling a couple holes and welding it in.
Gotta say, I'm well chuffed with that bit.

I'll finish welding it in tomorrow then turn my attention back to the outer rocker. Hope you've enjoyed this episode.
Hmm. Looks like things shifted down in the post somehow. I'll fix it when I get some spare time on a pc.

NOHOME
SuperDork
12/1/14 7:09 a.m.
Well played sir!
Rather than cardboard, I use masking tape layered over the repair section. I then trim the tape to the the bit I want to make. Then stick the tape on the metal sheet. Saves me all that measuring bit. It also shows where any shrink or stretch needs to happen on the panel. I do use a lot of tape though and must ignore the cost!
Really liking this thread. Looking forward to more.
Put in just enough time today to get that patch fully welded and ground off.
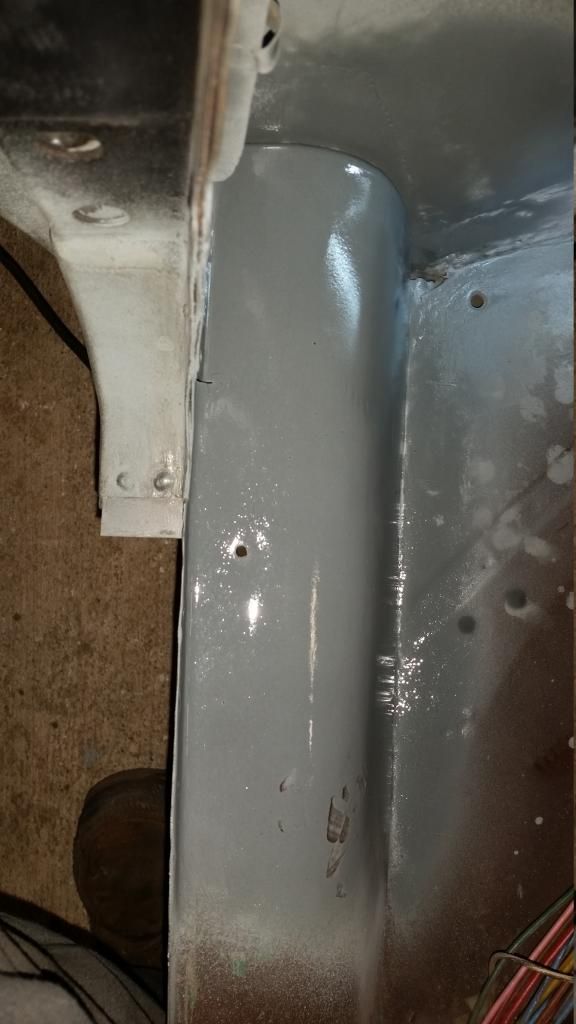
Not quite seamless, but still pretty good.
You can see along the top of the patch where there are 3 plug welds left to do. The gap was a little bit larger than I had hoped for up there and I had to make a quick piece to go in there.
It's actually all welded in, but still I'm need of a good grinding, but I didn't grab pictures of that, because the rozzers payed me a visit at this point.
Seems somebody got pulled over up the street in a stolen car and, since this guy was obviously a real thinker, decided that the dead end street my shop is on was a really good place to run to. Imagine my surprise when I opened the bay door expecting the kinda-stoney surfboard maker a few bays down, but getting a heaping helping of Vancouver's finest instead.
Huh, we have the same wedding date, what are the odds?
I better get started on my own Italian car. Step 1: buy an Italian car.
The odds? 1:365, I guess. But leap years are tricky, so I could be wrong.
You should buy an old Italian rot box and document the never-ending rust repair so I have something to read when I'm too lazy to do real work...
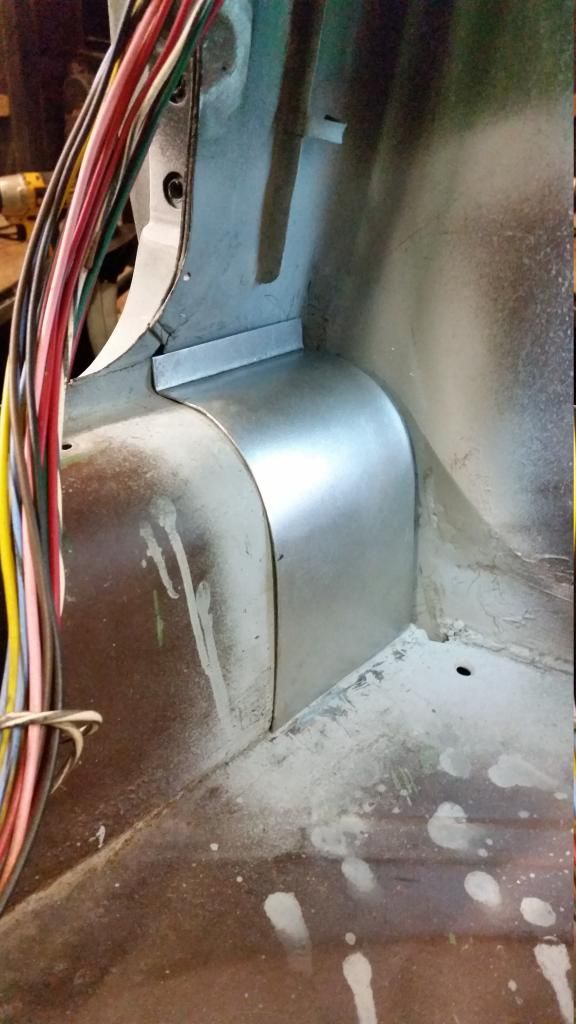
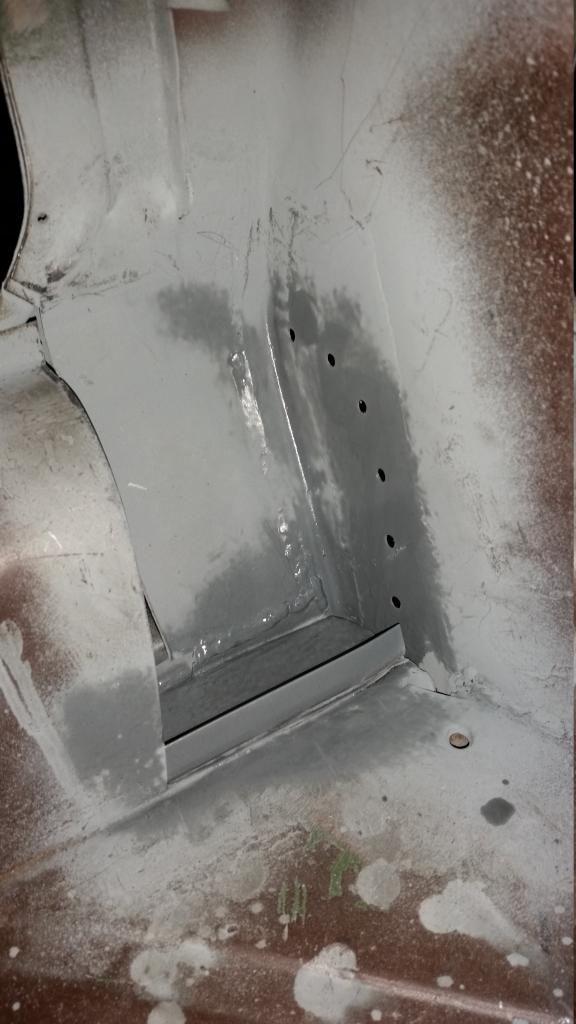
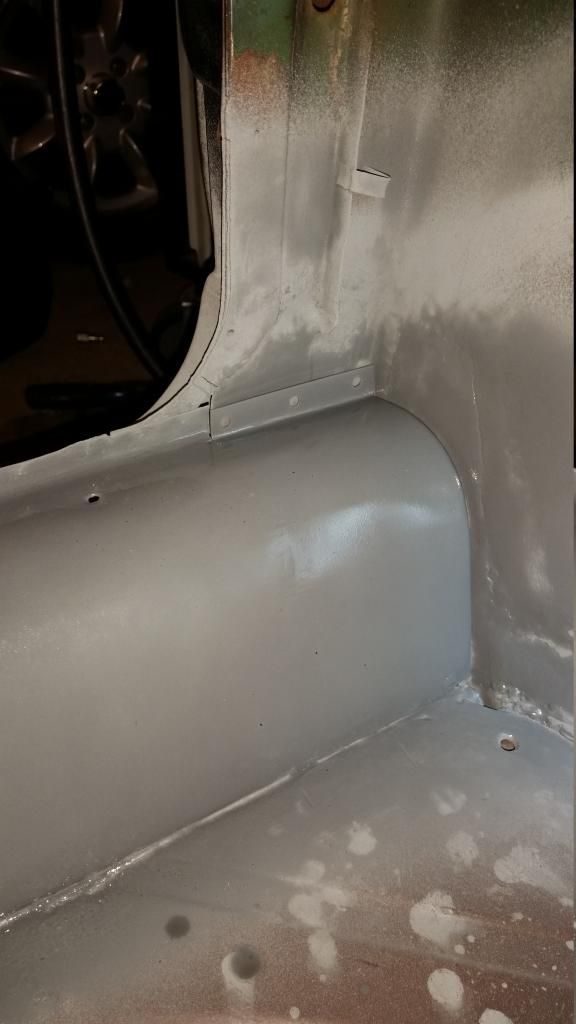
Last things first, here's the completed top edge of the inner sill.

I dig it. It doesn't look particularly factory, but the rest of the car will be a ways off from how it left the assembly line. I really need to swing by Harbor Freight and pick up a Belt-Sander-On-A-Stick this weekend so I can take care of the forward-most plug welds.
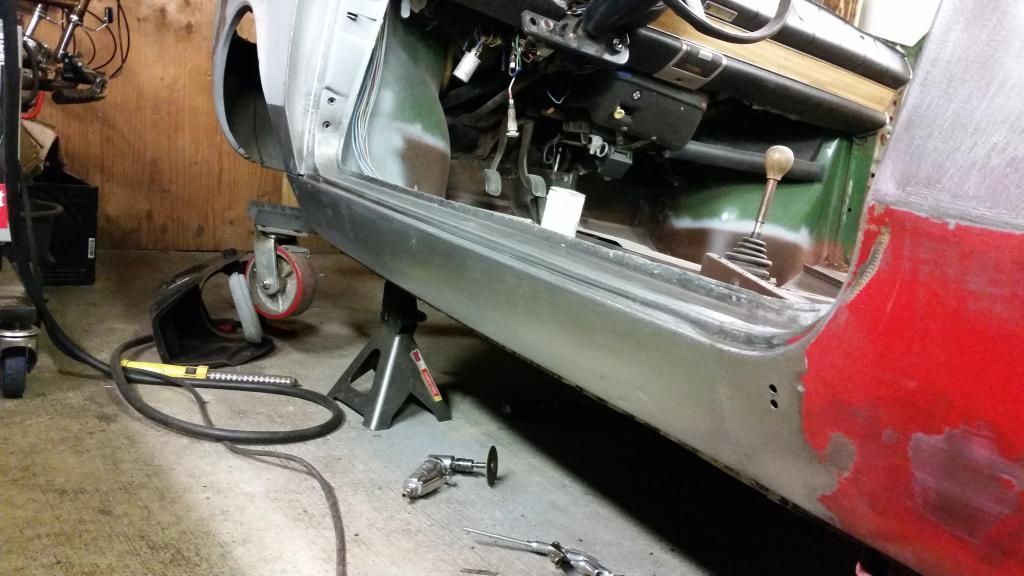
Tonight I put in some work on the door jamb. I'd like to get it all done before starting in on the rocker again. I have one more small area that needs my attention after tonight's little project.
Posting from my phone, so to be continued in next post...

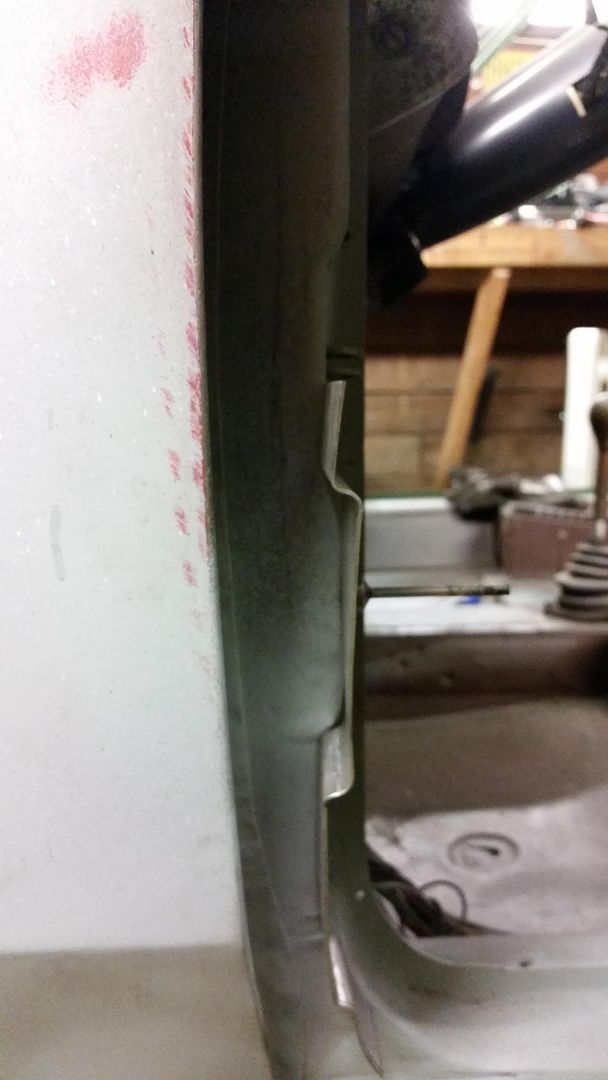
So, the door jamb... The wonderful world of door jamb. It's a beautiful vacation spot; cheap, nice locals, plenty of stiff adult beverages...
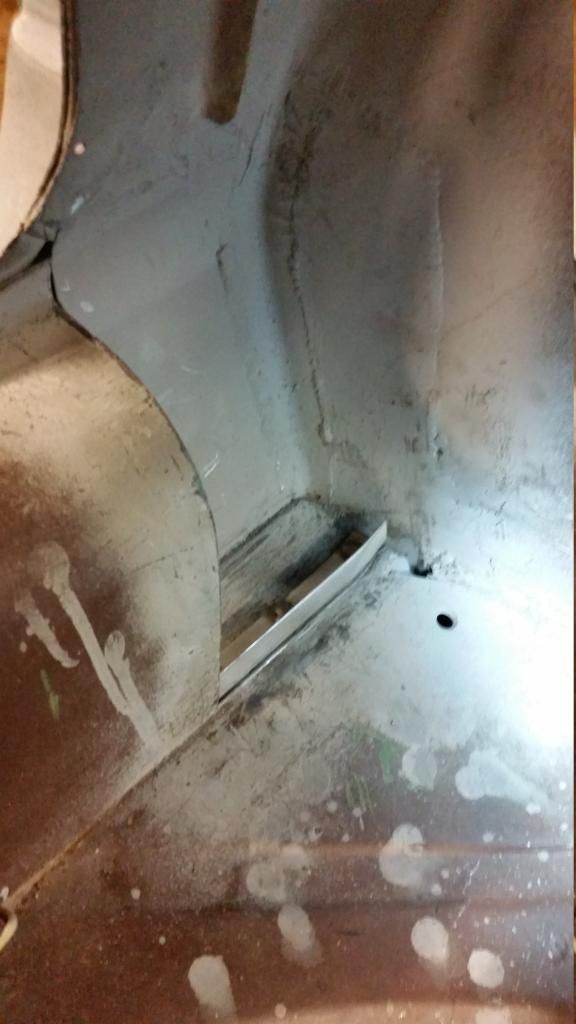
Here's a refresher on where we started.
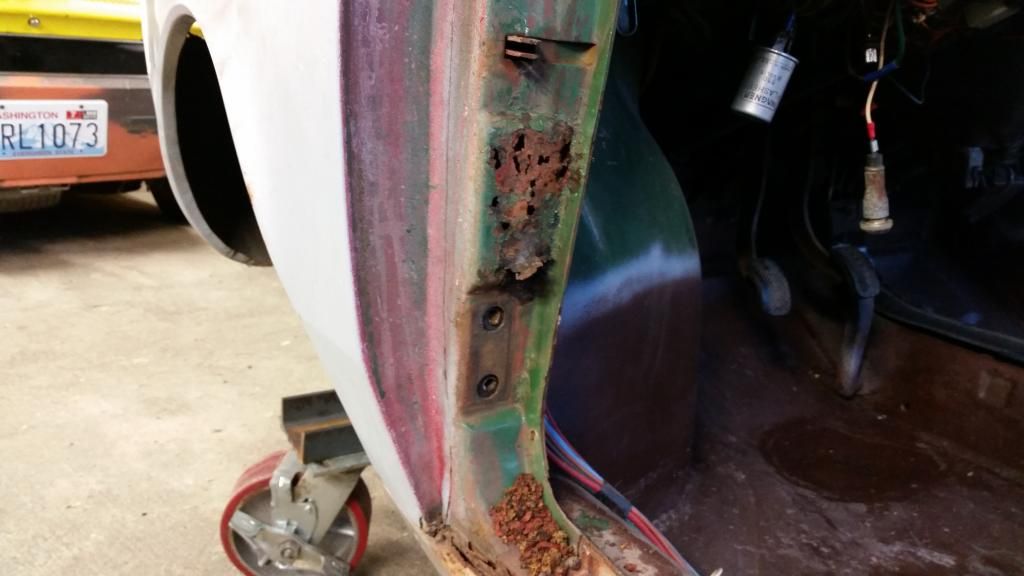
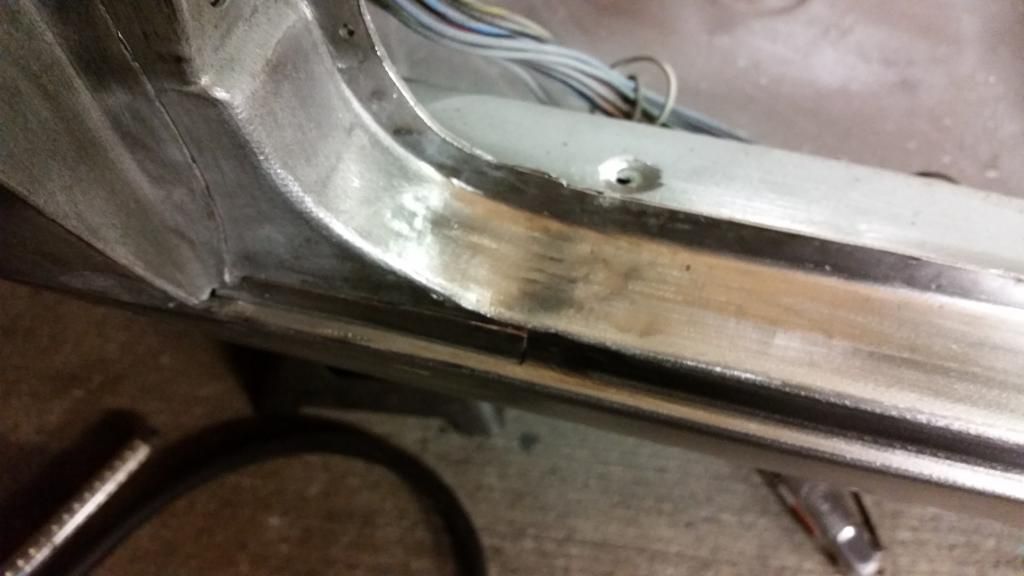
That amazing swiss cheese effect is brought to you by our good friends at One Drain Hole, Inc.
This guy. This guy right here is the problem. The top side is effectively a drain for, umm, something around the cowl or near the dash or something. That's all well and good, but it just trickles down into the jamb, which has no drain hole. Quality.
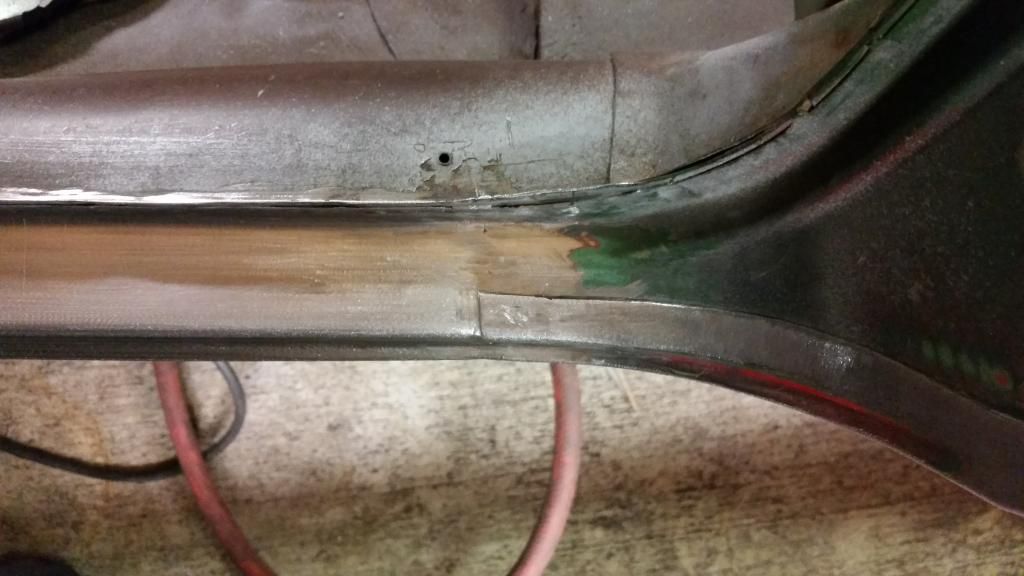
My first thought was that I could just cut a little slit in it and push it back, add a plug weld and a little patch and be on my merry way.
But once I cut into it and found a little more rust than I had anticipated, I decided to go a little deeper.
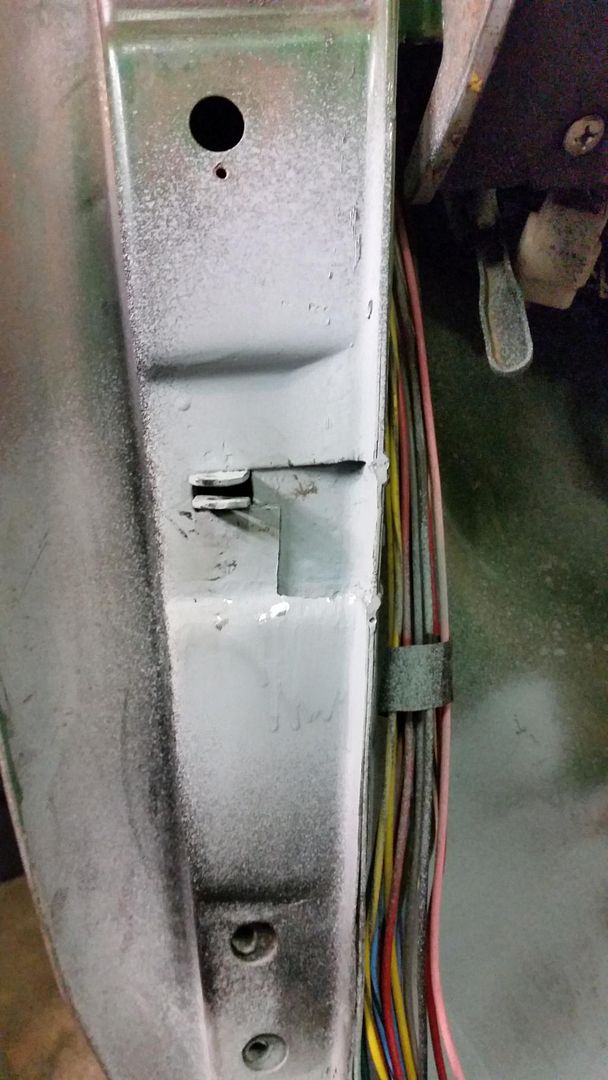
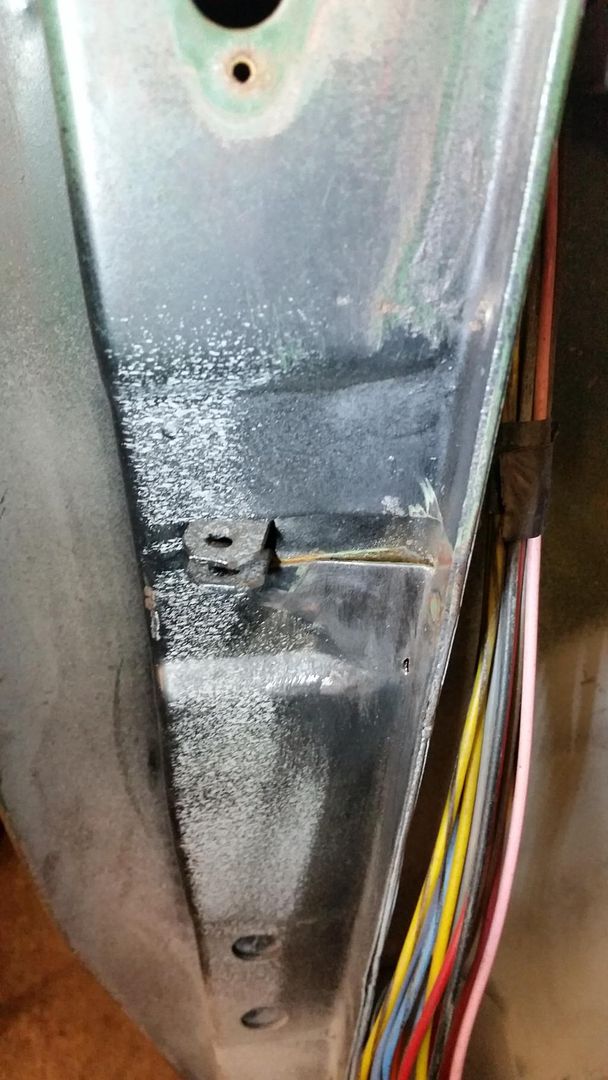
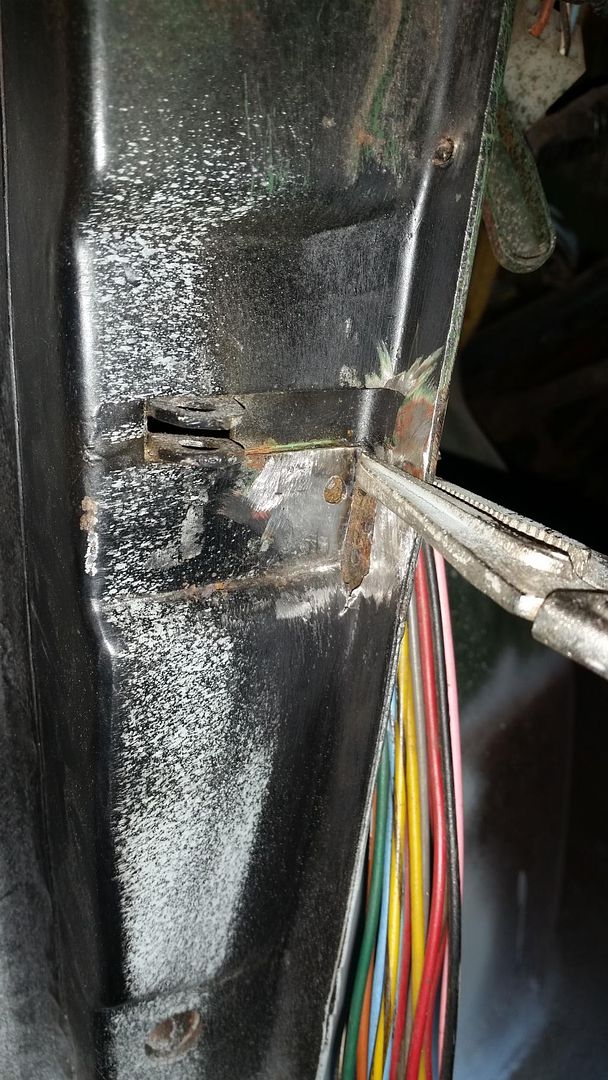
I made up a quick patch
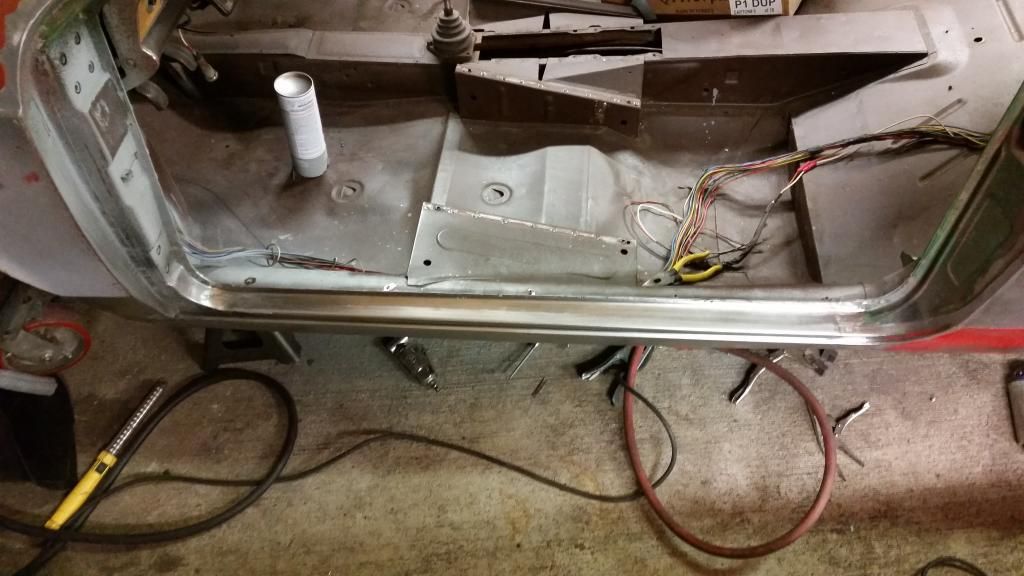
And after some welding and much grinding, I give you my new and improved door jamb. The dark area is just some funny business with the paint.
Probably no update for tomorrow, but I hope to have something to show on Sunday.
Cheers.

Ramona
New Reader
12/7/14 3:39 a.m.
Nice work! Have not checked your thread for awhile and got a bit of a shock seeing the coupe. Thought it was mine. I have done almost identical rust repairs as yours. Just refitted the doors during the week and relieved they fitted so well. Interestingly I also used my coupe on my honeymoon in 1972.
[URL=http://s218.photobucket.com/user/fishermantwo/media/P1070103.jpg.html] [/URL]
In reply to Ranona:
Very cool! It's nice to see another one getting some love.
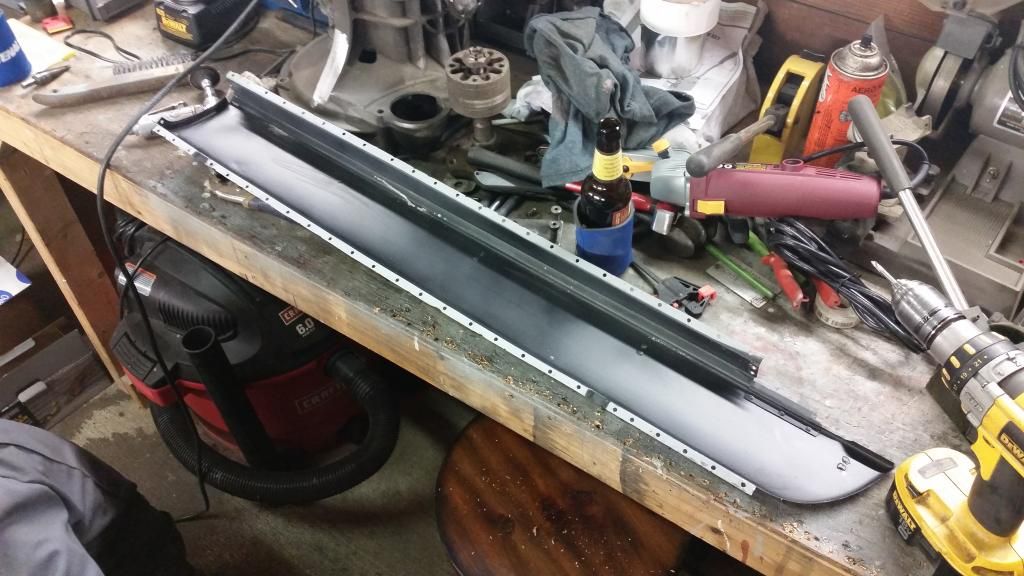
Tonight I dusted off the old Plug-O-Matic that I made while doing the floors on the Scirocco.
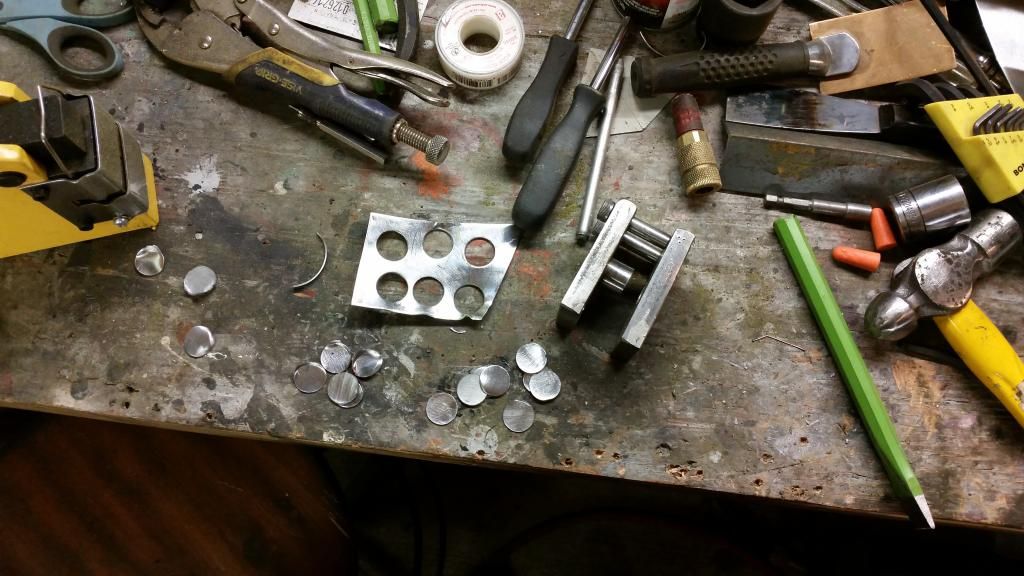
It took a little fiddling to get it working again. It's making good parts about 50% of the time right now. All the failed attempts are on the left, the good ones on the right.
The diameter of the plugs are right around .75", so I just chuck up the old unibit and waller away until I get there.

So, with that all done, I have no more excuses and will be finally finishing off the outer rocker as time permits.
Ramona
New Reader
12/9/14 3:48 p.m.
I think my A pillars may have had much more rust damage than yours. The LHS in particular needed new steel on the inside, in the wheel well and a new lower hinge plate made and installed. The car has sentimental value so I had to restore properly. I bought it new in 1970 when Fiat were in the middle of union troubles and the build quality was poor. Fitted the doors during the week and relieved to find they fitted so well.
[URL=http://s218.photobucket.com/user/fishermantwo/media/MyFiat16.jpg.html] [/URL]
NOHOME
SuperDork
12/9/14 6:18 p.m.
Cool, we can have dueling build threads and see who gets the car on the road first! Place your bets Gentlemen!
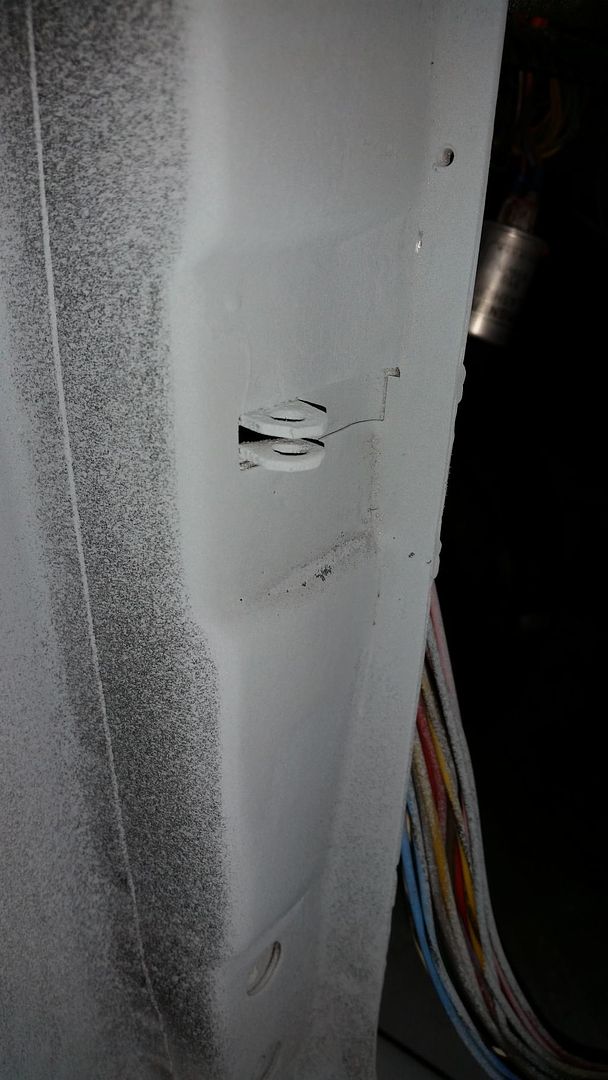
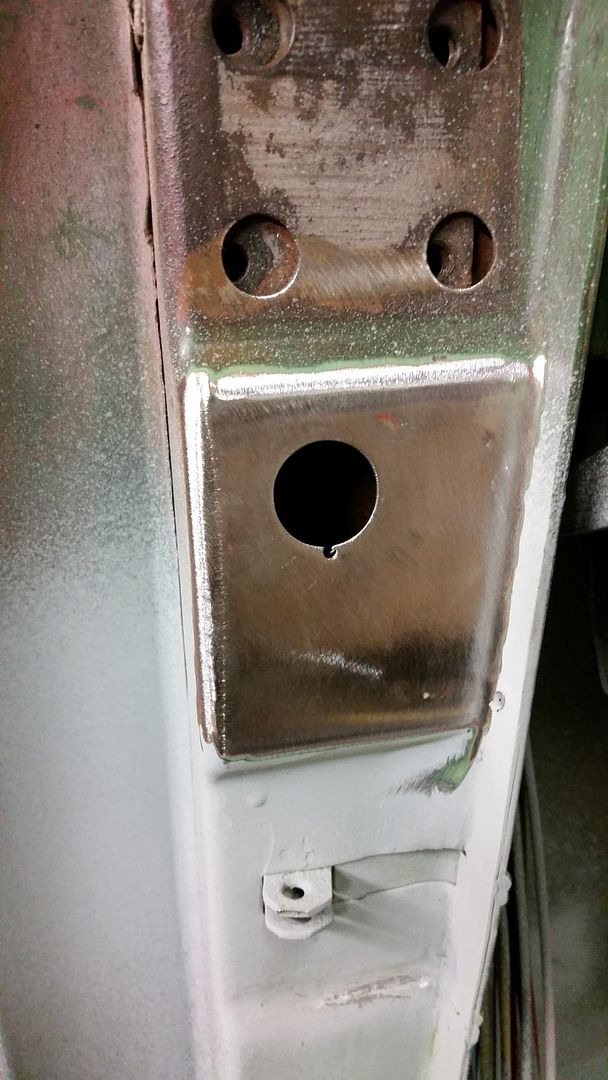
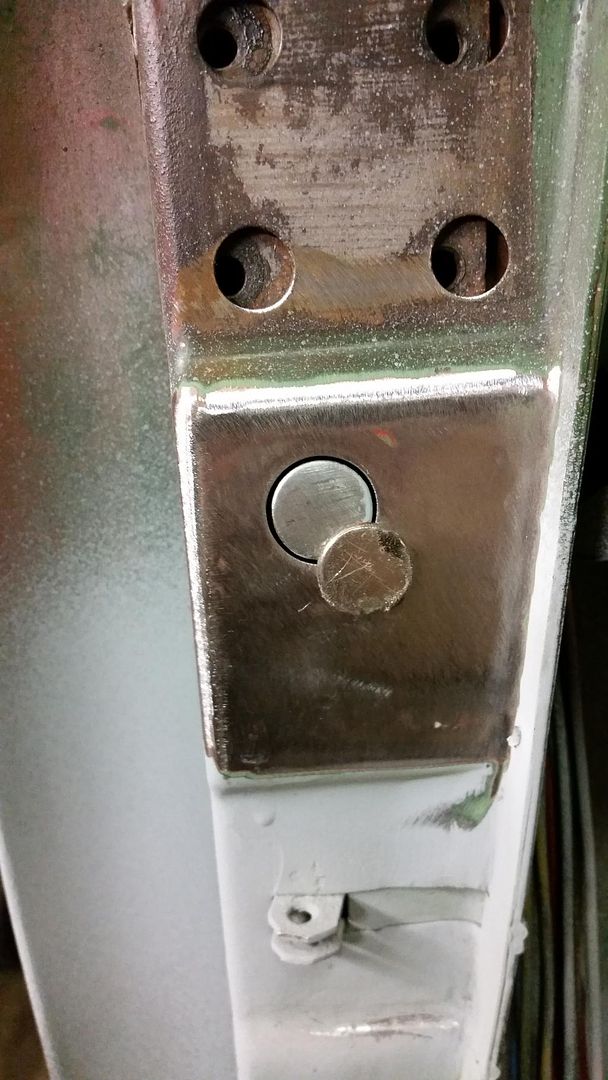
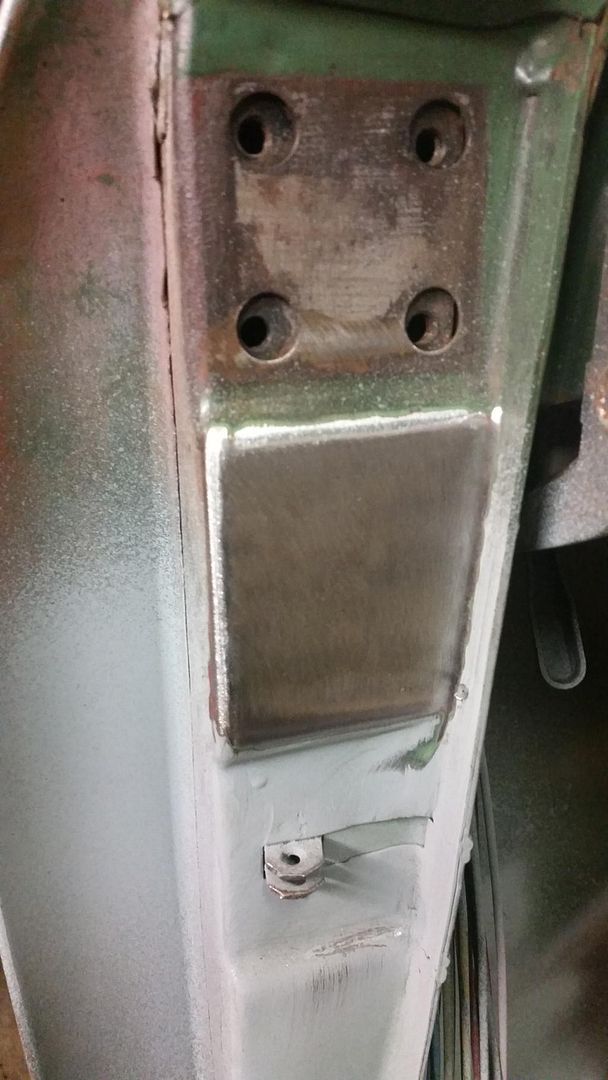
I'm confused. Was the round hole in the door jamb for your door dome light switch?
Nice welding though.
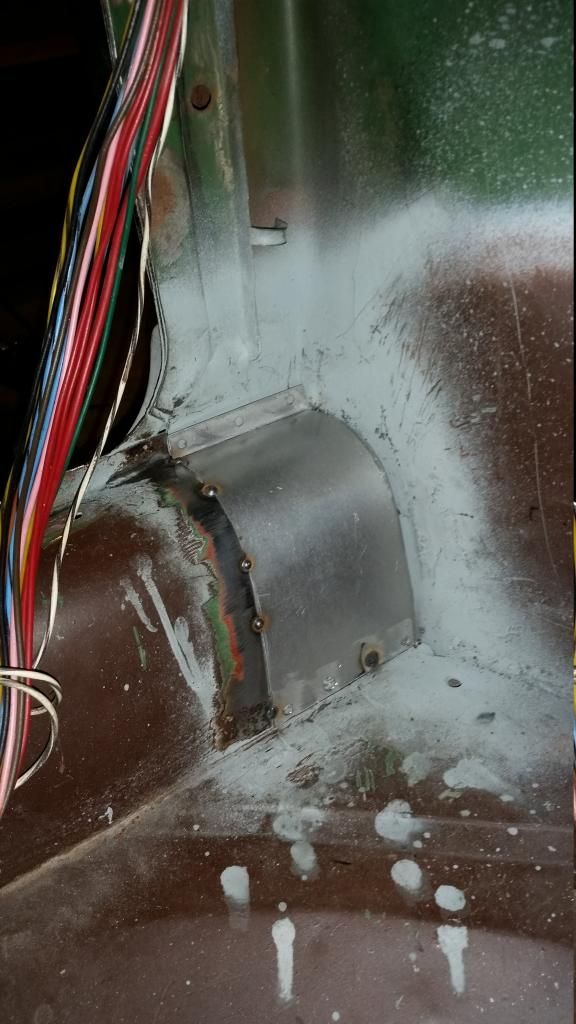
It was indeed the hole for the dome light switch. The original one was broken, the spider ones were different, and new ones aren't particularly cheap. Besides, "because racecar", even though it will be driven year round.
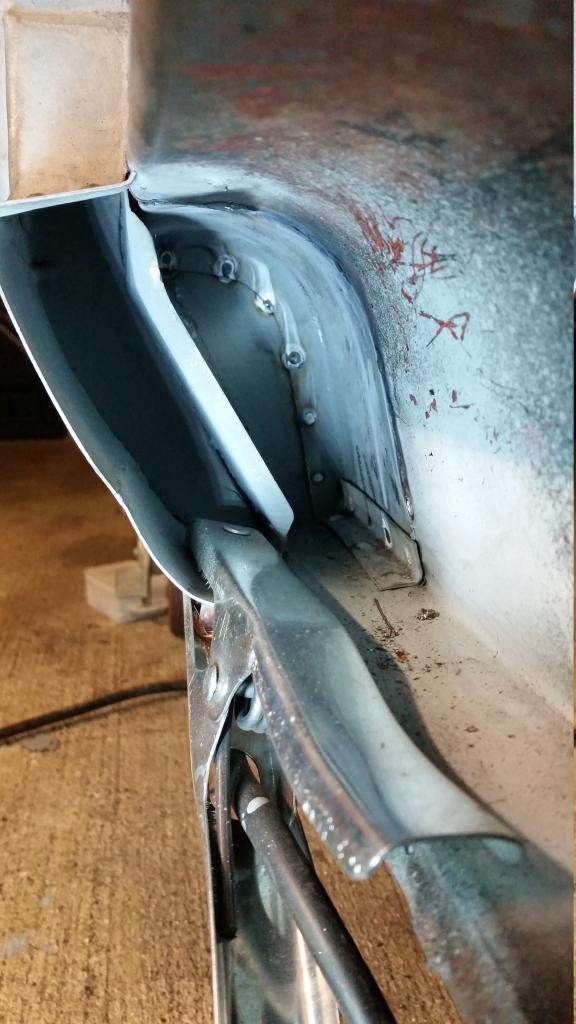
There's about 60 plug welds holding the rocker on. It seemed like a really good idea at the time, but upon further evaluation (i.e. grinding them all flush), not my best plan.
No during photos of this, though. I was in get E36 M3 done mode, not make things look good for the Internet mode.
This section could use a little more work.
But overall I am quite pleased with it. I ended up having to shave the body line where the rear of the rocker met the body. It was never going to look right if I didn't, and that whole area is about a 16th or so low, so a skim of filler should hide it even further. Eso si que es.
At any rate, it's about time to rotate the car around and do the same thing to the passenger side.
The recent lack of updates are due to the poorly aging coolant system on our 160k mile e46...
I hung an arts to make the shop a little more homey, since it's quickly becoming my second residence.

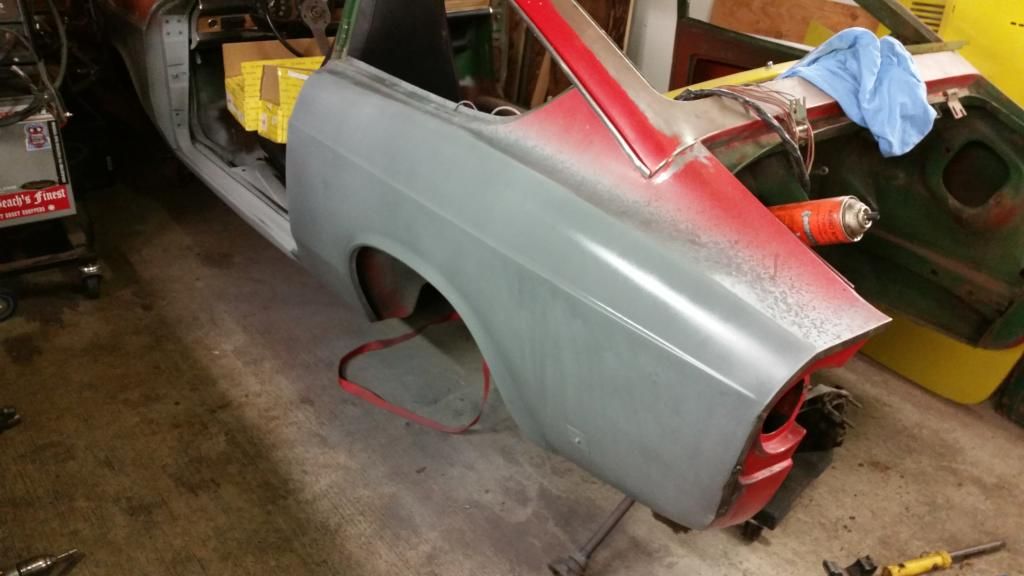
Before spinning the car around I stripped all the nasty plastic filler and gummy rustoleum off the driver's rear quarter panel.
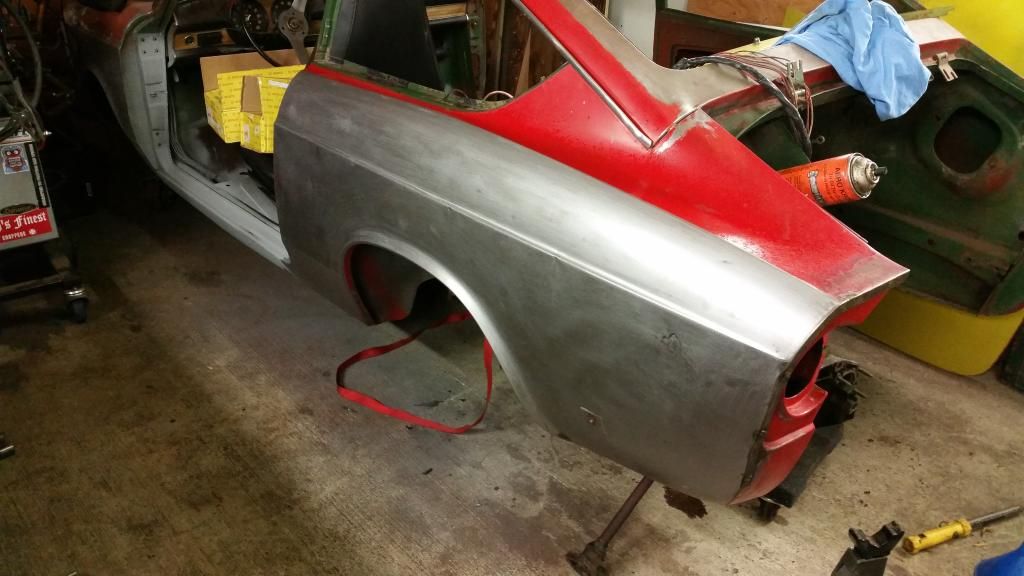
I gave it all a sacrificial coat of high zinc primer to keep it from flashing over with rust.
It's actually stripped all the way up to the drip rail at this point, but I apparently didn't take any photos of that. It's boring anyways, so just use your imagination. I had almost forgotten how much I detest sanding cars. My bogeys are a lovely shade of green, red, and gray; sneezes are even better.
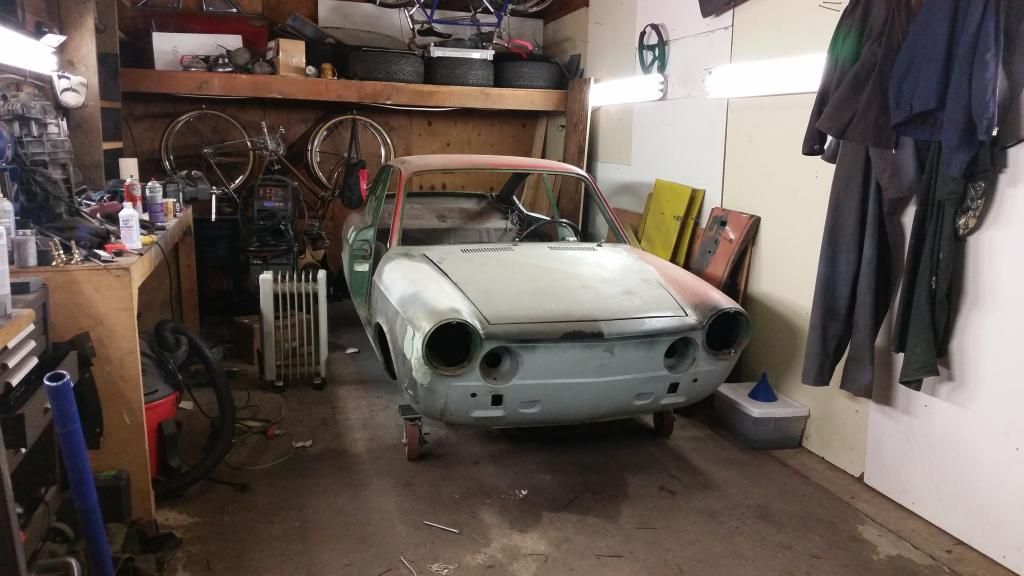
On Wednesday night DaveBob helped me spin the car around so I could begin the rust repair on the passenger side. It was largely uneventful, but it's certainly nice to see the the front end again.
Last night I poked around a little bit while Ladyfingers was off at the gym. Here's what I found.
So, out came the cutoff wheel.
Current plan is to cut it back to the sharpie line and see what is lurking under there. No amount of stabbing with my pick or scrubbing with the wire wheel produced and pinholes. So unless I find more damning evidence, it will just get a dose of converter and primer then a nice new panel built over it.
And because I can:


Opti
Reader
12/19/14 8:30 p.m.
Watching someone do rust repair, makes me hate rust repair. Having never done this I have a hard time following what you're doing but the after always seems to look better than the before, so ill keep watching.
Thanks for following along, anyways! I'm surprised every time someone says that they're enjoying the thread. It must be immensely boring at times. Hopefully there is only a month or two more of rust repair. I'm planning on a very short overview of the body work, because that's the only thing worse than rust repair.
Someday we will get to engine swaps, turbochargers, Porsche transmissions, sport bike rocker arm suspension, and other exciting engineering projects. But I feel like a solid foundation is the best starting point, so here we are. The car will eventually be very GRM, it just might take 4 months to get there. 
Looking good (the beer and the rust exorcism)
bgkast wrote:
Looking good (the beer and the rust exorcism)
It really was delicious, but I should lay off the stouts for a bit. The beers haven't been terribly kind to my mid-section this winter.
I spent my spare time this evening cutting along the dotted line from the last photo post and poking around and forming a game plan for the inner sill. Which meant a lot of thinking, not much doing.

While it doesn't look it, everything pictured is very solid. Before I left, I gave it a nice coating of rust converter. The next update should have some panel making content, but it likely won't come for a few days as I am working through the weekend. Turns out it's hard to turn down double time when you're building a vintage Fiat on a shoestring budget. 
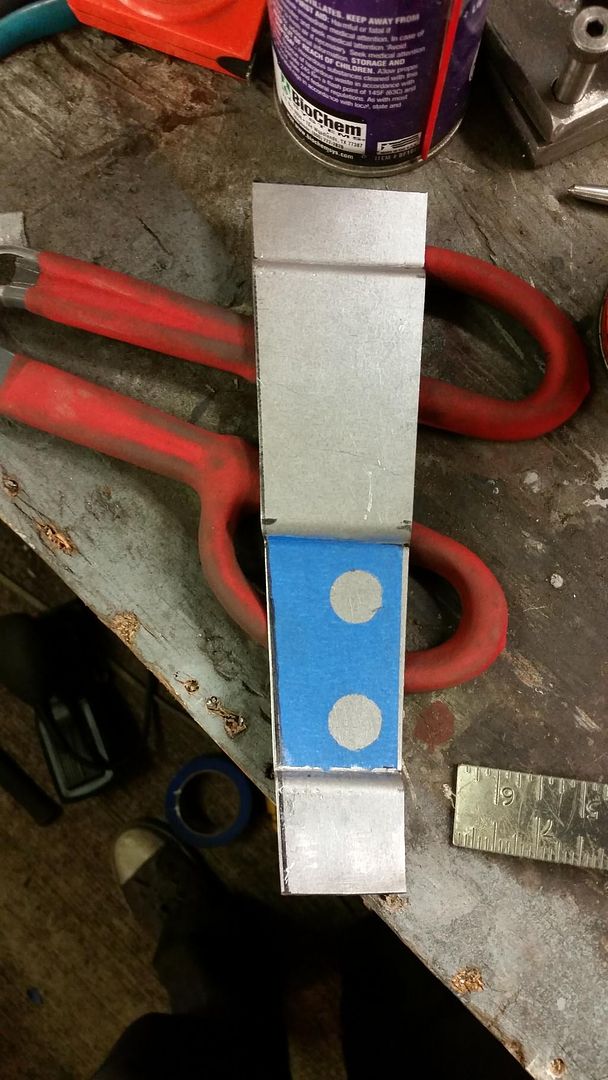
Earlier this week I tried my hand at making a one piece patch for the jamb, it turned out to be a fruitless effort and left a sour taste in my mouth. After a series of quick texts to Ditchdigger, which boiled down to "That's a tricky one. Make it in three pieces, bruh", I decided it was time for attempt #2.
I used the driver's side as a template for the dips and contours and whatnots.
 Not perfect, but nice enough for a door jamb.
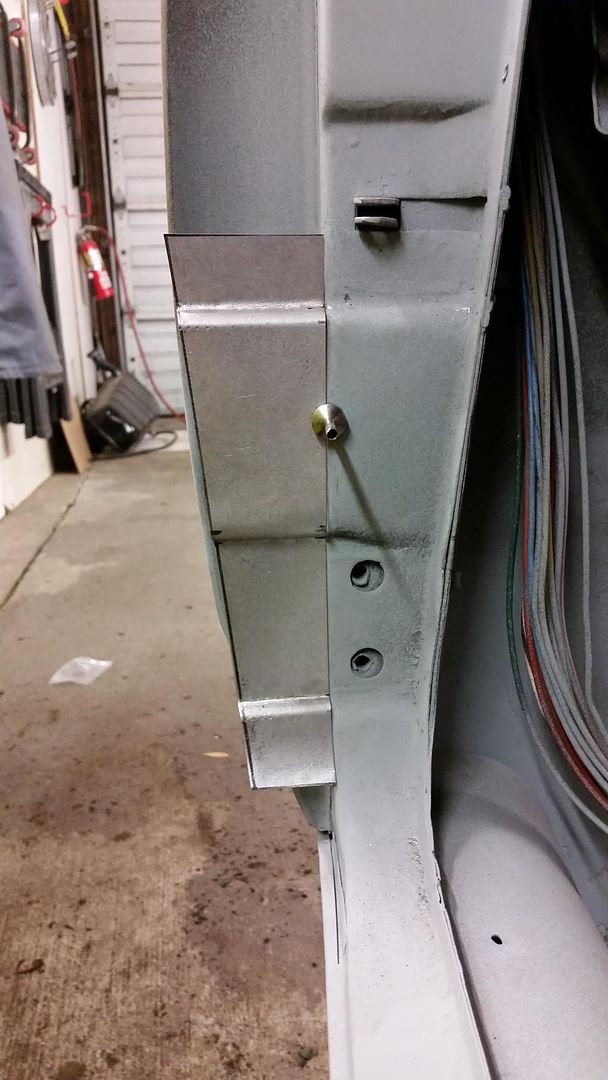
After a little trimming and fiddling its started to look like something.

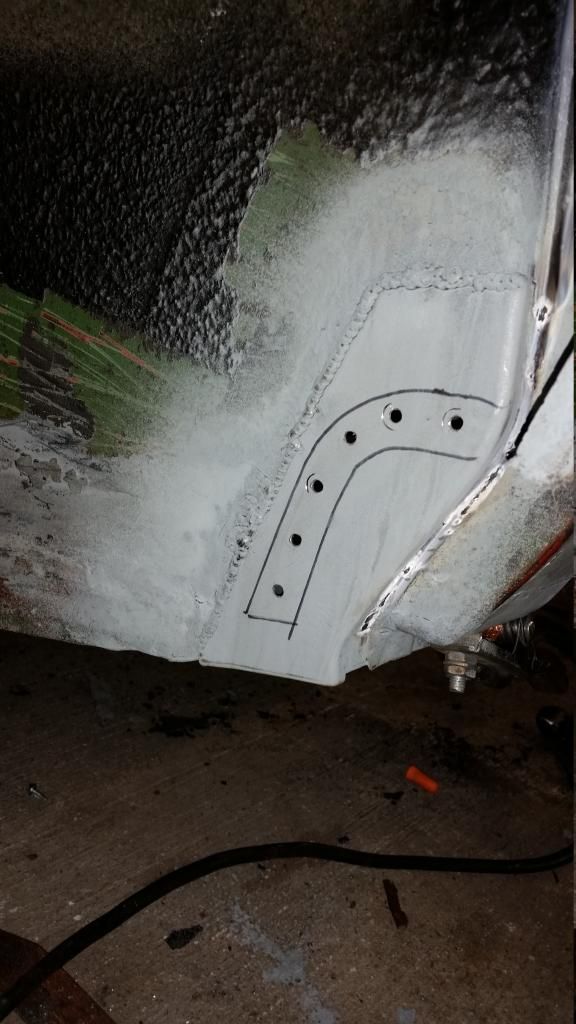
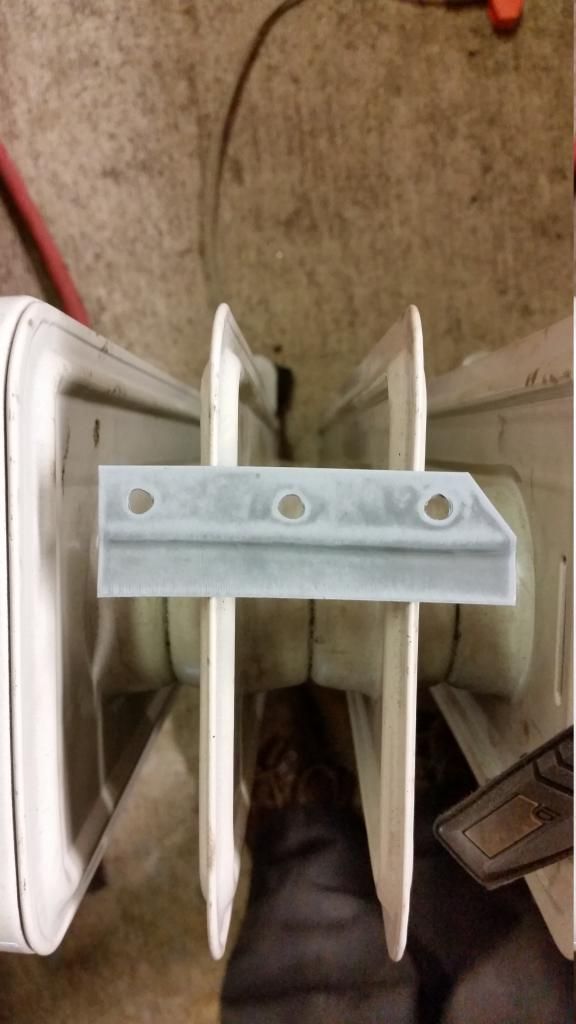
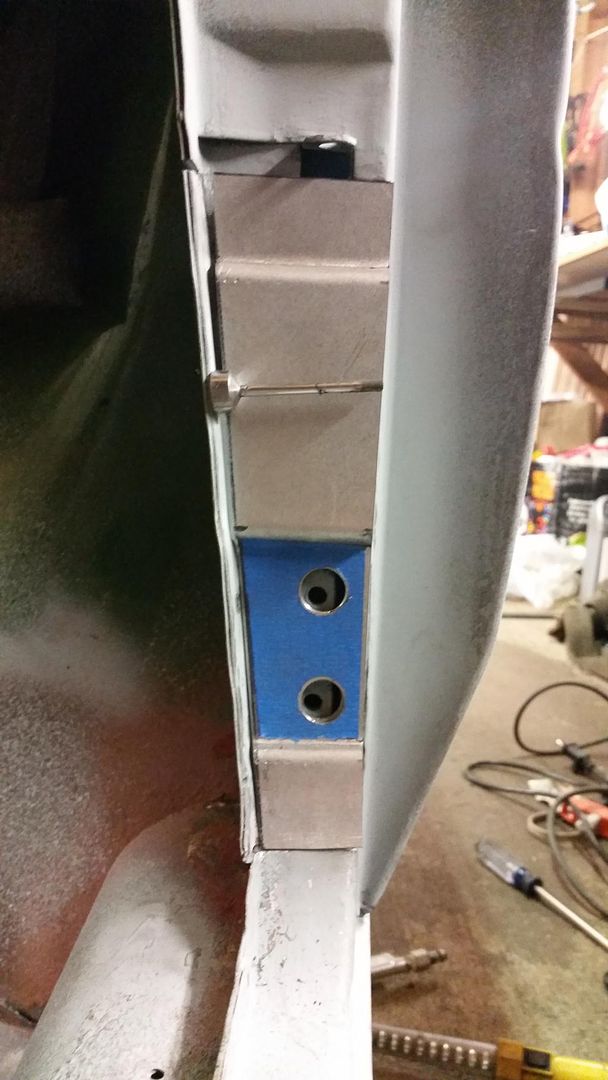
I figured the only thing that could ruin this piece at this point would be the hole placement for the bottom door hinge. Naturally, I made a little template.

Which I then transferred to the part.
After a little pokey pokey, drilly drilly with my best friend Unibit, we have some well located series of holes.
I seriously doubt I have ever said or worse typed "bruh"
except for right there 
Facking sweet work buddy!
NOHOME
SuperDork
12/24/14 5:53 a.m.
Tape templates rule. I would have made one of the entire PS jamb and transferred it over as a mirror image.
Had to go back and take a second look to see what you meant by this being a hard panel to make. Got it; the side fold has more than one plane. I would have used the PS as a base and covered it entirely with tape, including the wrap around the sides. I would then peel the tape off and making whatever cuts needed, turn it into a flat pattern. The location of any slices or puckers tells me where to stretch or shrink the tin.
But you are right, that one is interesting.
I think that I would stand a much better chance of making a one piece panel now that I've made this piece. I was having a hard time visualizing how it would be laid out, and as a result I really didn't put my best foot forward on it. At this point I have a good mental image of how it would be done. If for some reason this attempt doesn't work out, I will gladly try my hand at making it in one piece again. But I am largely out of steel after these two attempts, so I'm going to continue on with this method for now.
It's obvious now that I was making it way harder than it needed to be. Hindsight is 20/20 and all that.
Hoping to put in a little time today on the car today, but the real magic will be happening on Friday and all next week.


