In reply to tuna55 :
I too put many a clear coat run in today.....
So that line. Now that there is clear on top, I can't sand it off without sanding into the base. I can't clear over sanded base. How do I blend? It's contradictory advice.
As for the status, everything is in clear other than the doors and the inside of the bed. I got the door hinges on the cab today, too.
Tunakid 2 solved the errant free-spinning air control knob. "just zip tie it to the inlet". Good call, kid.
I'm taking forever re base coating the roof, the run in the door, and the bare spot on the inside of the bed.
Now I have enough time to re clear all of that before I have to leave. Just barely. I had hoped to get the doors on but that looks unlikely.
This thing is monumentally difficult. Fox three things, screw one of them up and find another you missed. Fox three things, screw one of th m up and find another you missed. I'm making forward progress, but wow it's more tough than it ought to be.
The air line made a nice black mark on the inner side of the front bed panel. I sanded it out but it needs more color now. I fixed the cab and roof and inner hood. I added a layer to the outer hood and made a small run. Trying to fix it made a big mess because I was too hurried. I'll try again but it's only in the clear layer. The doors are cleared but hanging. No way I'm getting them installed today. The bedsides look good after I fixed two clear runs. The inside of the bed is just okay and I'm okay with that. The cowl panel looks great until you look at one side real close and see that the basecoat is too thin in one spot.
Still hours to go. I'm out of time. Ballet recital coming in half hour.
For my own purposes, here's my checklist currently.
Also got 1 done. Struggled a bit though with some surprise contamination on the cowl panel, so it needs some addressing. The gate is clear only on the outside.
The struggle is real. We're all rooting for you! It won't be easy, but after so long you are so near the goal, just keep swimming but don't rush, make all your effort worth it.
Sonic said:The struggle is real. We're all rooting for you! It won't be easy, but after so long you are so near the goal, just keep swimming but don't rush, make all your effort worth it.
Thanks!
I'm trying to not rush but also to do things which have a window in which they must be done. Apparently, though I still don't understand why, some folks say I must clear very soon after base. Still don't get it. Some say it doesn't matter. Anyway that's handled. Likewise some say you just buff within ten days of clear, so that's another stopwatch ticking.
Glad the kids came to help out a bit because I do feel I've left them alone too much with this late push.
For a certain amount of time, a coat of primer, color or clear is "open" and receptive to adhere to the next coat of whatever is sprayed on ( assuming compatible material) Think of it as pouring melted wax on to hot wax.
After that window, the surface is less receptive to adhering/blending to a new coating sprayed on top. The solution is to scratch the "Closed" surface so that the new coating has a mechanical bond to compensate for any loss of chemical adhesion.
The reason for doing the cut and buff shortly after spray is because it is easier. The clearcoat gets hard after a week or so and it is just more work to sand it smooth; would you rather sand soapstone or granite? For the record, while I have done some color sanding with great results, my paint jobs end with whatever comes out of the gun. Life is way too short to go through that ordeal for what I get out of it. It will take as long if not longer to cut and buff the truck than it did to paint it, Good news is that you can do a panel at a time and take as long as you want. Be VERY careful of curves and edges when doing a color sanding or buff; they are the area most likely to go through the clearcoat when learning this stuff.
I get it, but I don't get how people disagree on the duration of those windows, or even if they matter. The clear went on without a fuss, despite some panels being an hour fresh base coat and some being a week old.
Currently I'm gathering the family forces for a door installation event tomorrow, that will be fun.
I do think I'll put another two or three flow coats on the body as assembled at the end of the week. Then cut and buff the rest, just mildly. I'll be very careful. There isn't enough clear to do that now.
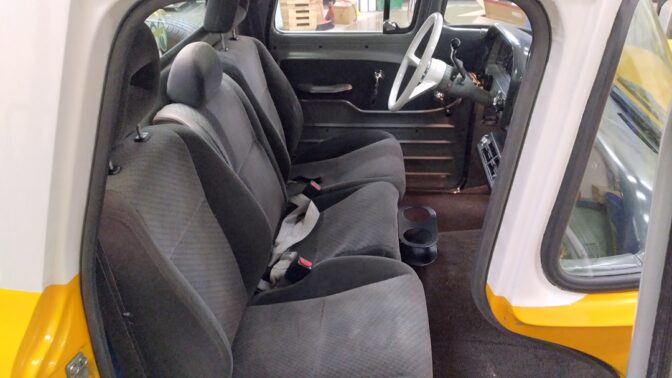
One big decision point still is the seat. I don't have a core, so here are the paths:
1: spend a day at the junkyard finding a core I like for $50, throw away the foam and upholstery (because they're always terrible from a yard), repair the core and make it pretty, buy a custom upholstery cover (see B62 on Etsy) for ~$600
2: find the right seat on marketplace for the truck for $200, repeat other steps.
3: call Snowden seats, pay a lot and wait, receive amazing seat.
tuna55 said:I get it, but I don't get how people disagree on the duration of those windows, or even if they matter. The clear went on without a fuss, despite some panels being an hour fresh base coat and some being a week old.
You have been engineering for long enough to fully grasp the concept of "No such thing as Can't when you have to". Or what the military describes as "No plan survives contact with the enemy". Both apply to the painting schedule.
Carry on, odds are in your favour.
NOHOME said:tuna55 said:I get it, but I don't get how people disagree on the duration of those windows, or even if they matter. The clear went on without a fuss, despite some panels being an hour fresh base coat and some being a week old.
You have been engineering for long enough to fully grasp the concept of "No such thing as Can't when you have to". Or what the military describes as "No plan survives contact with the enemy". Both apply to the painting schedule.
Carry on, odds are in your favour.
Funny story. That quote, no plan of operations survives first contact with the enemy's main Force, comes from the battalion commander of the Prussian army, von moltka the elder. But a different philosopher repeated much the same sentiment much later in time, in 1992 Mike Tyson said " everybody's got a plan until they get punched in the mouth" which I think is a lot more apt given the current colloquial use of the English language rather than Prussian translation.
Regardless there is a number four I wanted to add to the seat discussion, I can always buy some simple deep buckets and have someone upholster them in a classic way, because I think that would be fun to drive, maybe more even than a bench.
https://www.speedwaymotors.com/EMPI-Poly-Low-Back-Comfort-Bucket-Seats-with-Covers-Pair-Black,400842.html
And I thank you for the encouragement!!
Dusterbd13-michael said:Good luck my friend. Wish there was more i could do than root from the stands.
Thank you!!
Comfortable late model buckets in the correct color. Ive done that a dew times, and am generally able to find ones in nice shape for 150 or so for the pair at pullapart. Then, build brackets or modify the rails.
Used neon seats in my duster, 300m seats in the el camino, grand am seats in the s10...
Dusterbd13-michael said:Comfortable late model buckets in the correct color. Ive done that a dew times, and am generally able to find ones in nice shape for 150 or so for the pair at pullapart. Then, build brackets or modify the rails.
Used neon seats in my duster, 300m seats in the el camino, grand am seats in the s10...
I would need to refoam and recover them, and make the cover fit the aesthetic. I like a distressed leather with either houndstooth or plaid (with yellow stripe) insert right now.
In reply to Dusterbd13-michael :
Can u fit three Miata seats across? Cause like Miata is always the answer and there are a few Tunae in the school last I checked.
If it comes to it, upholstery is almost kind of fun. Kits make it easy.
Honda Civic seats, and I made the flip-down center seat out of the back seat and plywood and a staple gun.

A few things on seats:
Bench or buckets, either must be low back
I will recover (and gladly pay for period correct upholstery)
Modern plastics and covers are not allowed.
Nobody is going to sit in the center. There's not enough room and the shifter is long.
I really like the idea of the low back plastic buckets honestly. I like firm seats. The bench looks better though.
I know I am post-bombing my own thread, but hey, it's my thread.
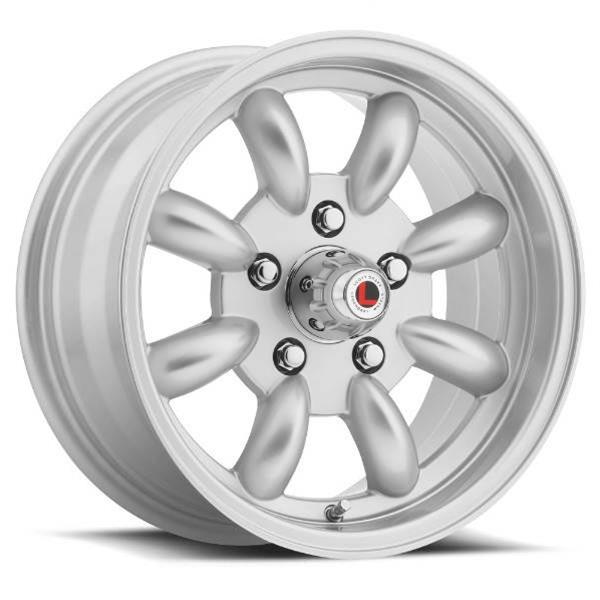
Wheel spacers/adapters. I need them. I knew I needed them long ago. I am going to change bolt patterns and run this wheel or one like it:

Which are 5x4.5 whereas the truck is 5x5. The tires, as standard on the truck, especially with its suboptimal narrow read end from a 1970 truck, are all hiding. They will need to come out a few inches each. I want the spacer which bolts to the brake, then has its own studs. I have a toolmaker here who can make them if I design them.
Making the lug holes is easy. What feature do you use for locating the back of the stud for the wheel side of the spacer? What about center bores and such? Just measure or is there a hot ticket cheat code?
You'll need to log in to post.