


Ouch dude. I know that feeling. (I just sent another truck to her w/ no motor, response was less than stellar.)

Ouch dude. I know that feeling. (I just sent another truck to her w/ no motor, response was less than stellar.)

Over the past two days, completely unrelated to the weather (honest!), I worked on a really timely indoor project to build a sewing table for Tunawife.

Cut the bottom off of some on-sale cabinetry

Test fit the subject

Cut the tabletop (adding more material to the part sticking out, adding legs, etc tonight and beyond)

What setting do you use on the MIG to weld that light brown looking stuff?![]()

Wanna come over and build me a sewing thing? I just bought a serger for... Reasons. In other news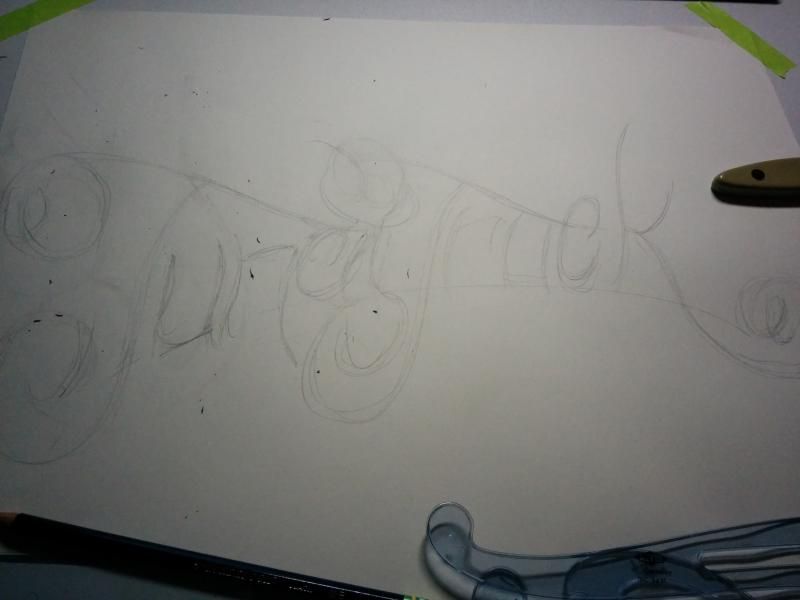 Move along, nothing to see here. The rest of you at home probably know what I'm up to by now.
tuna truck? I cannot quite make out what it says.
Yeah, that. Its realllly early. It probably won't look anything like that when I'm done.
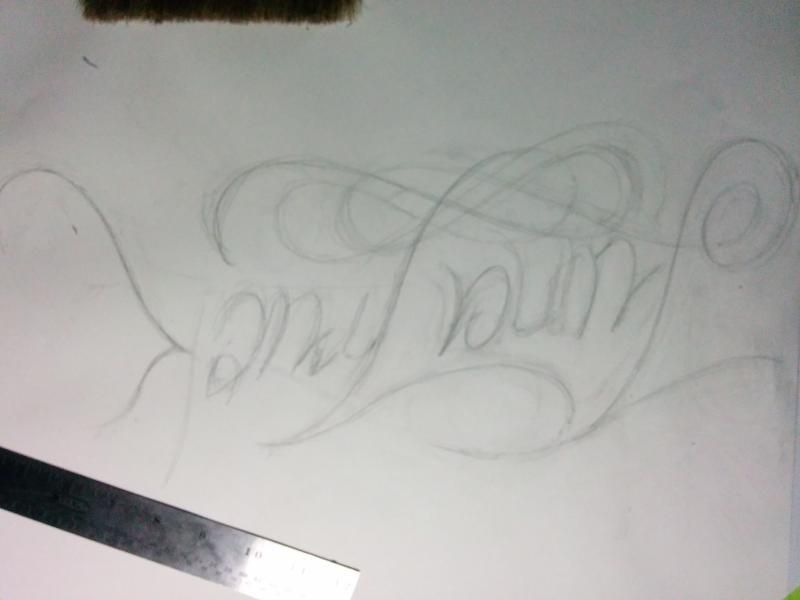 two things. This edit is upside down and I don't care. And the letter t- it vexes me. Took me most of the night to get it passable.
In reply to mndsm:
I will totally build you a sewing thing. This one is made specially to fit in that corner, and will cost more than most because we bought those cabinets new and the corner ones are pricey, but gift cards from work made it essentially free.
I also have no clue what you're up to.
A few more days and I'll be back in the garage, many sincere apologies for the delay folks!
Tuna:
Can't blame you for staying inside. It's so cold here that even making it the 50 feet from my back door to a fully heated shop is keeping me in the house doing a Heinlein binge rather than go work on the Volvo!![]()

On the sewing table - use a router and roundover bit and sand it well. Even better - poly the edges. Nothing messes up a sewing project like being 90% done and snagging the cloth and ruining it all.
DILYSI Dave wrote: On the sewing table - use a router and roundover bit and sand it well. Even better - poly the edges. Nothing messes up a sewing project like being 90% done and snagging the cloth and ruining it all.
She has some thoughts about the edging, that is definitely one of the options. It's not done yet.
Cool cool. The sewing table I made the wife is a 4x8 sheet of melamine coated particle board. Awesome top surface, dreadful edges. The roundover, and a few rounds of poly and sanding made it so that even silk won't snag. I got to be the hero for that project.
NOHOME wrote: Tuna: Can't blame you for staying inside. It's so cold here that even making it the 50 feet from my back door to a fully heated shop is keeping me in the house doing a Heinlein binge rather than go work on the Volvo!
There are FAR worse things to read than that.

Any advice for using/prep for chassis saver? I'm hoping to continue car work sometime in the near future and would like to paint things before reassembly.
That stuff will stick to a puddle of grease!
In all seriousness, what I have done is to wire wheel the area moderately, and then hit it with Eastwood's 'Pre'. Once it dried, I brush it on, wearing gloves, then throw away the brush.
I do really have spots where it hit the concrete and it'll be there forever as far as I can tell.
Pete's earlier suggestion has been golden. Instead of the weird oil slick they tell you to make, I pour it in a mason jor with two holes poked in the lid. I fill the air cavity with argon/CO2 from the MIG and tape it over following a paint session. Forget about being able to unscrew the cap once the paint gets on it.
I have zero road miles, though, so it's hard for me to say how this method is working.
As far as the build, many apologies for not getting more updates up here. Sewing table, houseguests, and stomach troubles (which for every parent on here, you'll understand that this means cleaning vomit and doing lots of laundry) have conspired against me. Last night, despite only a few hours of sleep, I went out and tried out the sweet new swaybar brackets and made sure the chassis tabs would work for the control arms. I ordered them and will weld them into place before drilling the holes in the frame for the bracket.
Stay tuned. I still have some more sewing table stuff to knock out.
something is going around stomache wise.
son and wife got hit this weekend. that is the third one this year for us...
I finally got back into the garage after a long time off building a sewing table.
I started to rough in the steering bits. Everything went together pretty easily, and it all just finger tight. I wanted to get the swaybar finalized first so I can manage any conflicts.
The first thing is that I intended to weld a gusset onto the control arm to mount the endlink thusly:

But as you might be able to see, the bottom bushing hits the gusset ends.

So I put a filet on it

But that did not help.
Then I saw this

So I had to re-evaluate.
I will now likely drill the hole right in the control arm, and move the bar rearward. Easy-peasy. I am off to buy a new pitman arm nut today at lunch, and will be able to tighten all of the steering bits and get the swaybar location handled soon.

Yay for more progress!
Tunawife has proceeded to paint all of the downstairs trim.
Which means that often I am painting the downstairs trim instead of truck.
Many apologies.
I did get out last night. The truck now steers! All balljoints, idler arm, pitman arm, tie rods and such are done, torqued and pinned. The control arms are on with new shafts. Next up is the upper damper mounts (easy) and drilling the control arm for the swaybar (easy) and mounting the swaybar brackets (moderate) and then the engine comes out.

I still need to get those calipers down there. ..
Dusterbd13 wrote: I still need to get those calipers down there. ..
Whenever!
I am not 100% sure I can/will use them, but I am definitely interested in trying. If all else fails, I can use the old ones. Don't break your back over it.
The rest of the truck order goes something like this:
Finish front suspension, clean up old rotors temporarily and drop the front end back down.
Pull engine, figure out how much it NEEDS and give it that and nothing more.
Paint frame/crossmember/random other junk that's easier to get to with the engine gone.
Brake lines
Finish metalwork, prime cab and bed and tailgate
Sand, for like 45 years. At some point during the sanding, I'll get sick of it and do the wiring in the rear end.
Then I'll paint the truck
Then, and only then, will I put in the master cylinder (which is really the only thing that needs to be bought to switch the calipers other than the flex lines)
Interior etc
DRIVE
Just to put a huge positive spin on this, take note that had you numbered the list, it is in the single digits.
In reply to NOHOME:
Sweet, I hadn't noticed.
I cheated though, a couple of lines are a few steps long.
Eh, you can break anything down to enough subsets to discourage the most die hard optimist. I choose not to. The list looks good. Keep at it!
FYI
 if you need to move anything from now on.
lmk.
if you need to move anything from now on.
lmk.
You'll need to log in to post.


