


In reply to a_florida_man :
Theres roughly a handspan.
Its tight, as that is where the alternator mounts as well.

In reply to a_florida_man :
Theres roughly a handspan.
Its tight, as that is where the alternator mounts as well.
Challenge budget so far:
previous challenge budget: 1527.54
recoup total: 820
new money:
torsen: 200
quick release wheel: 20
aluminum paint: 6.99
satin black spray paint: dustin was throwing out a box of aerosol cans, I took what I wanted and he put the rest by the road to make them go away. They lasted about 9 minutes.
further budget clean up (took out leftover steel and other supplies were pro-rated. Also, since wvtumbler gave me the box of leftovers from his project, I dont need the gasket kit. Or the hydraulic clutch fittings, as there was one in there!)
new total: 1686.08
recoup: 820
progress!!!!
finished off my rattle can of rustoleum in the trunk. We found last year that theres a lot of wrenching in the dark at the challenge. White makes things easier to see by flashlight. Since the nitrous and battery go back in the trunk, I brightened it. Badly, but the can was running out. I have a bit of white left yet from the valspar, and im thinking about putting a solid coat of that on. However, its not a priority. At all.
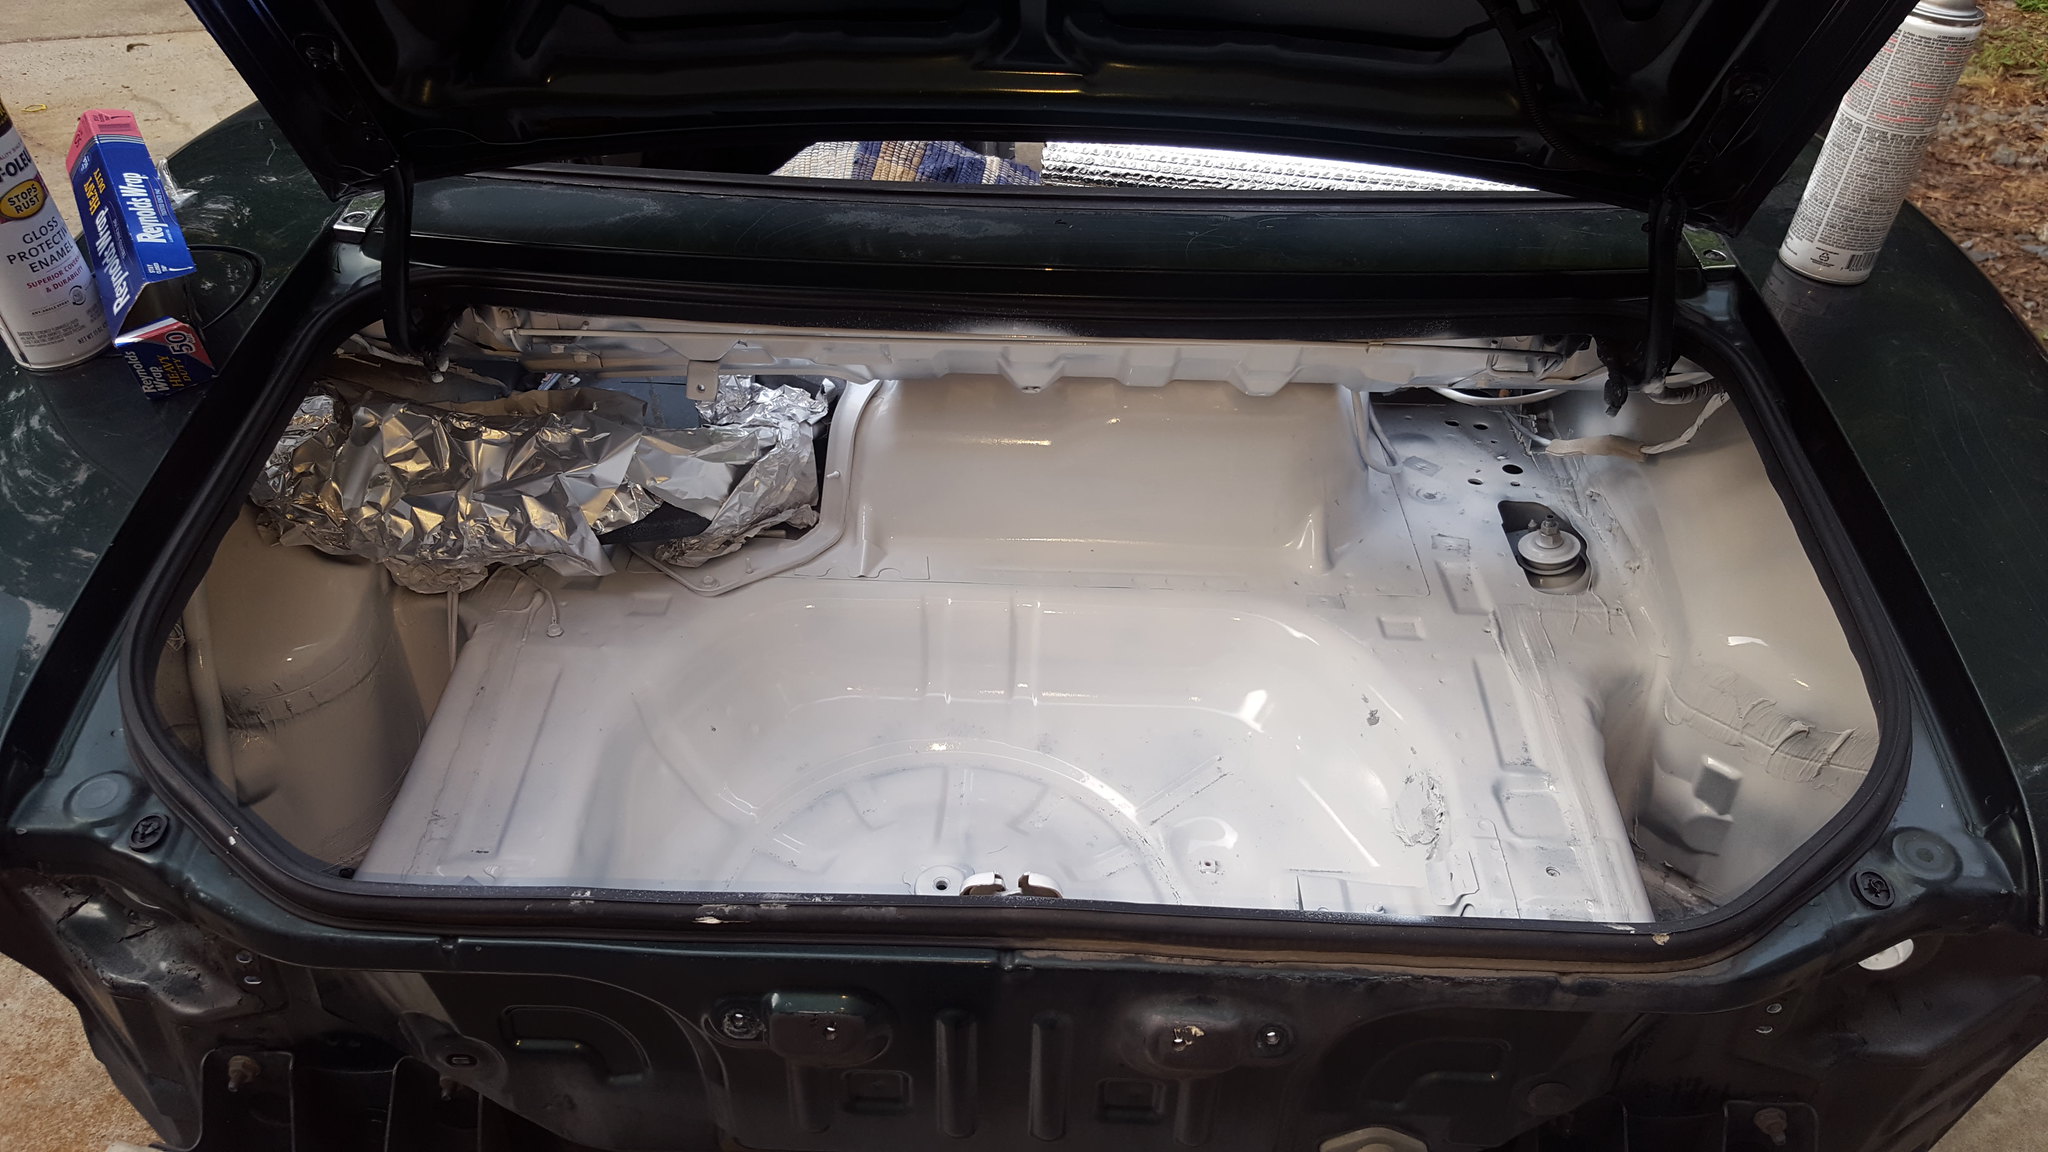 20180608_192603 by Michael Crawford, on Flickr
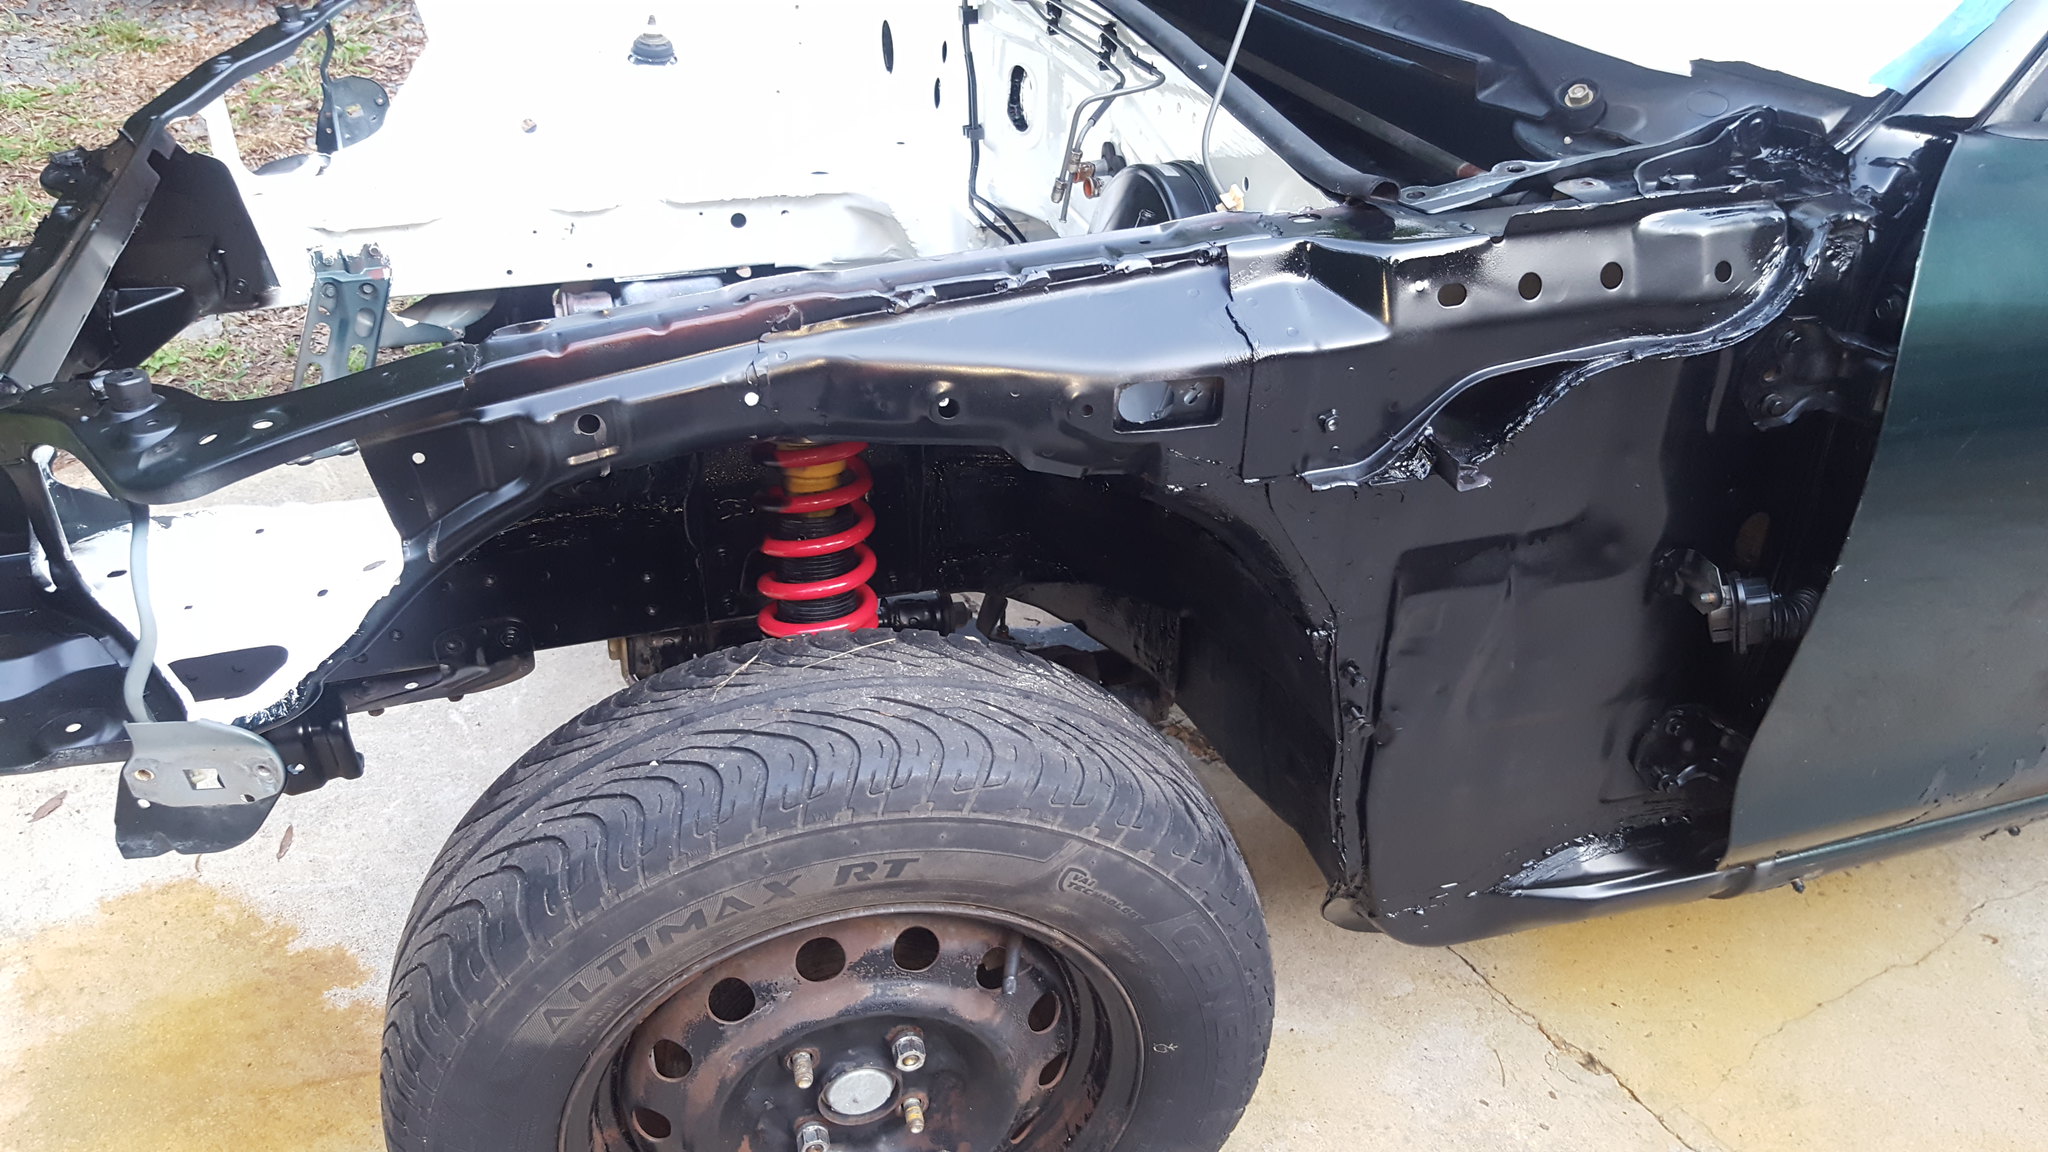
I also spent a few minutes with a can of sating black. Blacked out the core support and fenderwells. Some off brand of paint ive never heard of, but the price was right....
two days later its soft as hell and easily damaged. Theres a reason he was throwing it out.....
 20180608_192545 by Michael Crawford, on Flickr
 20180608_192530 by Michael Crawford, on Flickr
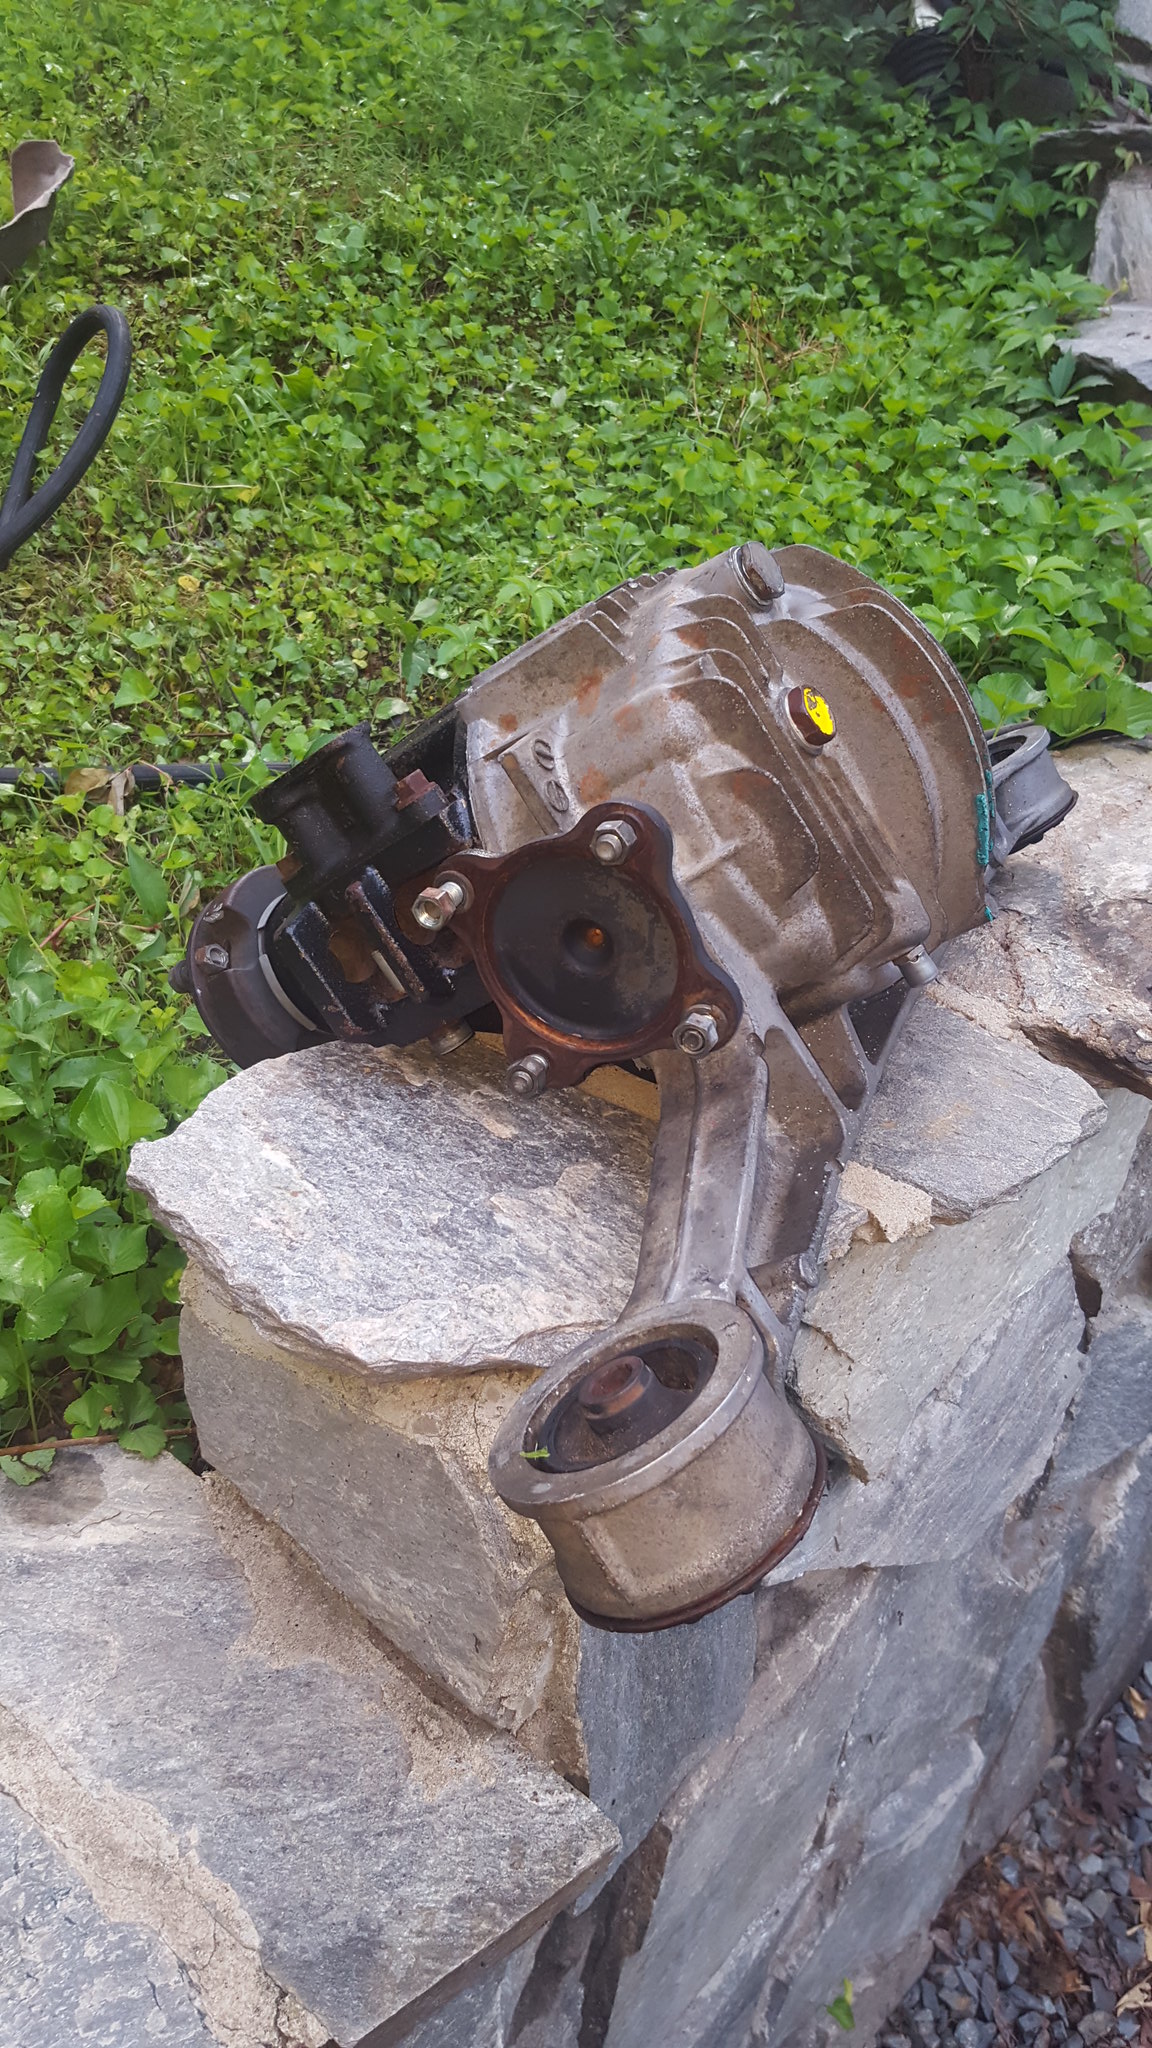
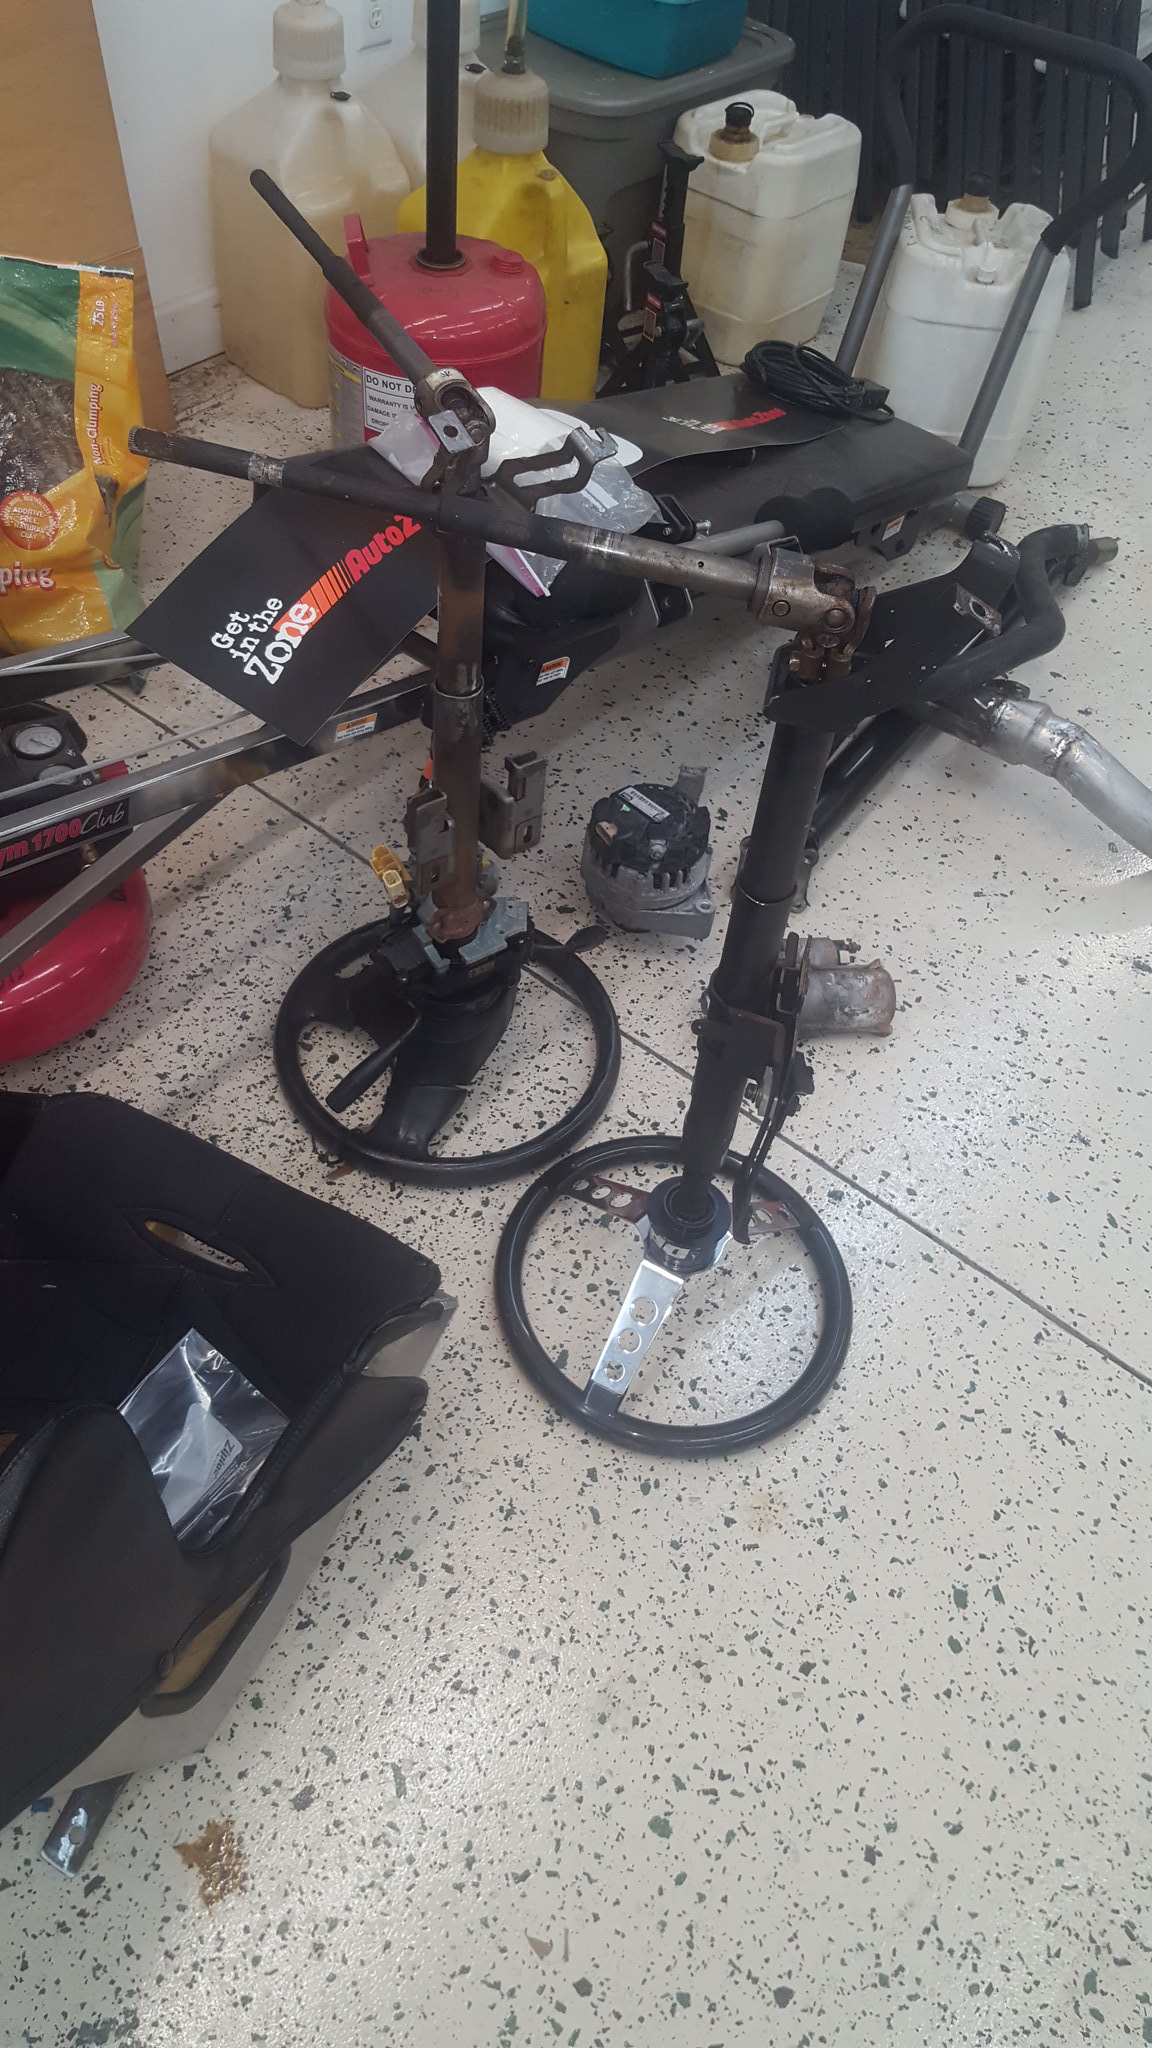
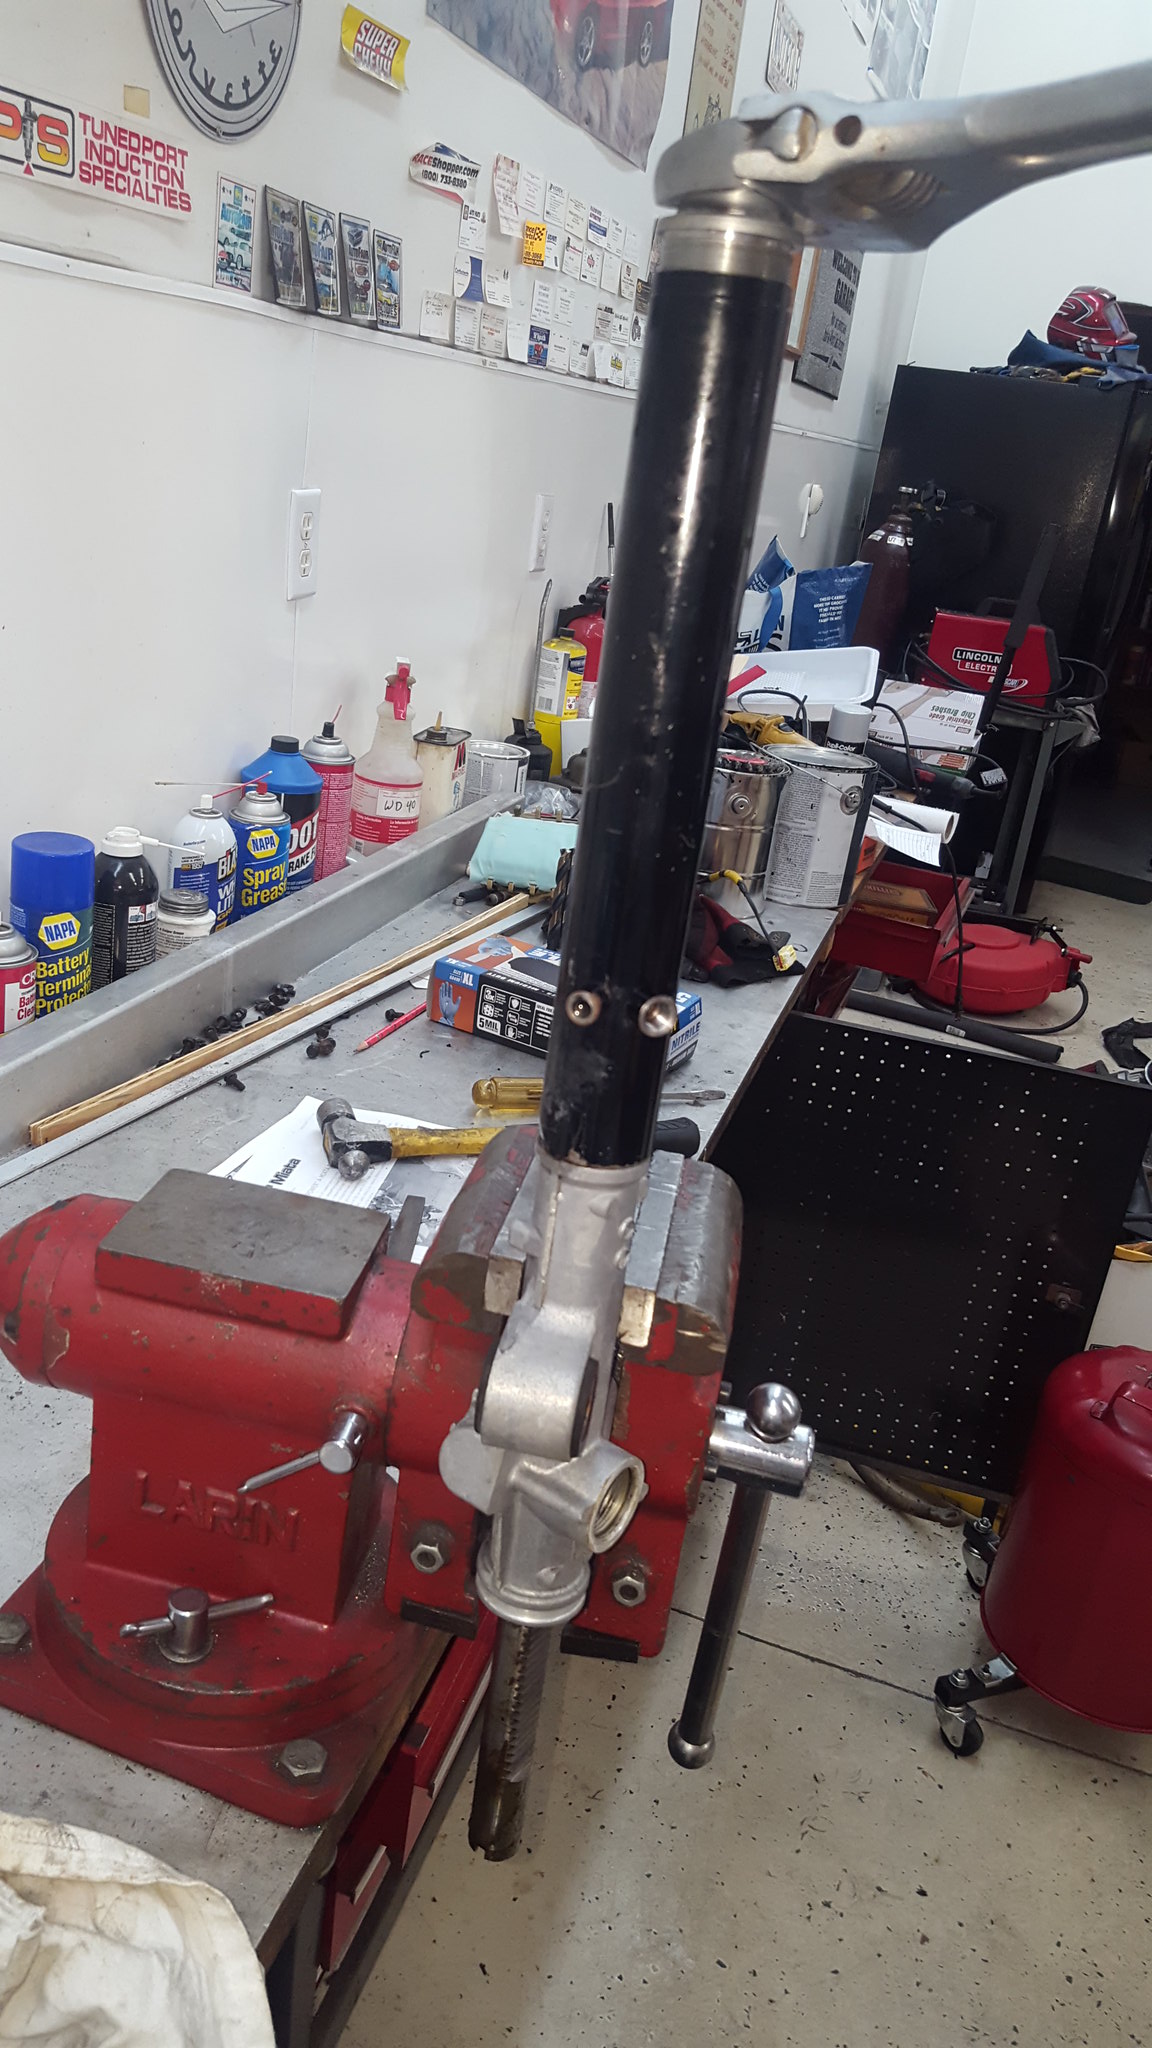
I also scored a torsen with 4.11 gears for $200 from a failed challenge car project (also lemons racers. Cool, cool guys.) along with a miata steering column with quick release and wheel. I need to figure out if I can swap my ignition switch and other parts from the stock column with the quick release welded on. Hopefully. If someone can answer before I spend the time, that would be great!
 20180601_200319 by Michael Crawford, on Flickr
 20180608_071040 by Michael Crawford, on Flickr
 20180610_112435 by Michael Crawford, on Flickr
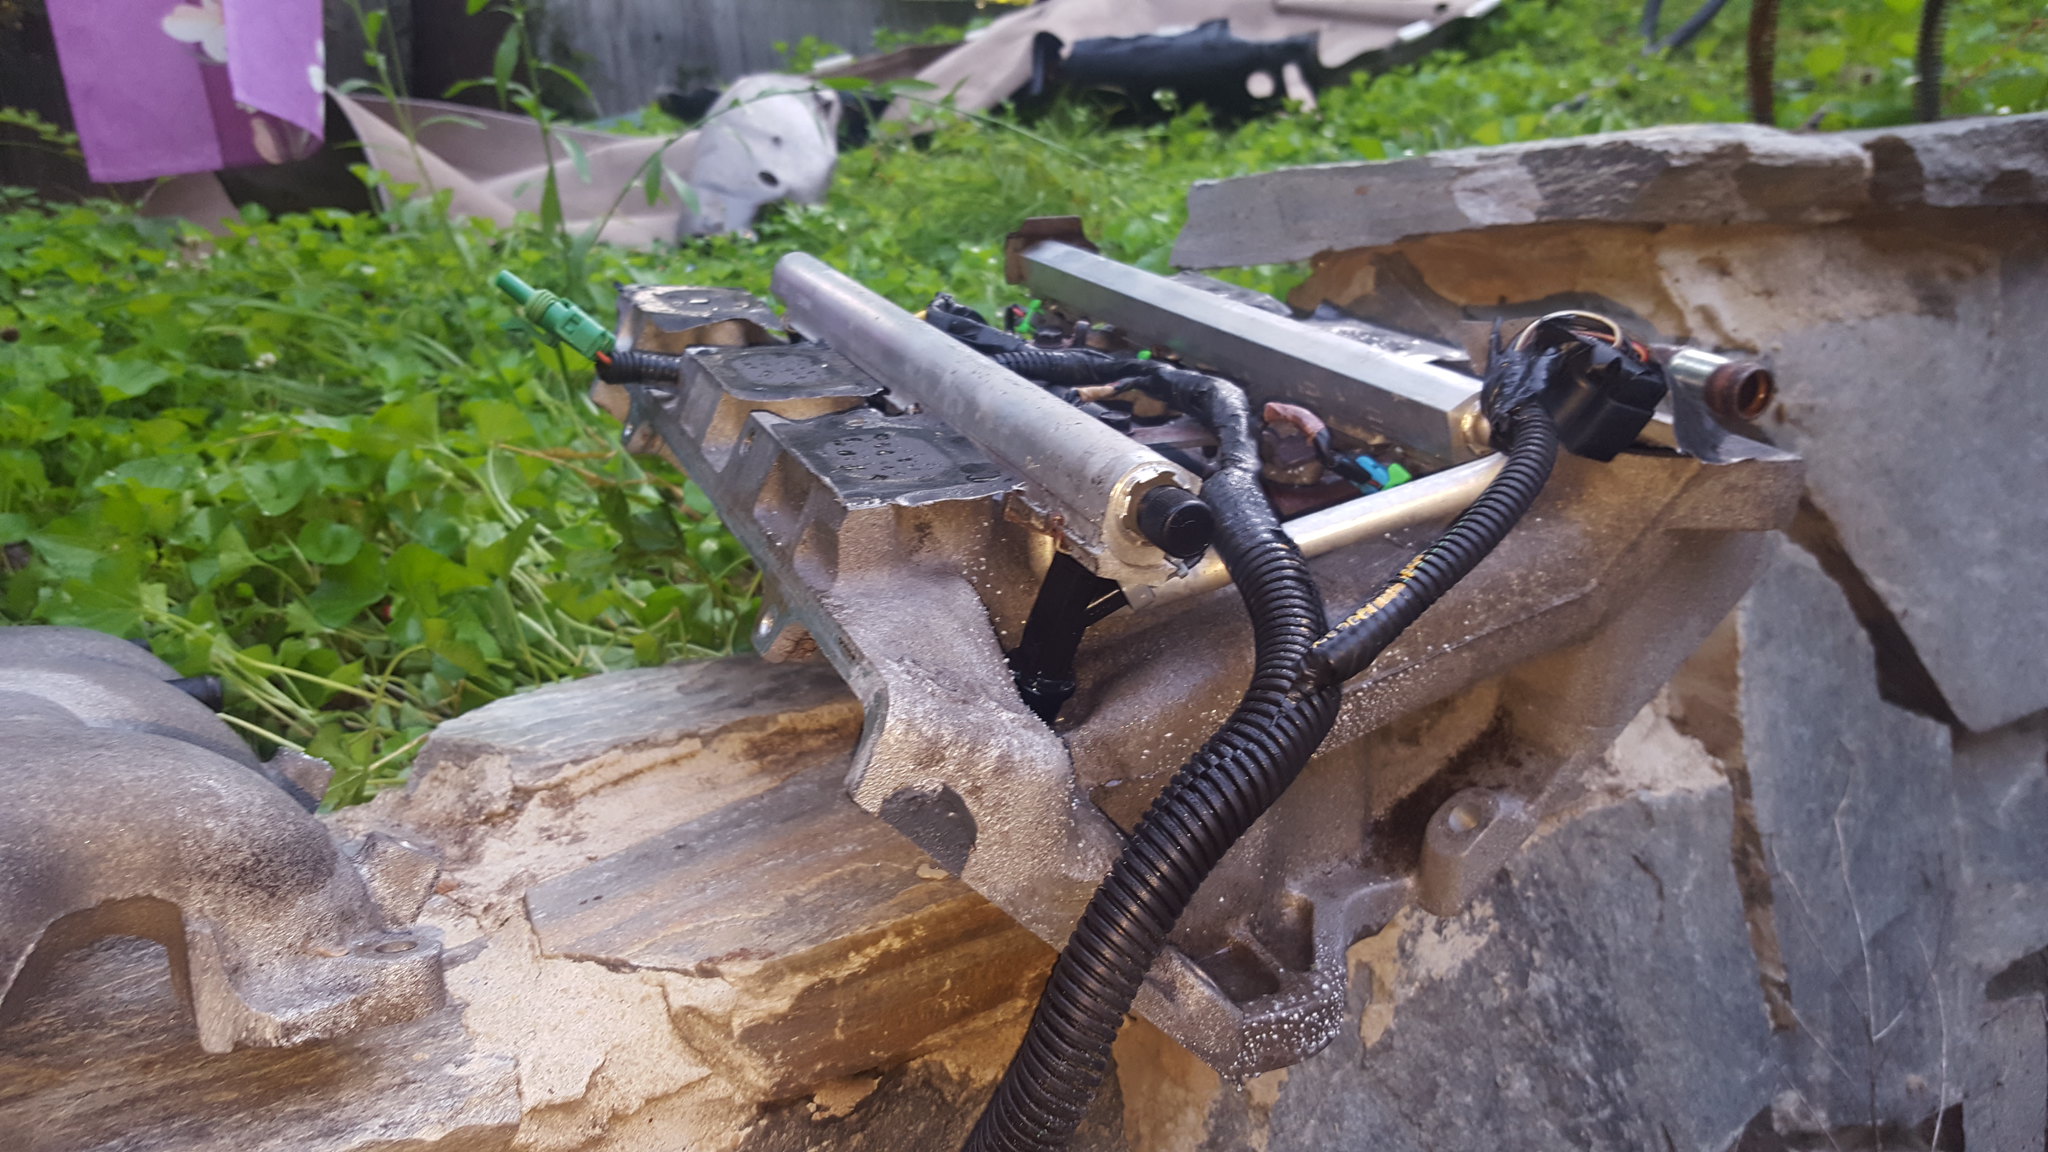
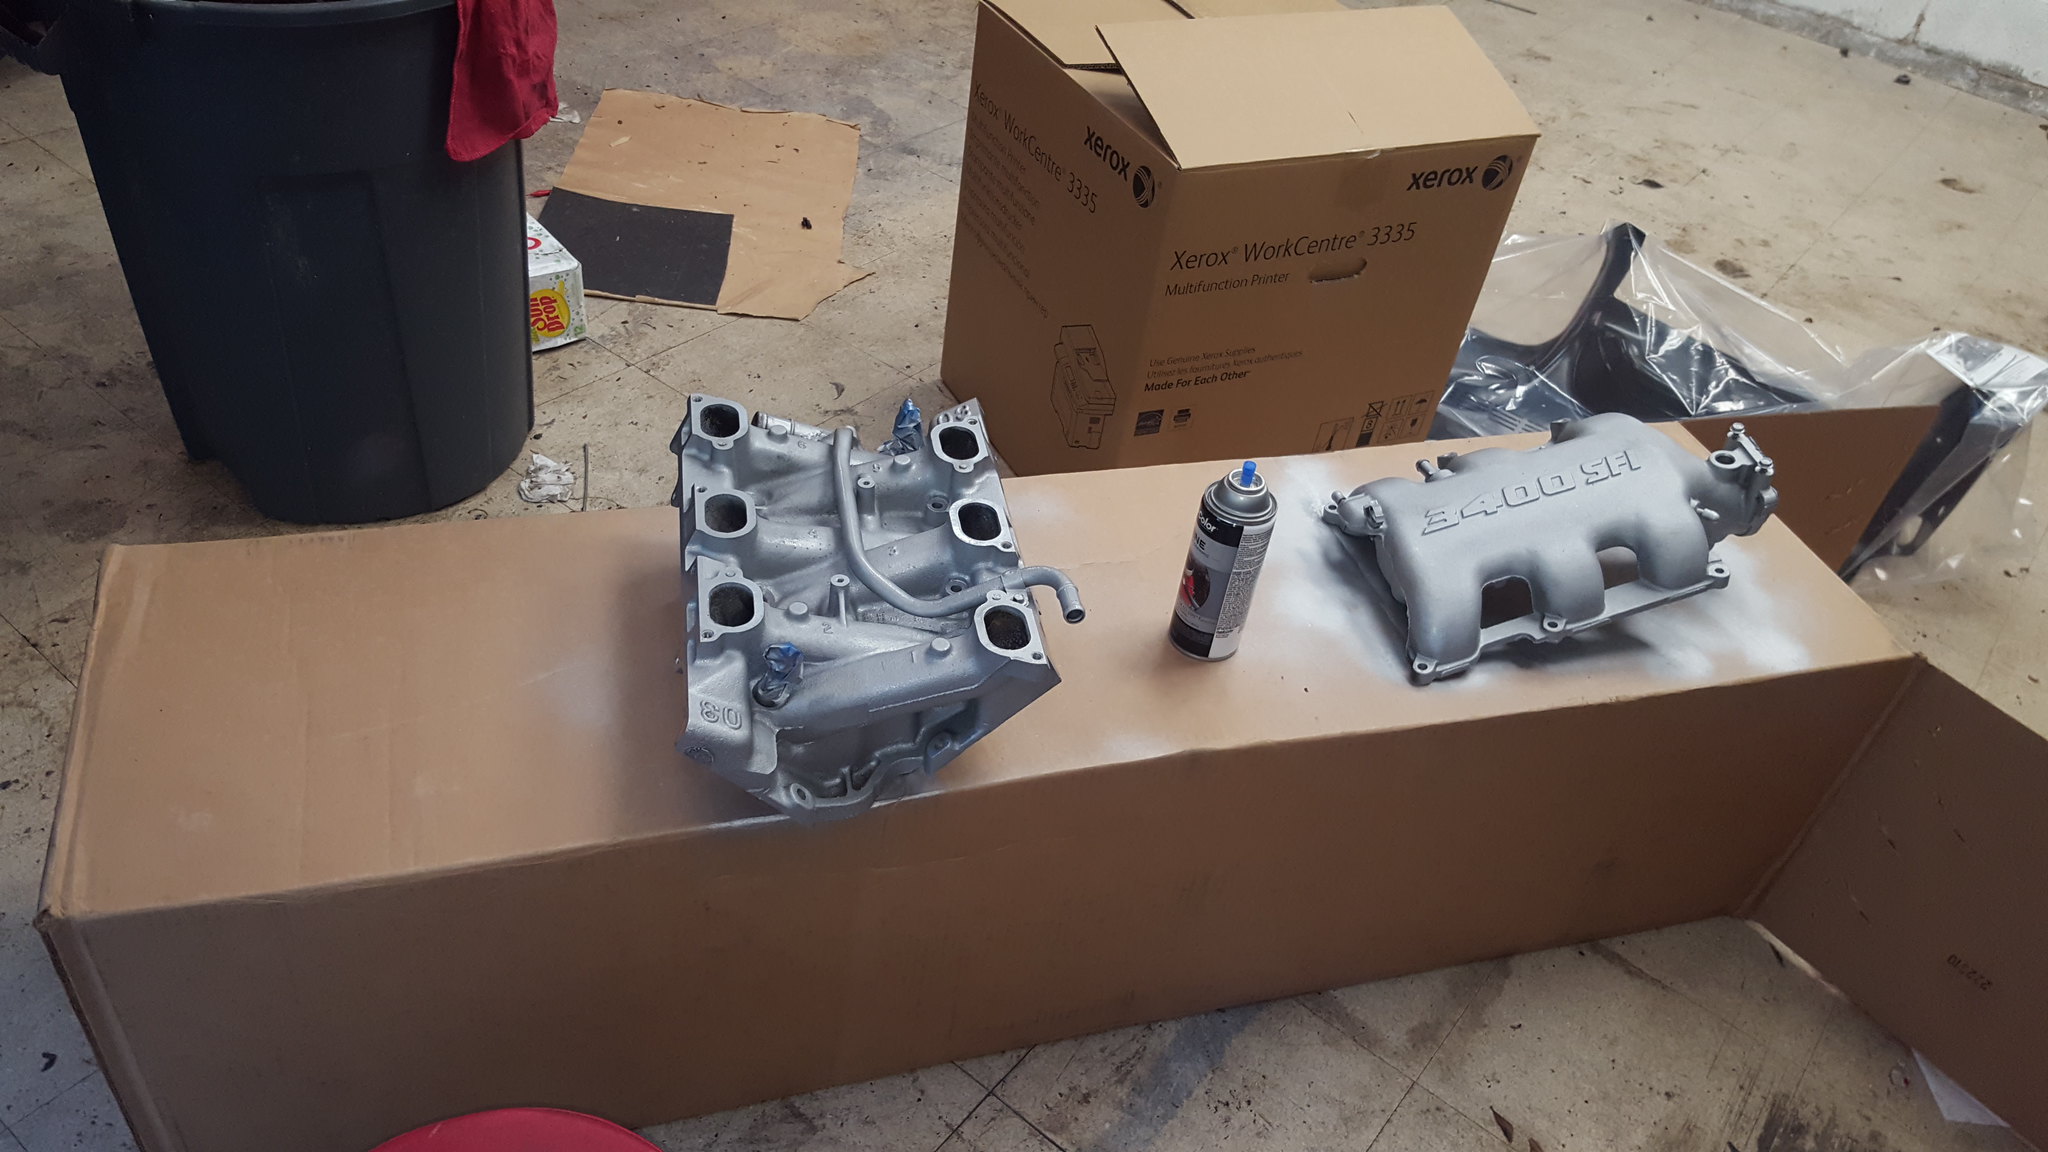
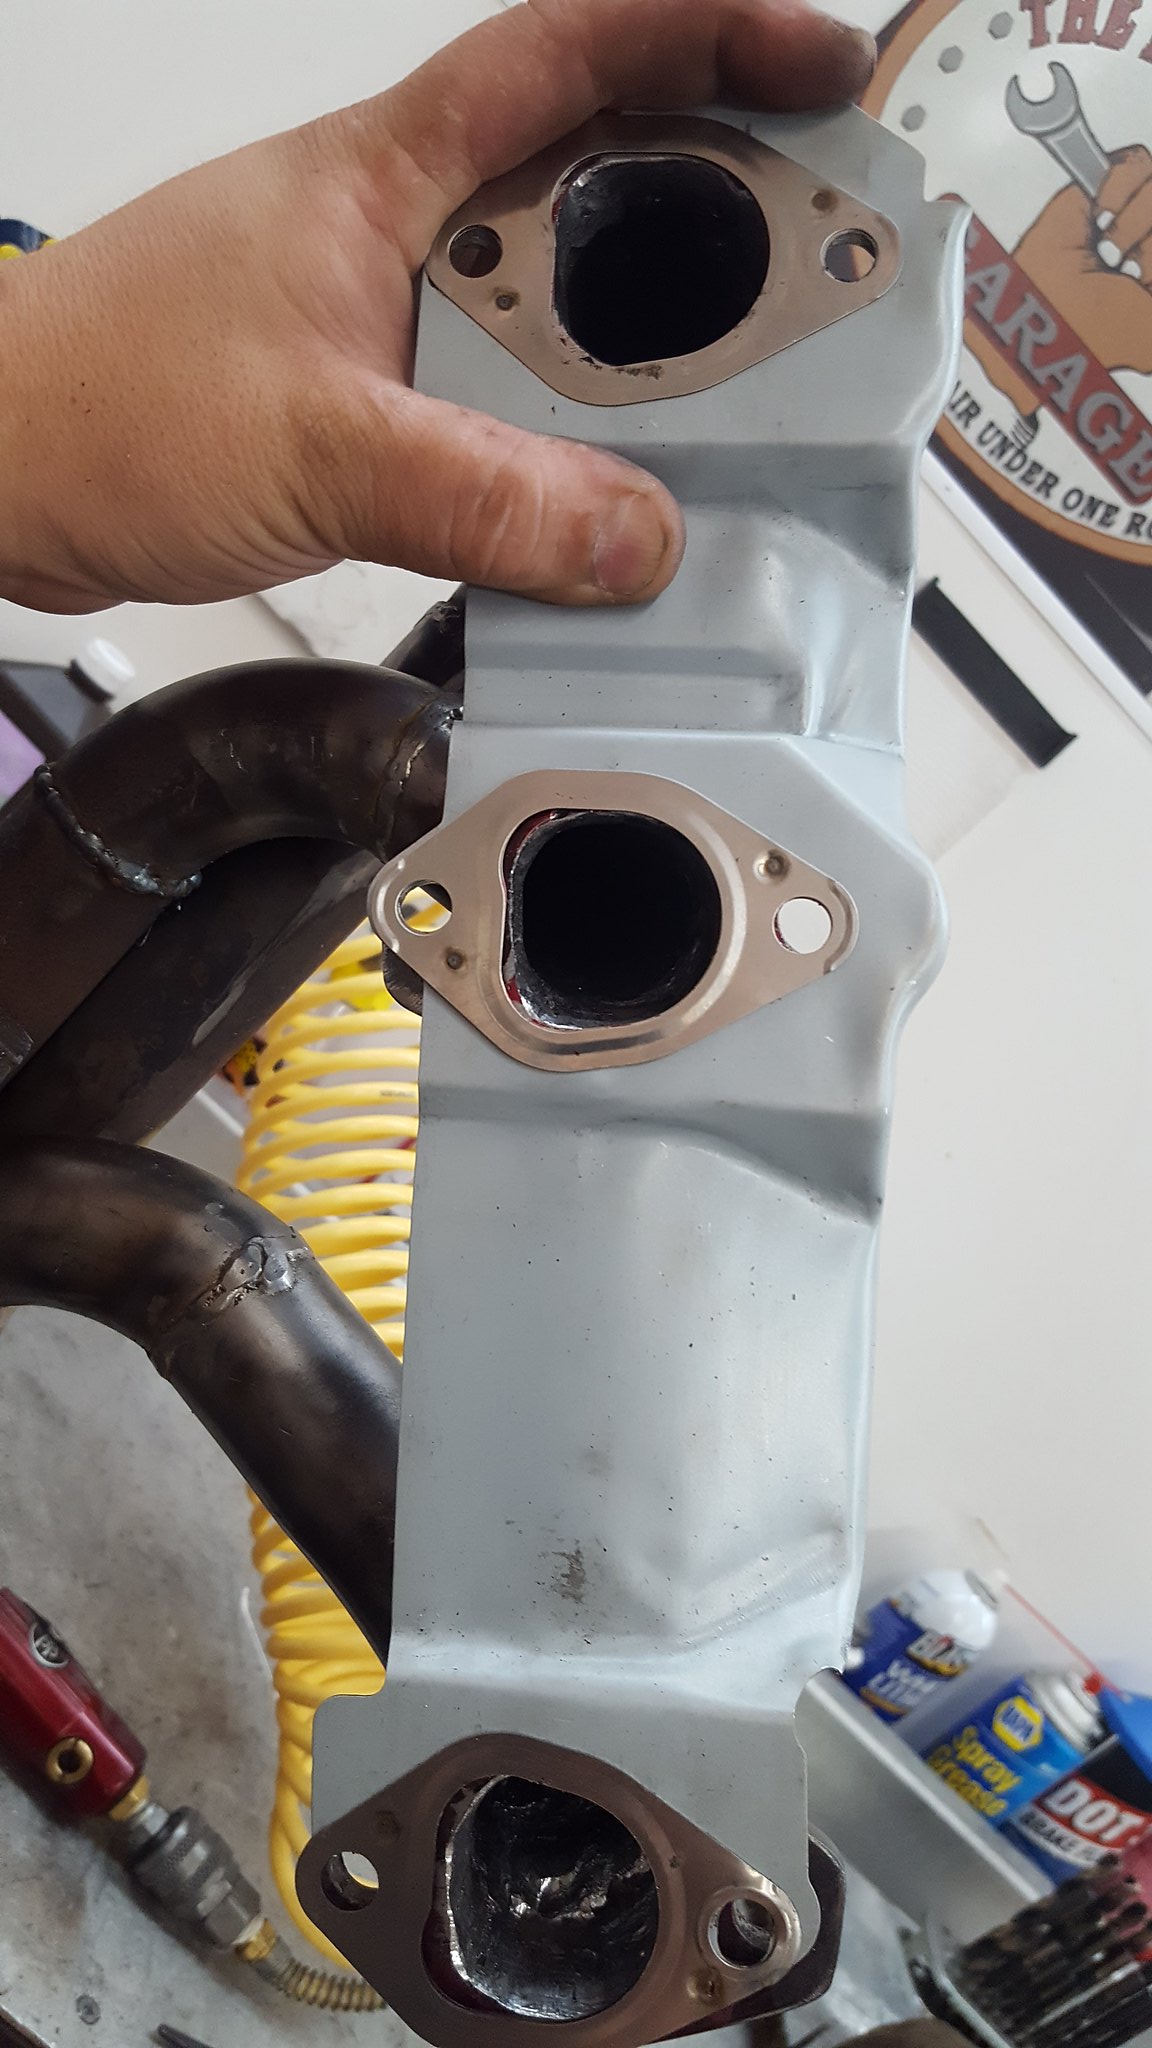
cleaned and painted the upper and lower manifolds
 20180608_071019 by Michael Crawford, on Flickr
 20180609_071506 by Michael Crawford, on Flickr
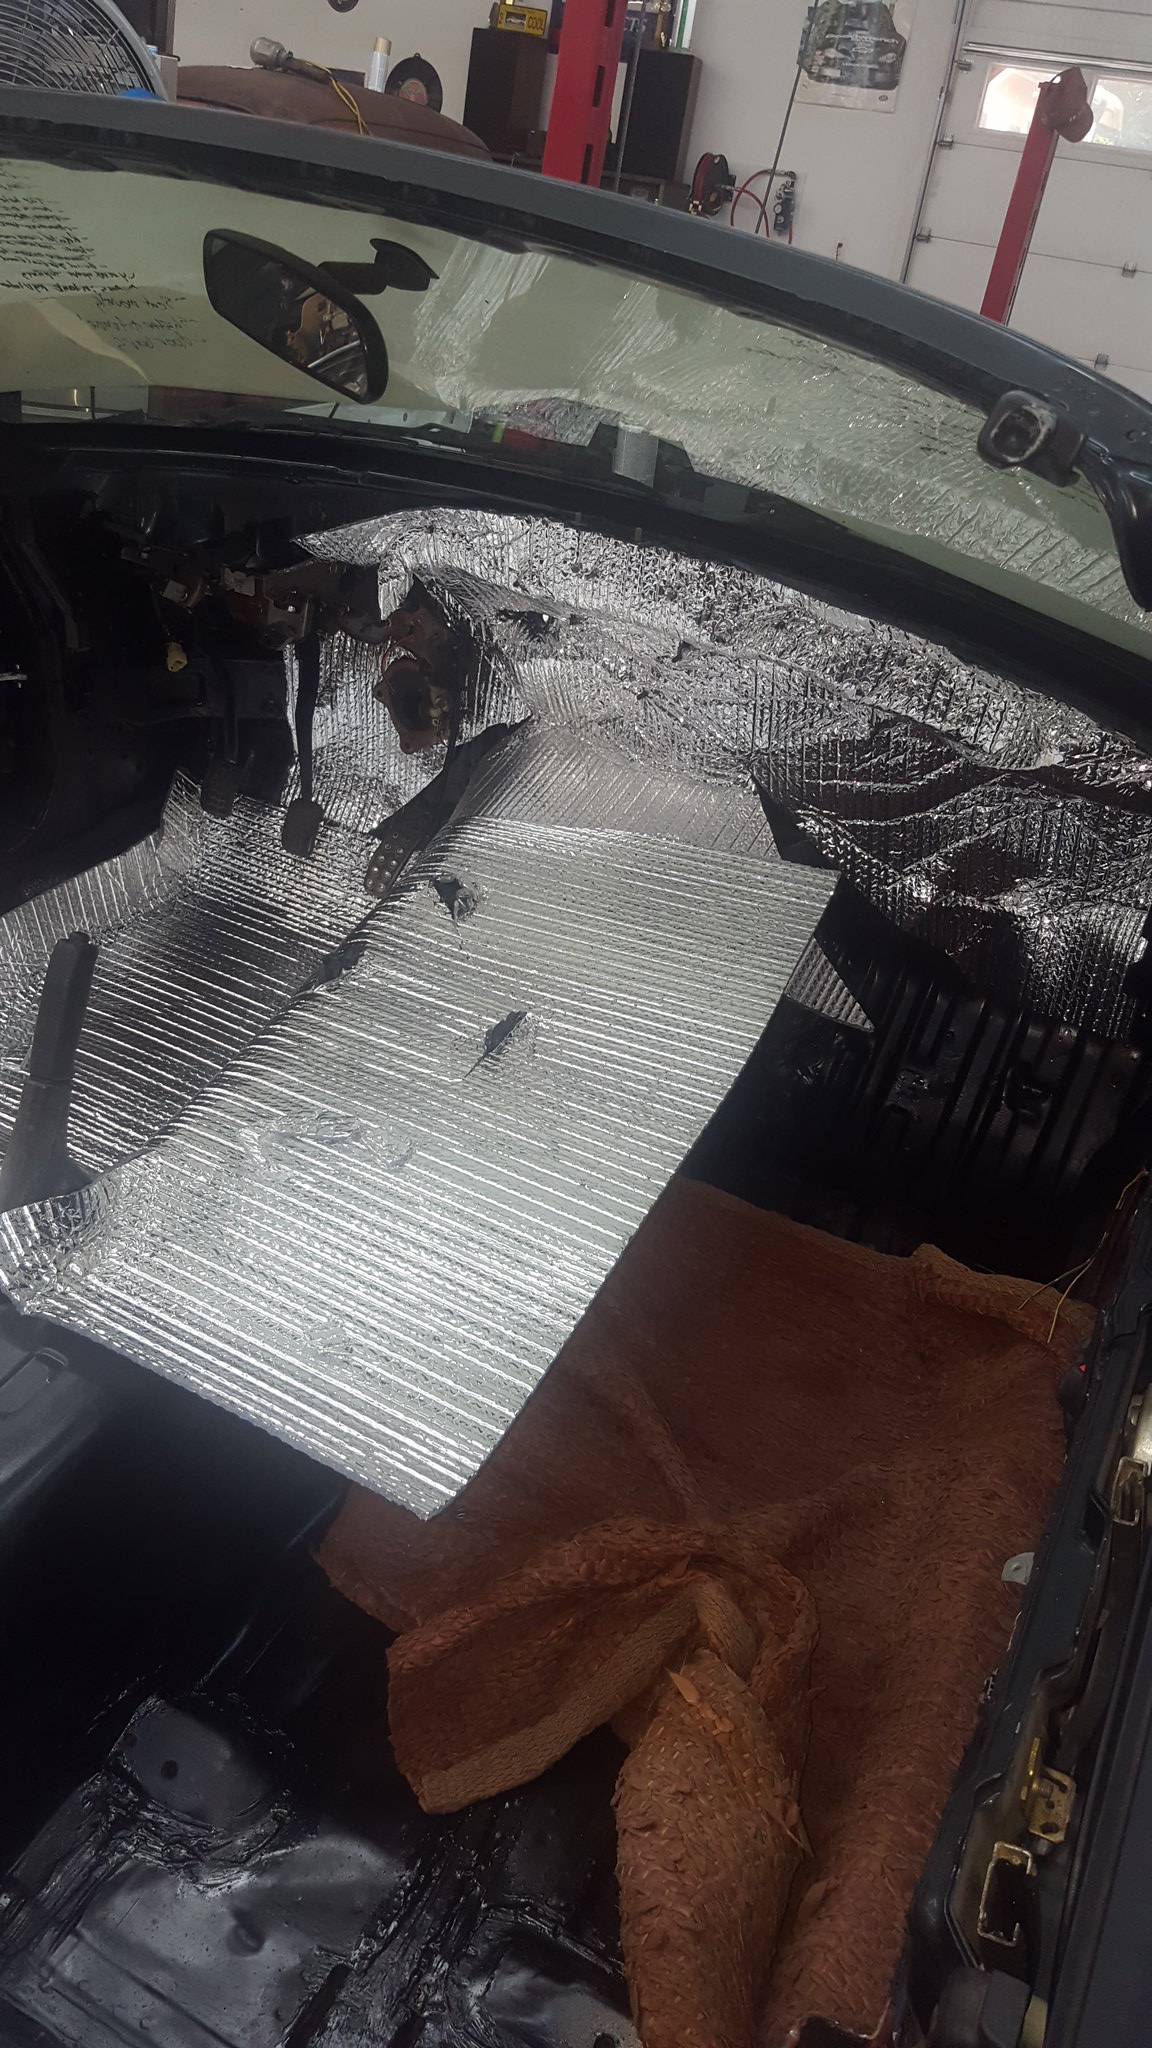
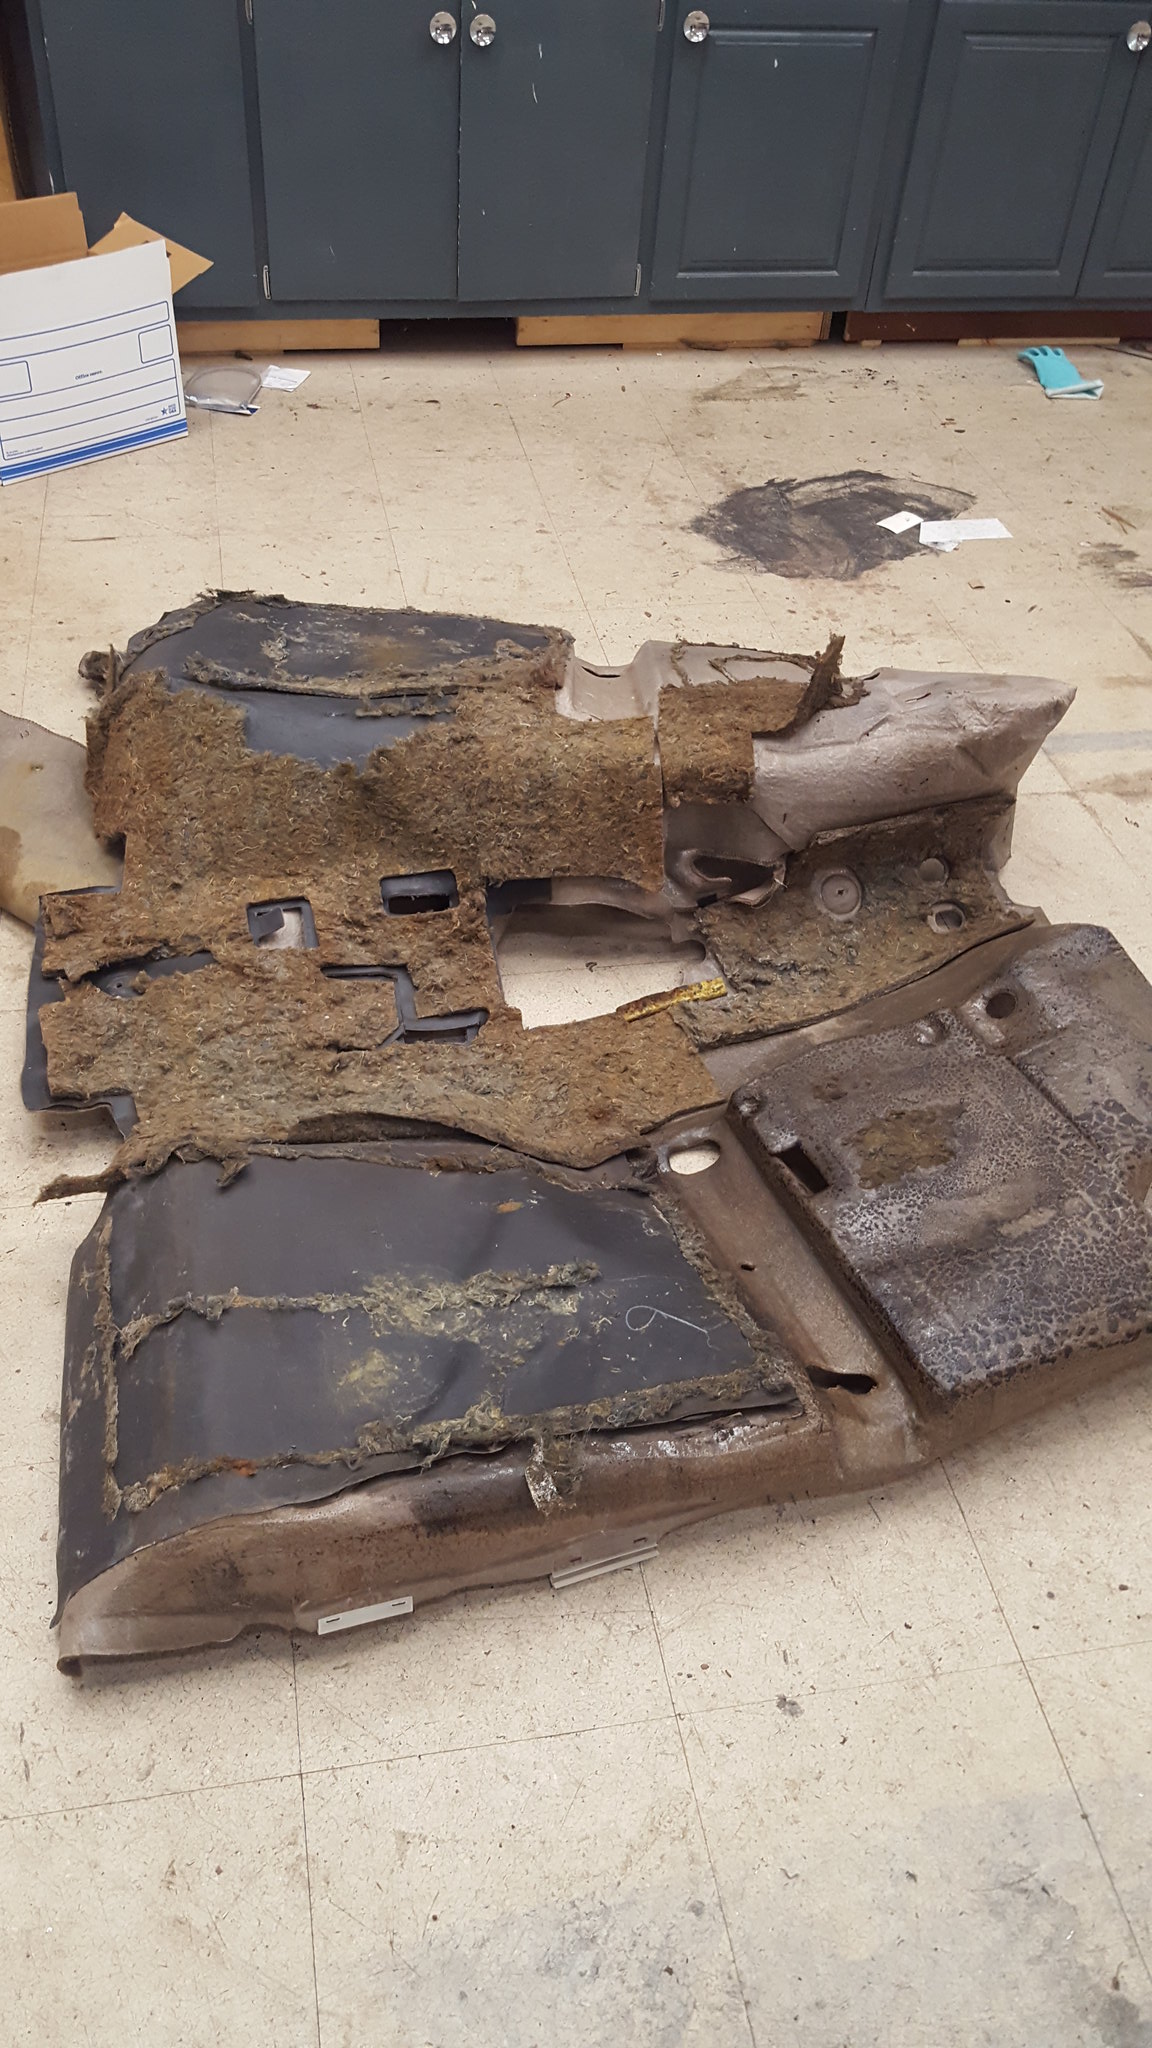
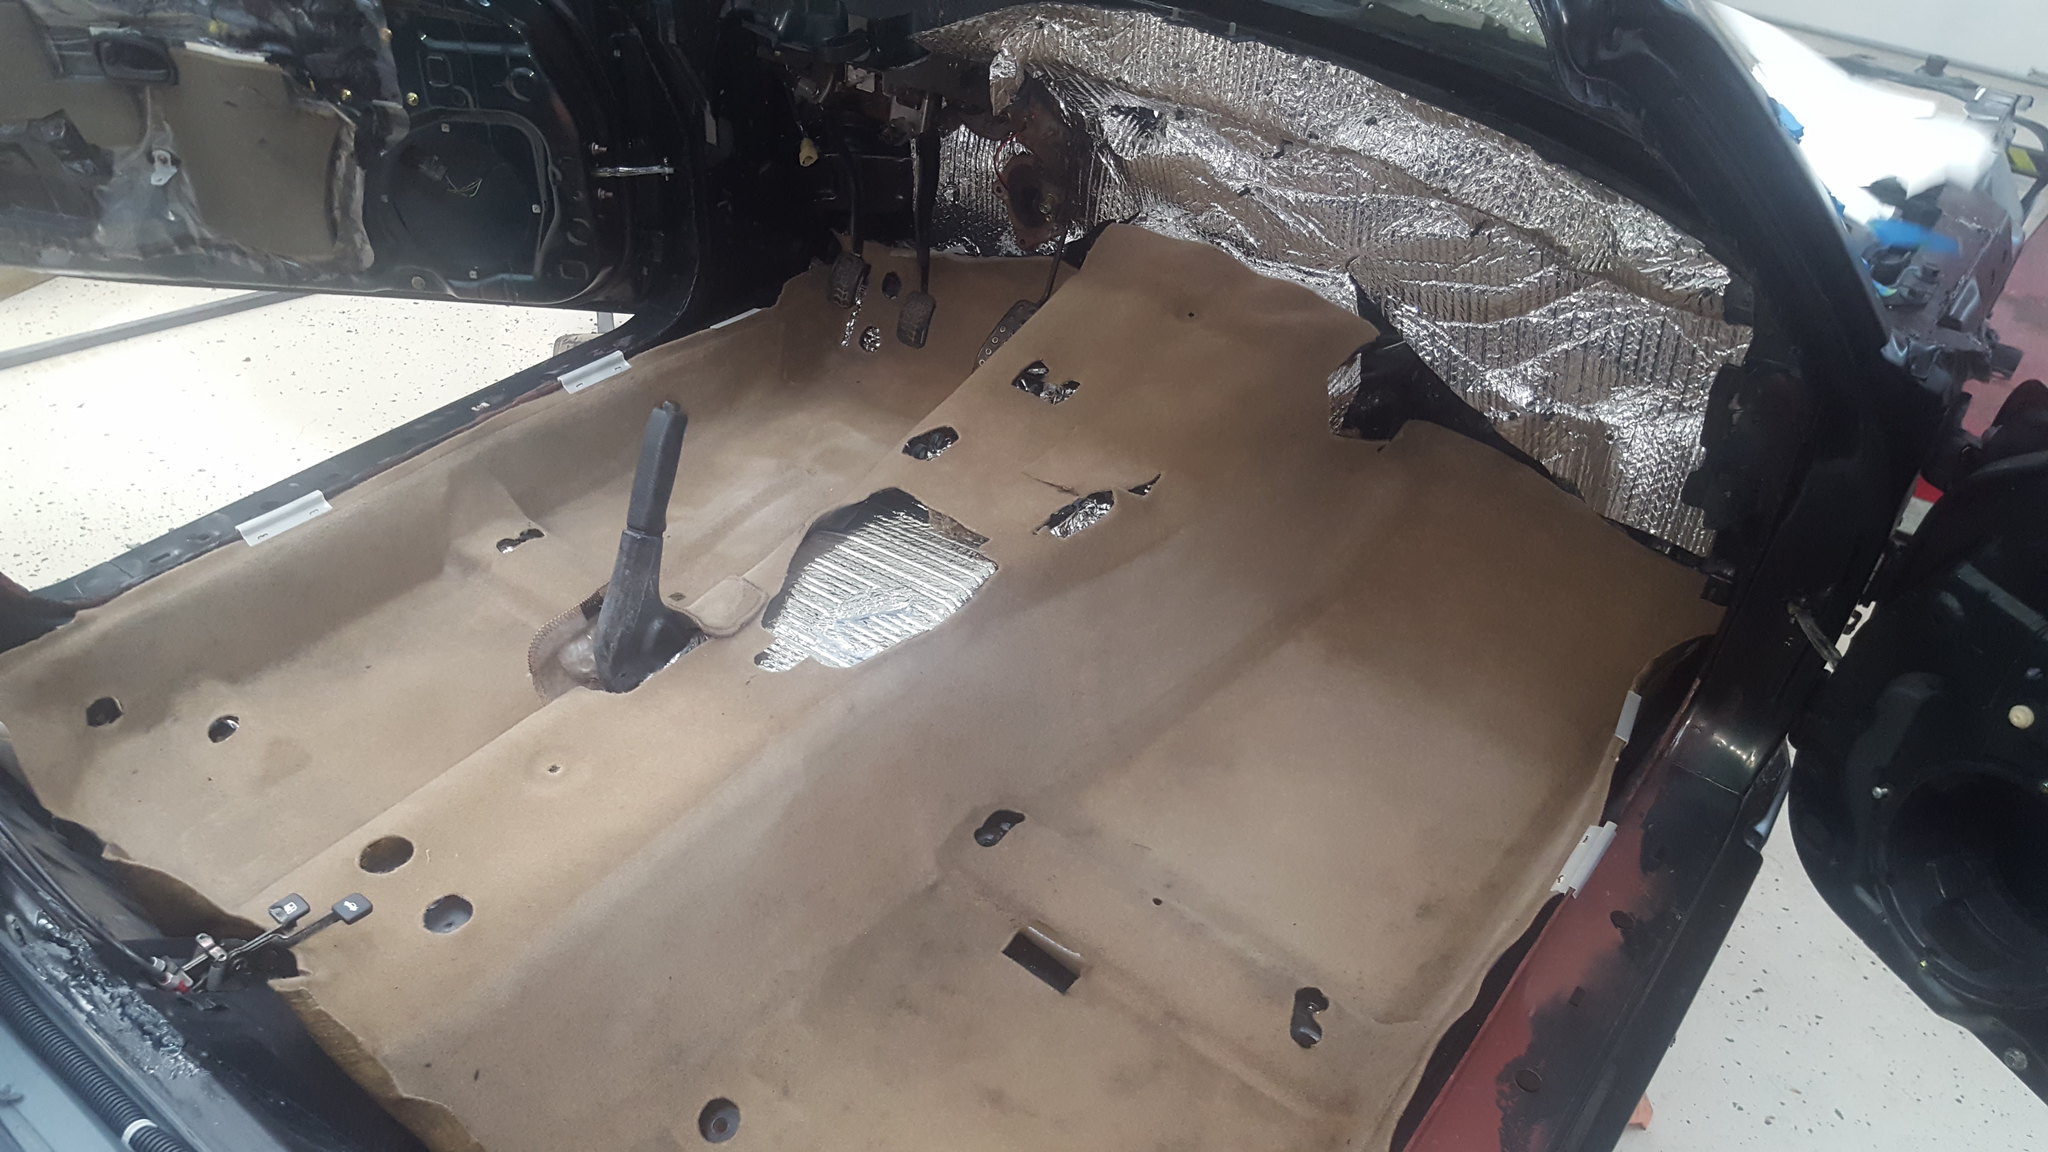
finished insulating the trans tunnel and drivers floor pans
 20180610_103149 by Michael Crawford, on Flickr
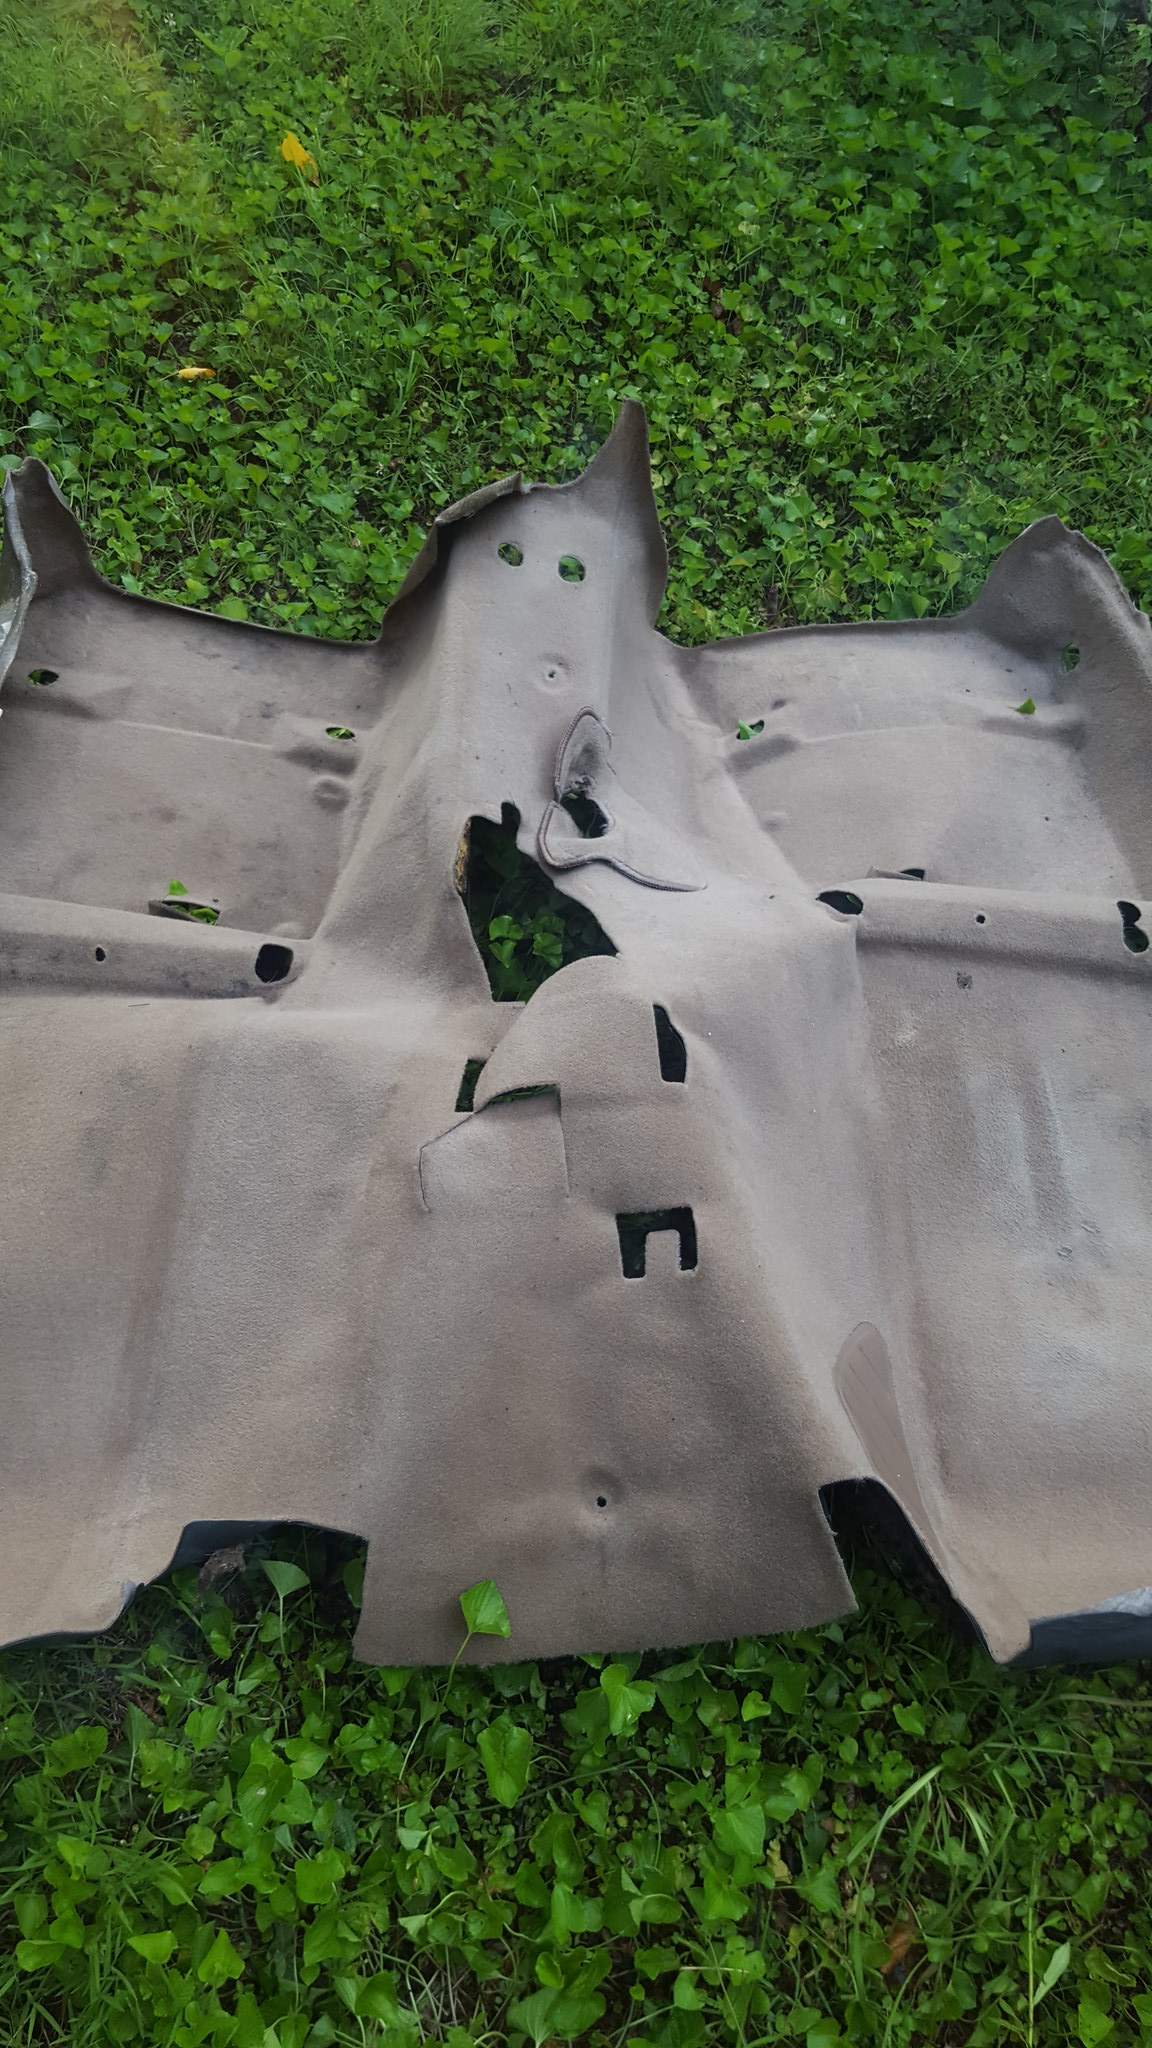
pulled the carpet out of storage. This I will so a little more explanation on.
These were the most disgusting carpets I have ever encountered. Honestly, the interior was the primary reason I parted this car out. It was that bad.
 20171007_163818 by Michael Crawford, on Flickr
I had used a vacuum, castrol superclean and a garden hose on them to see if I could get them better during the parts car phase of this project. Some improvements were made, but they were garbage. Dont know why I put them in storage instead of throwing them out as I had planned, to be honest. But when I pulled them out of storage, this is what they looked like.
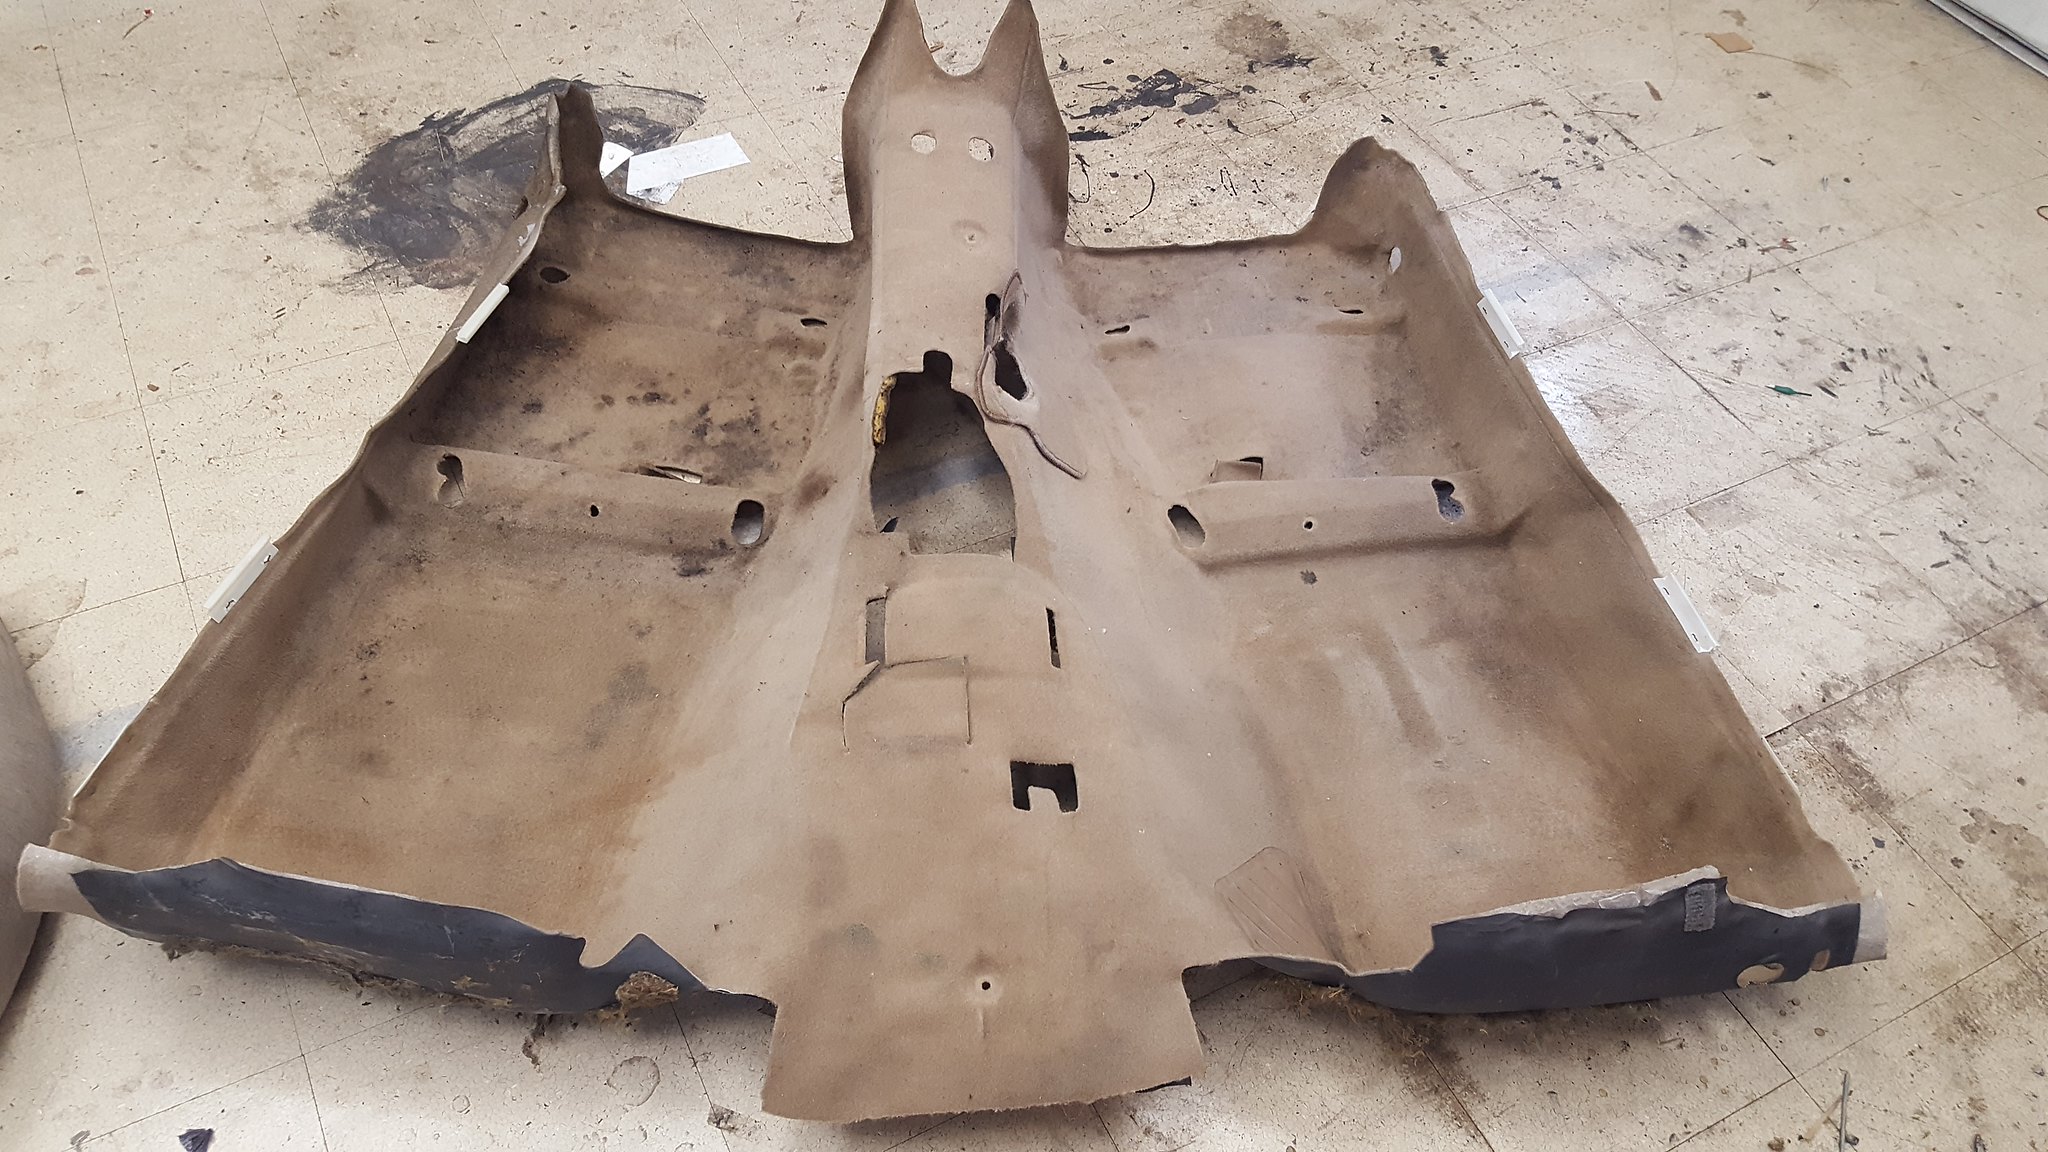 20180606_161423 by Michael Crawford, on Flickr
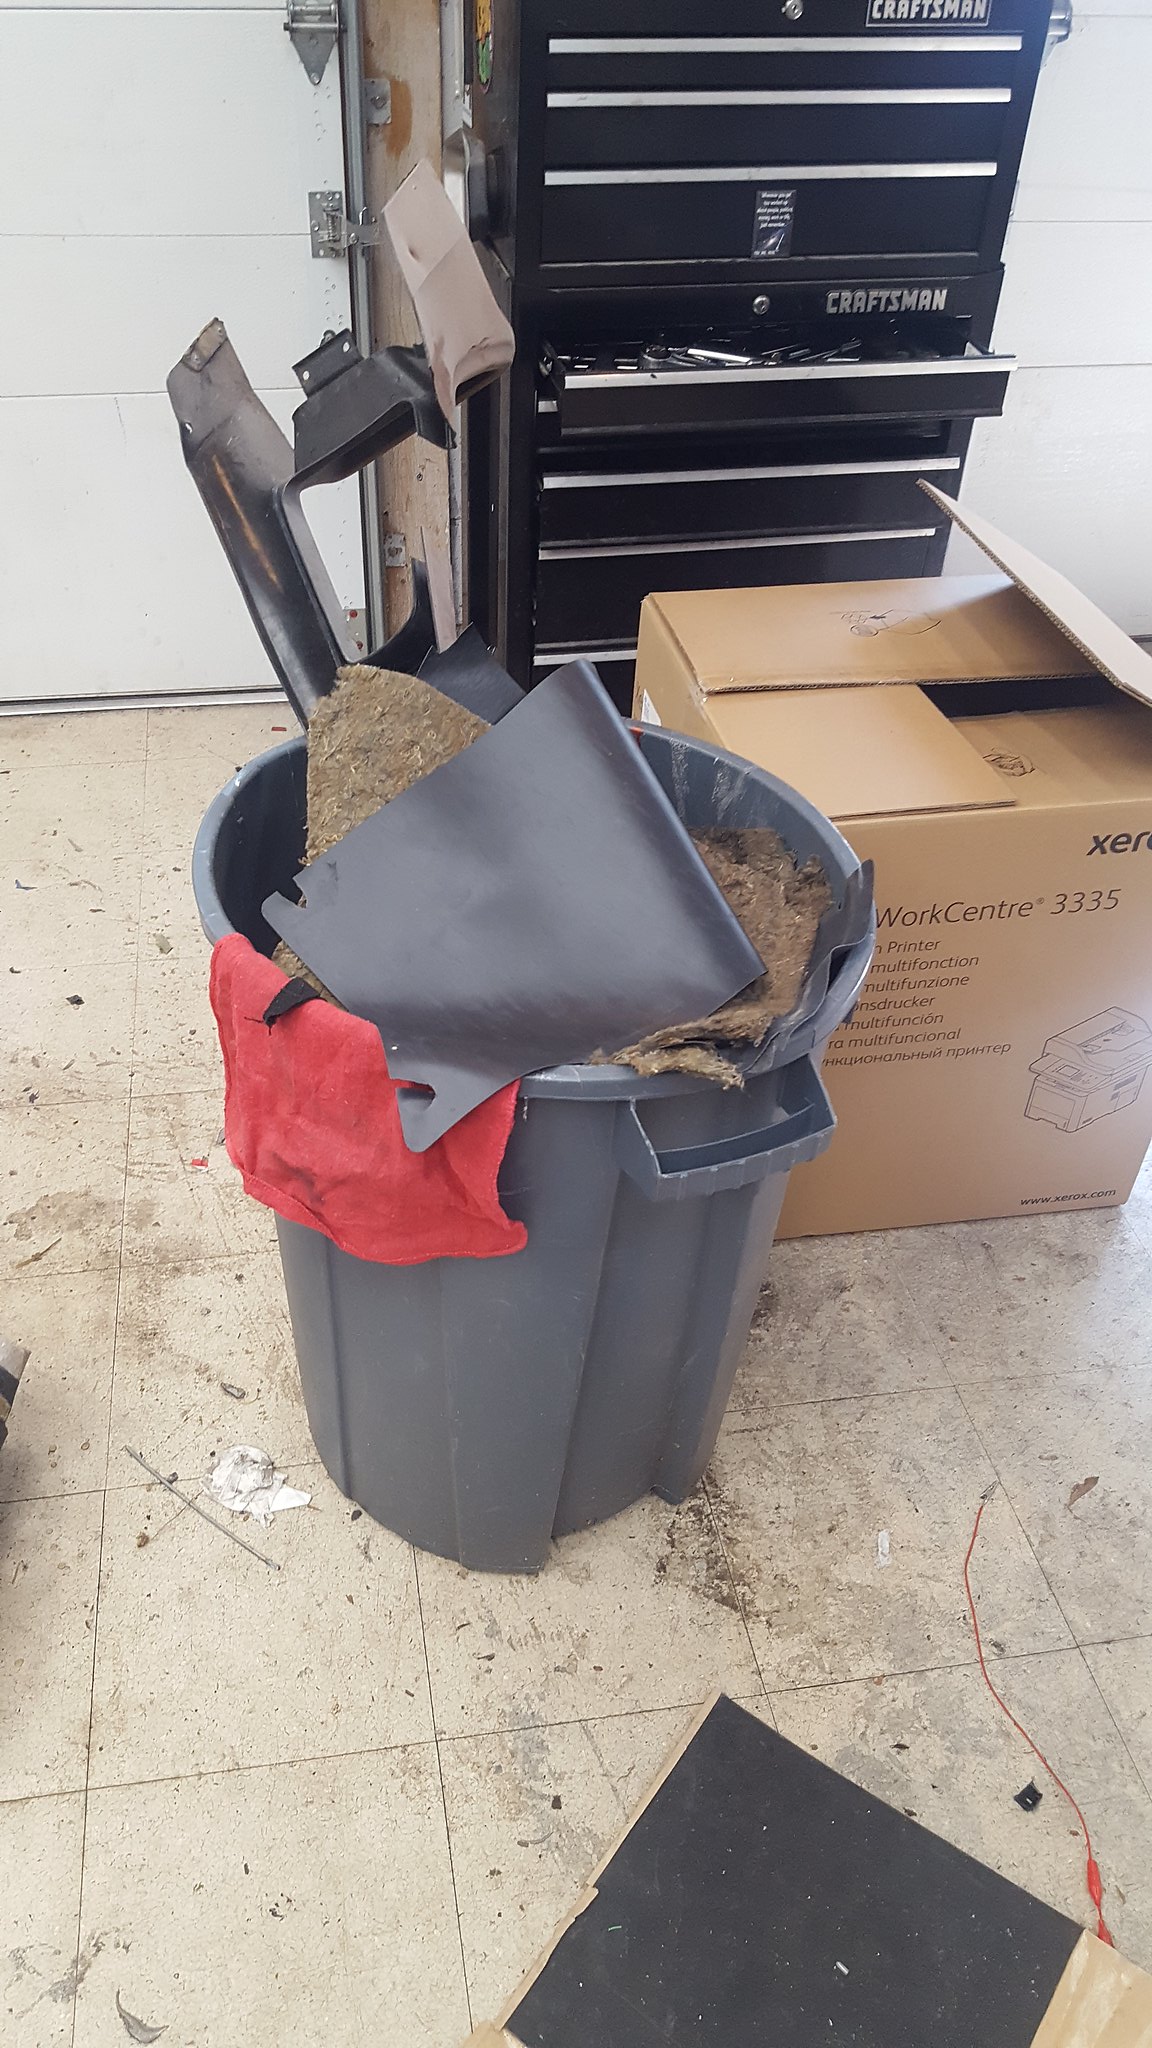
they were heavier than I was anticipating. As im trying to find a thousand places to save an ounce, I had to do something. Also, the jute and carpets were still dripping some unknown sticky substance. This would not do, and the were still too bad to use in a race car cosmetically. So I fixed them.
 20180606_161204 by Michael Crawford, on Flickr
 20180606_161511 by Michael Crawford, on Flickr
and then we got midevil on it. Superclean and a 10 degree nozzle on the pressure washer.
 20180608_070931 by Michael Crawford, on Flickr
damn things are still sticky to the touch. But, race care pretty if you dont touche them...
 20180610_103555 by Michael Crawford, on Flickr
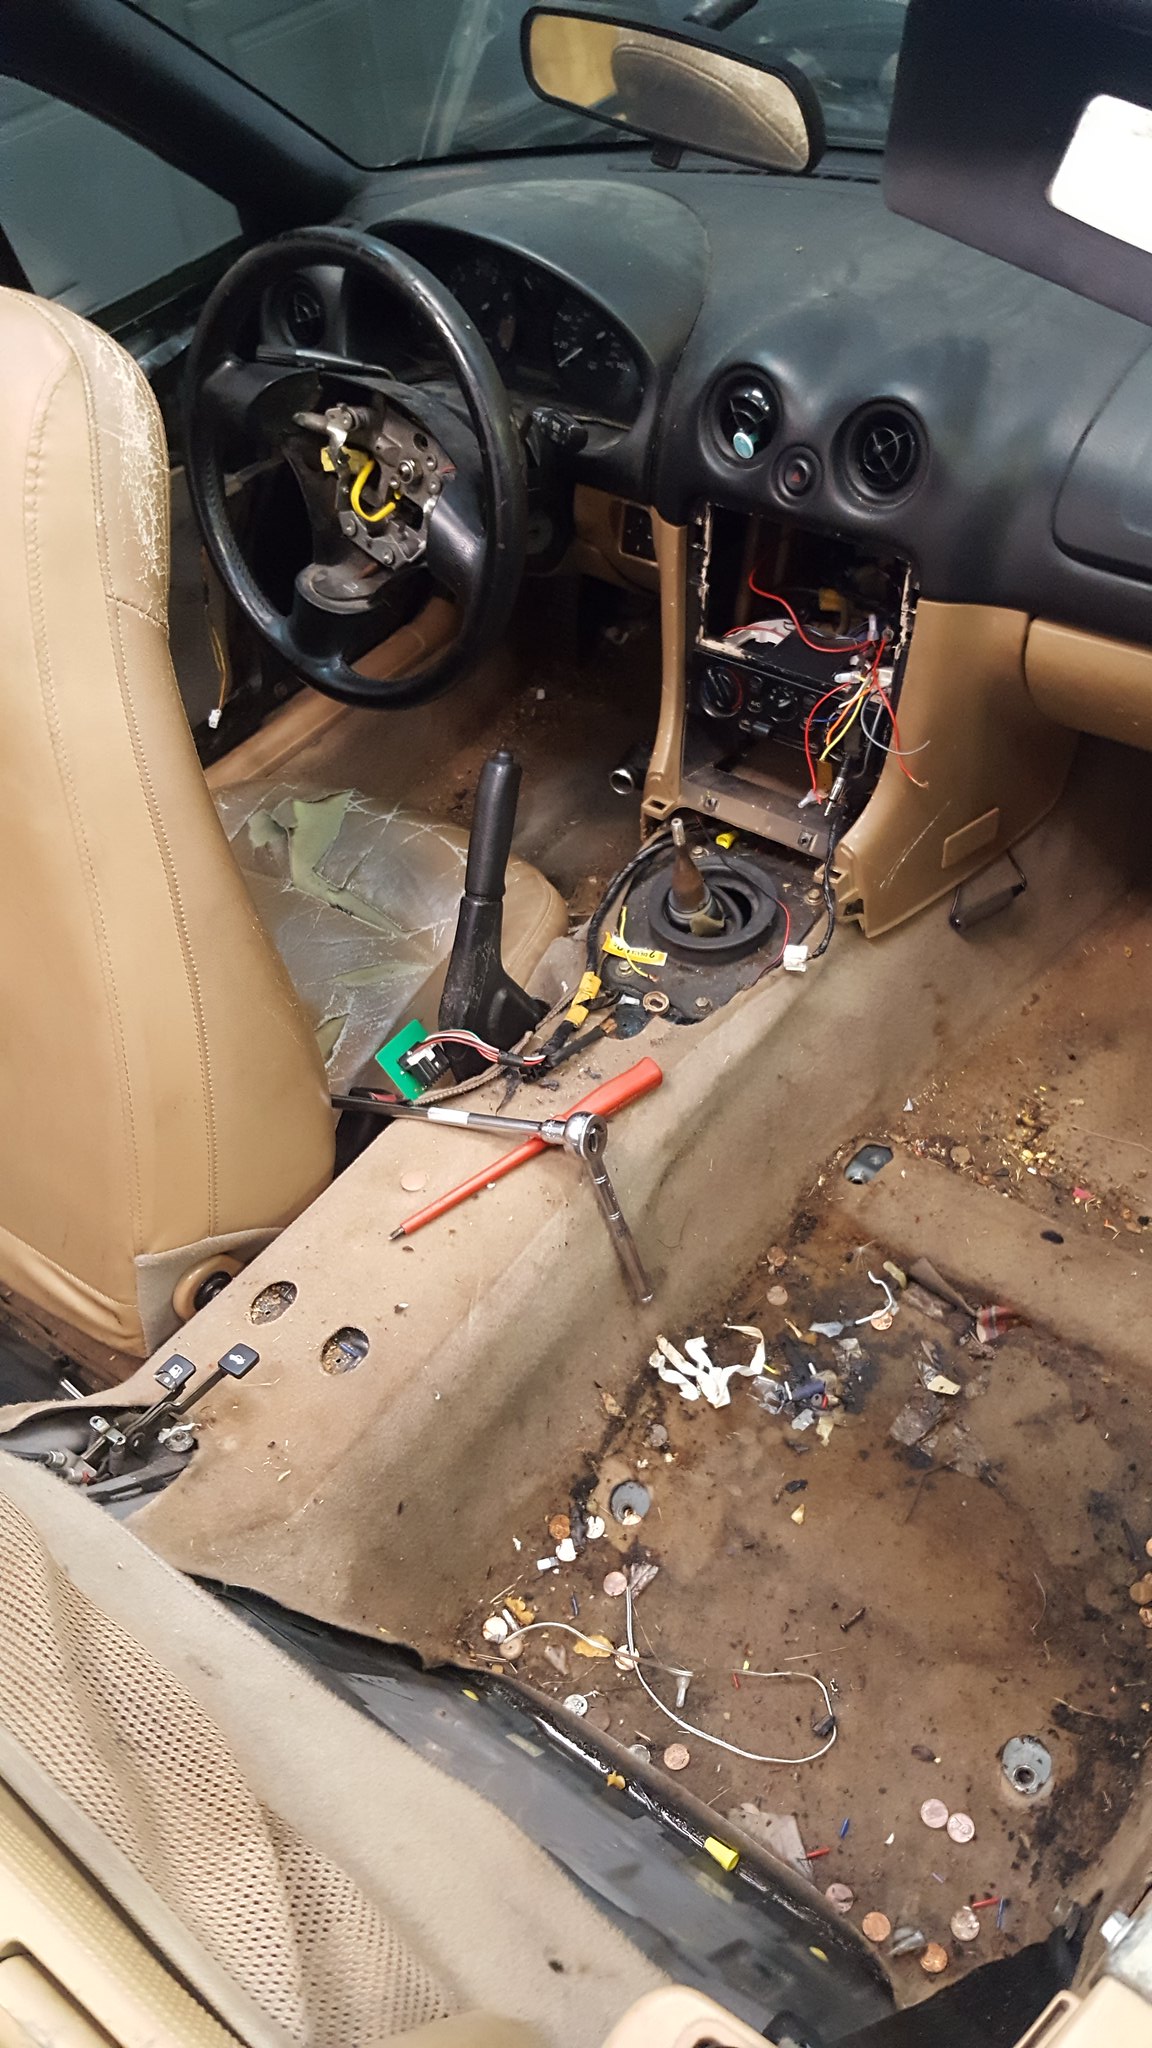
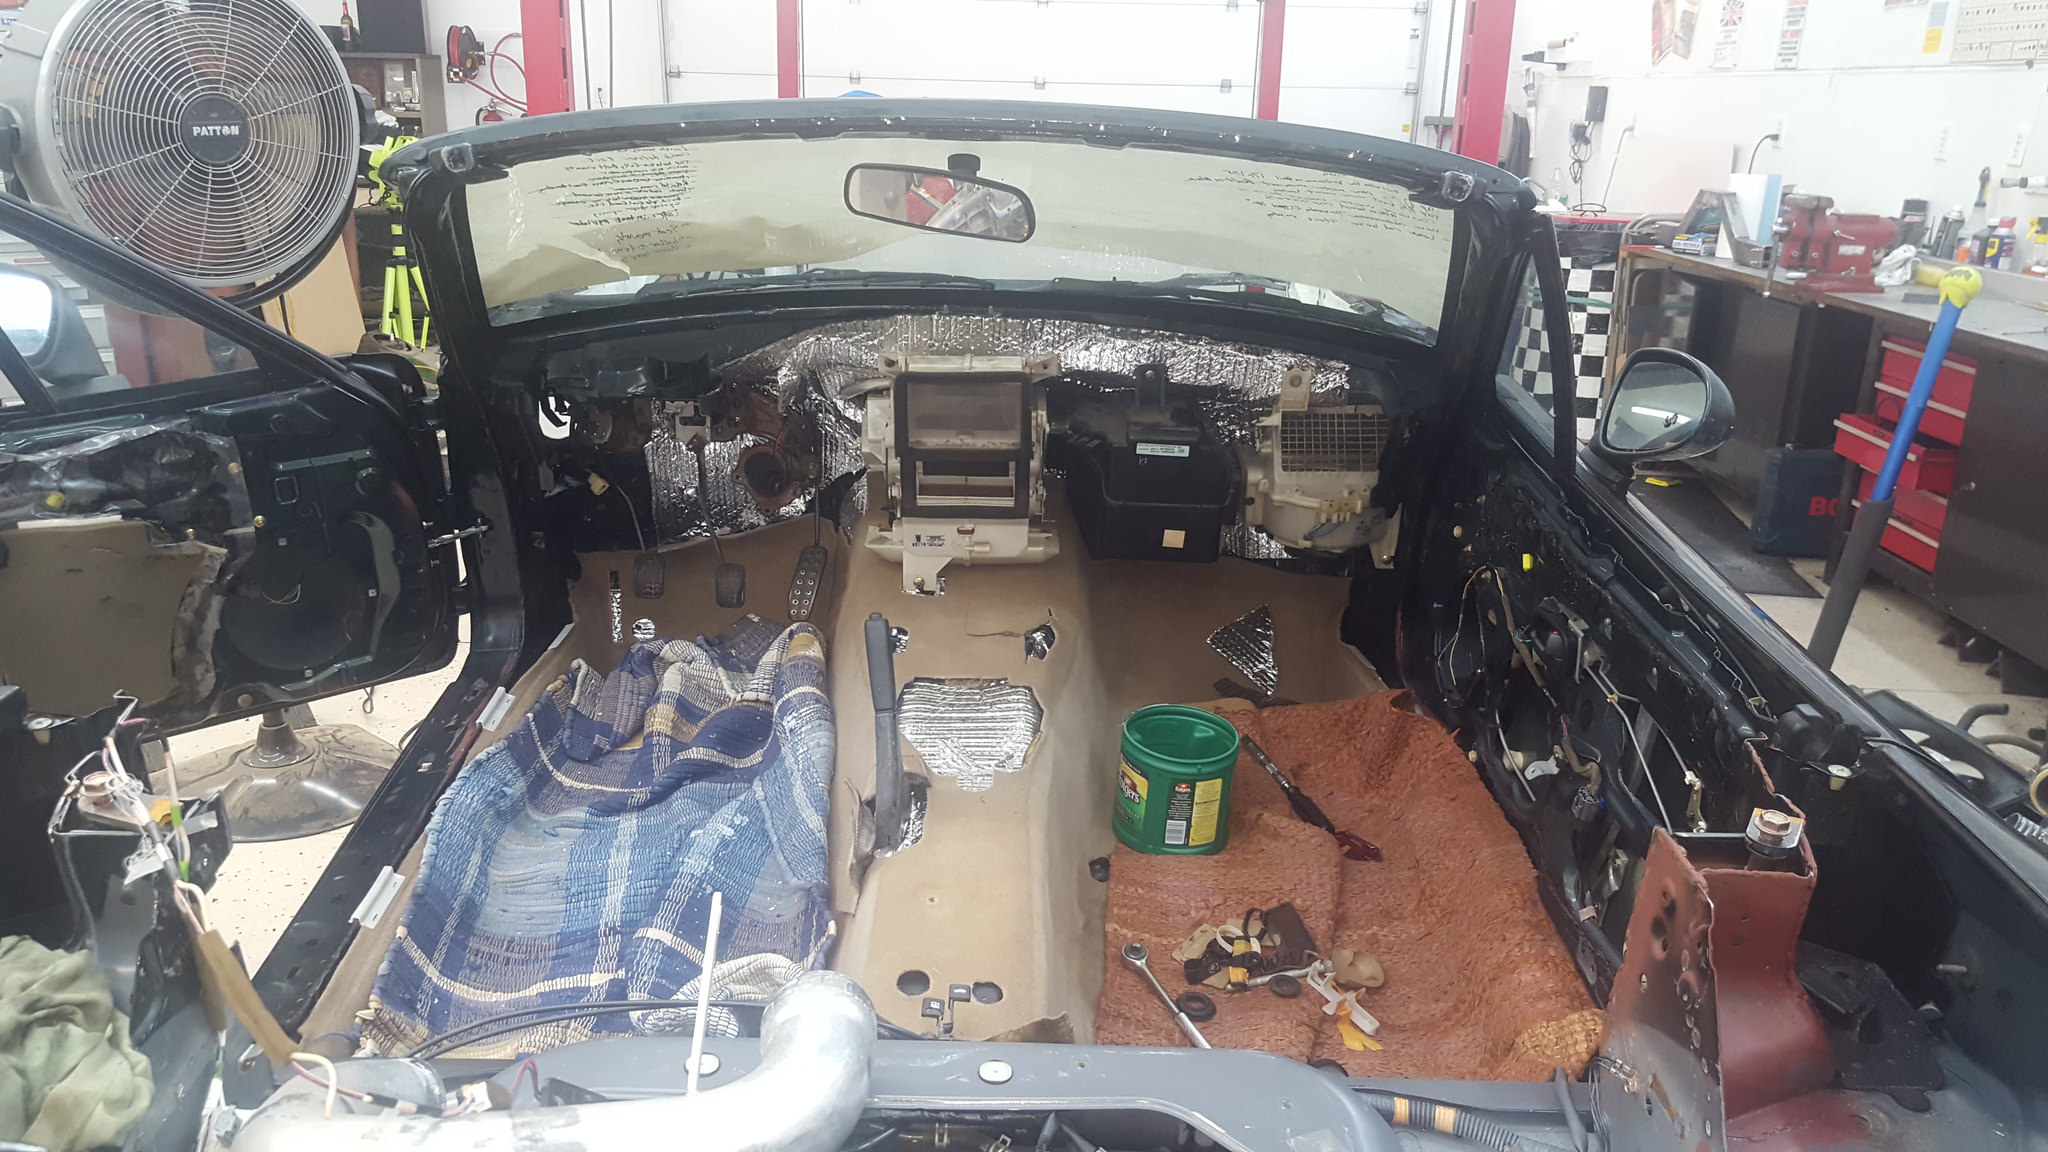
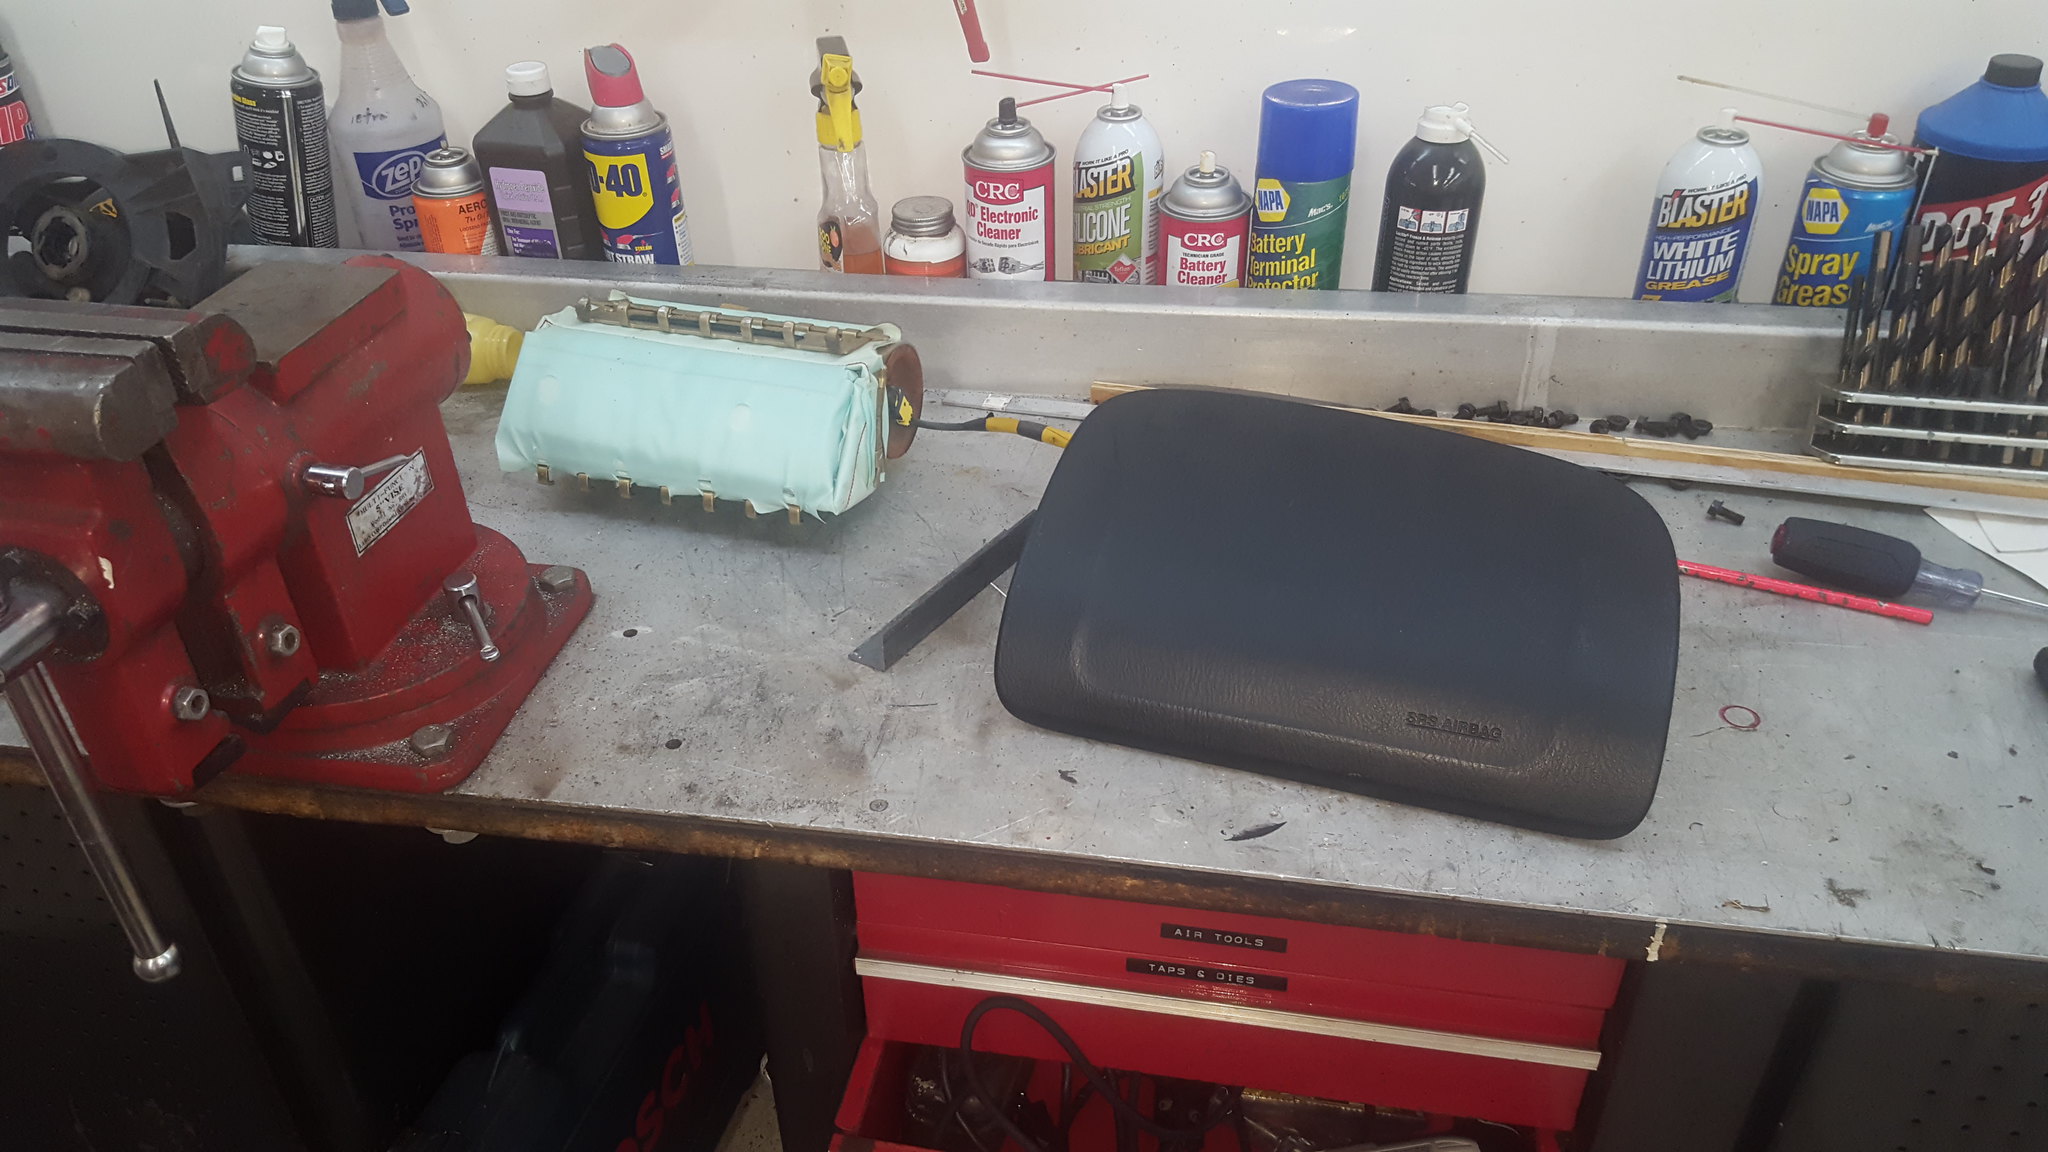
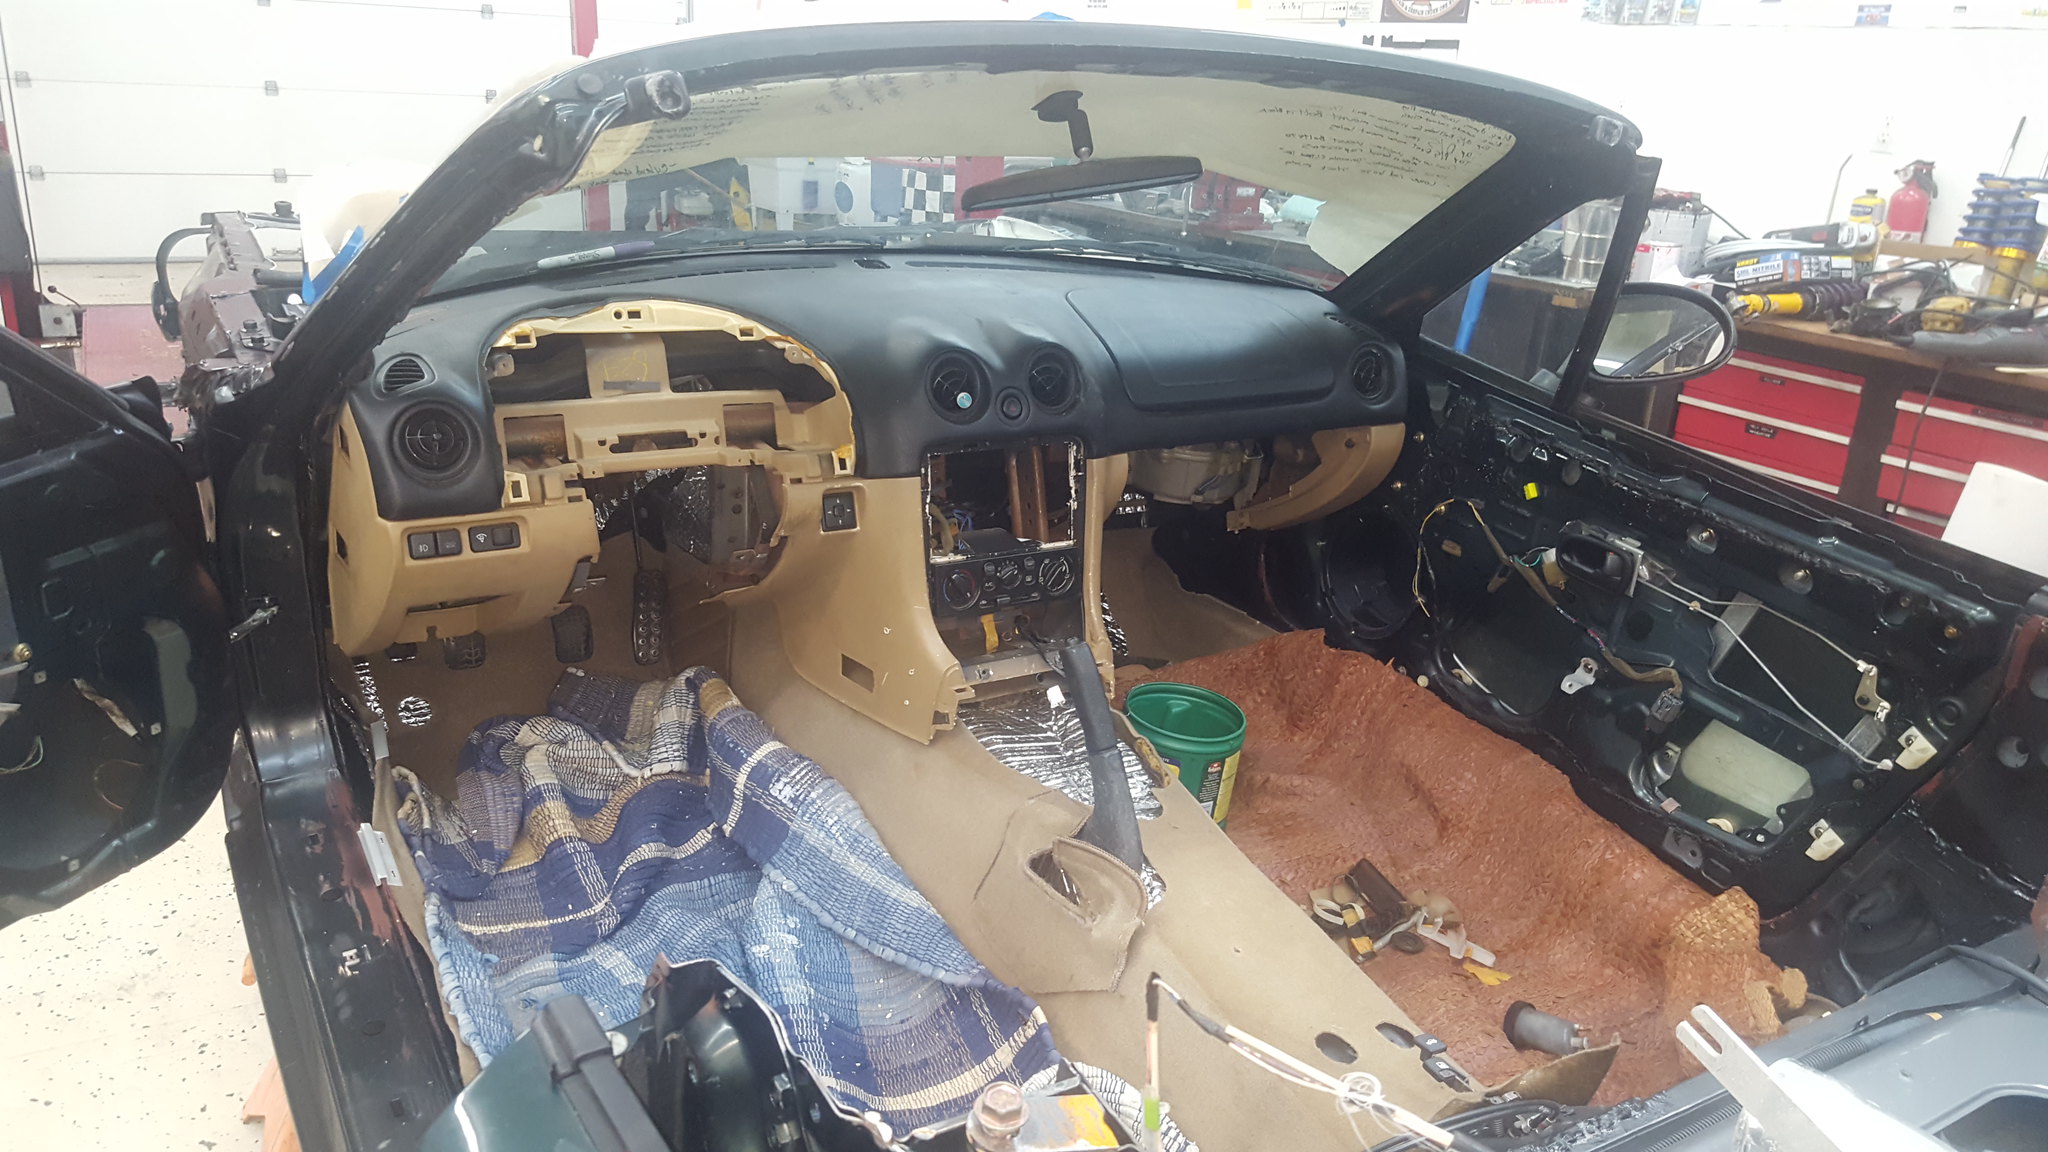
went ahead and gutted the ac evaporator, cleaned the center stack and blower motor, and rehung them. In the excitement of rehanging stuff, pictures happened less. But, I pulled the bose stuff out of the dash. About 2lbs. Then passengers airbag. Roughly 10. but I pulled the cover and reinstalled it for cosmetic purposes. Theres more weight to come out of the dash, but thats going to wait for now.
 20180610_101015 by Michael Crawford, on Flickr
 20180610_104612 by Michael Crawford, on Flickr
 20180610_111807 by Michael Crawford, on Flickr
ran the dash home, and tossed the seat in. nice to have parts being consolidated.
 20180610_112224 by Michael Crawford, on Flickr
 20180610_143649 by Michael Crawford, on Flickr
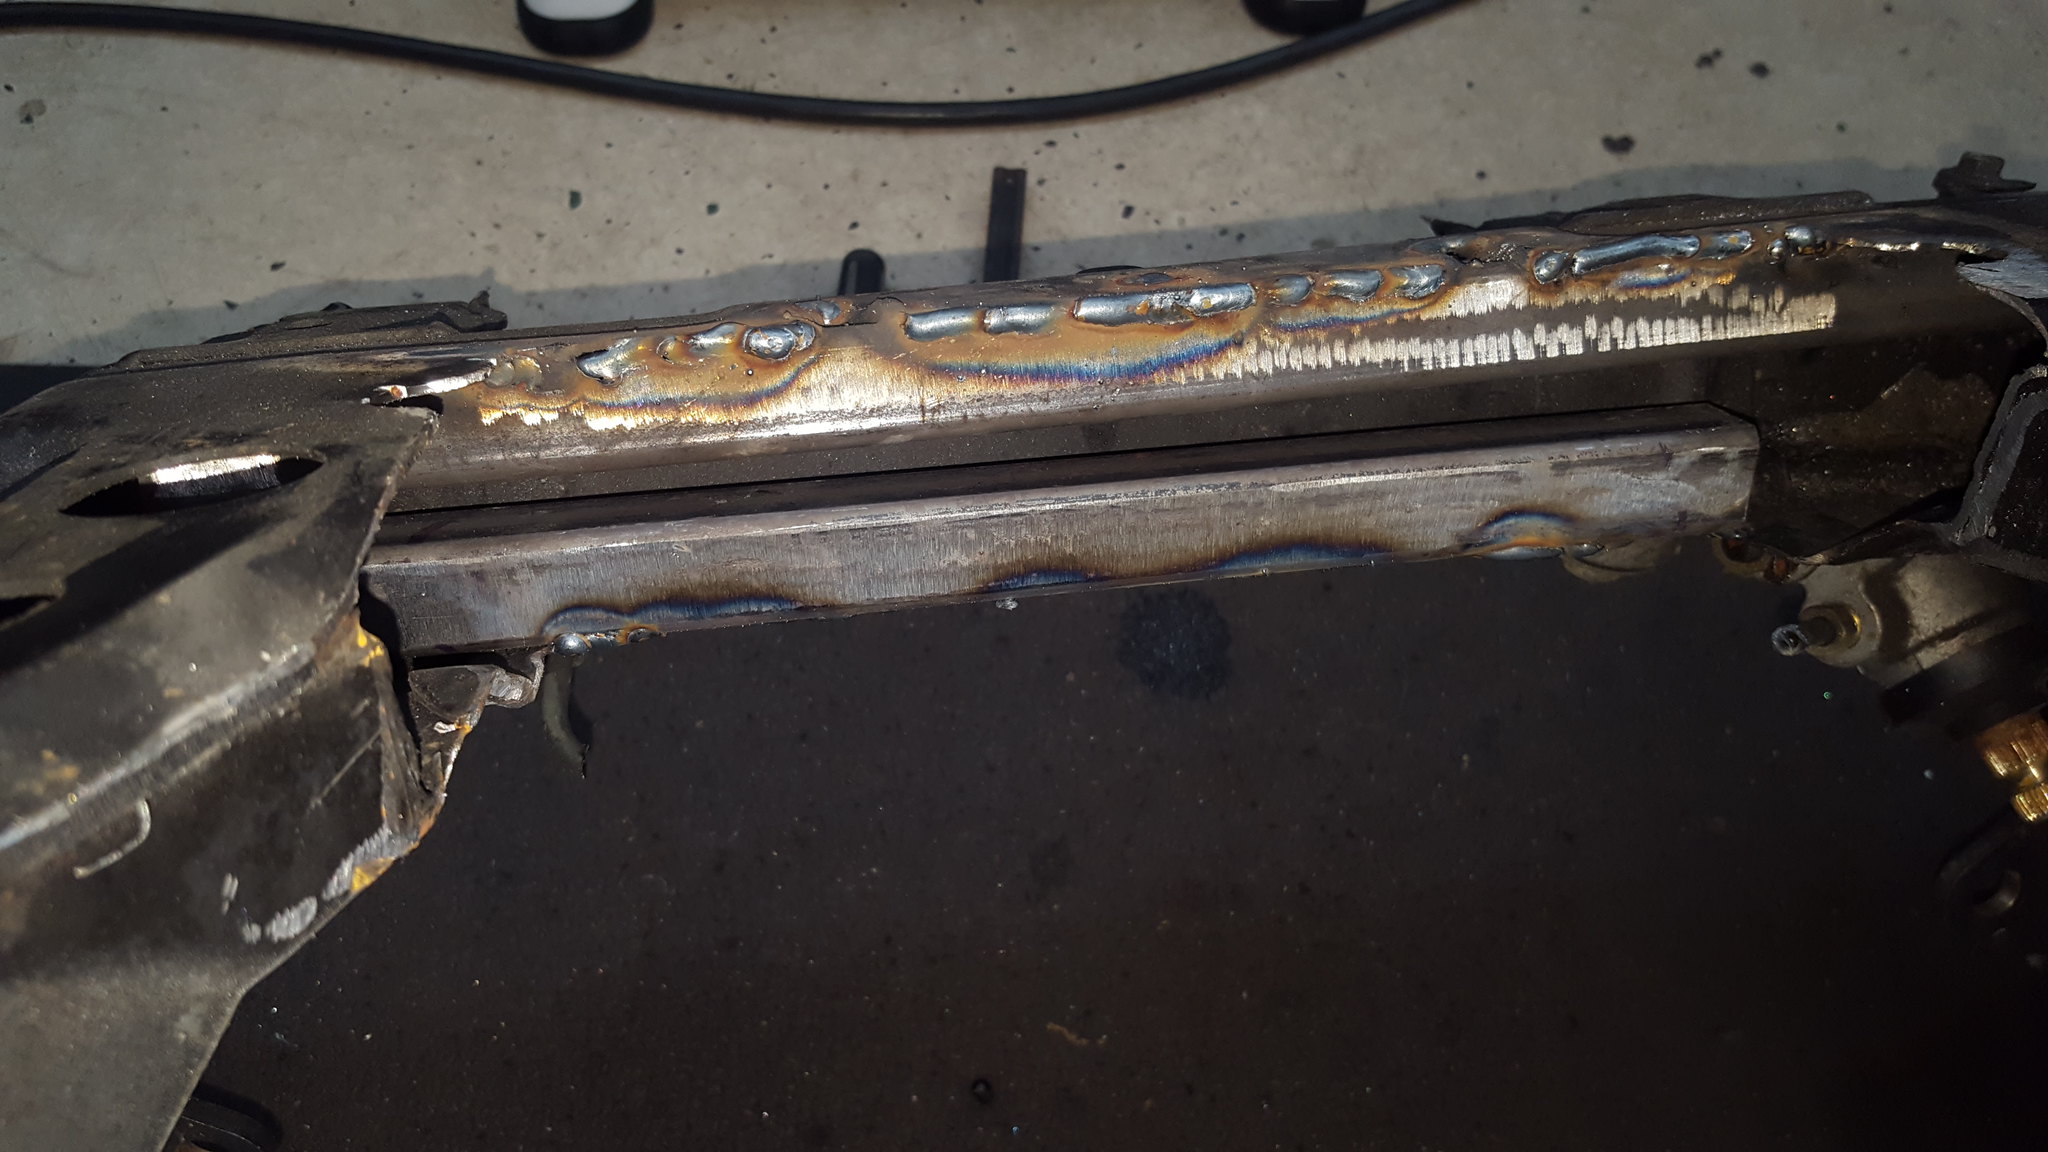
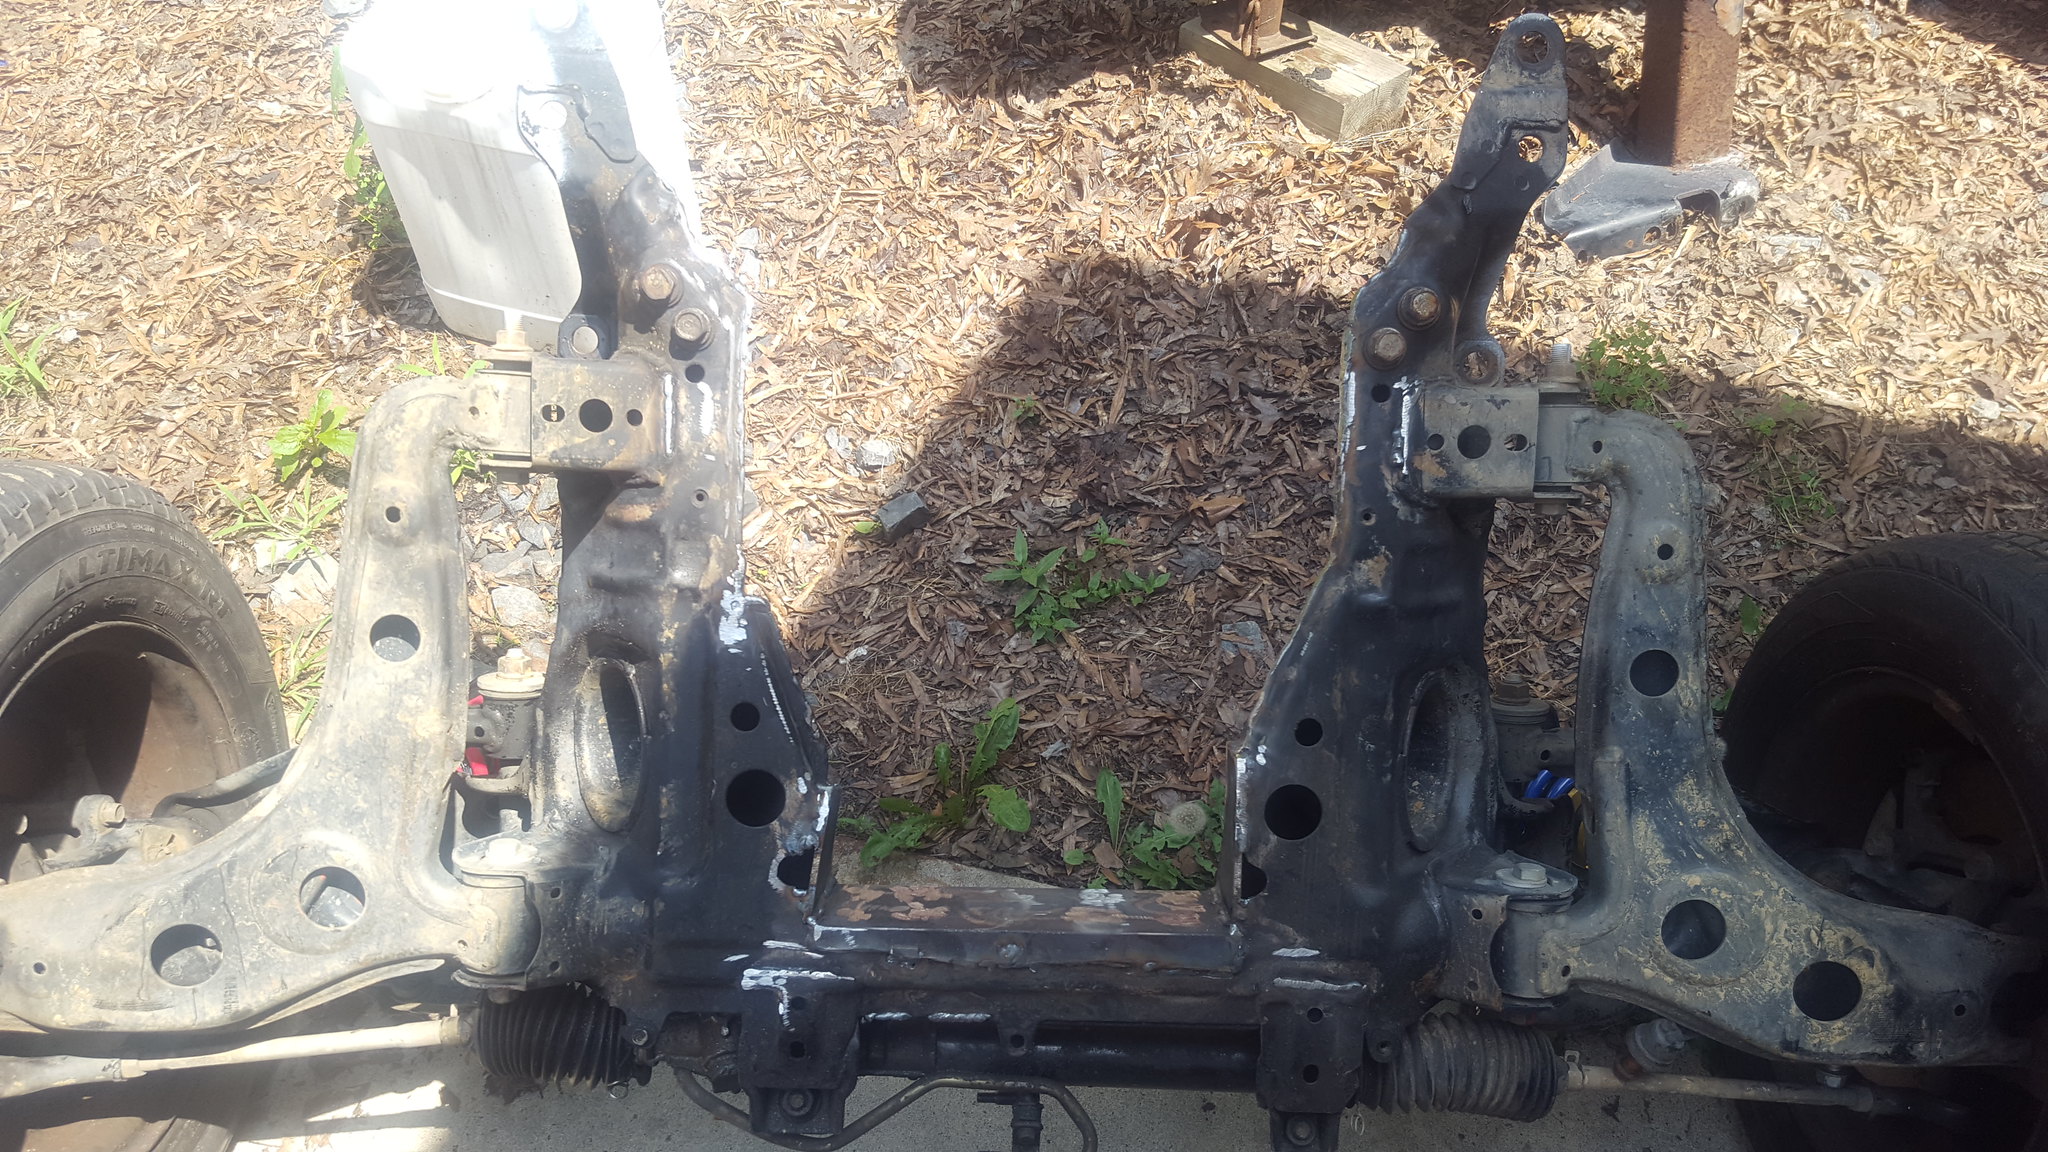
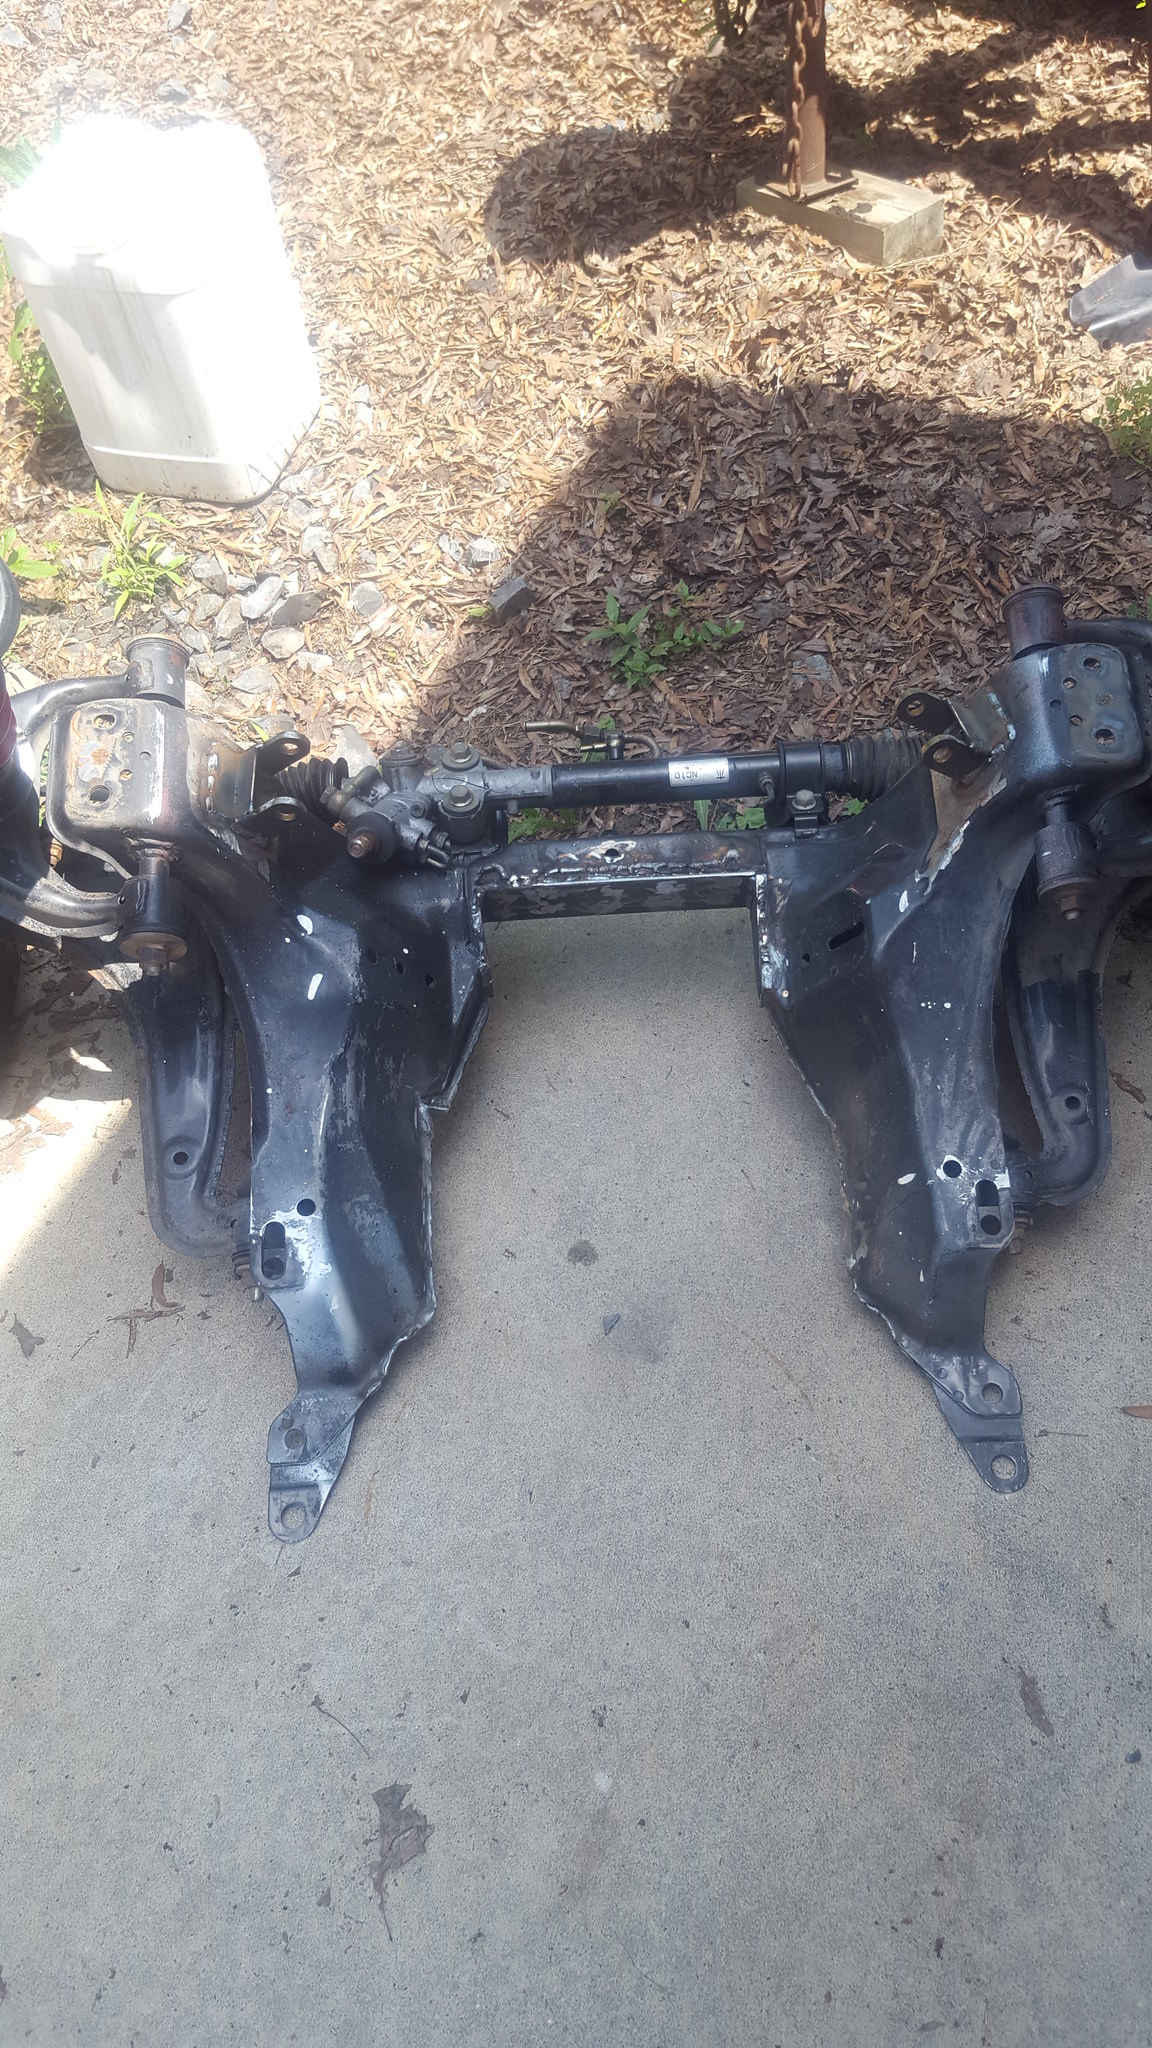
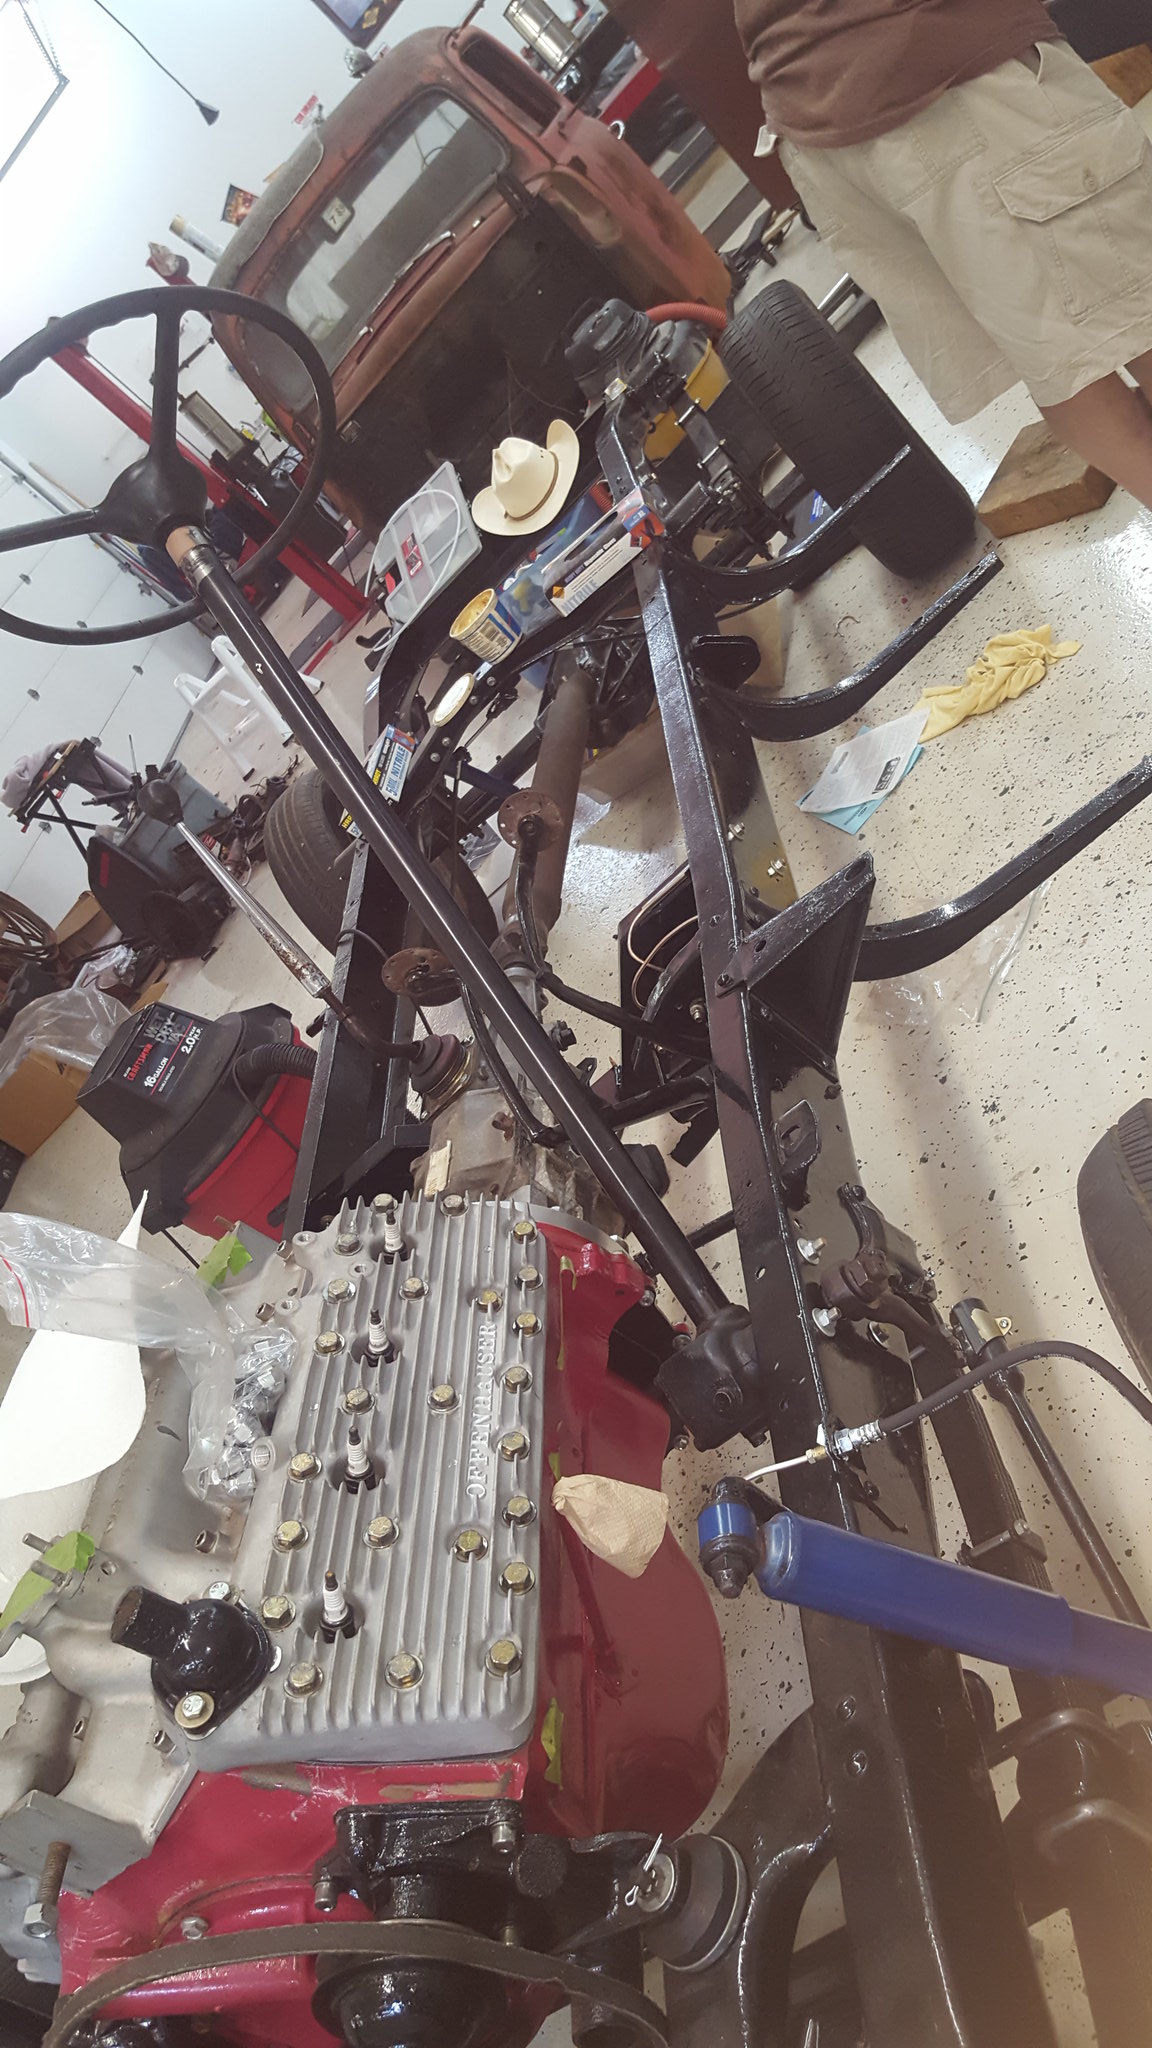
the big project this week was the front crossmember. I needed to do a little more clearance just for service room. I also needed to do something about the fact that I cut the thing up radically, and it had lost all strength it ever had. After some brief thought, I came up with a plan. First, some 1x1 tube welded to the horiszontal surfaces. These were both seam welded and plug welded, includeing as far as I could get inside the crossmember.
 20180609_100532 by Michael Crawford, on Flickr
 20180609_105307 by Michael Crawford, on Flickr
after I welded those, I took a leftover piece of lintel from some foundation repair when we bought our house. Ground it down, drilled some holes, did some trimming, and burned it in.
 20180609_105319 by Michael Crawford, on Flickr
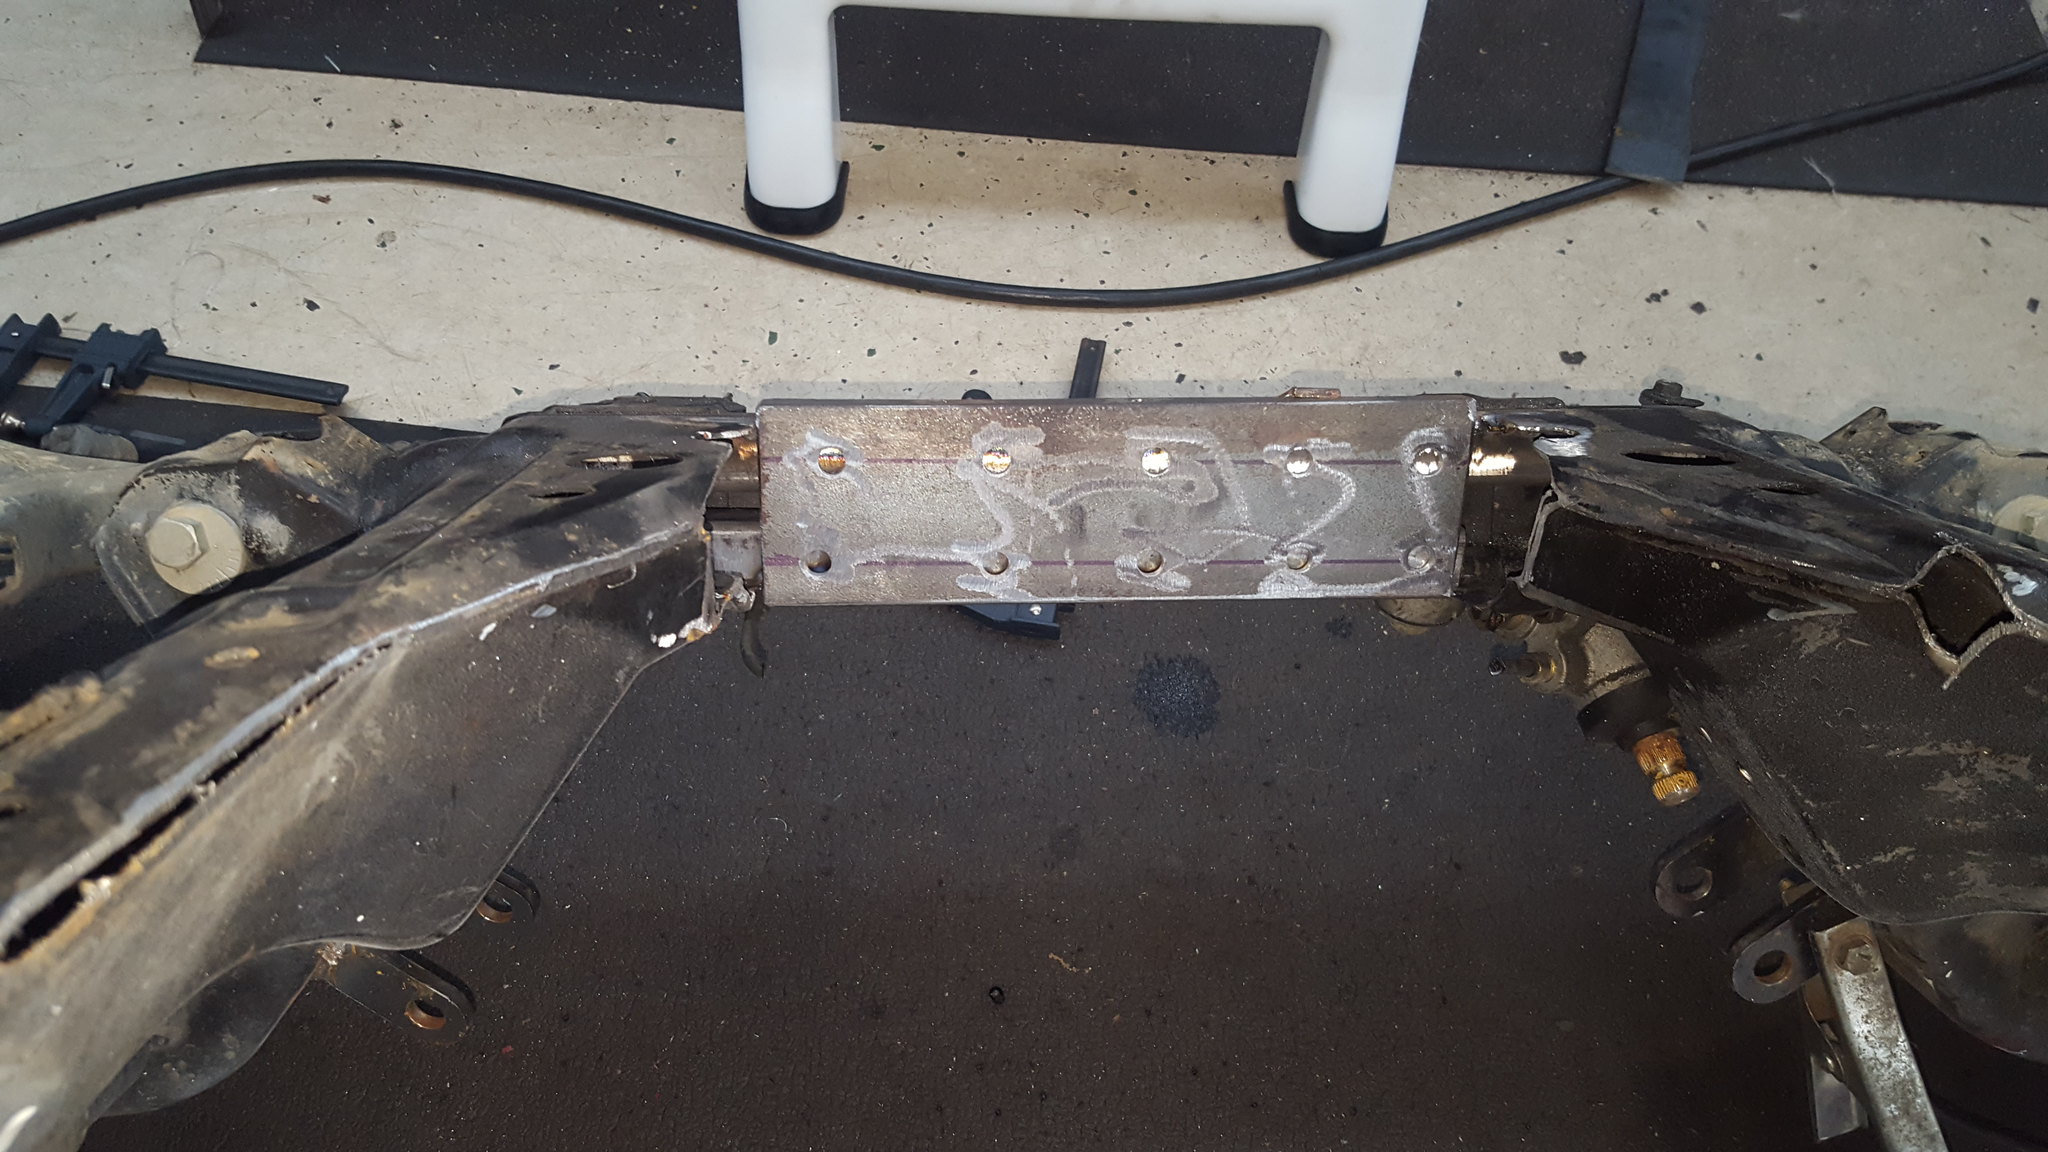
made some block offs for the wings, and a piece of angle reinforced the motor mounts. Went ahead and welded the entire thing where the two halves meet, as well as all the parts that were just partially welded or tack welded. Lots and lots of welding. And then a lot of grinding. But its DONE.
 20180610_143516 by Michael Crawford, on Flickr
 20180610_143502 by Michael Crawford, on Flickr
have a good week, y'all. And remember to be grateful for your blessings.

Strong work!!

Now that's a busy day.
It's nice when the small efforts start to come together and make something really noticeable.
I need to catch up!!!
Not just a day. More like last week and all weekend.
But thanks! Lotsand lots of small efforts and baby steps....
Tonight's plan is to get the engine reassembled. Dads working on cleaning and painting the crossmember.
The thrash is on!
Engines reassembled. Still have to get some broken exhaust bolts out before paint. And finish alternator mounts.
K frame finished.
Gauge cluster in progress.
Header wrap in mail.
Wvumtnbkr was more awesome than i thought! Everything i needed to put the engine together was in the box except exhaust gaskets and oil pan. Which means more budget saved. I really owe him a beer and burger, or codrive or something.
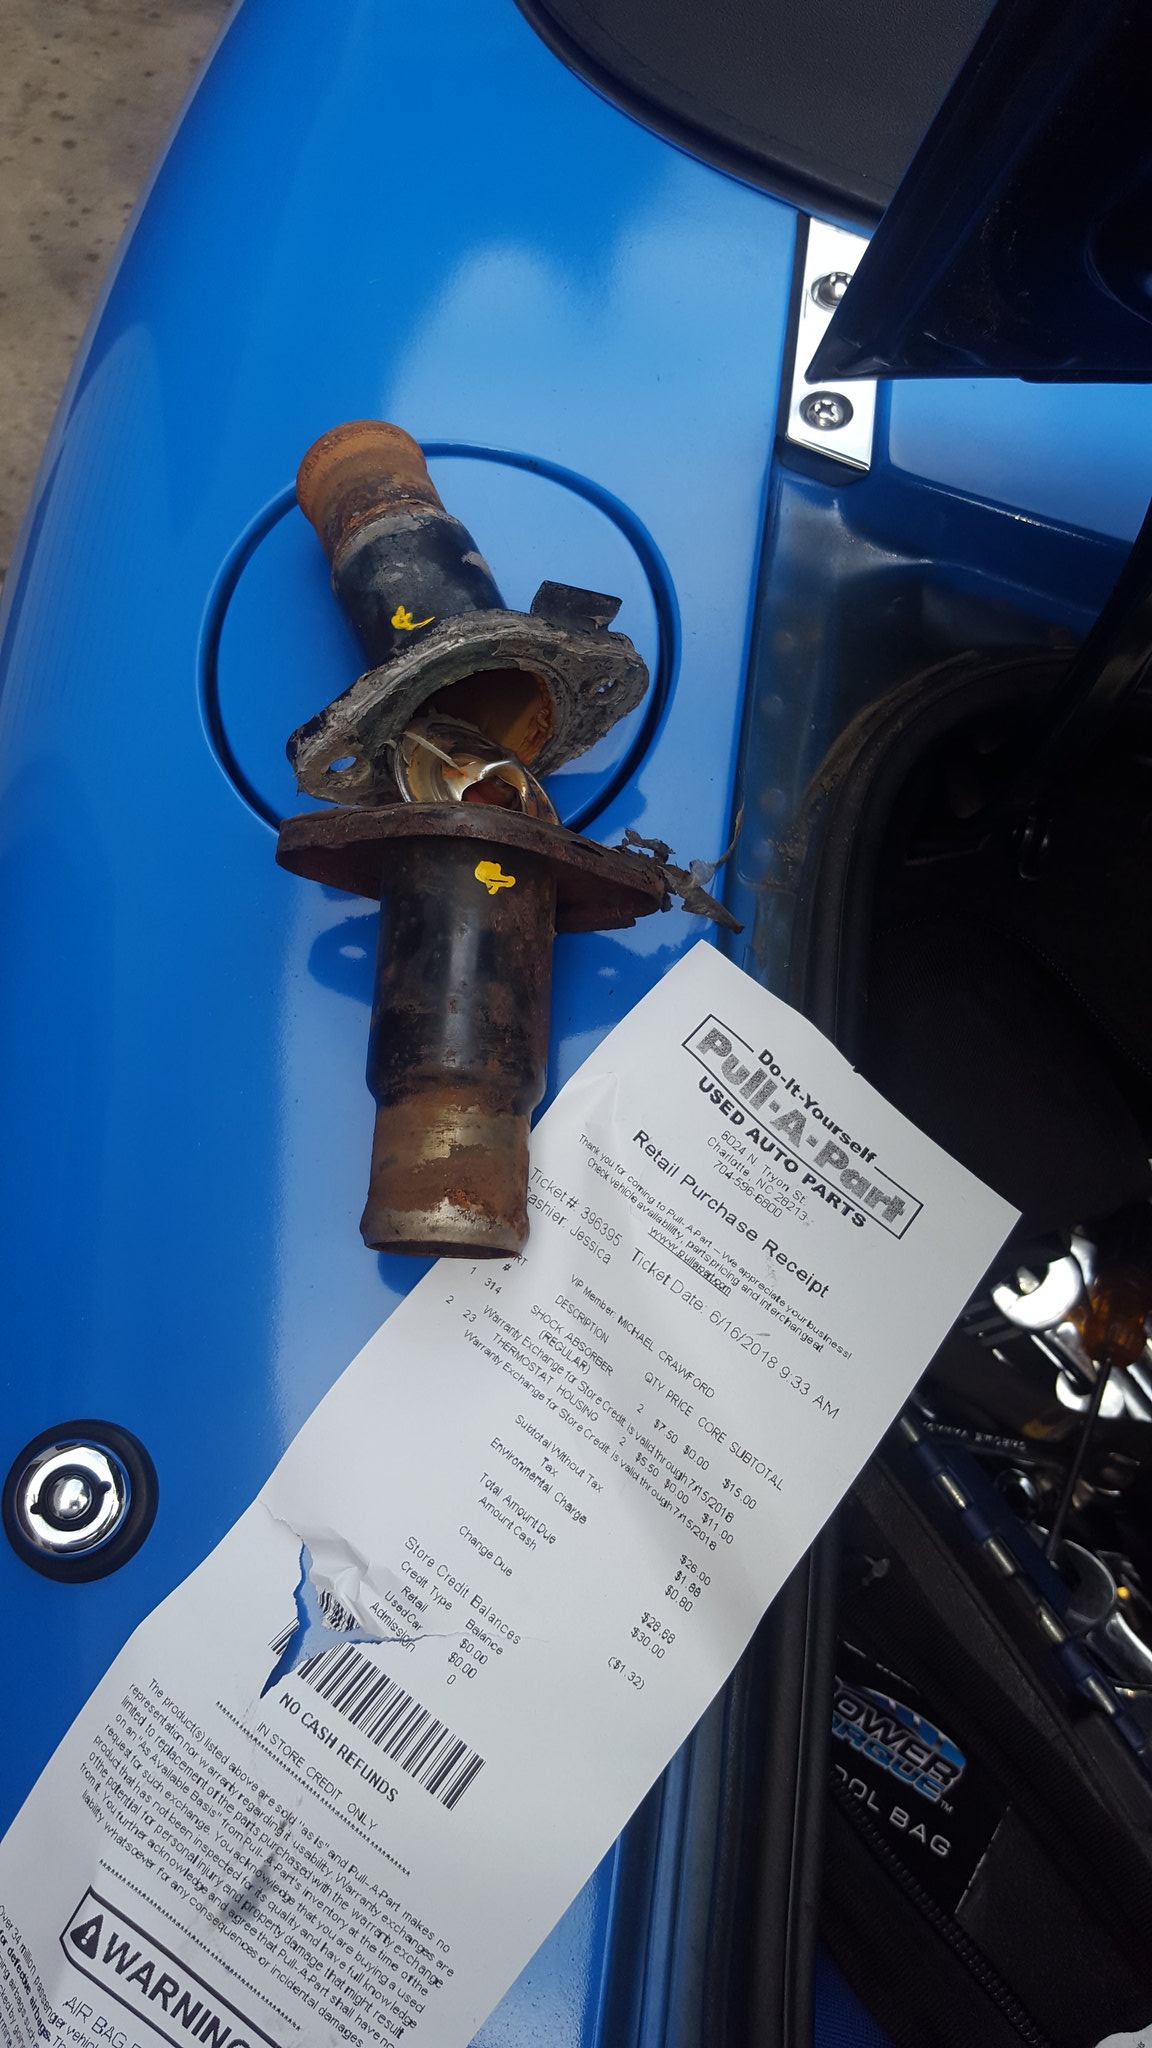
Heading to pullapart Saturday morning for some bolts. And a pair of small block mopar thermostat housings to make a remote thermostat with.

Dusterbd13 said:And a pair of small block mopar thermostat housings to make a remote thermostat with.
Aahh, more of the wiley Dusterbd knowledge is to be dropped. Carry on.

Lol. I do feel that way sometimes....
I honestly believe that if my only marginally intelligent self can figure this stuff out, that it's probably not all that interesting to other people. I appreciate the feedback.
Challenge budget so far:
previous challenge budget: 1686.08
recoup total: 820
new money:
2 thermostat housings from pull-a-part: 11.00
traded the autometer ultralight gauges to myself for some REALLY scuzzy sunpro (oil/water/volts/tach)
oil pan gasket: 12.60
new total: 1709.68
recoup: 820
kicking ass and taking names.
First, dad painted the crossmember.
He made my mediocre fabrication look GOOD.
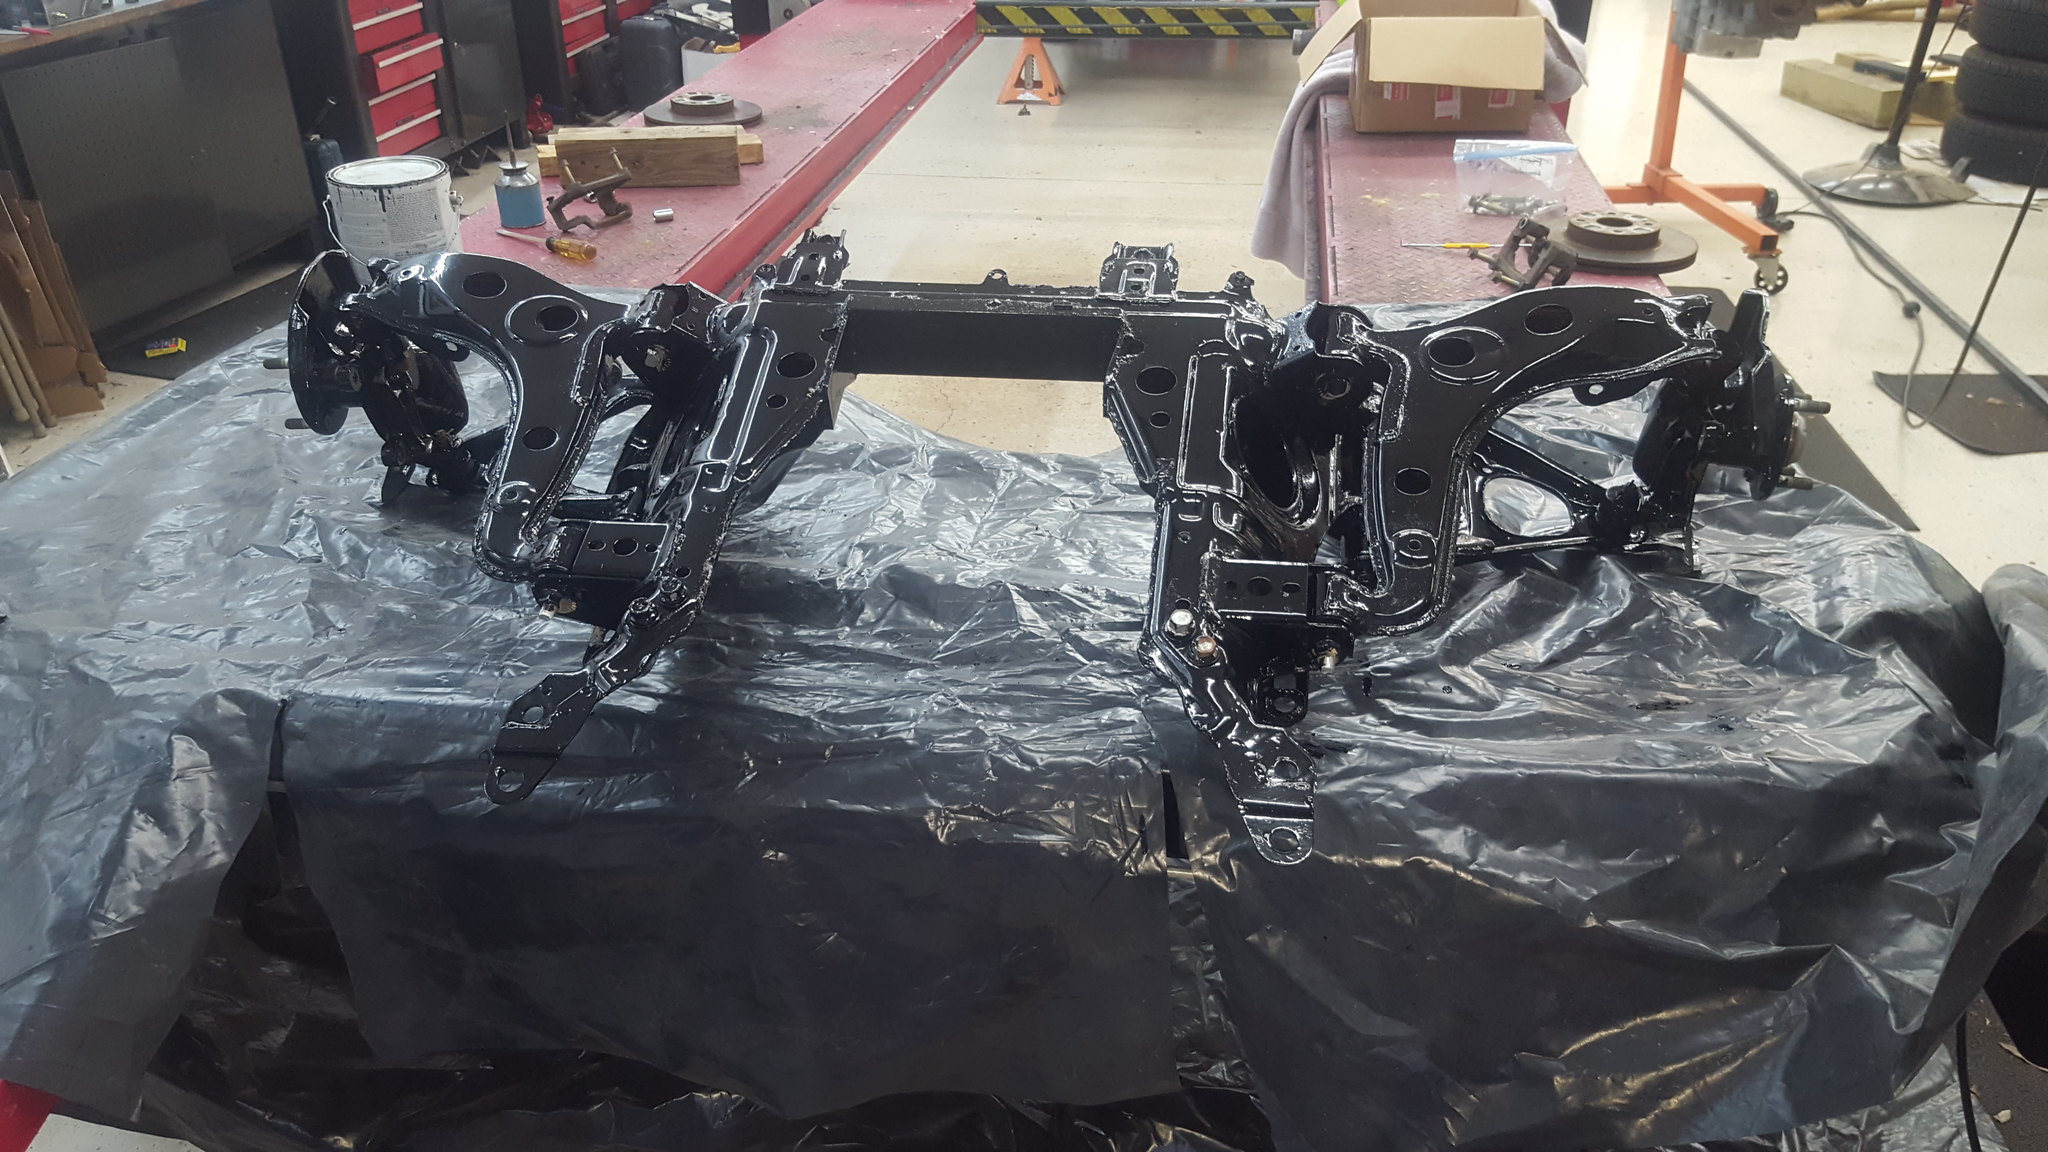 20180612_195646 by Michael Crawford, on Flickr
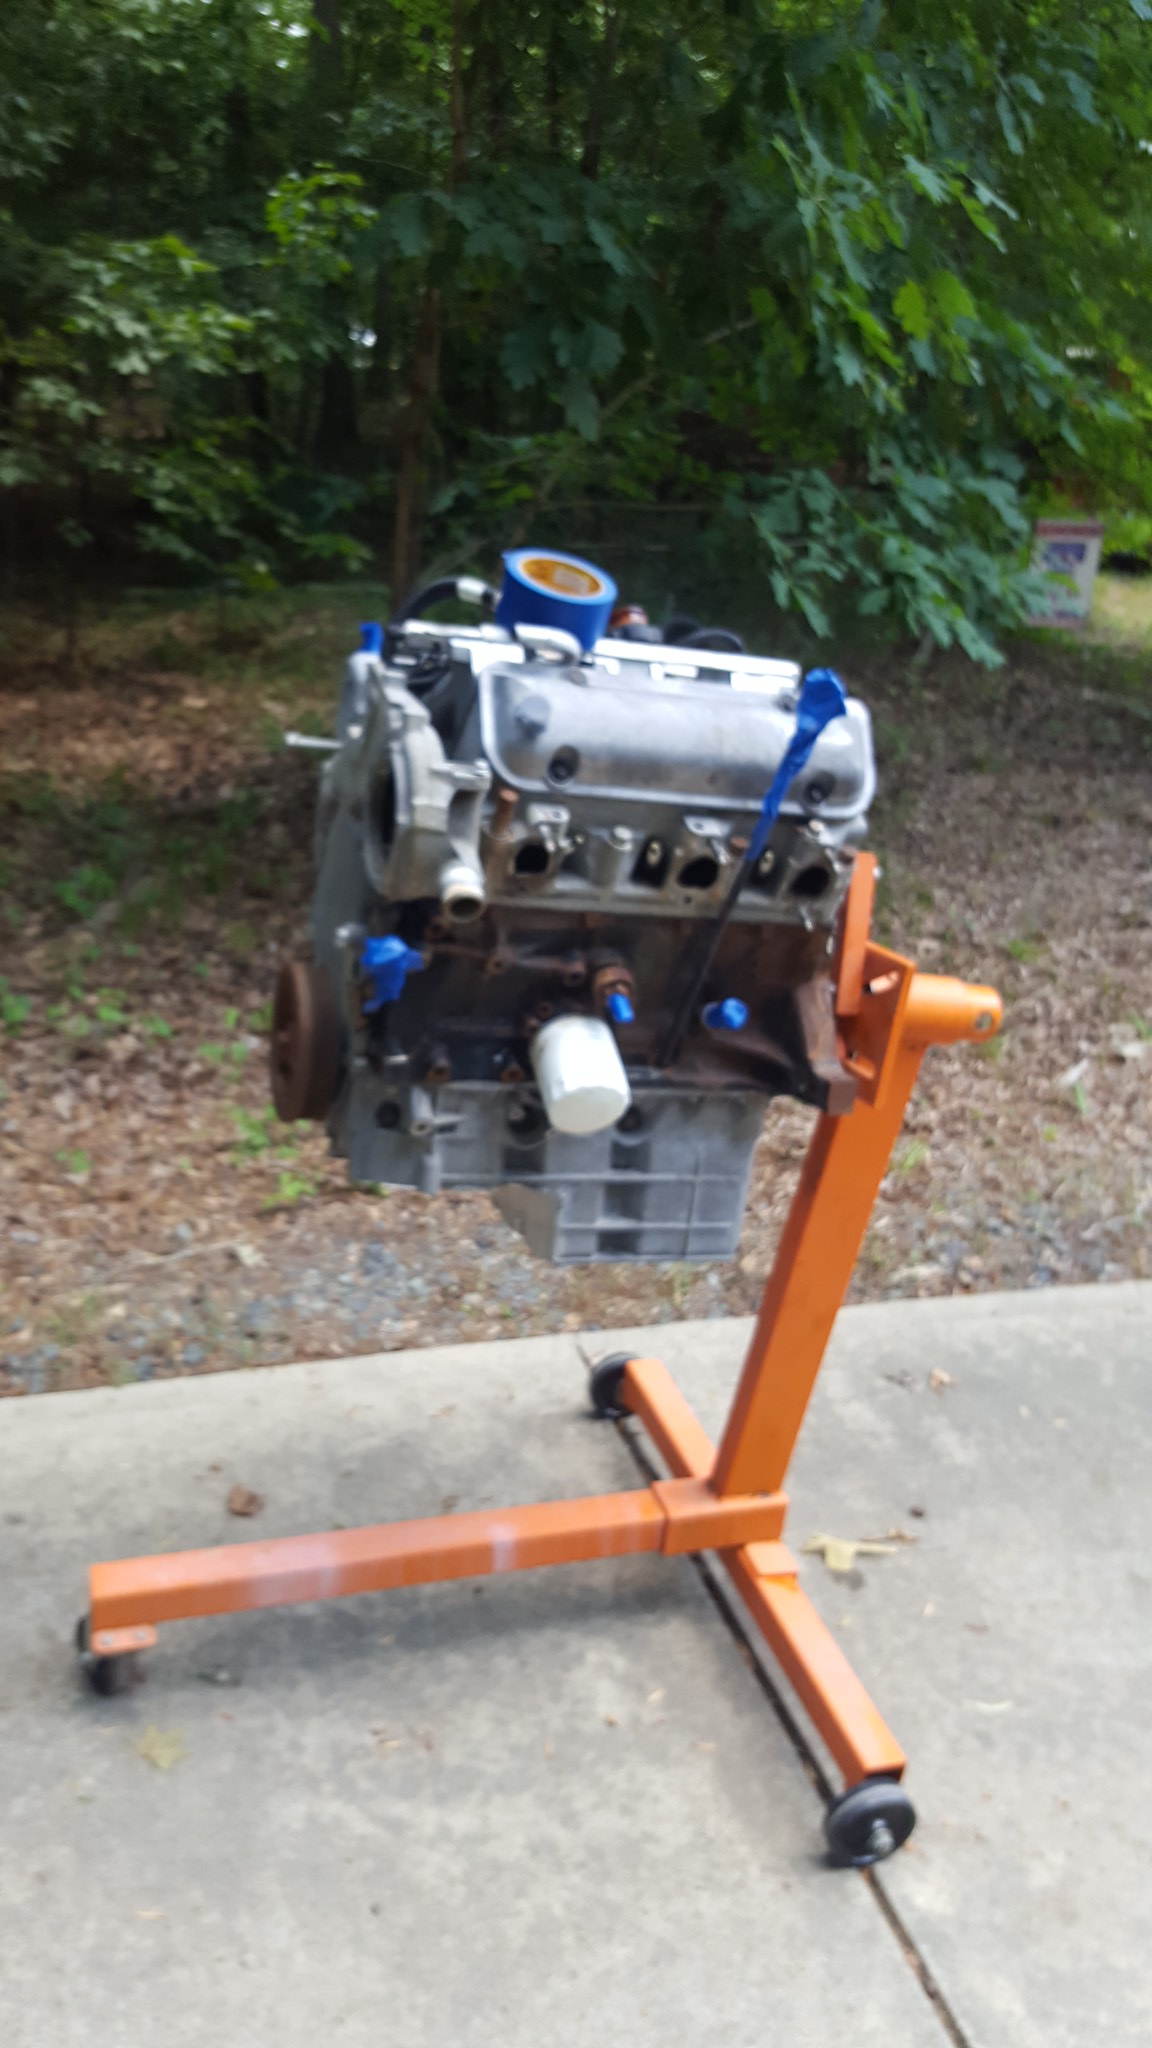
then we assembled the engine. WVTumbler had sent a care package mentioned earlier in the thread. A,azingly, it contained EVERY gasket I needed except oil pan and exhaust manifold gaskets. He even had new intake bolts in the box. Amazing guy. I bought the pan gasket, but am debating using a real gasket or high temp RTV for the exhaust. We then loaded it up in the back of dads truck, and he took it to a friend of his for broken exhaust stud removal. Neither of us have ever been any good at that, and these heads dont need to get damaged by my hamfistedness. Were supposed to be able to go pick it up this week sometime, but as kenny is a HVAC guy with a sick wife, were not holding our breath. Its over 100 degrees here today....
 20180612_195557 by Michael Crawford, on Flickr
 20180612_195611 by Michael Crawford, on Flickr
when we get the engine back, well clean and paint it, as well as finish the alternator mount.
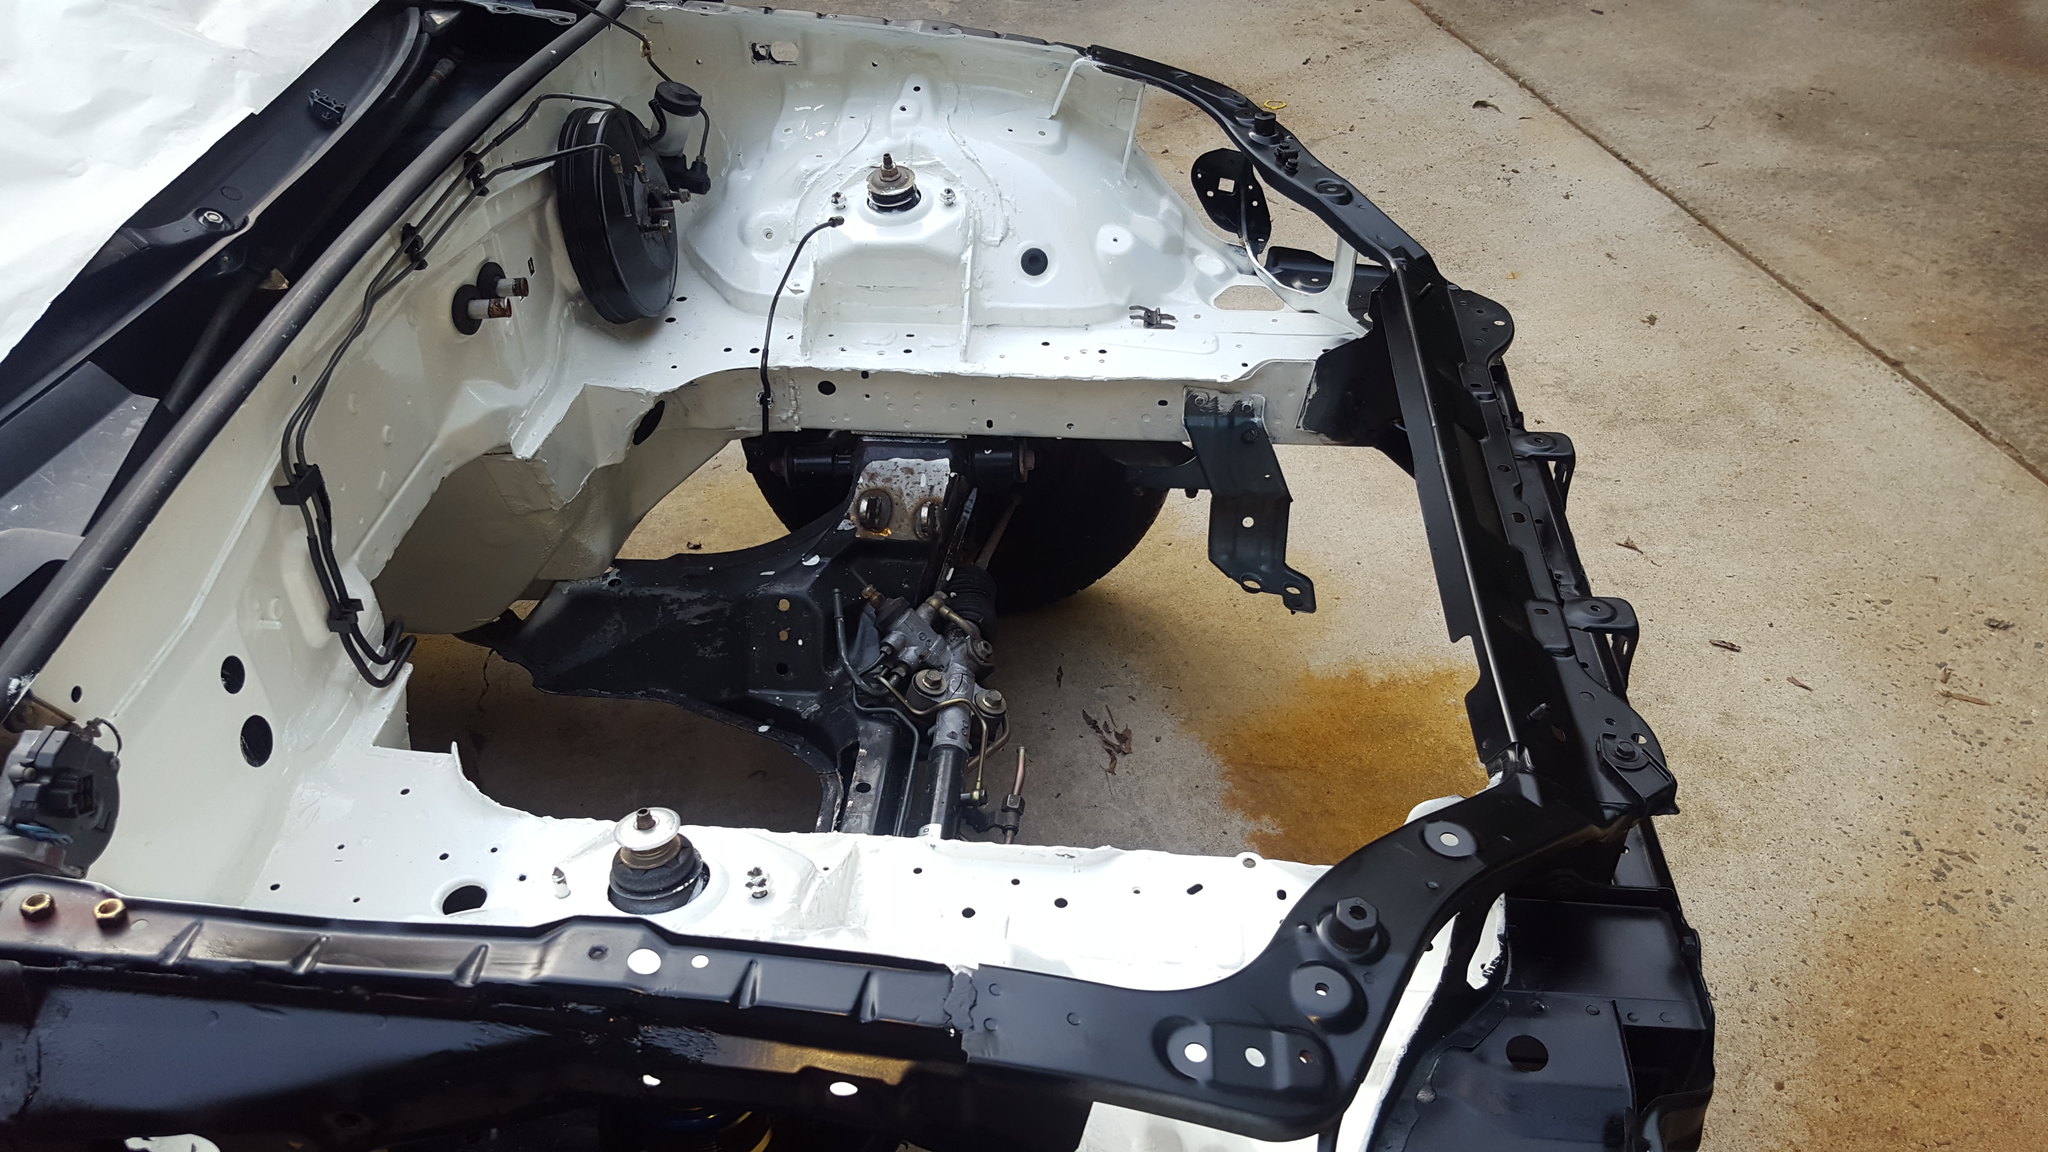
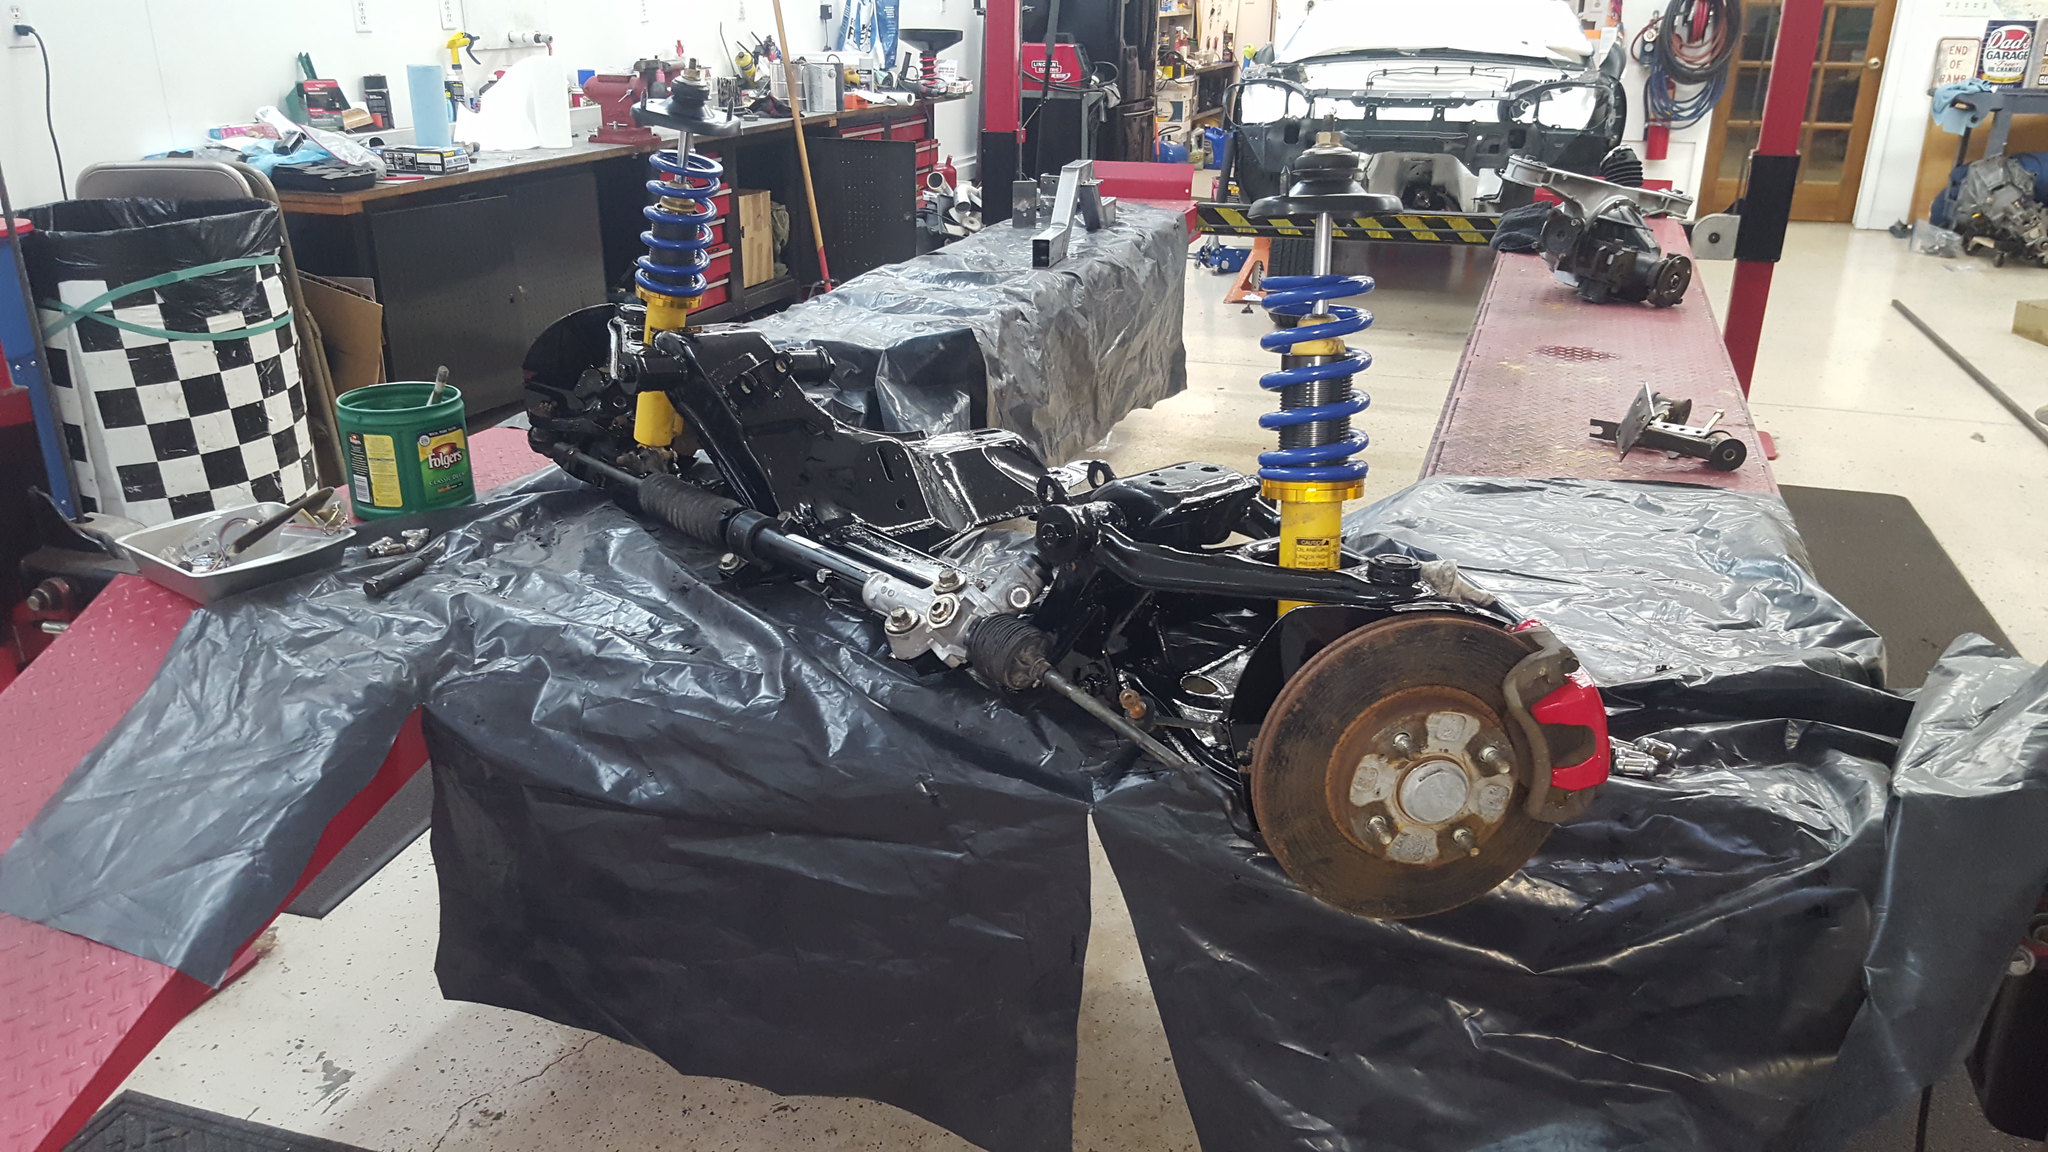
In preparation for engine reinstall, I went ahead and finished the crossmember. To do so, I first depowered my replacement rack. That wasn't a fun job, but its done.
 20180616_121228 by Michael Crawford, on Flickr
reassembled it all with the bilsteins, brakes, rack, etc. and rolled it out of the way under the car.
 20180616_143746 by Michael Crawford, on Flickr
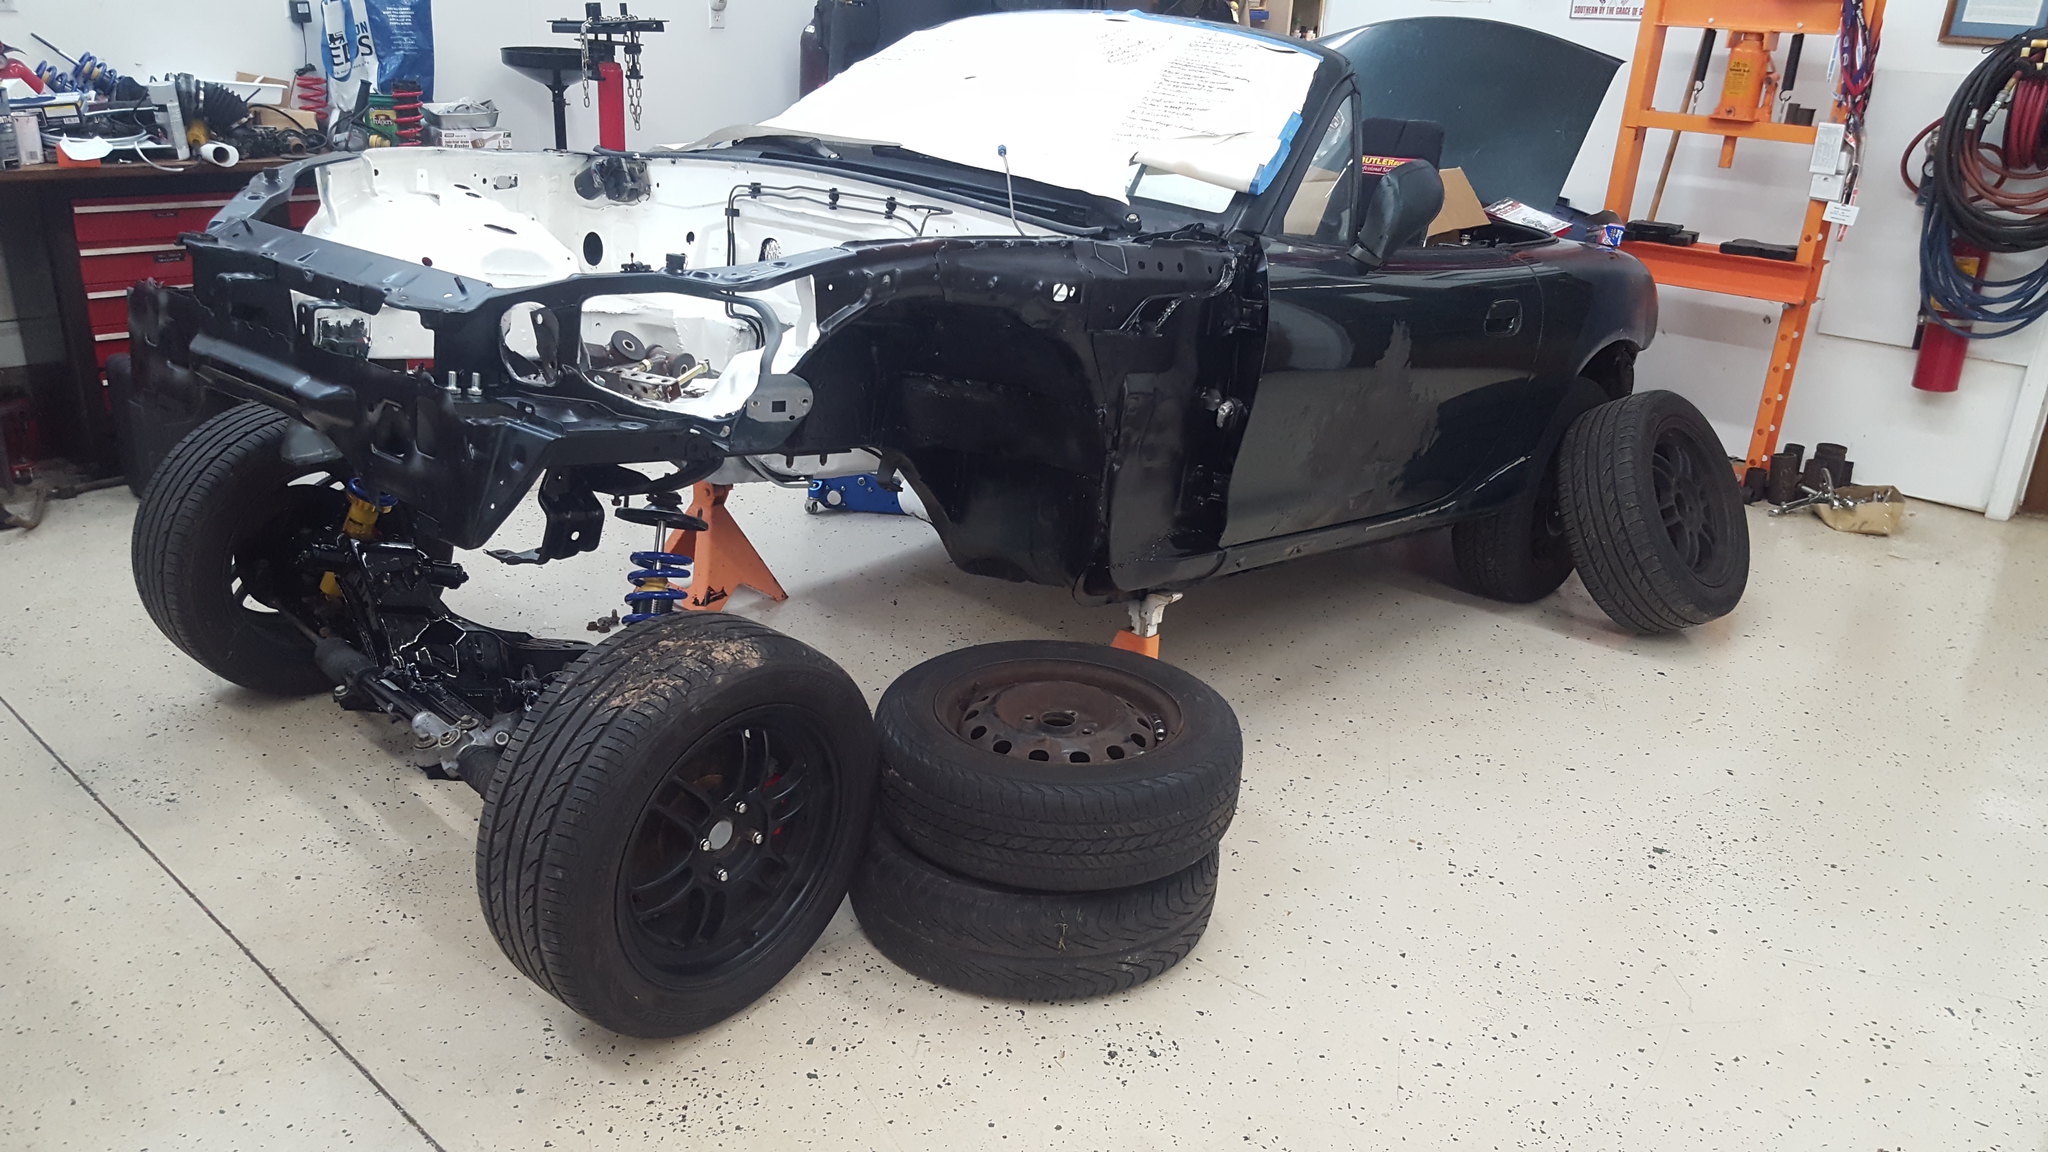 20180616_151039 by Michael Crawford, on Flickr
also, I need to note my bumpstops. Wound up with a buch of NB front bump stops. Cut them all down to 1.5 inches and put them in.
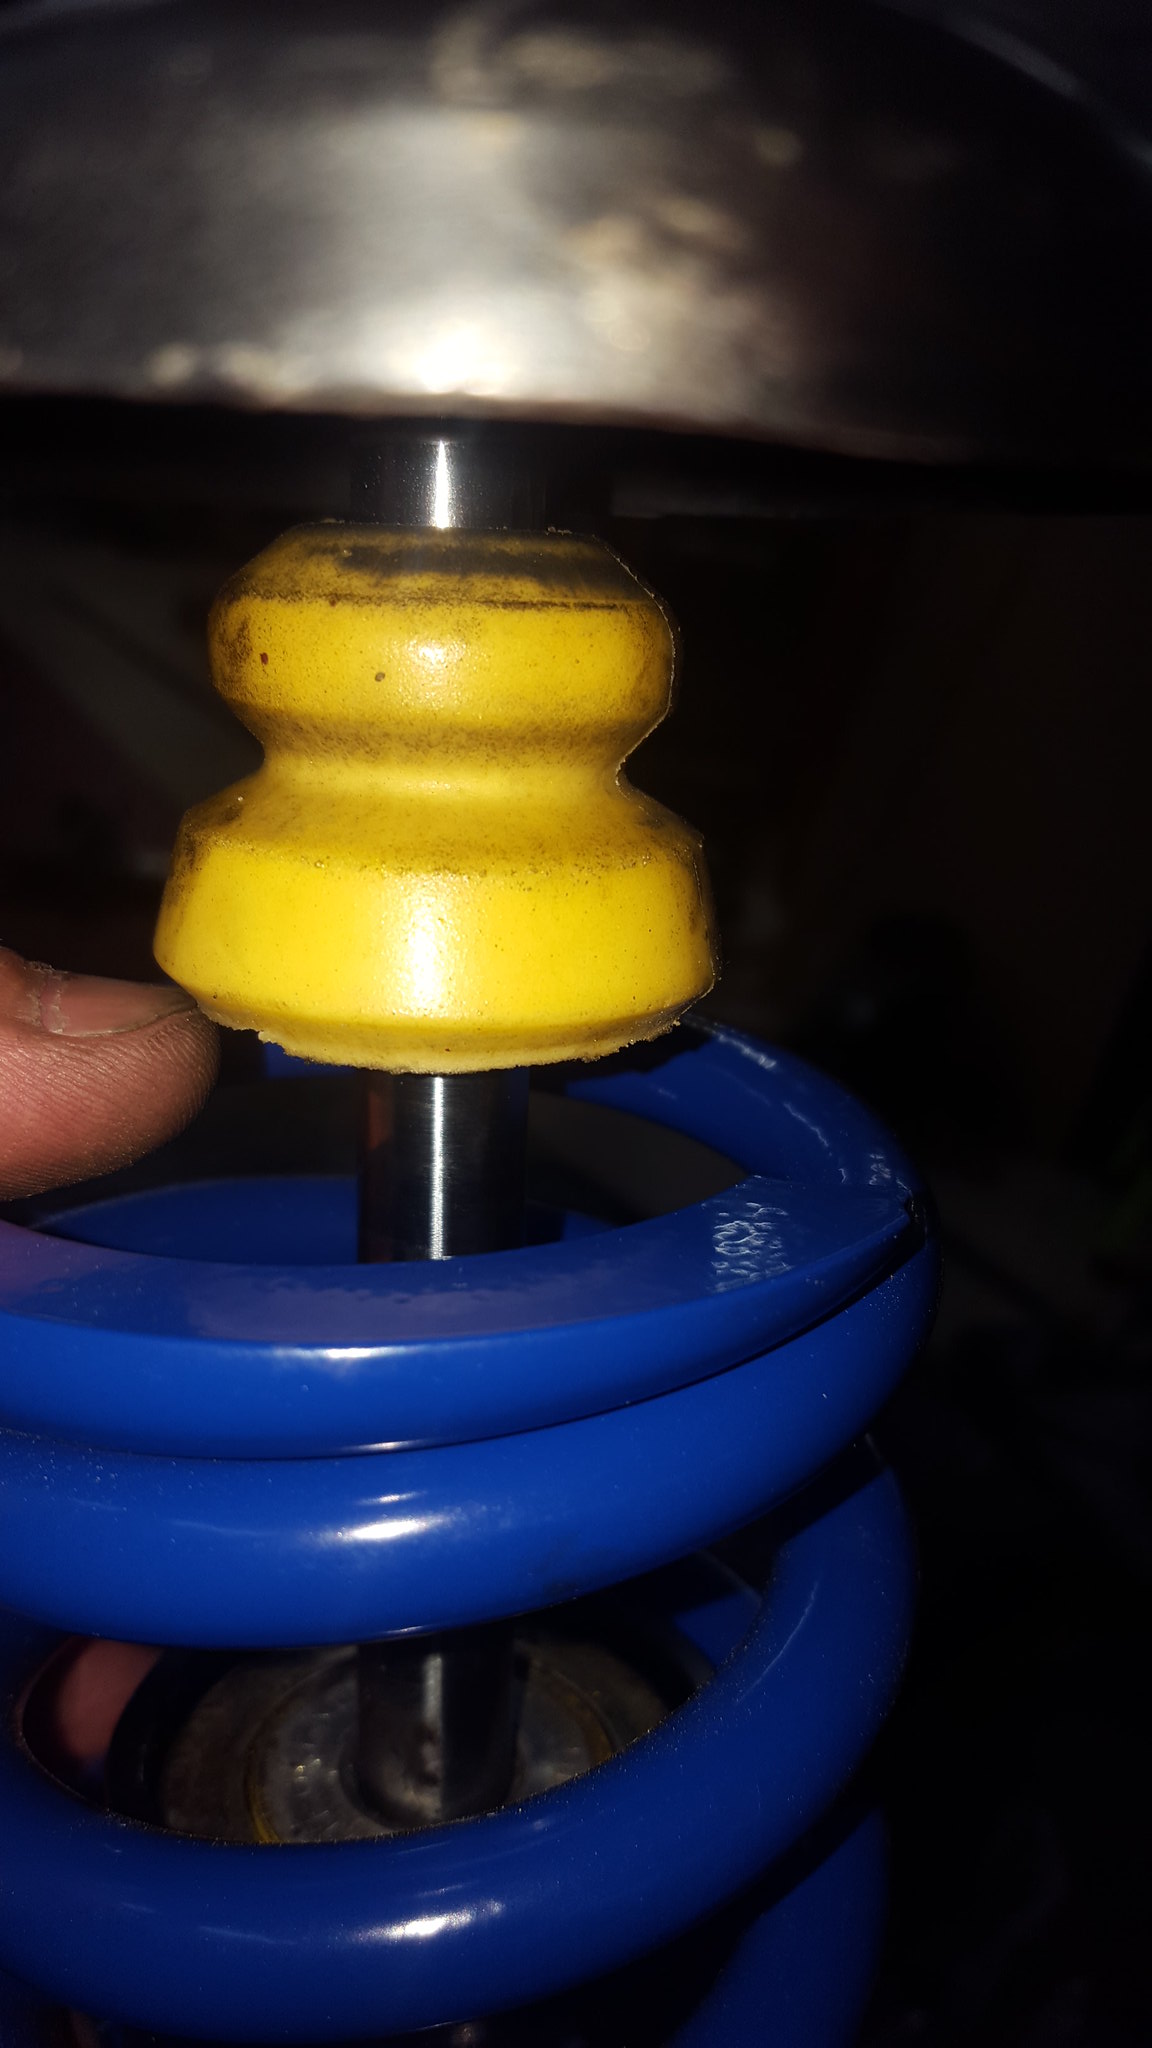 20180616_143832 by Michael Crawford, on Flickr
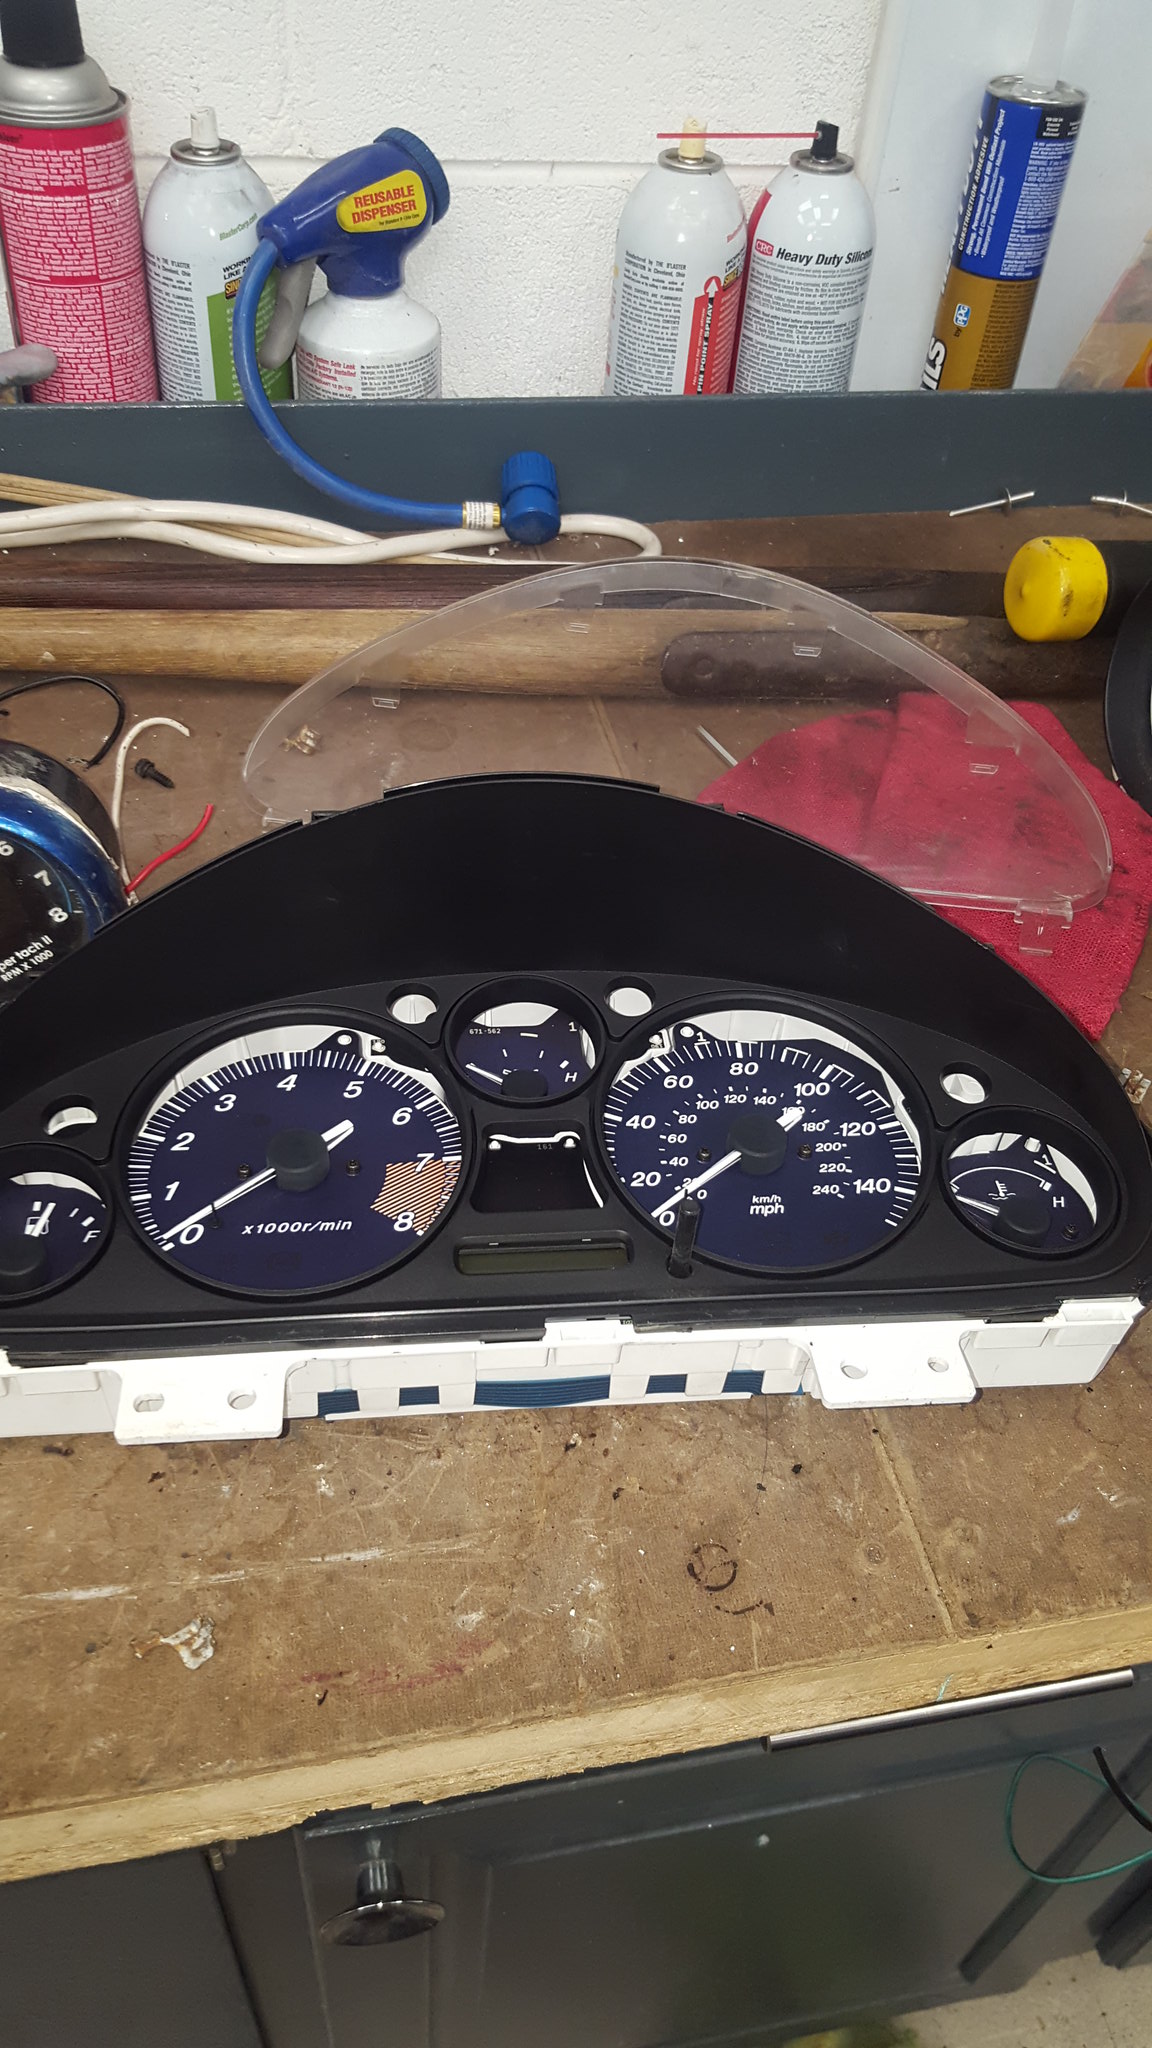
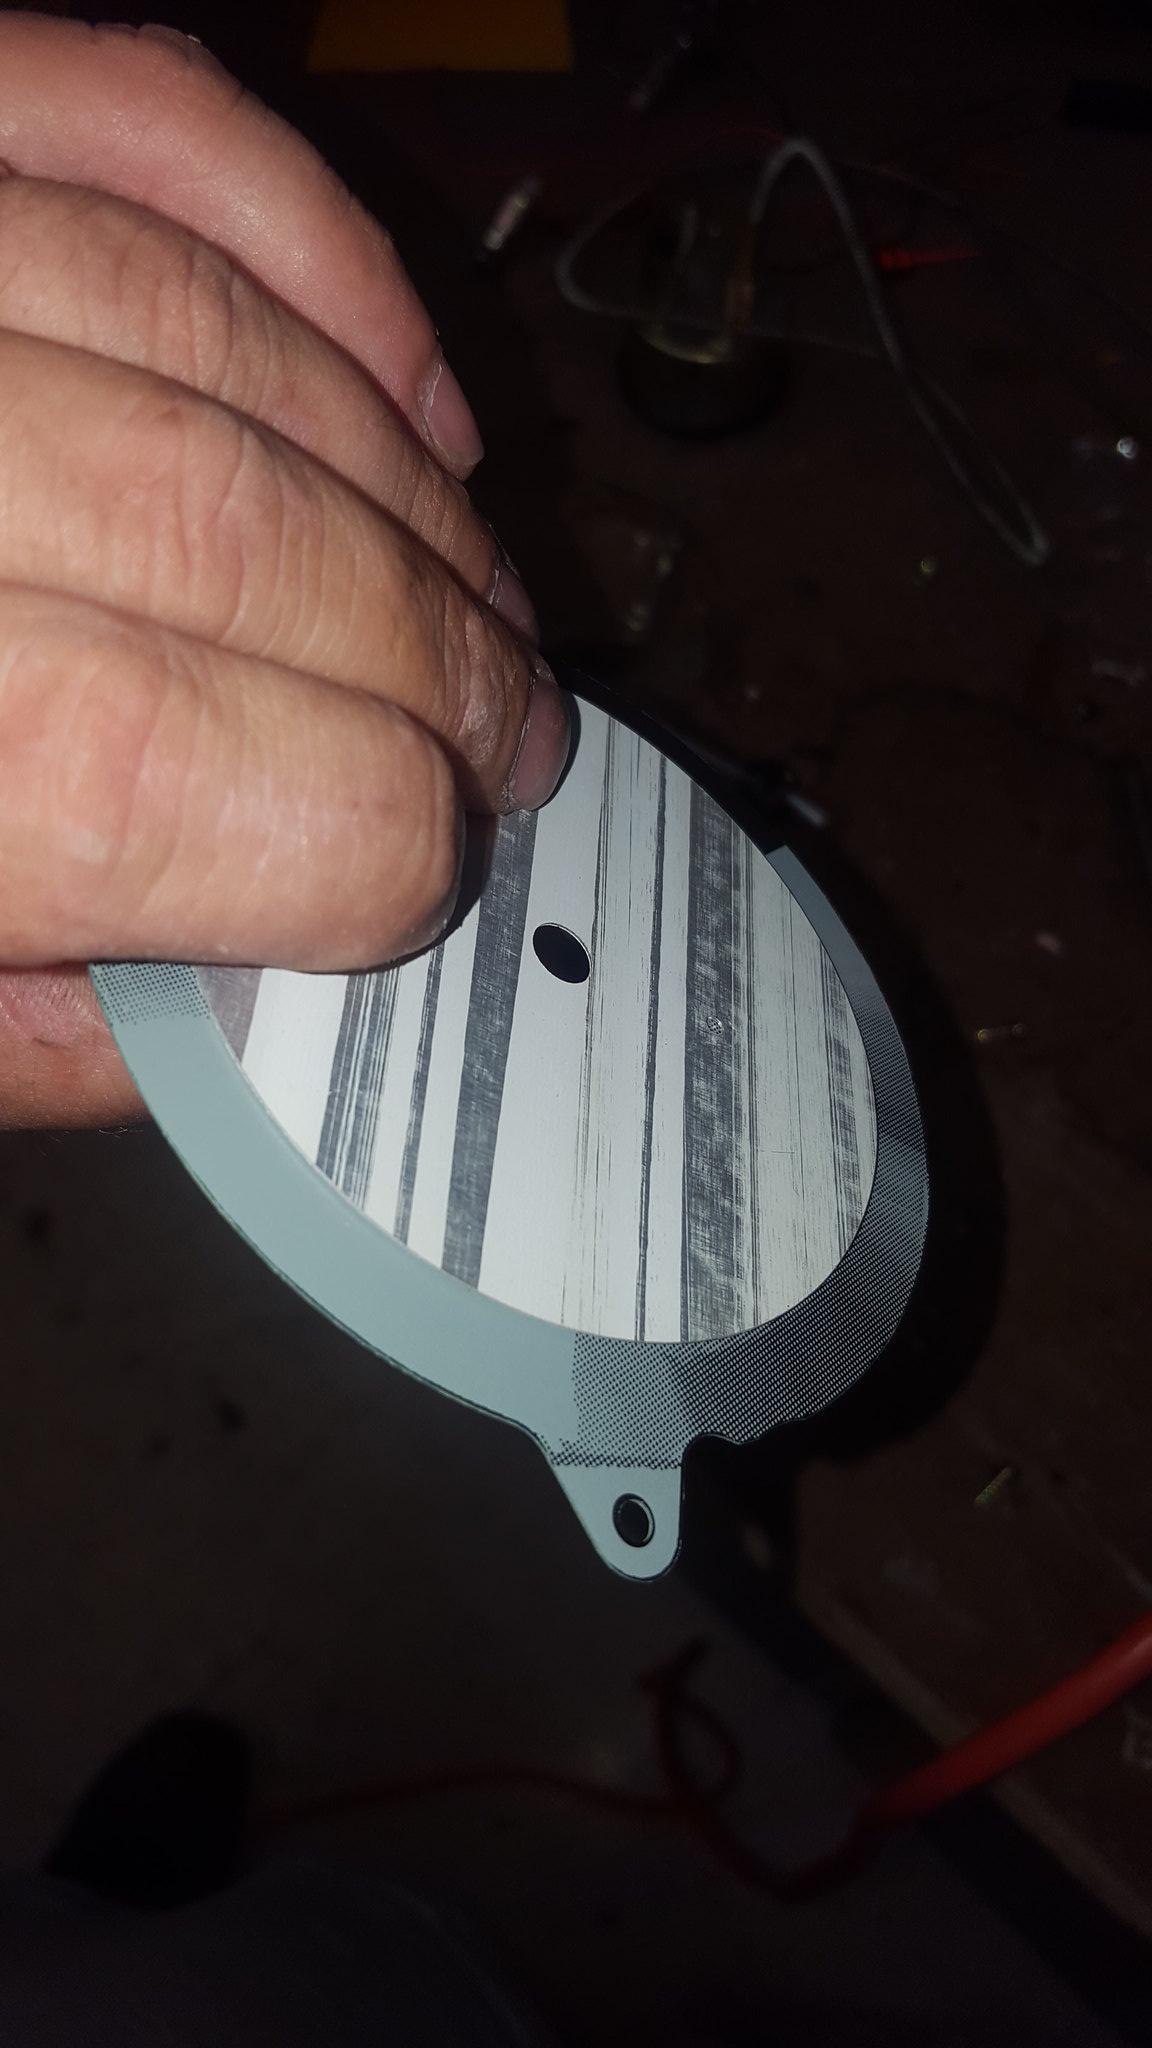
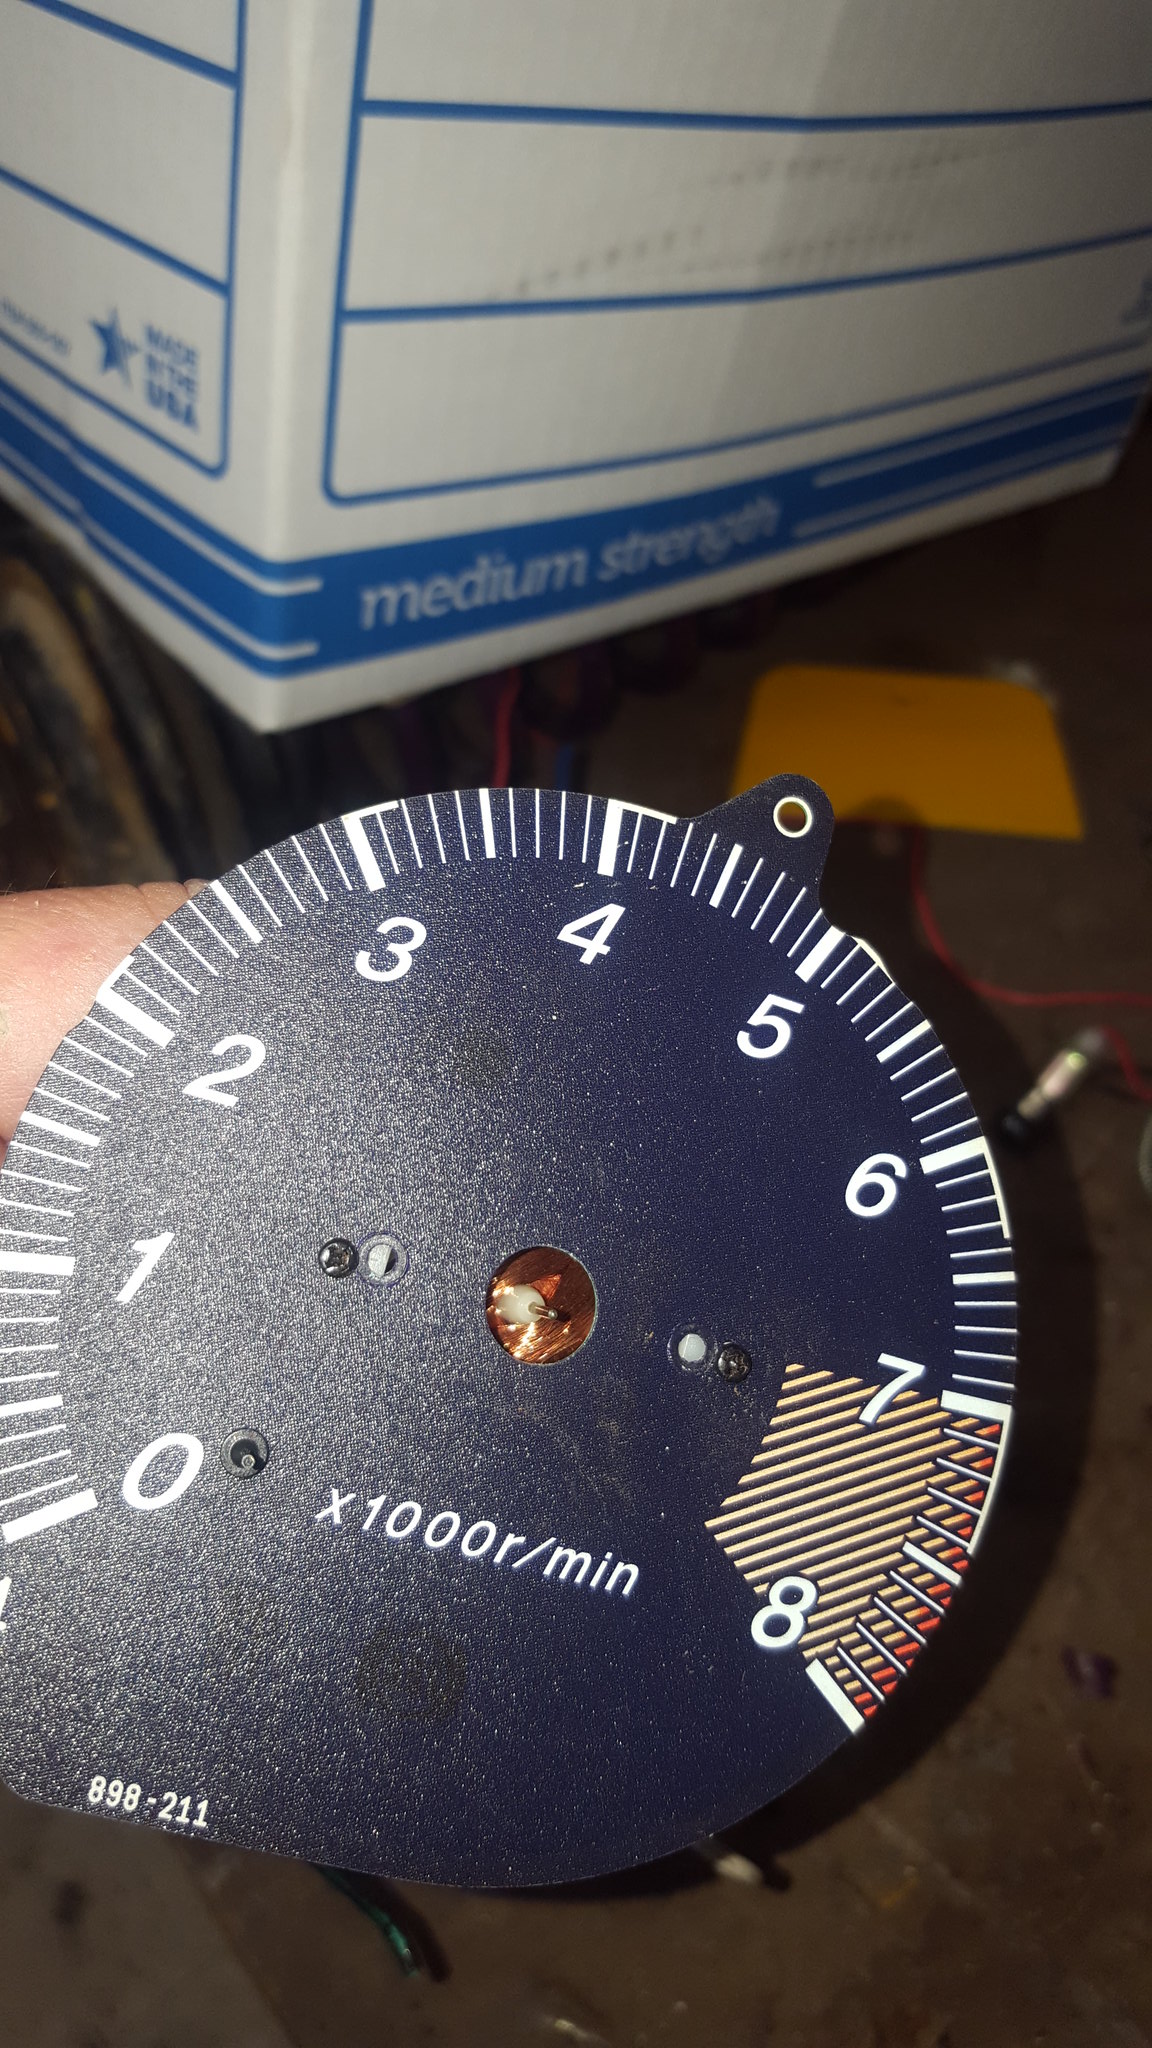
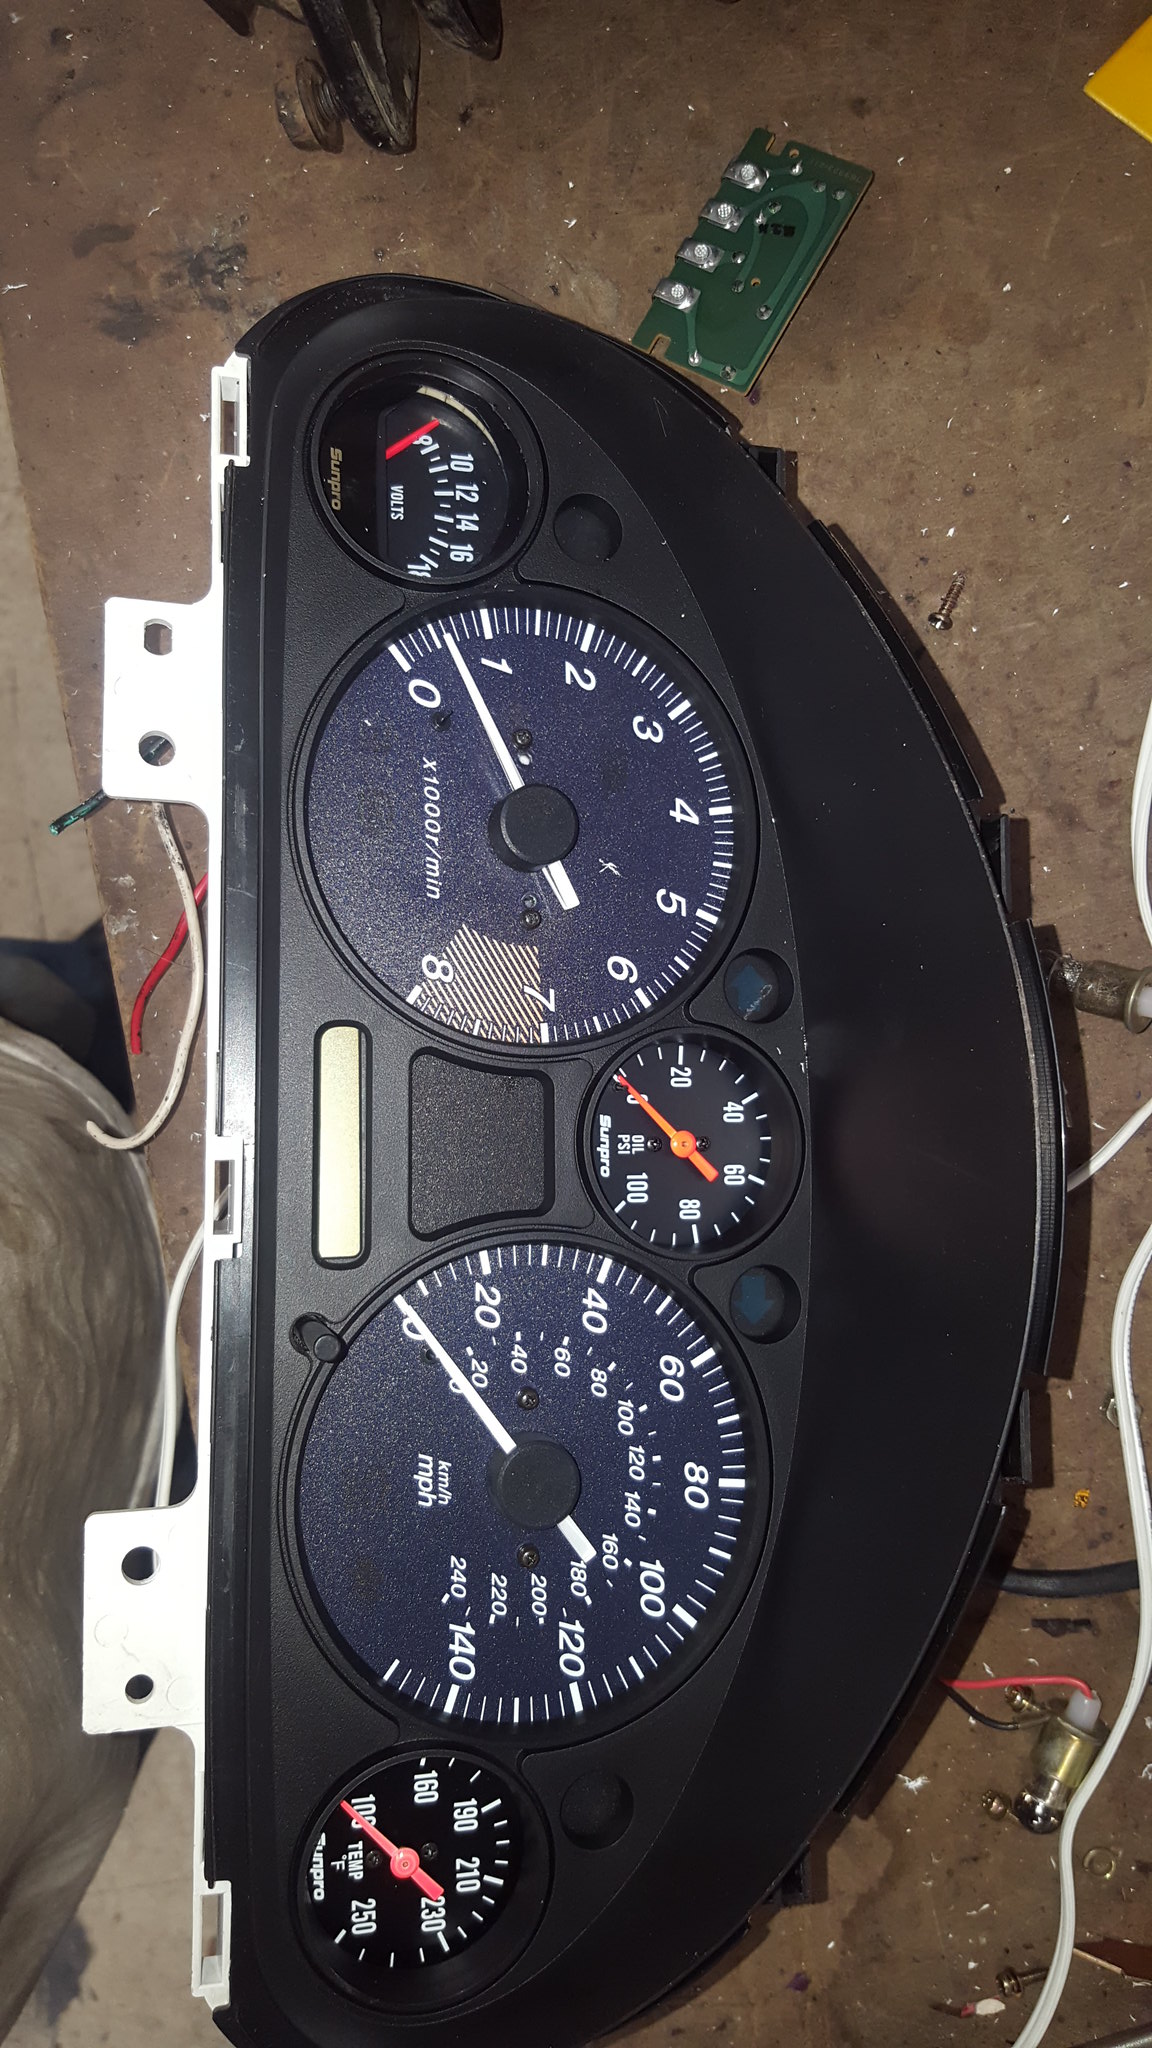
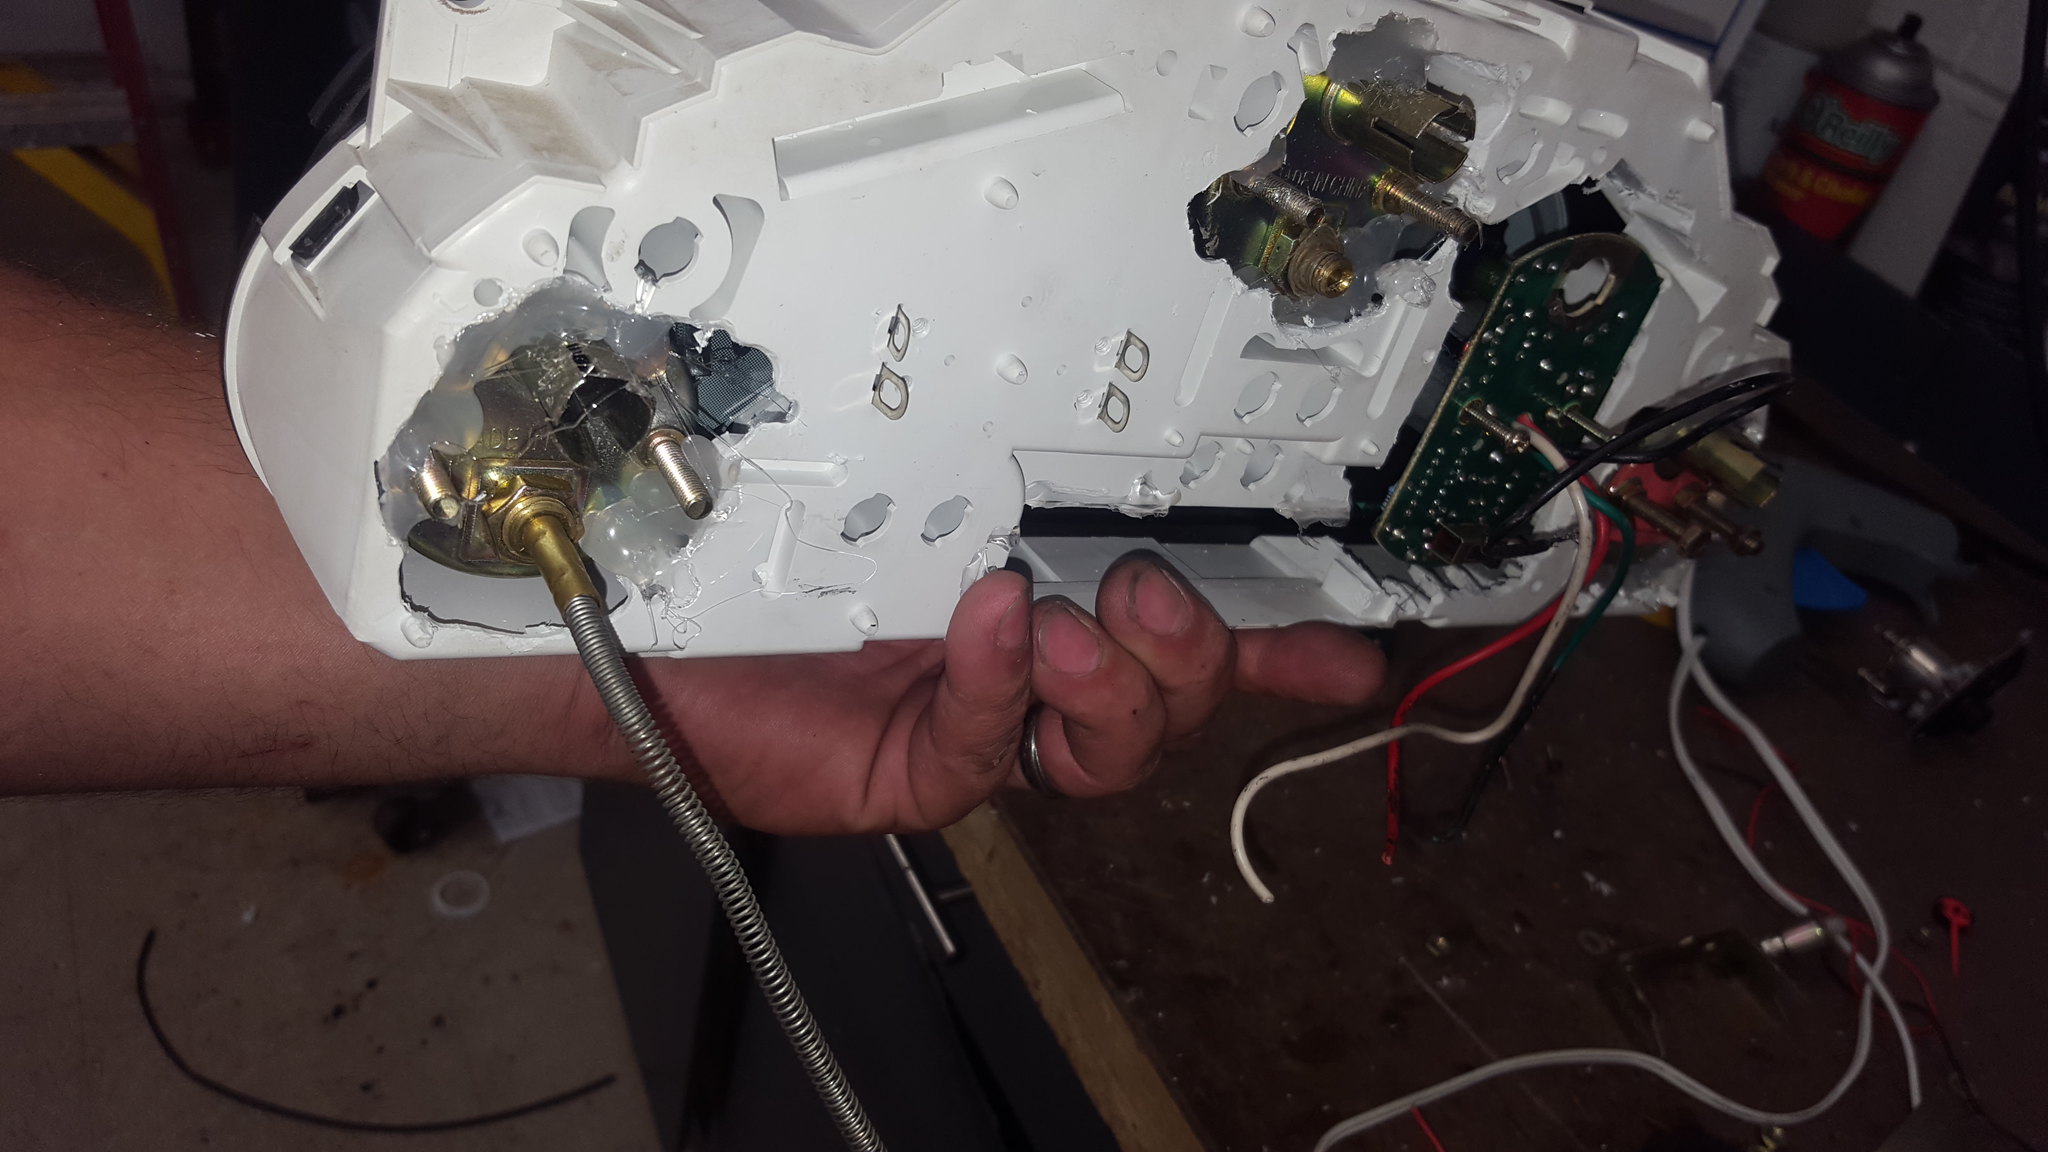
ive also begun the task of wiring and gauges. Nothing to report on wiring yet, but I built the cluster. To do so, I first spent far too much time researching how to make the stock tach work with a v6. Never could figure it out. This opened up the cluster to slight modification. By slight modification I mean I stripped it completely, cut the berkeley out of it, gutted some other gauges and cut them, and put it all back together.
The tach was primary concern. I traded myself the ultralights I bought for some really rough sunpro gauges. Tach, oil, water, and volts. Somebody had painted the bezels blue with nailpolish, glass cracked, the tach had been apart multiple times and the housing was falling apart, etc. pretty much garbage. I had actually offered them for free, and had no takers. So I don't feel bad about trading myself. If I had traded someone else, I would have called myself a sucker.
 20180613_113240 by Michael Crawford, on Flickr
 20180613_113244 by Michael Crawford, on Flickr
 20180613_143223 by Michael Crawford, on Flickr
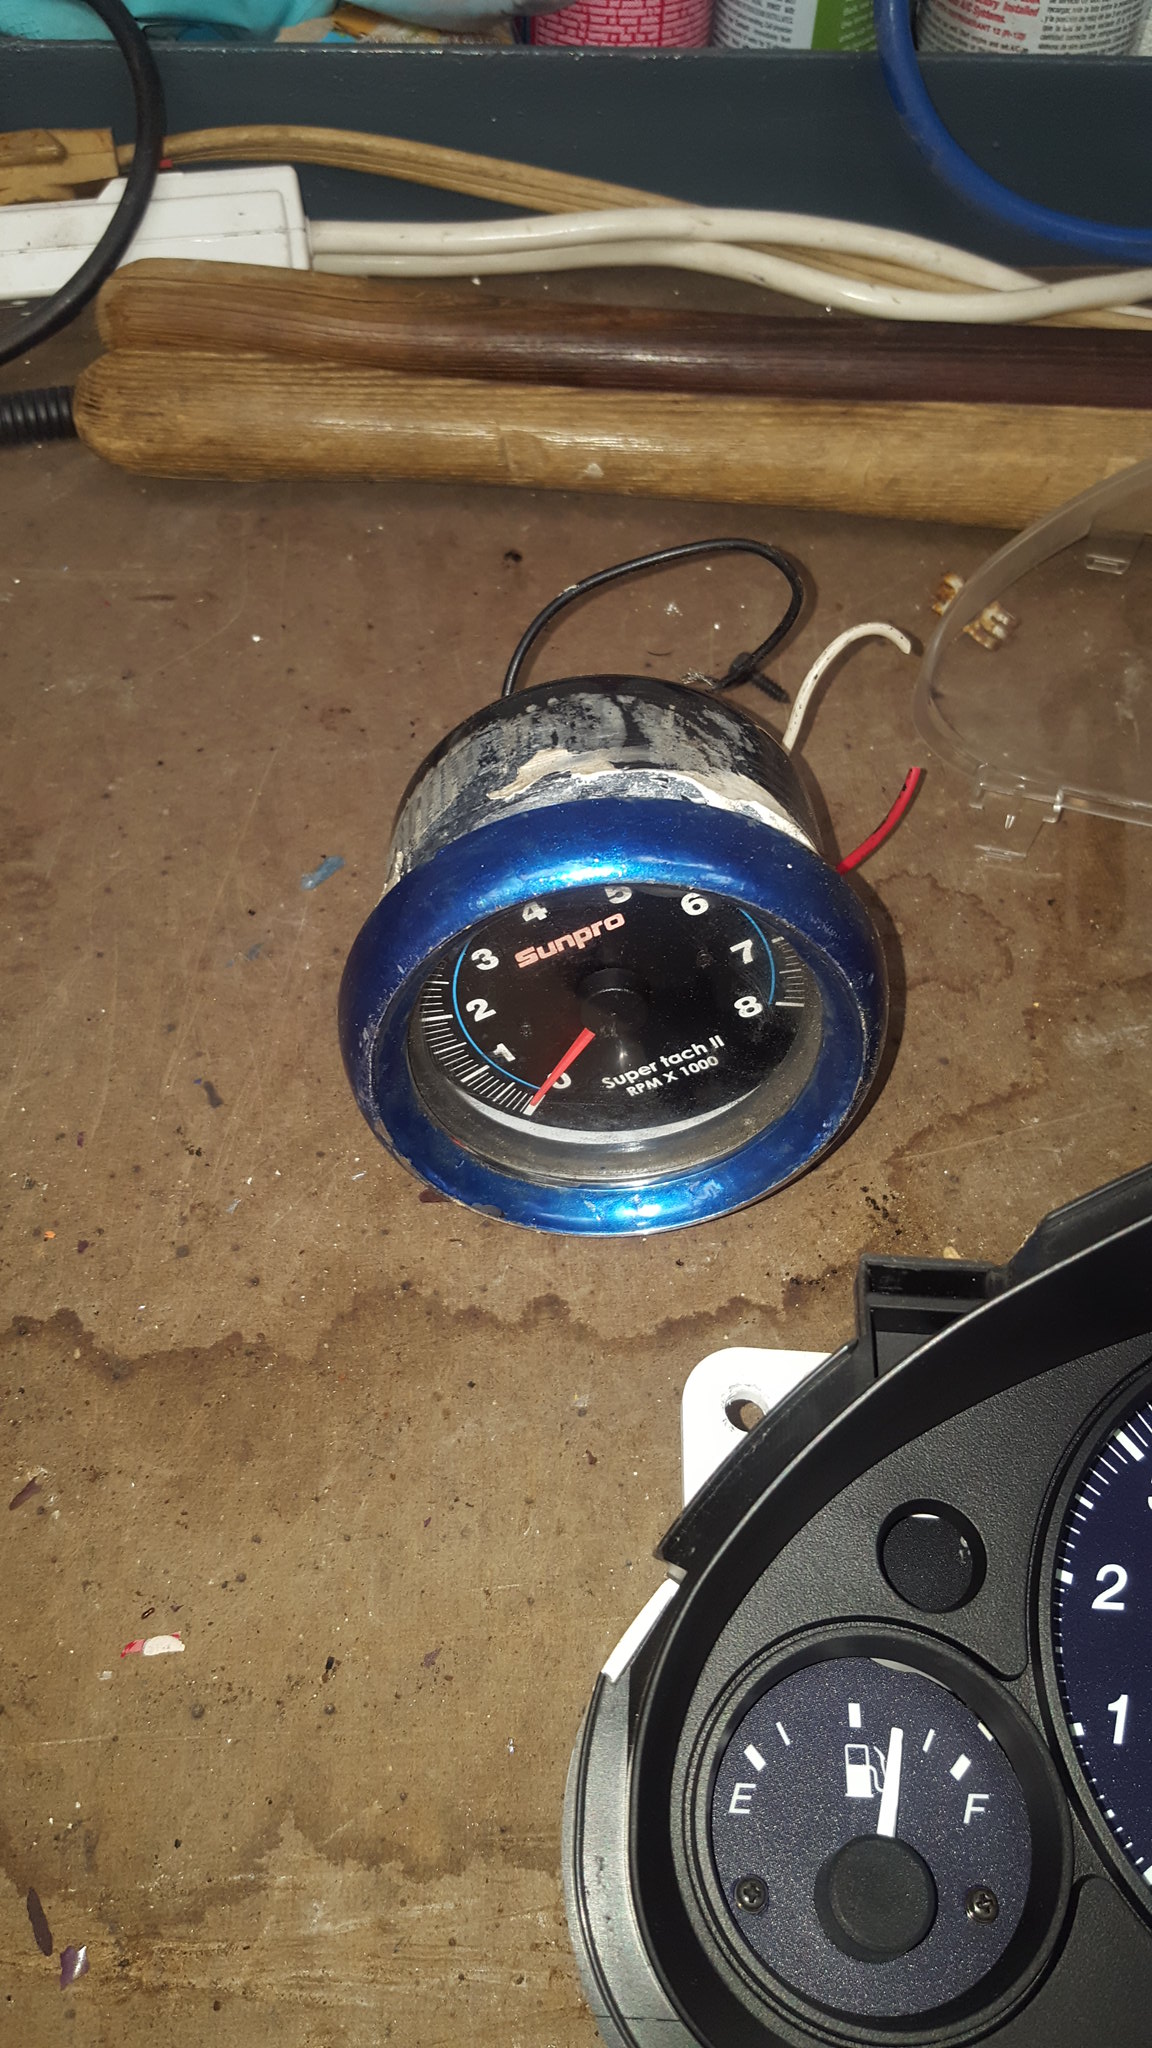
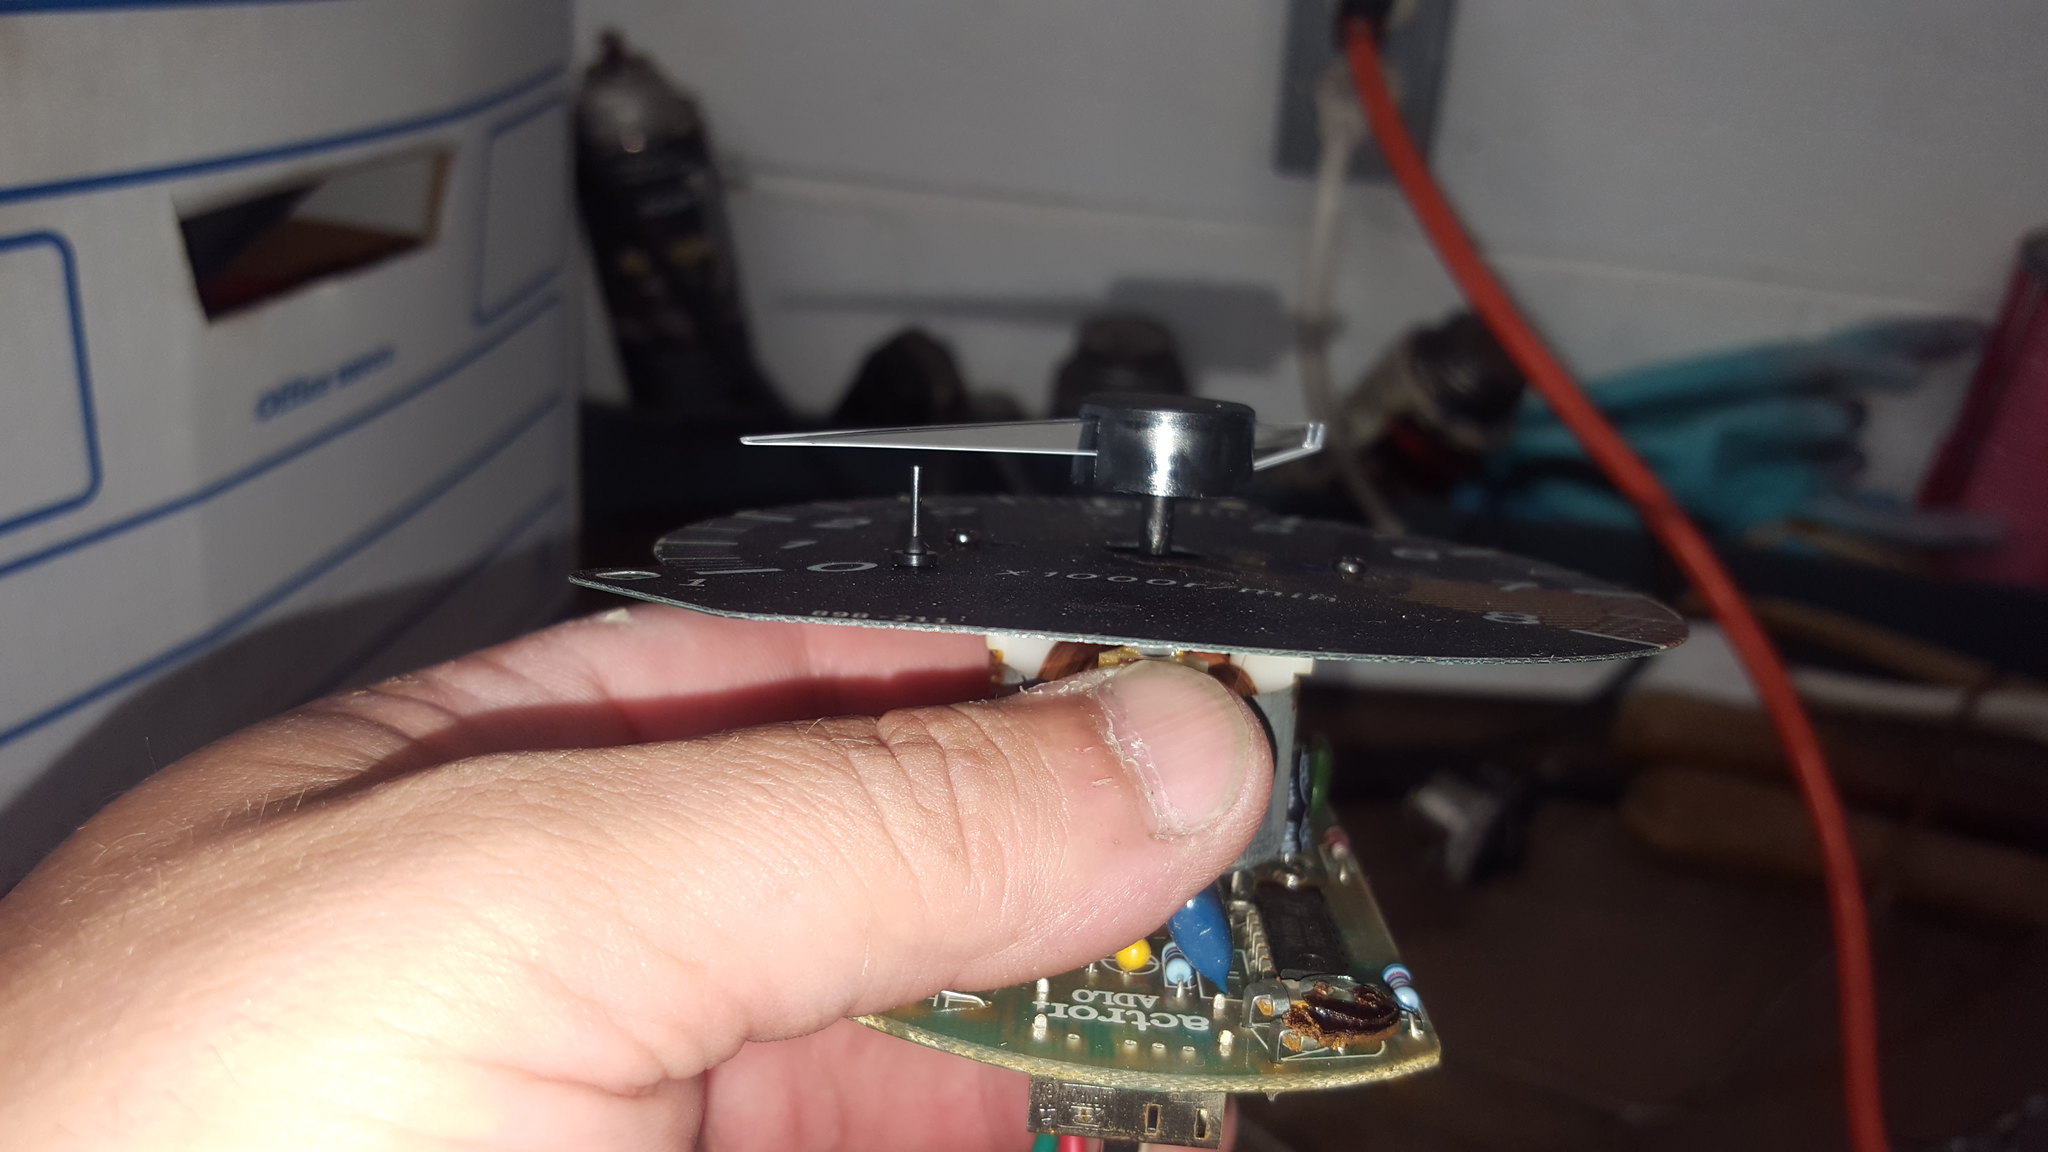
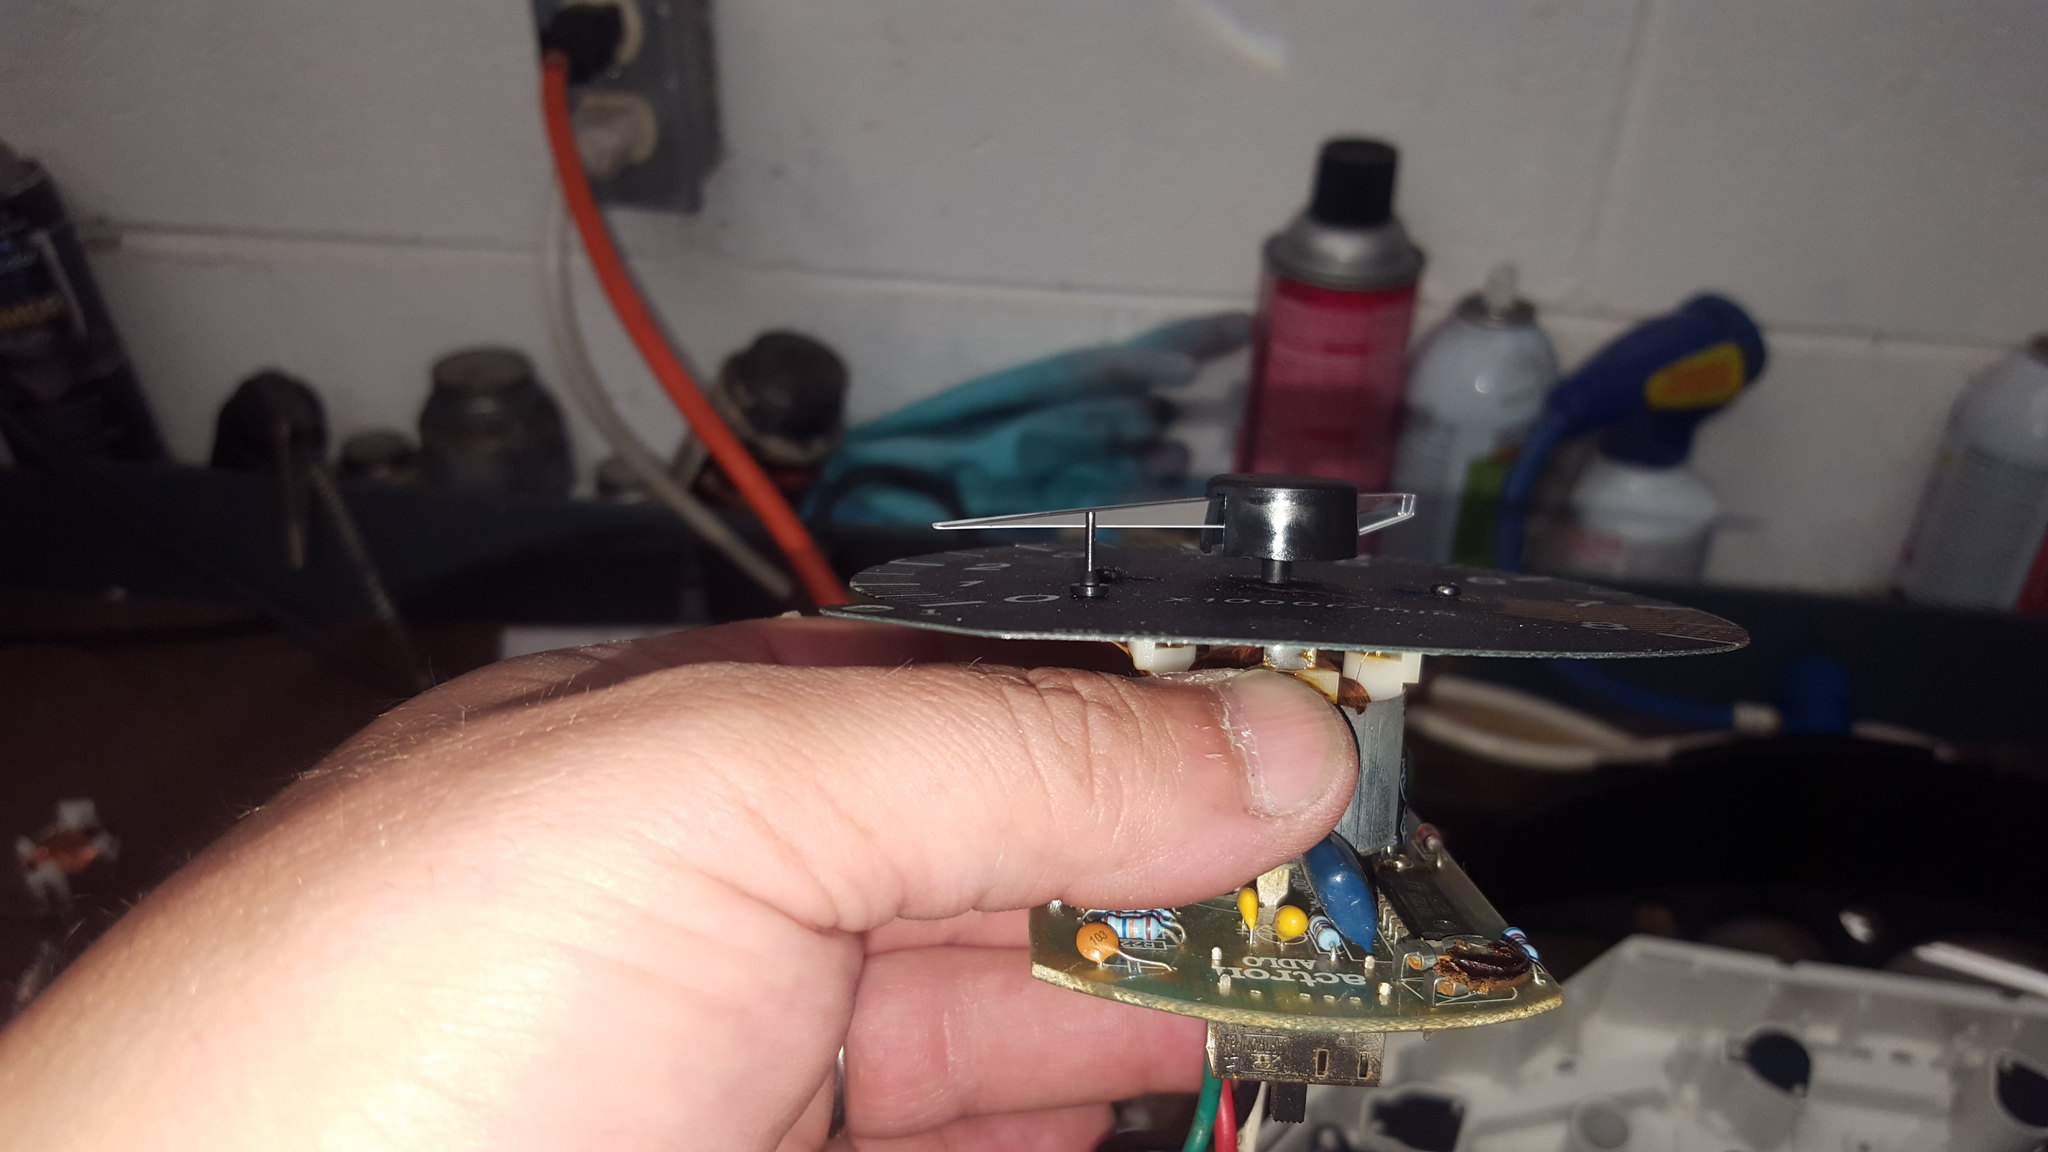
you can see in the second picture I ripped the guts out of the tach. I then proceeded to re-gut the factory tach with the sunpro parts. Do so so, I used the factory face, redrilled for the sunpro pattern. Used the sunpro face to mark the pattern. I wound up needing the clear plastic backer as well, but its not in pictures. The face itself proved to be too flimsy to stand alone.
 20180615_183322 by Michael Crawford, on Flickr
 20180615_183830 by Michael Crawford, on Flickr
I then put the miata needle on. Proved to be too tall....
 20180615_183843 by Michael Crawford, on Flickr
cut down, and redrilled the shaft hole with my pin drill.
 20180615_183955 by Michael Crawford, on Flickr
all the tools used minus the phillips screwdriver for the tach conversion.
 20180615_184010 by Michael Crawford, on Flickr
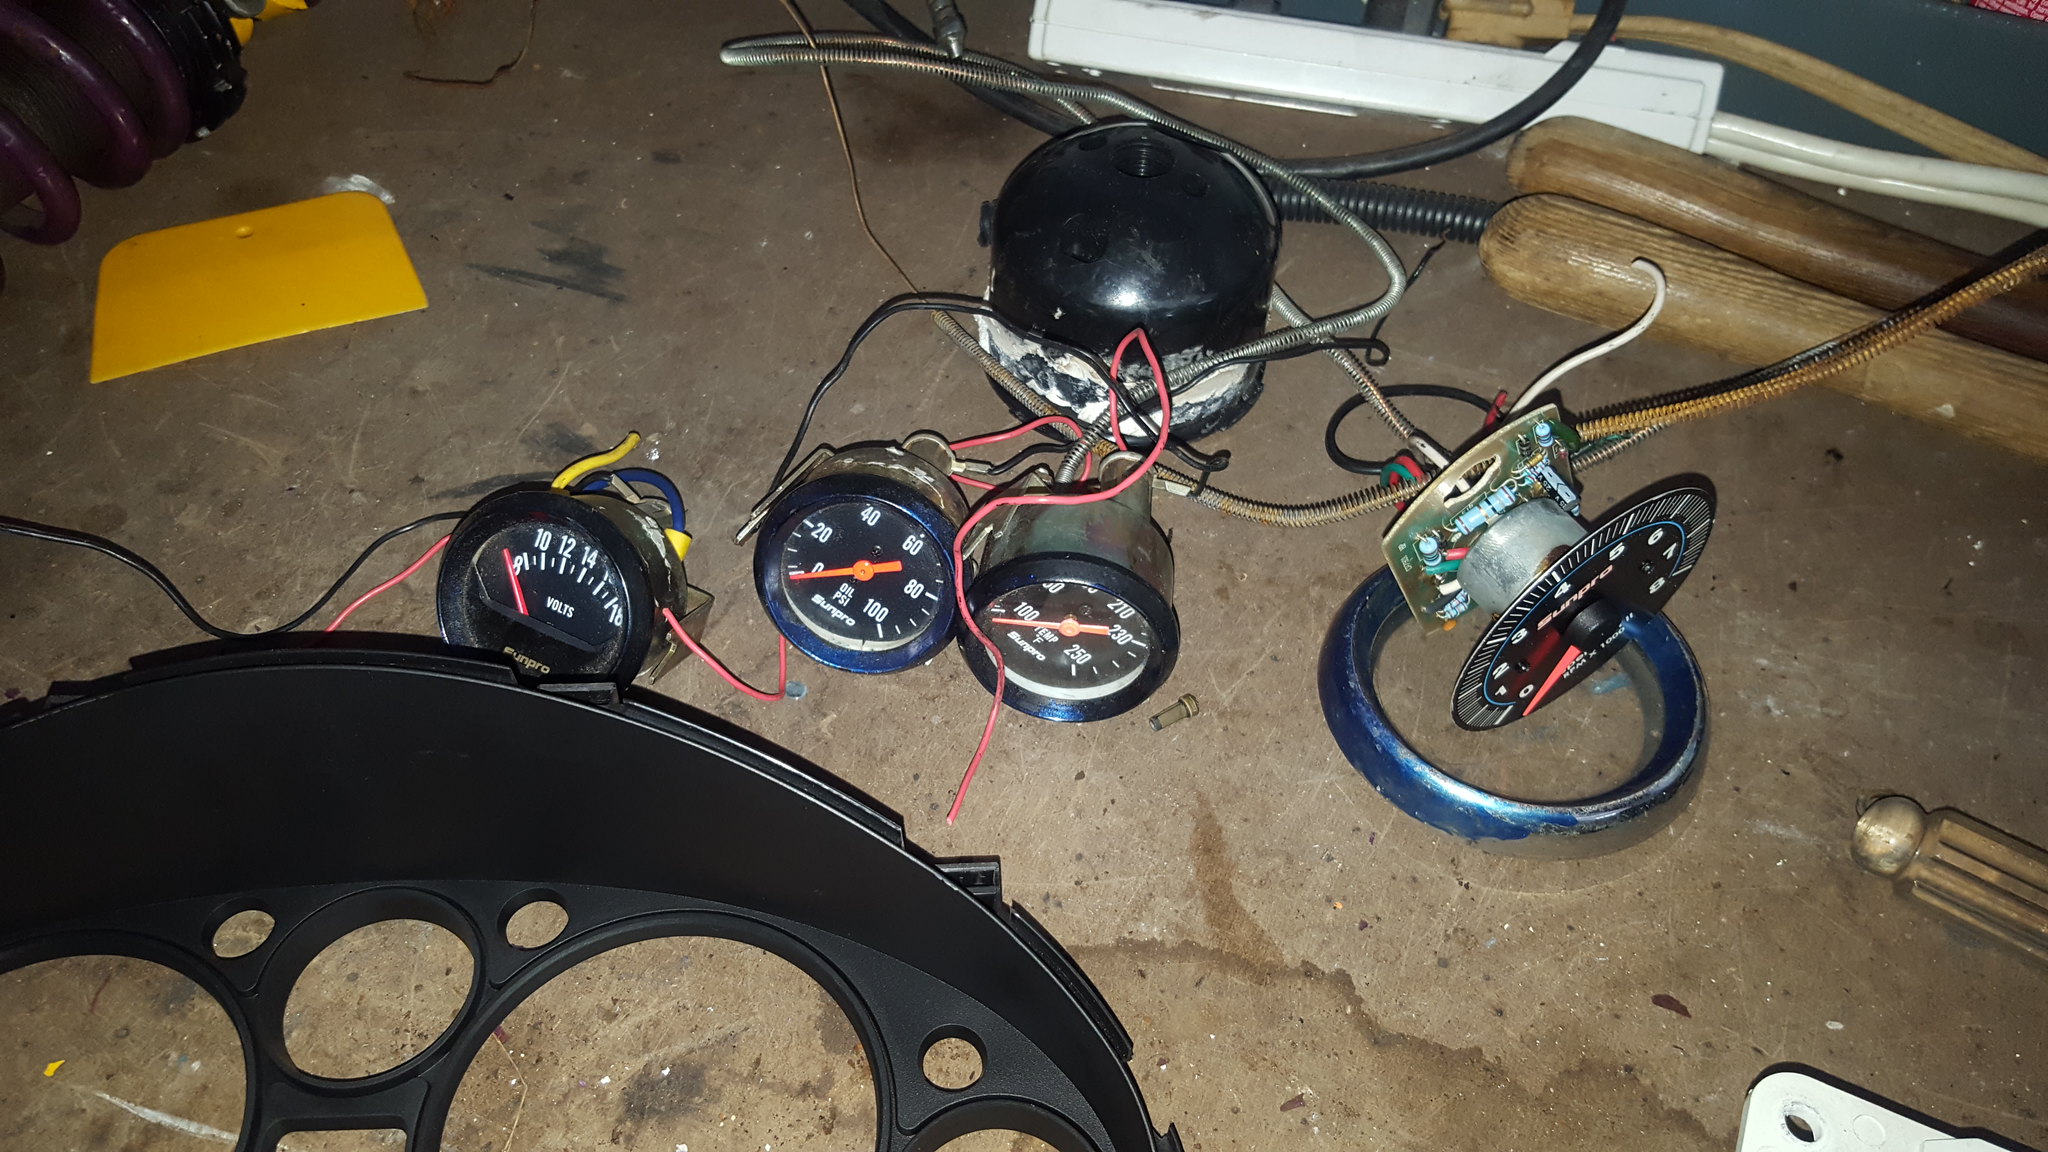
I got into the zone on the next part and stopped taking pictures. Suffice to say, I pulled the bezels form the water and oil gauges, and cut the white plastic until everything fit properly. Used my dremel for that. Then used hot glue to hold it all in place. The fuel gauge will be relocated to where the stereo used to be. I also need to put some lights in.
 20180616_180001 by Michael Crawford, on Flickr
 20180616_175637 by Michael Crawford, on Flickr
this cluster is only for the challenge. I actually have a full set of autometer pro-comp gauges that will be added after the challenge. But they were budget breakers. I had bought them for my elky before it was totaled.....
also, I figured out my thermostat solution. With the welded neck at the back of the intake, there's no way to put the factory thermostat in. so I grabbed two housings from magnum v8 mopars in the junkyard, and the corresponding thermostat. As im leaving the heater core in, that will act as the bypass. Then these will be bolted and RTV'd together with a thermostat in the middle. With them being steel, I can weld a tab on to bolt it down for support, as its not light....
 20180616_102618 by Michael Crawford, on Flickr

You should be careful with remote mounting a thermostat. There's a possibility that the motor could cook itself before the thermostat actually opens. Particularly after the car has sat long enough to cool the housing, but not the motor.
I'd be inclined to just use a 5/8" restrictor and adjust restrictor size with testing.
At the very least I'd drill a 3/16" bleed hole in the thermostat so that it can't completely cut flow off.
I like how you fit the gauges in the old cluster. I'm going to try hacking up a factory cluster like this myself.
In reply to Crackers :
Mopar already has a bleed hole, but your advice is welcome! Im making it up as i go over here.....

Call me when you get to the clutch hydraulics. I damn near ruined a trans because I didn't have it quite right. Lesson learned!

In reply to Dusterbd13 :
In regards to thermostat stuffs, in my challenge car, currently I just removed the thermostat altogether. Might be a simpler option for you. You can always add a little bit of restriction with a partial blockoff plate if necessary so it warms up a bit faster. My car warms up just fine though, just a bit longer than normal.
In reply to wvumtnbkr :
Probably within the next week or so. Dad picked the engine up from kenny today, so we can get it buttoned up and run home.
Thanks again for the box. It has thourouly saved our butt on this build!!! Jext time you come south, or i come north, i owe you dinner.
In reply to AWSX1686 :
I had thouggtabout running with no thermostat to save budget. My concern is that it wont get warm enough!
Or am i overthinking obd2 efi?
In reply to Dusterbd13 :
I would start with no thermostat, and then if you need to you can put a metal plate with a hole of whatever size to allow flow more like an open thermostat, vs completely unrestricted. Again, our engines are different of course, but mine gets up to about 180* just idling, which works well, and under load it has no problem warming up.
The way I see it, if it works with no thermostat, that's one less thing to fail.
Besides, I was told that race cars don't have thermostats! ;)
not much this week, to be honest. Been busy playing with trucks....
spent a lot of the week rebuilding the dash and HVAC in my truck. Still have the rest of the interior to do.
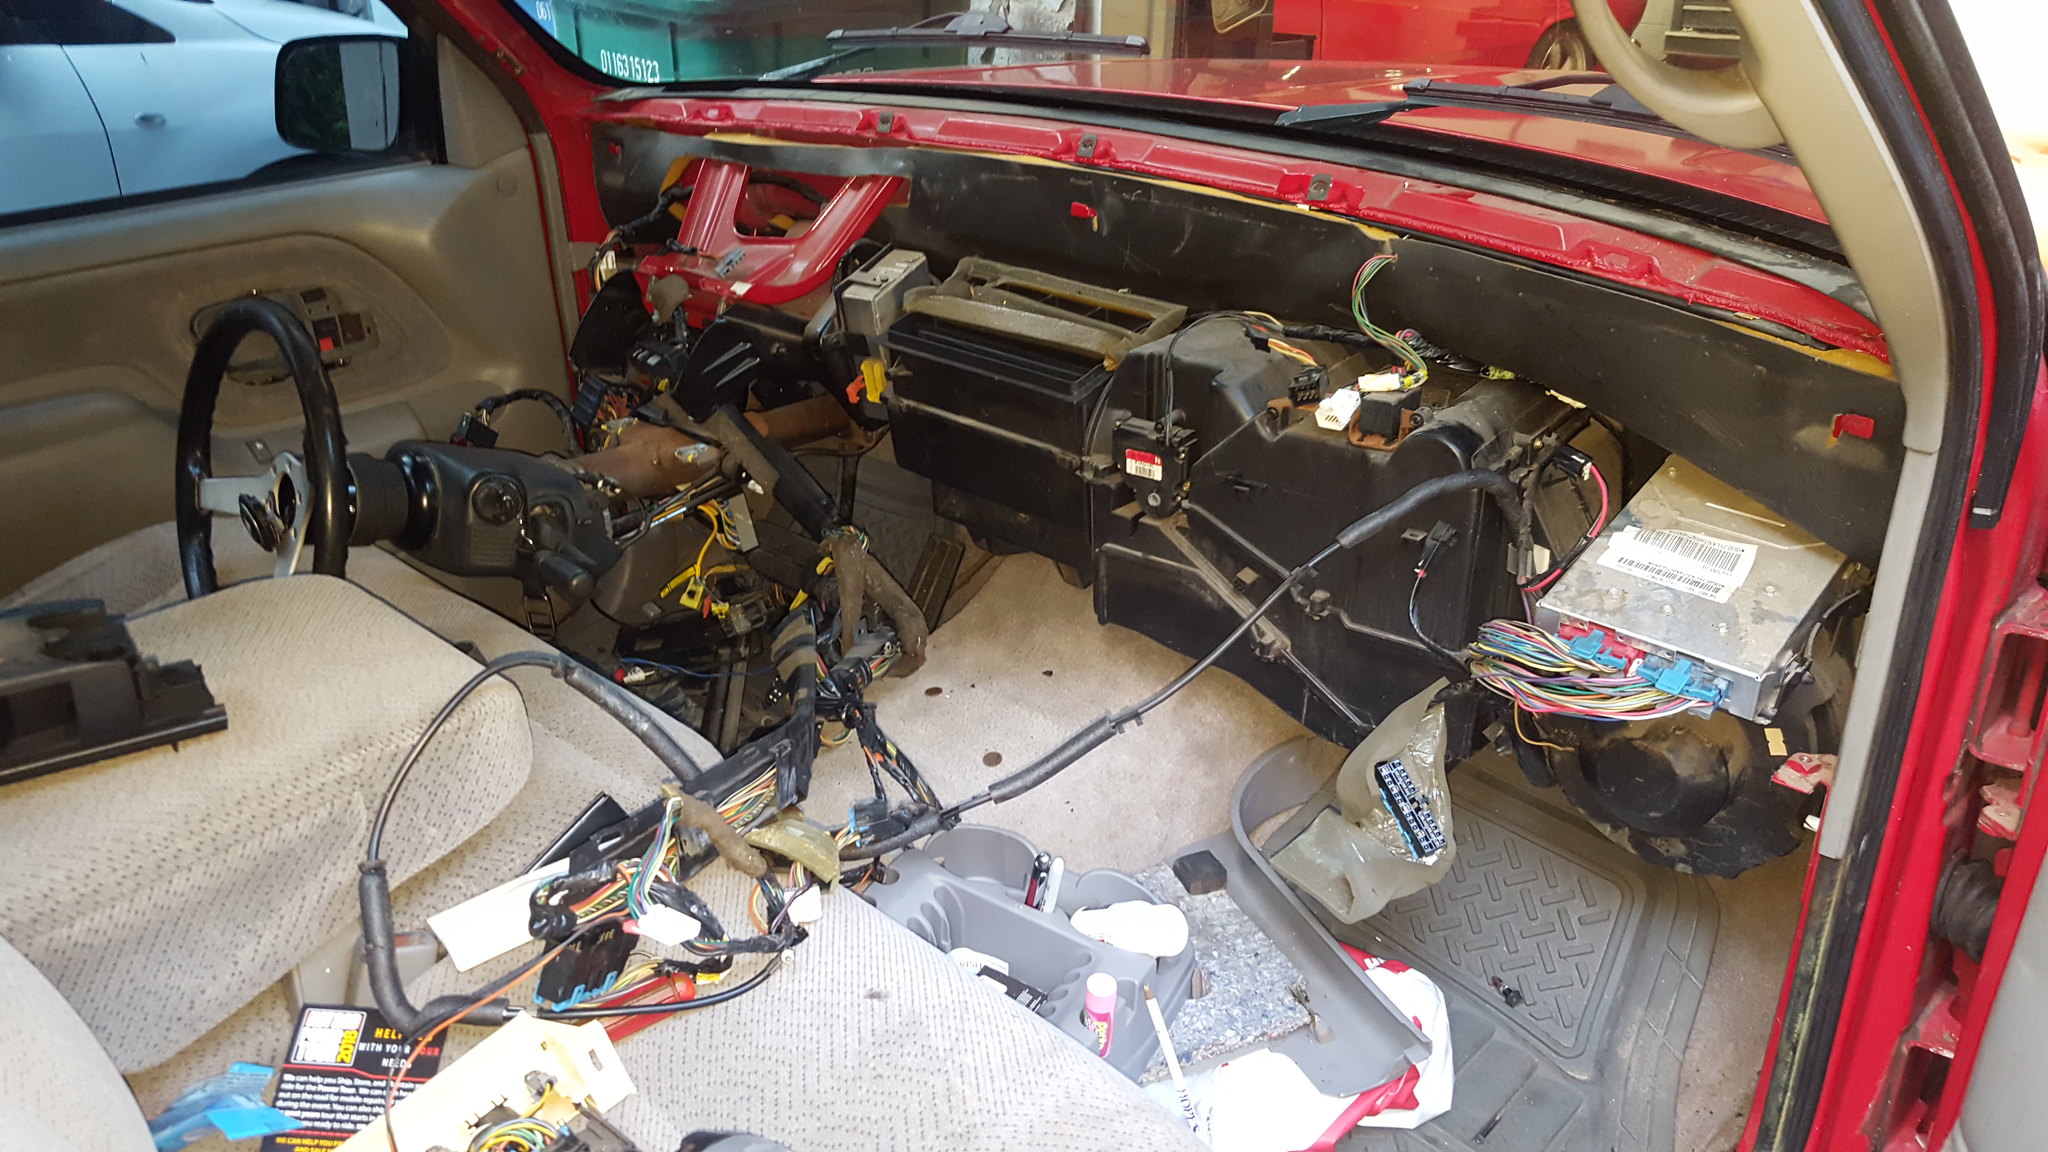 20180618_195121 by Michael Crawford, on Flickr
rewired a 65 mustang for s customer (no pictures)
was the puppet and storyteller for VBS at church
helped dad get the trans sorted in his truck and plumbed it for him
 20180624_125412 by Michael Crawford, on Flickr
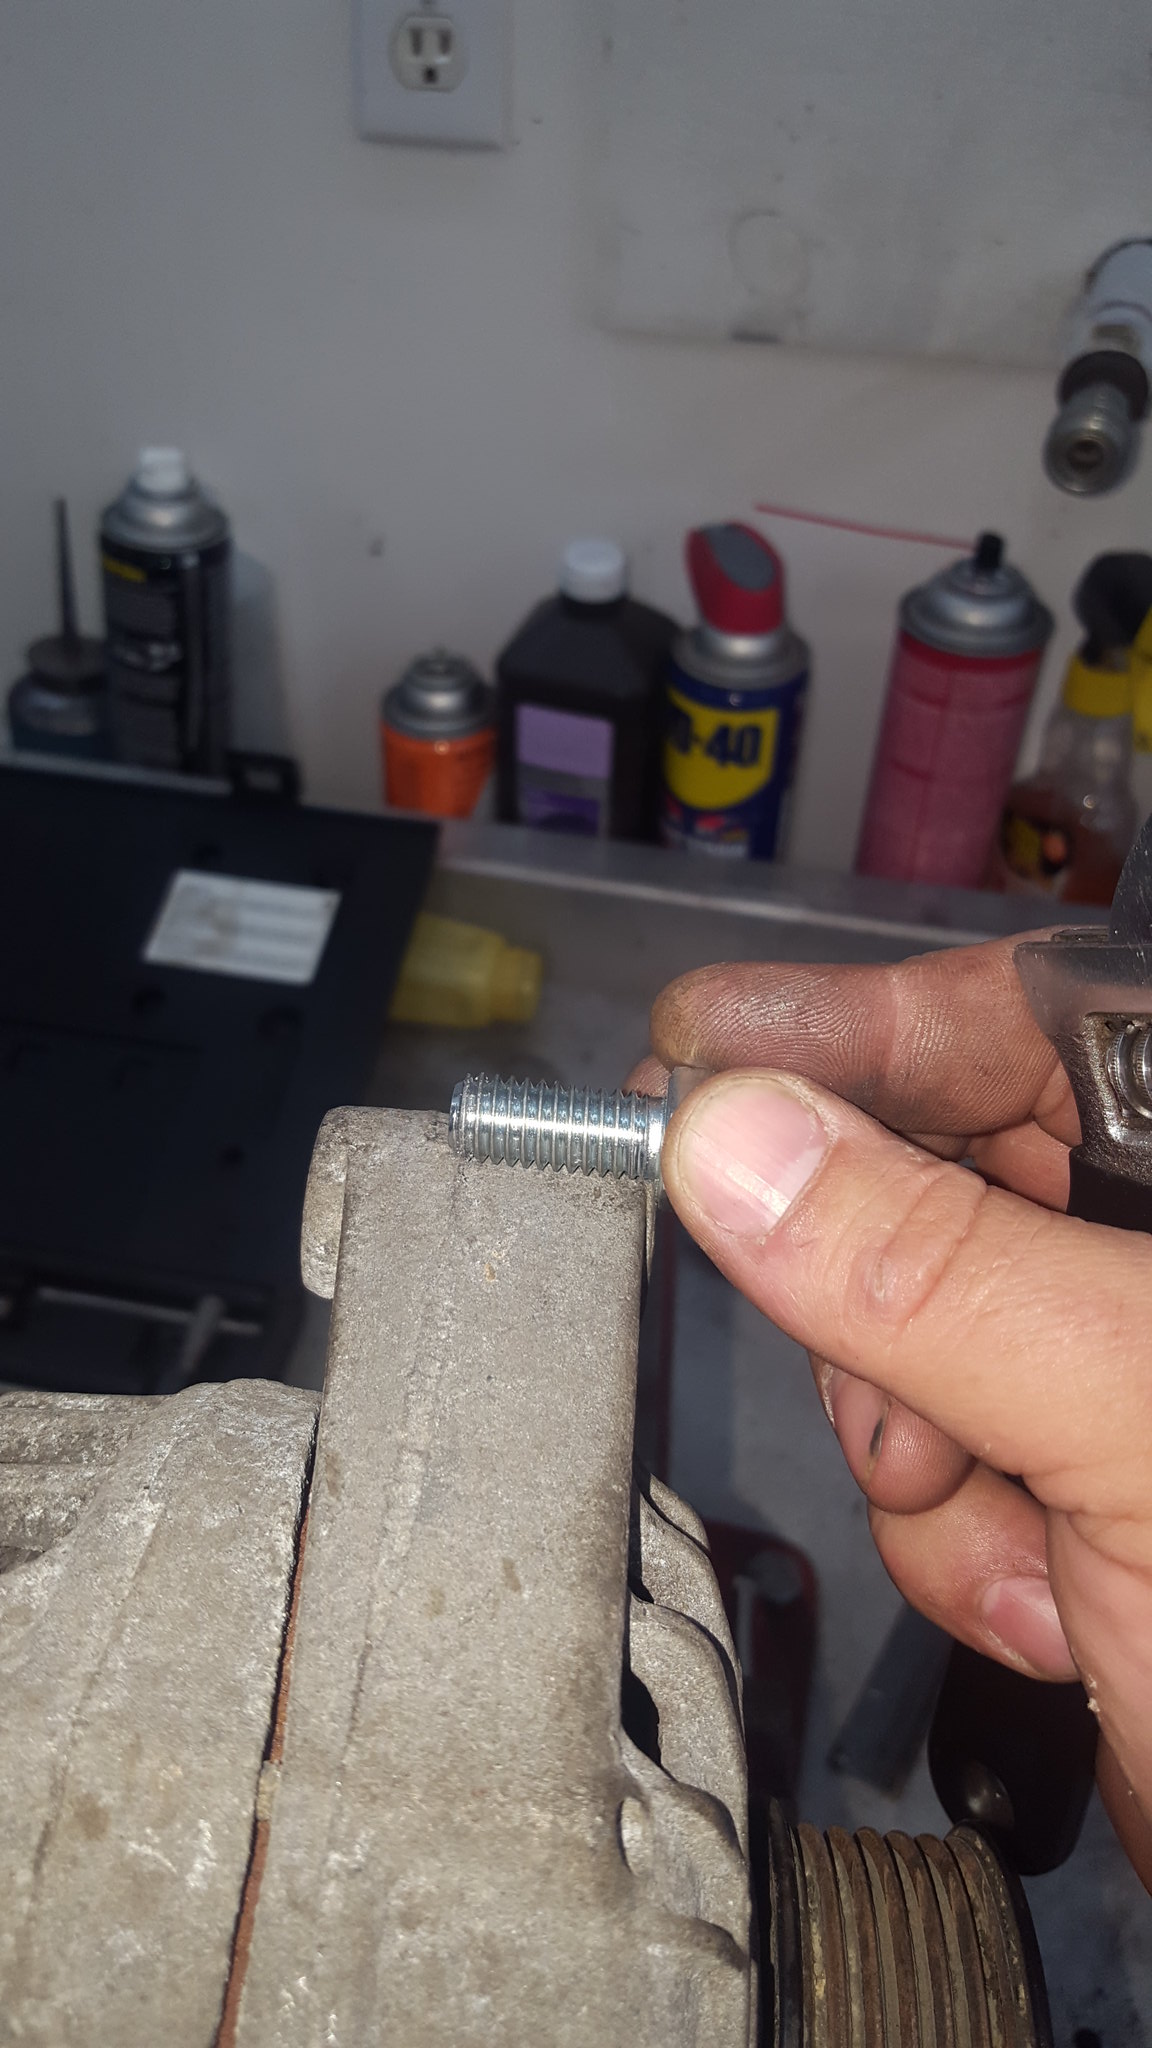
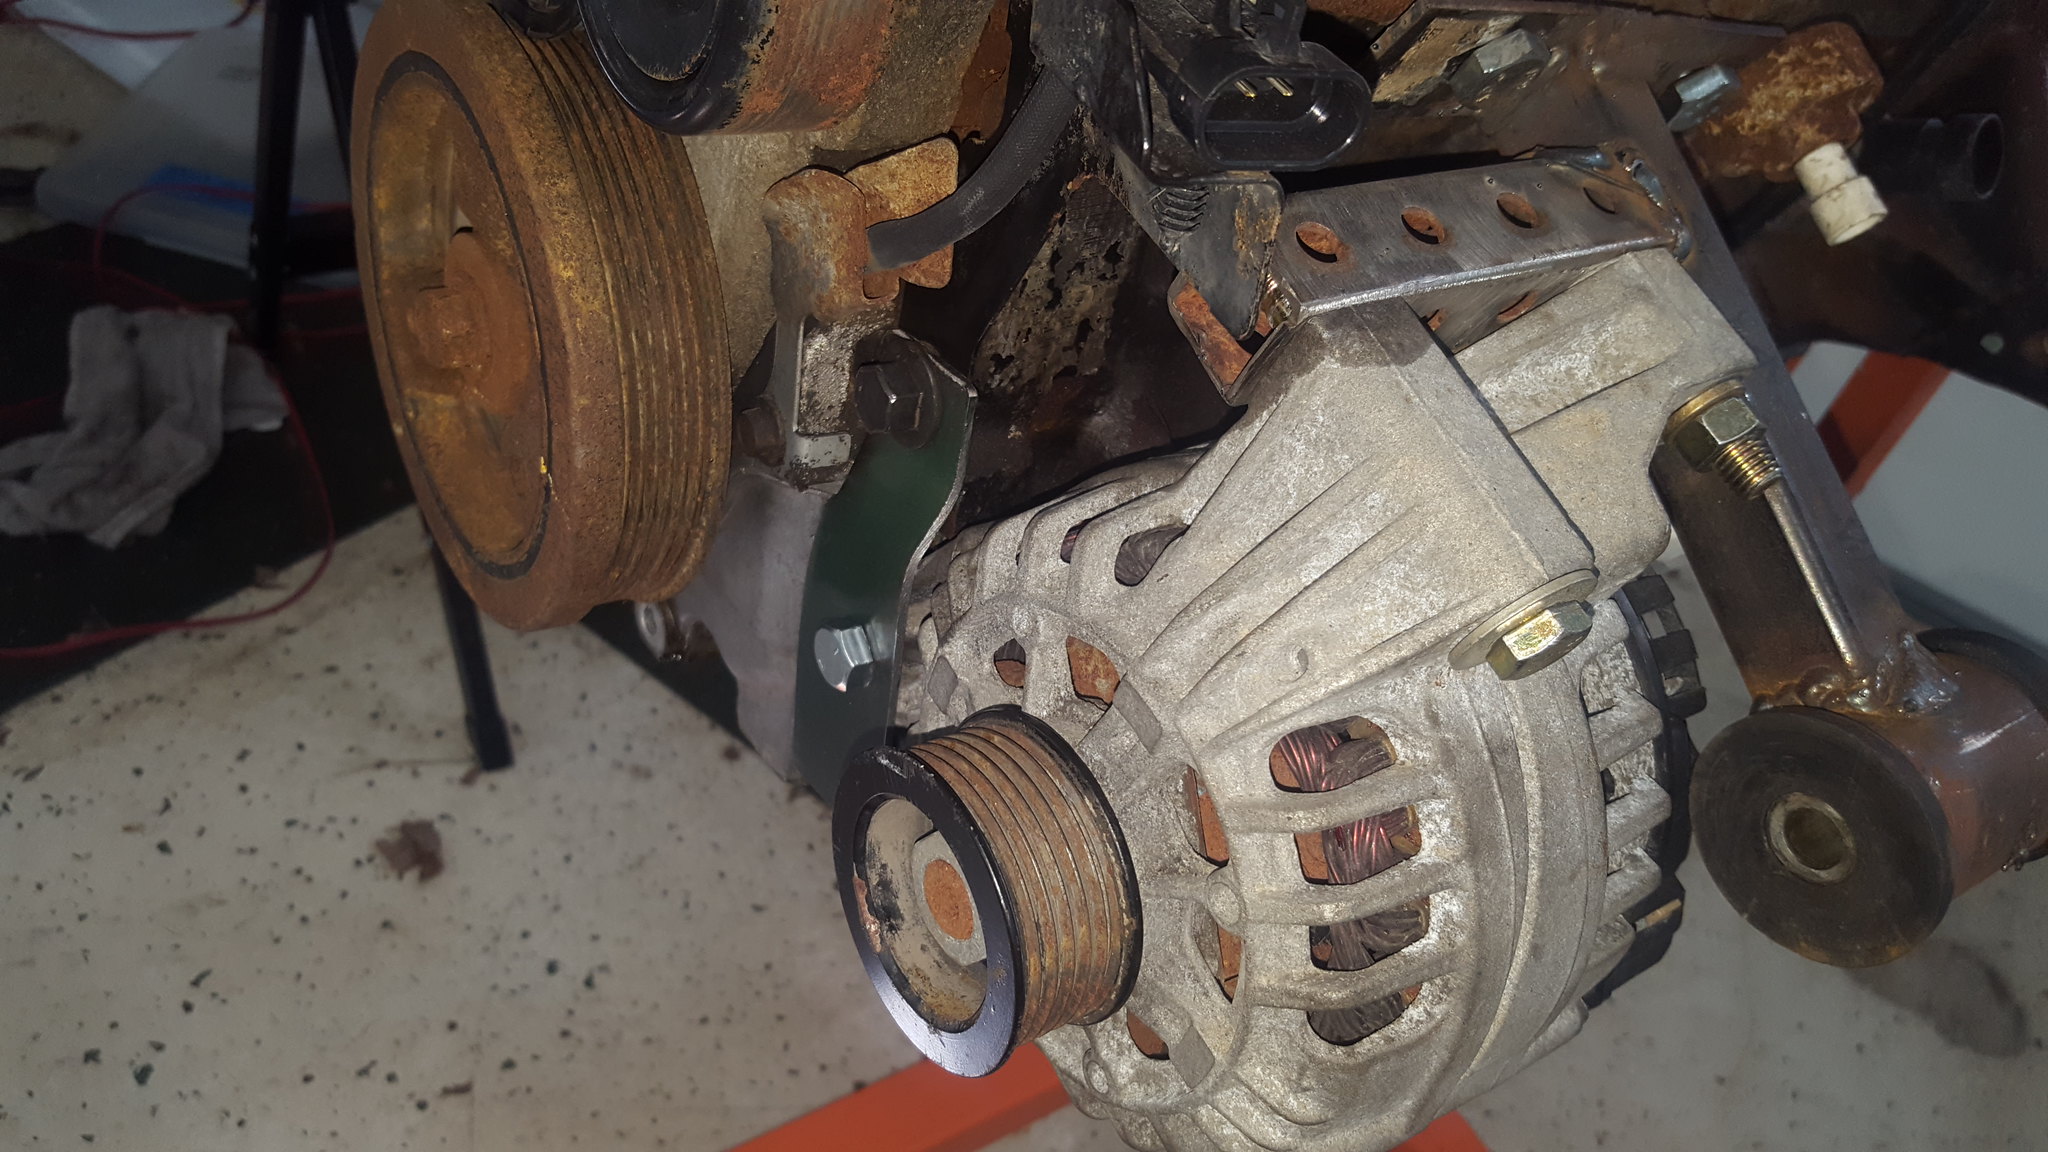
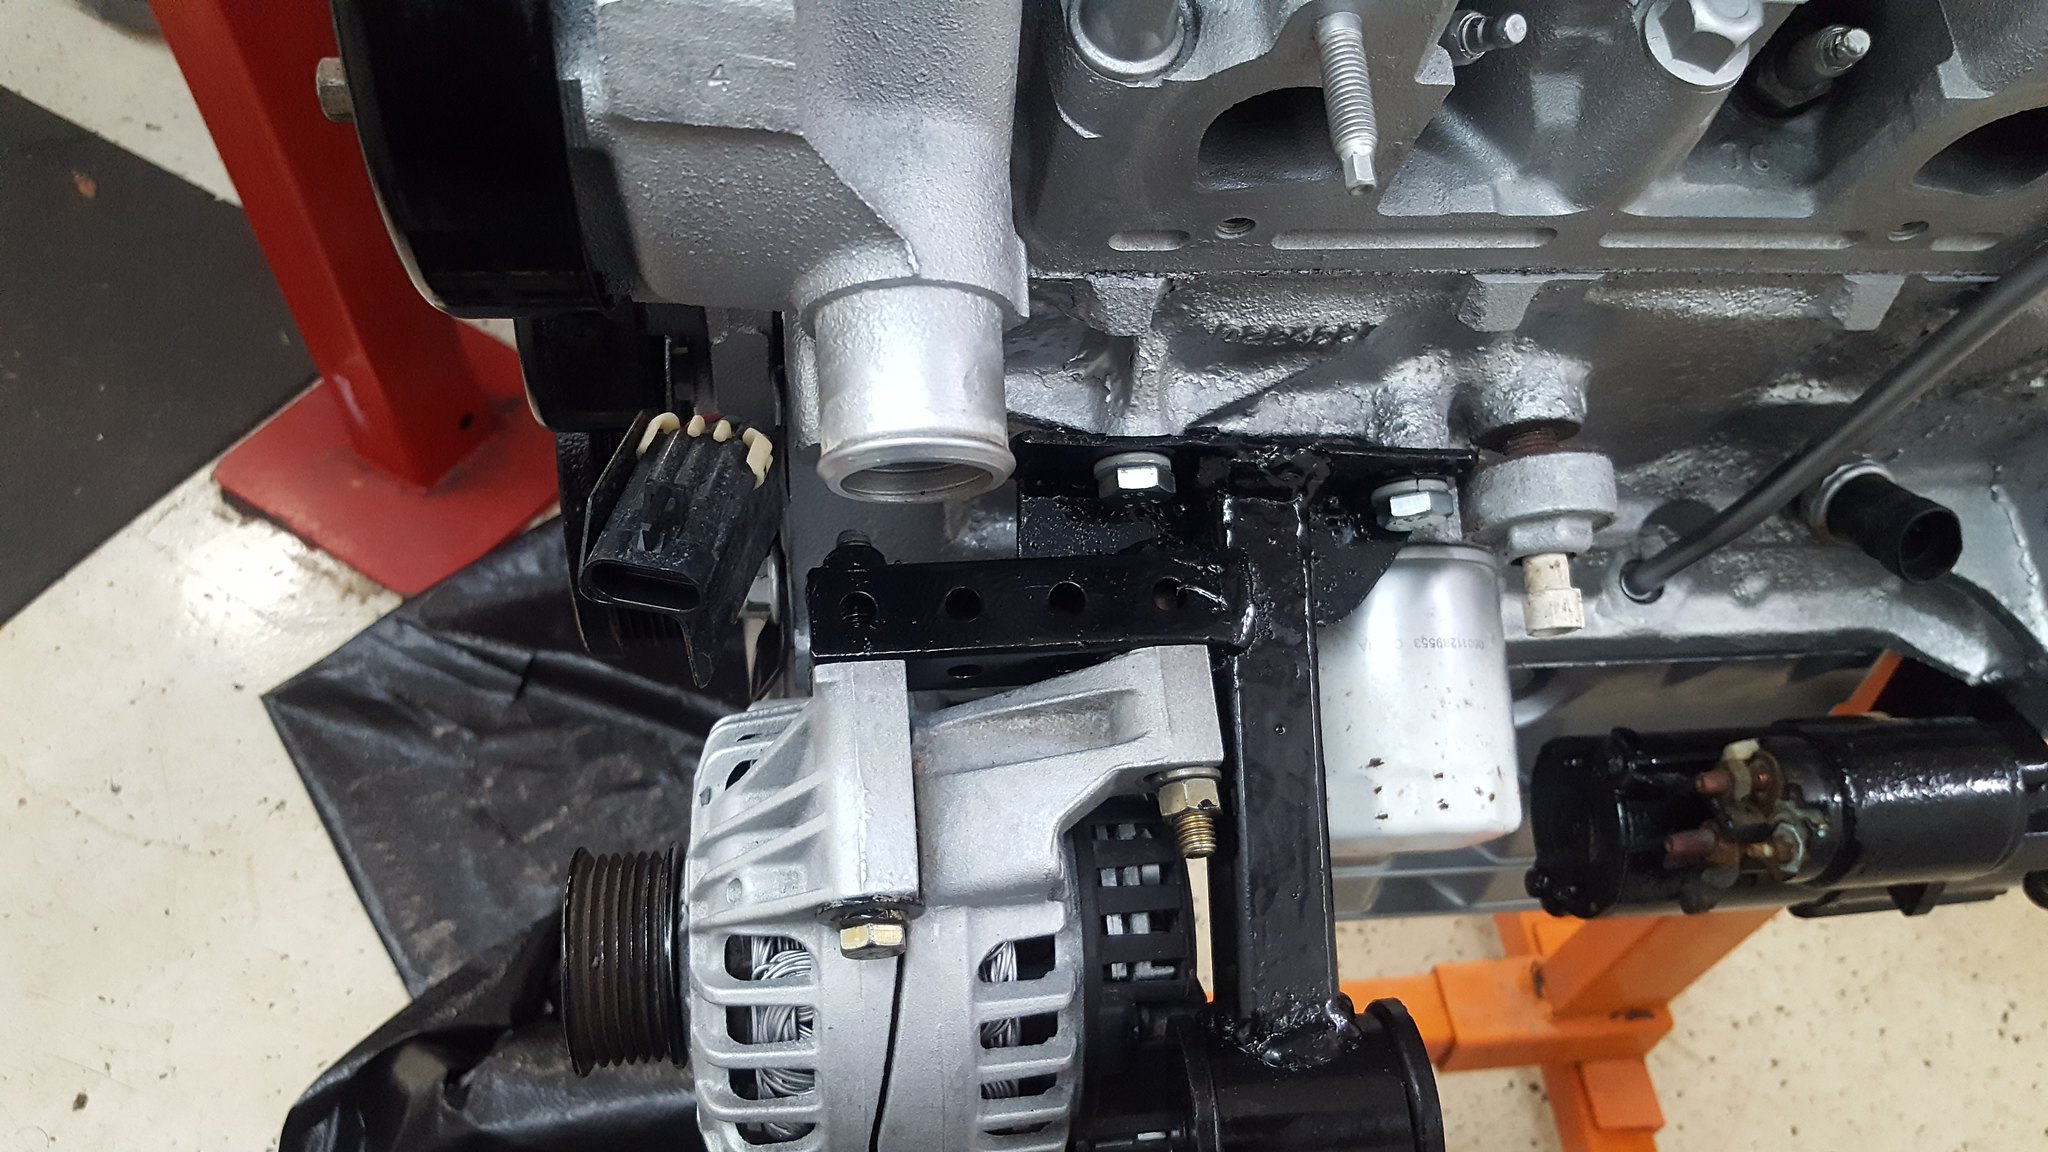
but on the challenge car front: I finished the alternator mount and motor mounts. Added gussets, fully welded, and drilled and tapped the one ear of the alternator for a triangulation tab.
 20180624_084526 by Michael Crawford, on Flickr
 20180624_092305 by Michael Crawford, on Flickr
no finished pictures, as I cut a finger pretty badly shortly after that picture. Called it a day....
At it again!
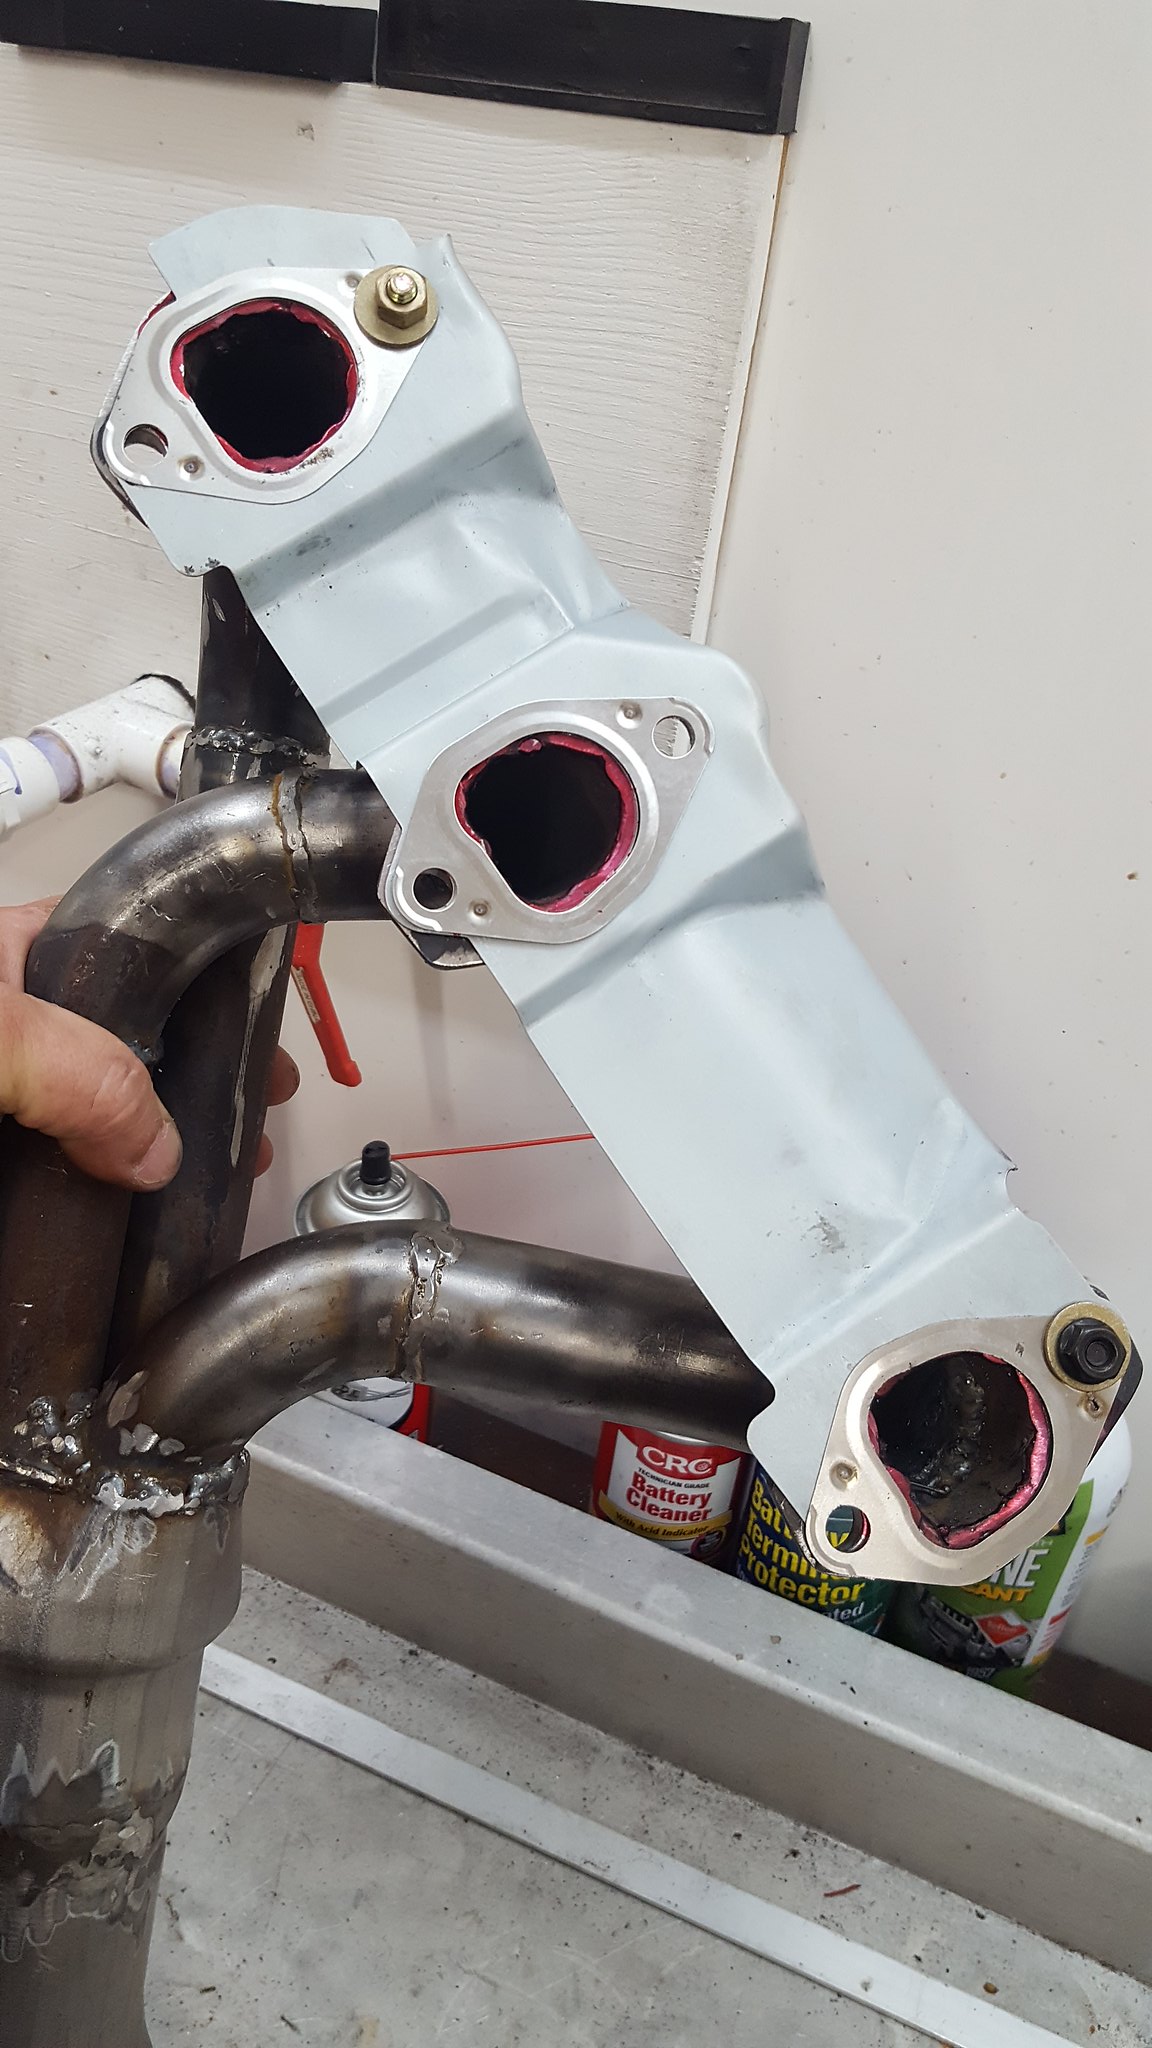
Headers fit properly and are ready for port matching
Engine cleaned and drying awaiting paint
Time to find all the bolts.....
Challenge budget so far:
previous challenge budget: 1709.68
recoup total: 820
new money:
header wrap: 17.10
misc supplies: 50
and fittings: 21.98 (4.99 male coupler, 10x tube nuts for 16.99)
race car paint: 14.98
new total: 1813.74
recoup: 820
kicking ass and taking names. This weekend was spent helping dad on the 49 ford truck, and getting ready to get the motor back in.
the motor started here:
 20180630_110948 by Michael Crawford, on Flickr
step one was to make the headers actually fit and flow again. Somehow, when I finished welding them, I screwed up and made all the tubes move. Not sure how I did that, other than stupidity and heat. So I cut them apart a bit, and re-welded them bolted to the engine. They still fit after cooling, so im calling that a win. They really don't look any different in ways that you can tell, other than having all the bolt holes line up. So use your imagination.
I then tackled the other bit of stupid I did. When we cut the flanges, we cut them exactly to exhaust gasket size. When I put them together, I shoved the tubes into the holes in the flanges and welded. Obviously, now the headers are smaller than exhaust port size. So I put dykem on the gaskets, dykem on the header, and ran it all together. A bit of creative scribing and jigging, and we had some marks to port to.
 20180630_125209 by Michael Crawford, on Flickr
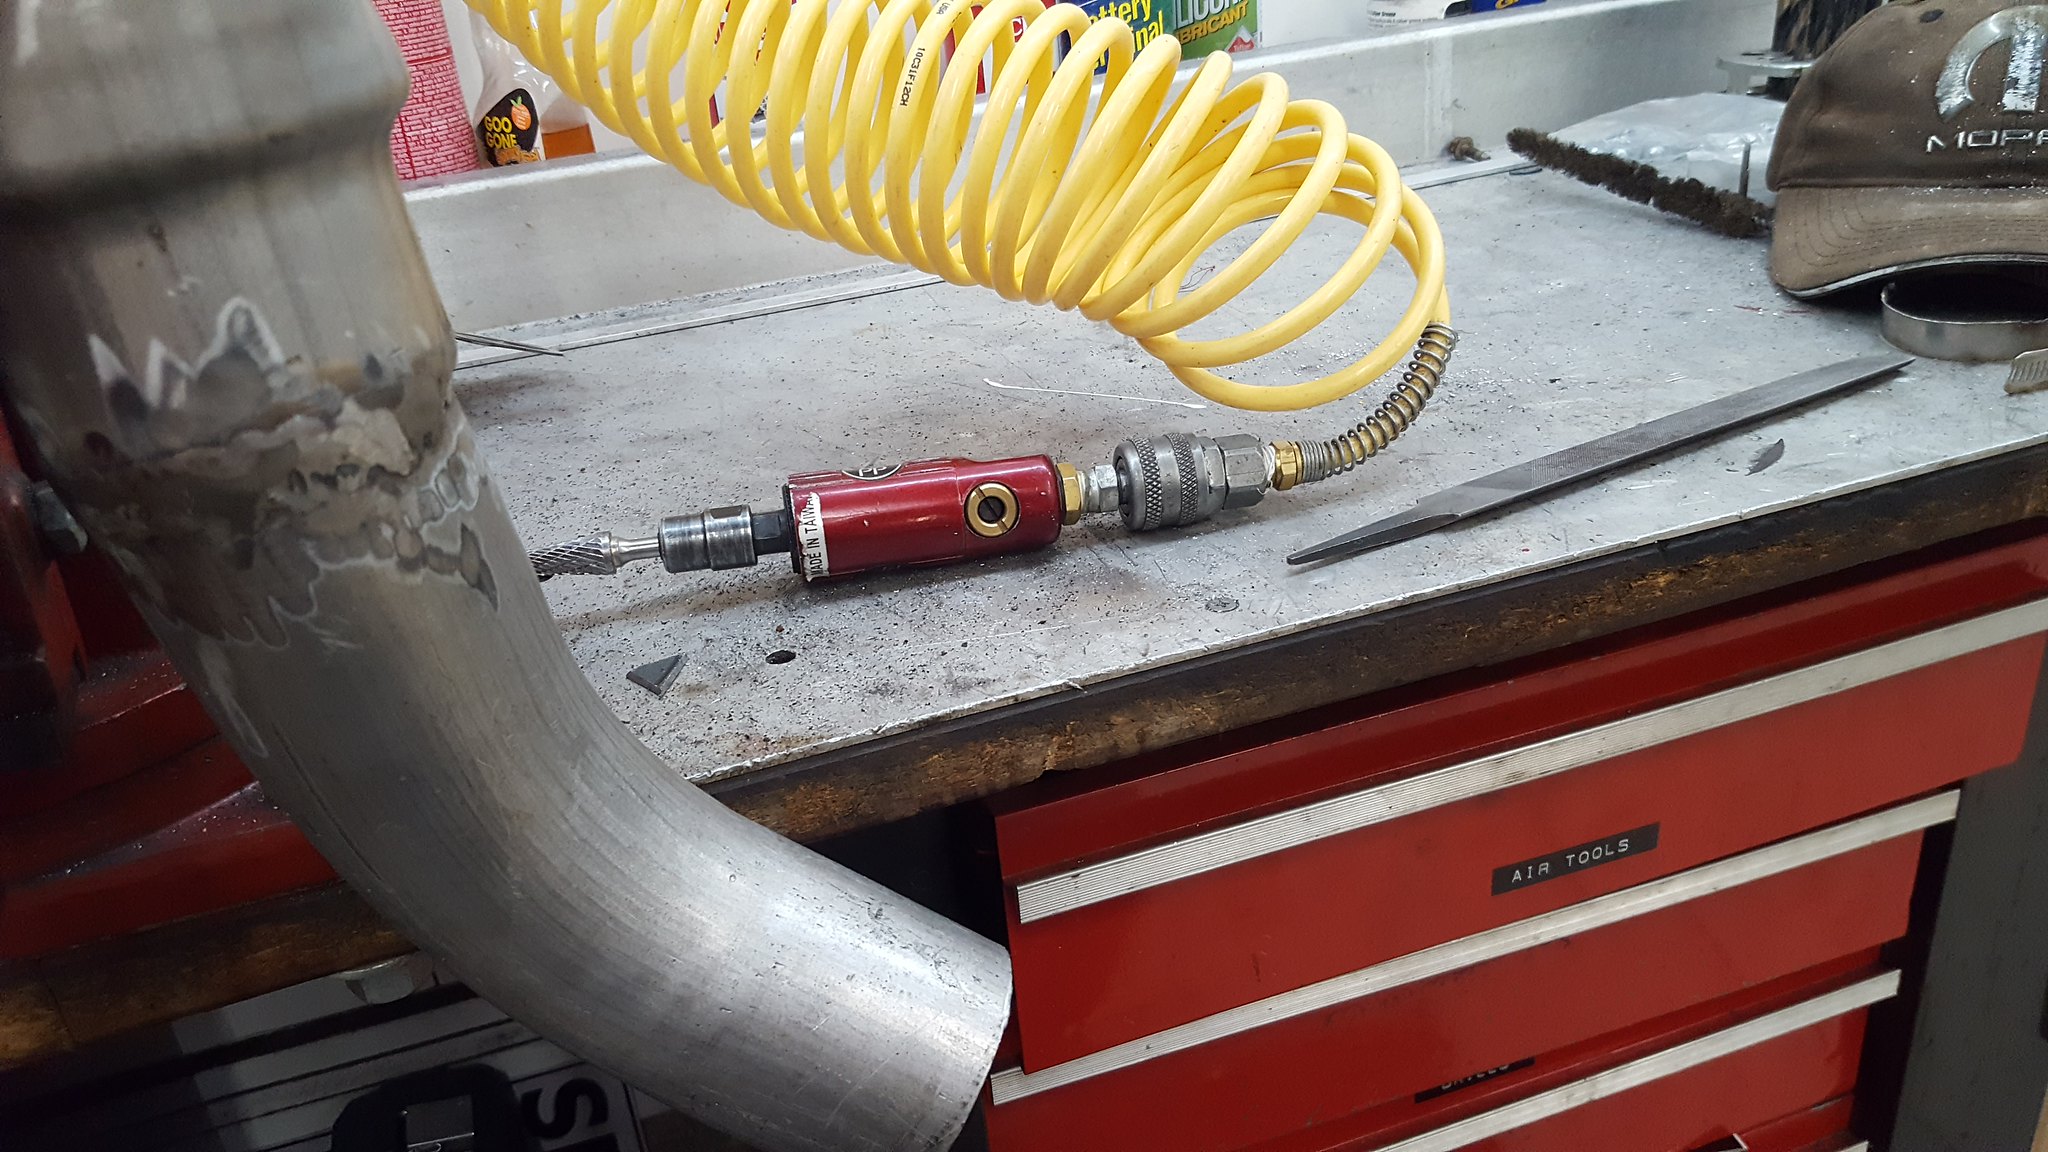
I then broke out a new carbide burr on my die grinder.
 20180630_131050 by Michael Crawford, on Flickr
couple hours later, and one completely wore out burr
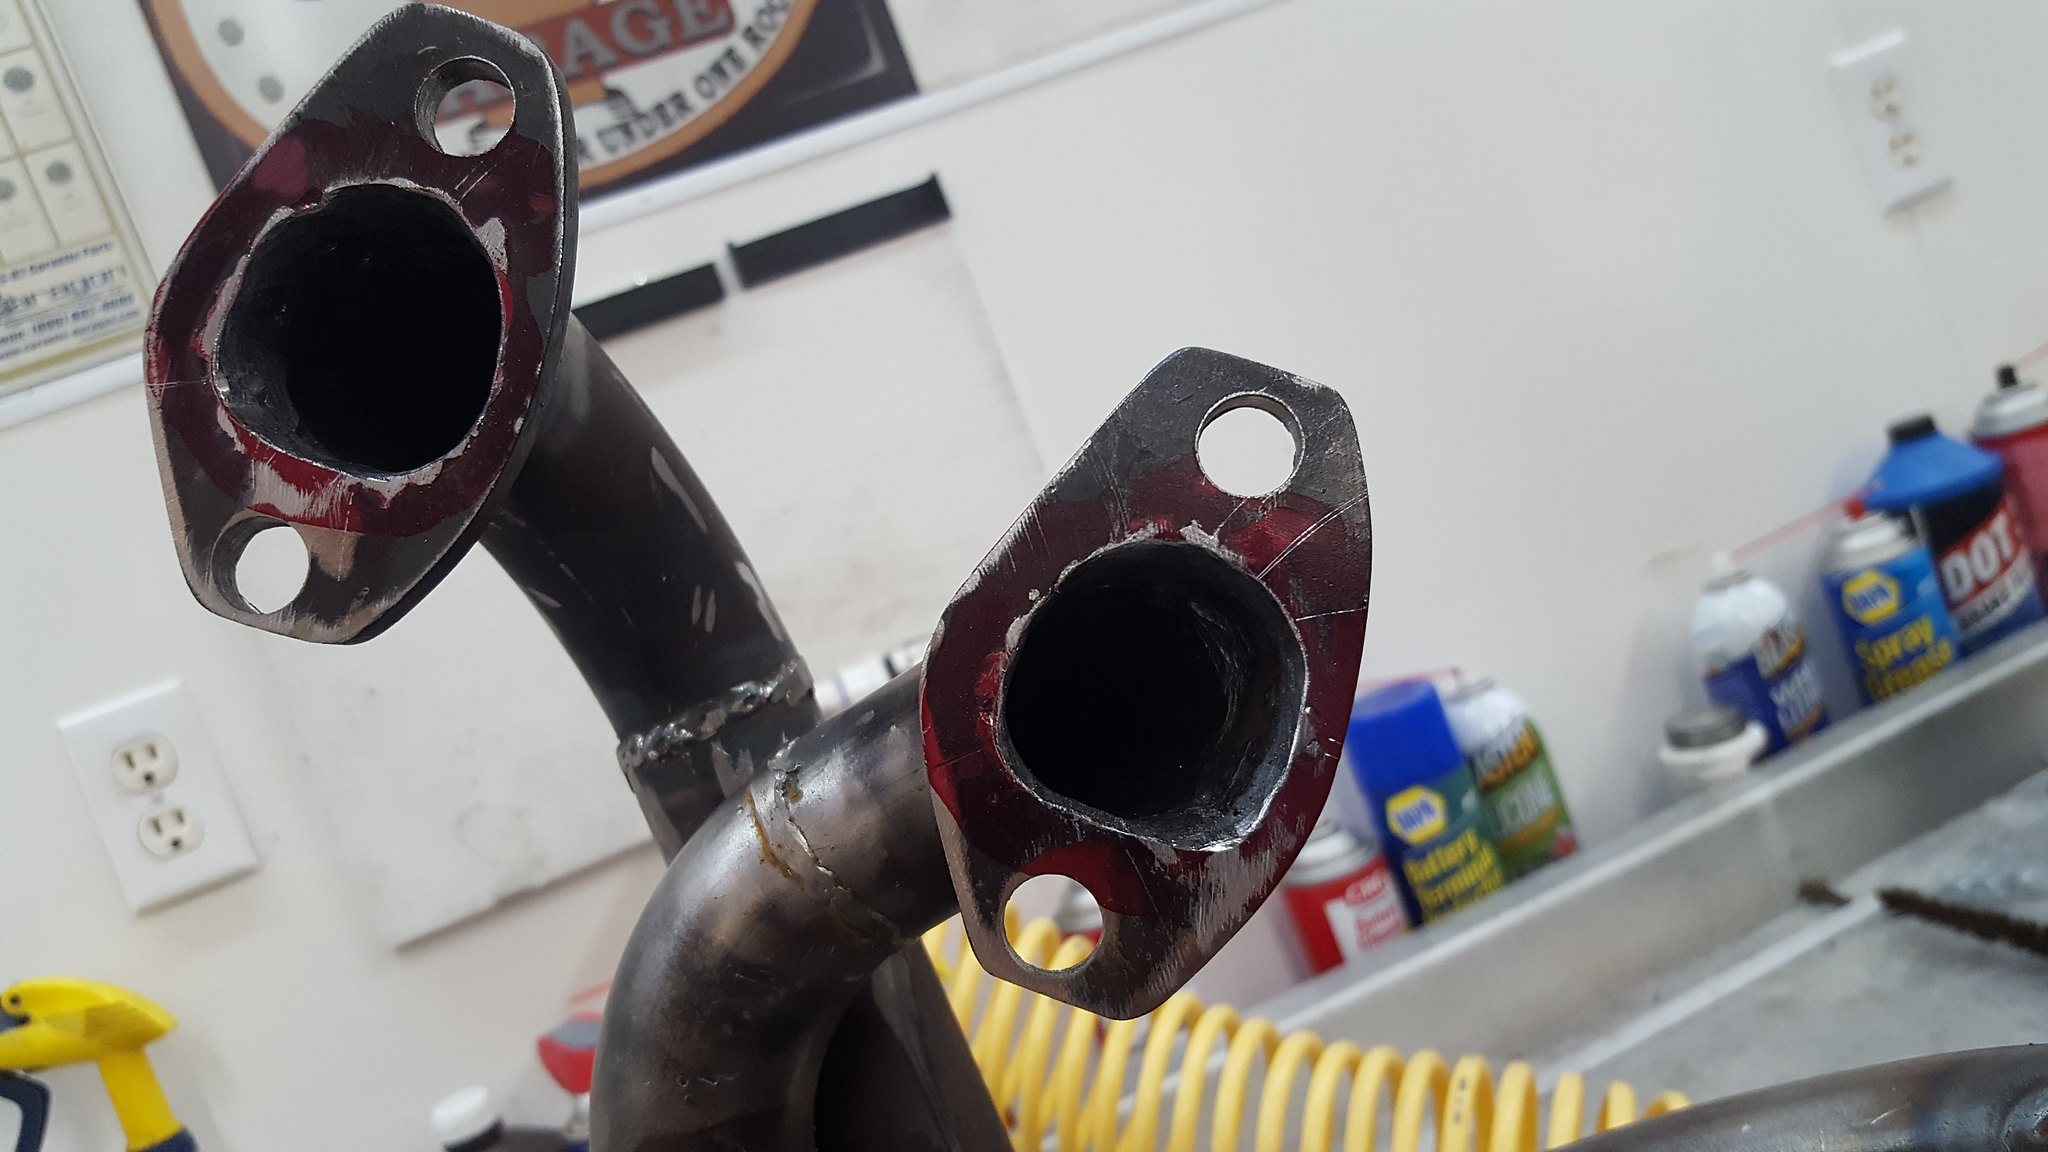 20180630_131049 by Michael Crawford, on Flickr
 20180630_131044 by Michael Crawford, on Flickr
when I came back to the shop this morning, dad gave me the headers mostly completed. He took one of the pictures (he used some muffler paste on the flanges. That muffler paste has been on the shelf since he found it under the seat of the tracker when he bought it. Im throwing it in the misc category for budget), and I took the picture of paint. Paint is another of the misc (neither of us remember buying it, and the can is so old that its starting to rust out on the bottom. Dad wanted to use it up.)
 20180701_111931 by Michael Crawford, on Flickr
 20180701_160440 by Michael Crawford, on Flickr
 20180701_160442 by Michael Crawford, on Flickr
they're still uglier than some of the women I woke up next to after a week long bender, but some header wrap and no one will see them. And the header wrap should help underhood temps.
 20180701_184256 by Michael Crawford, on Flickr
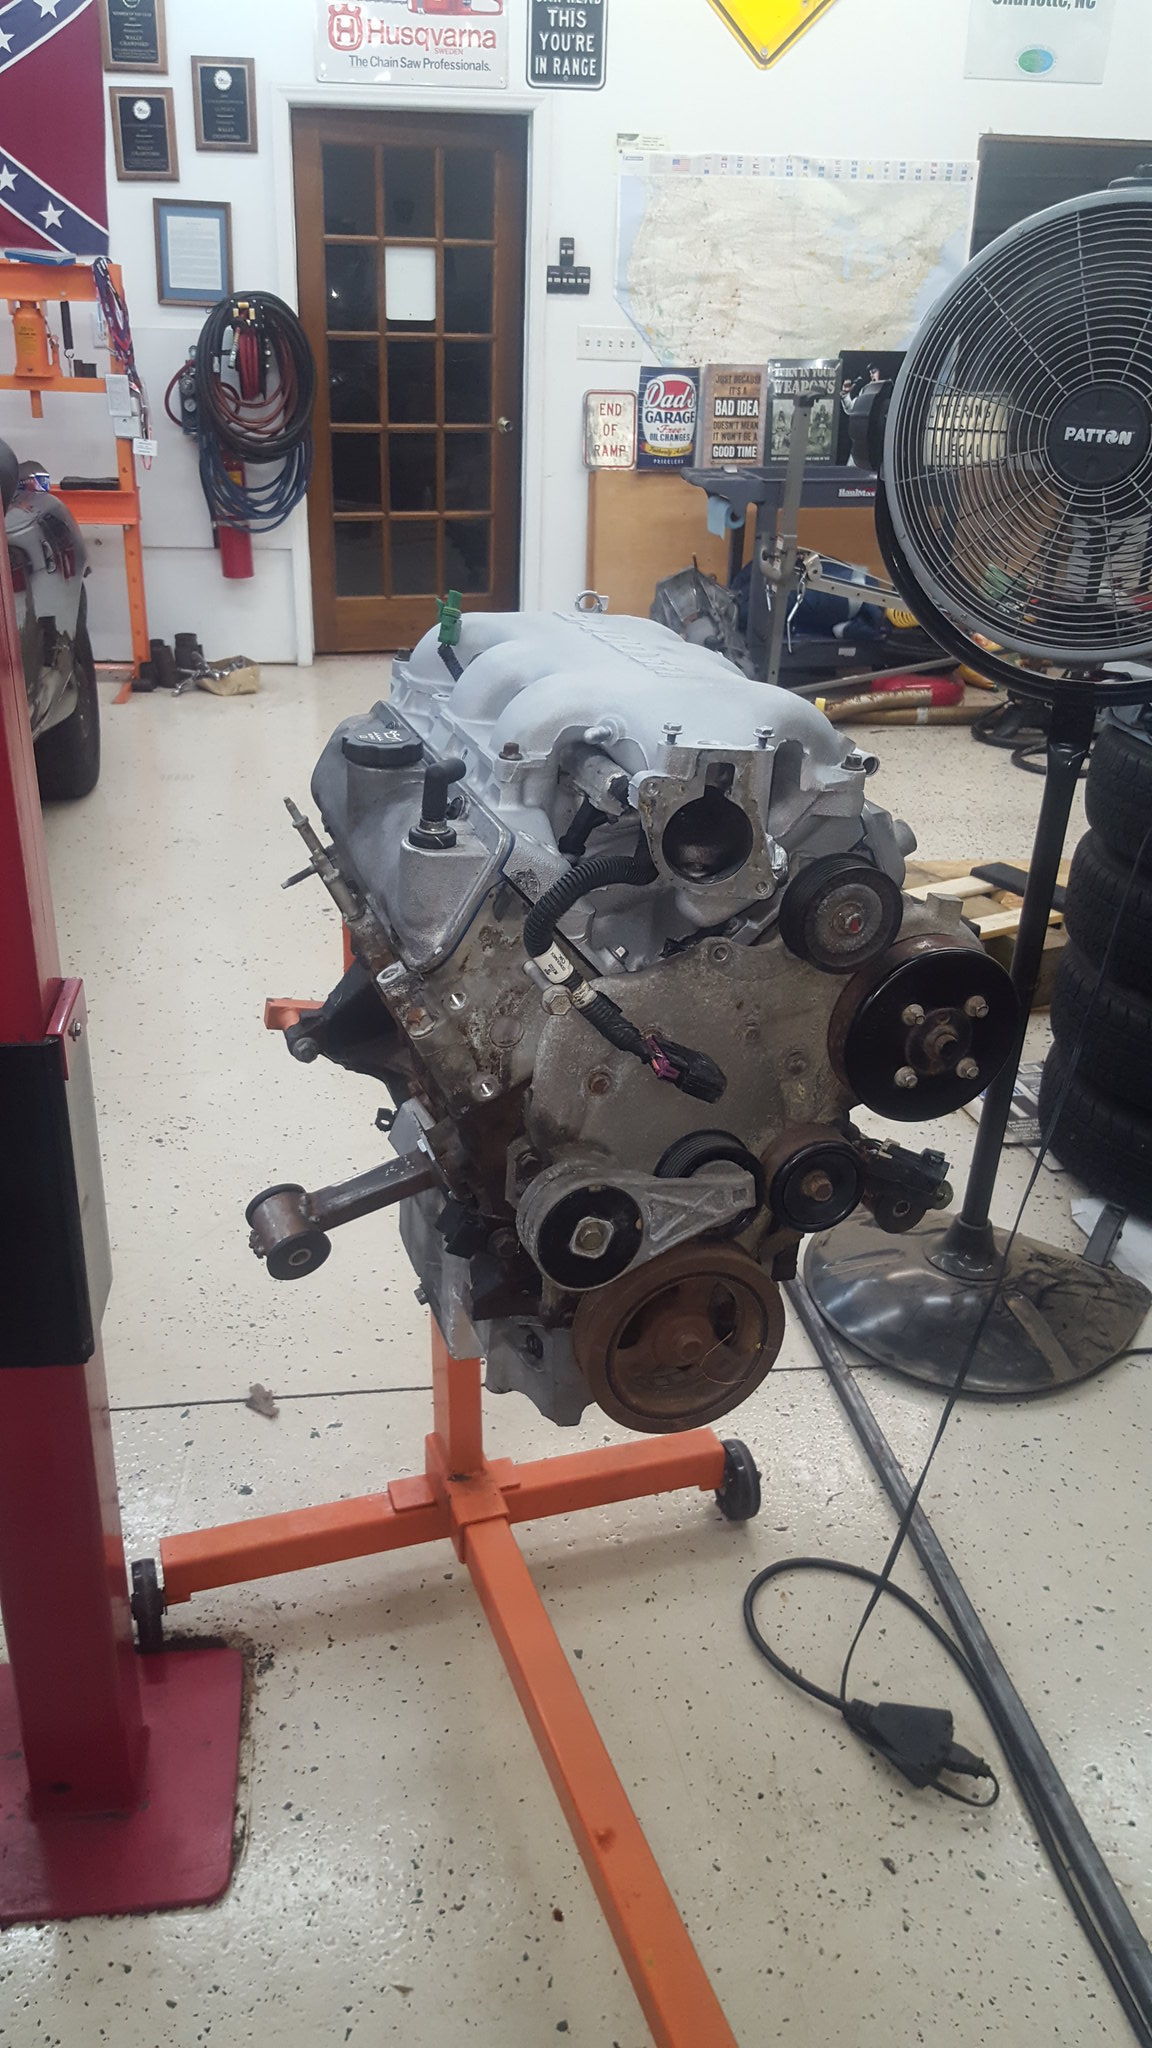
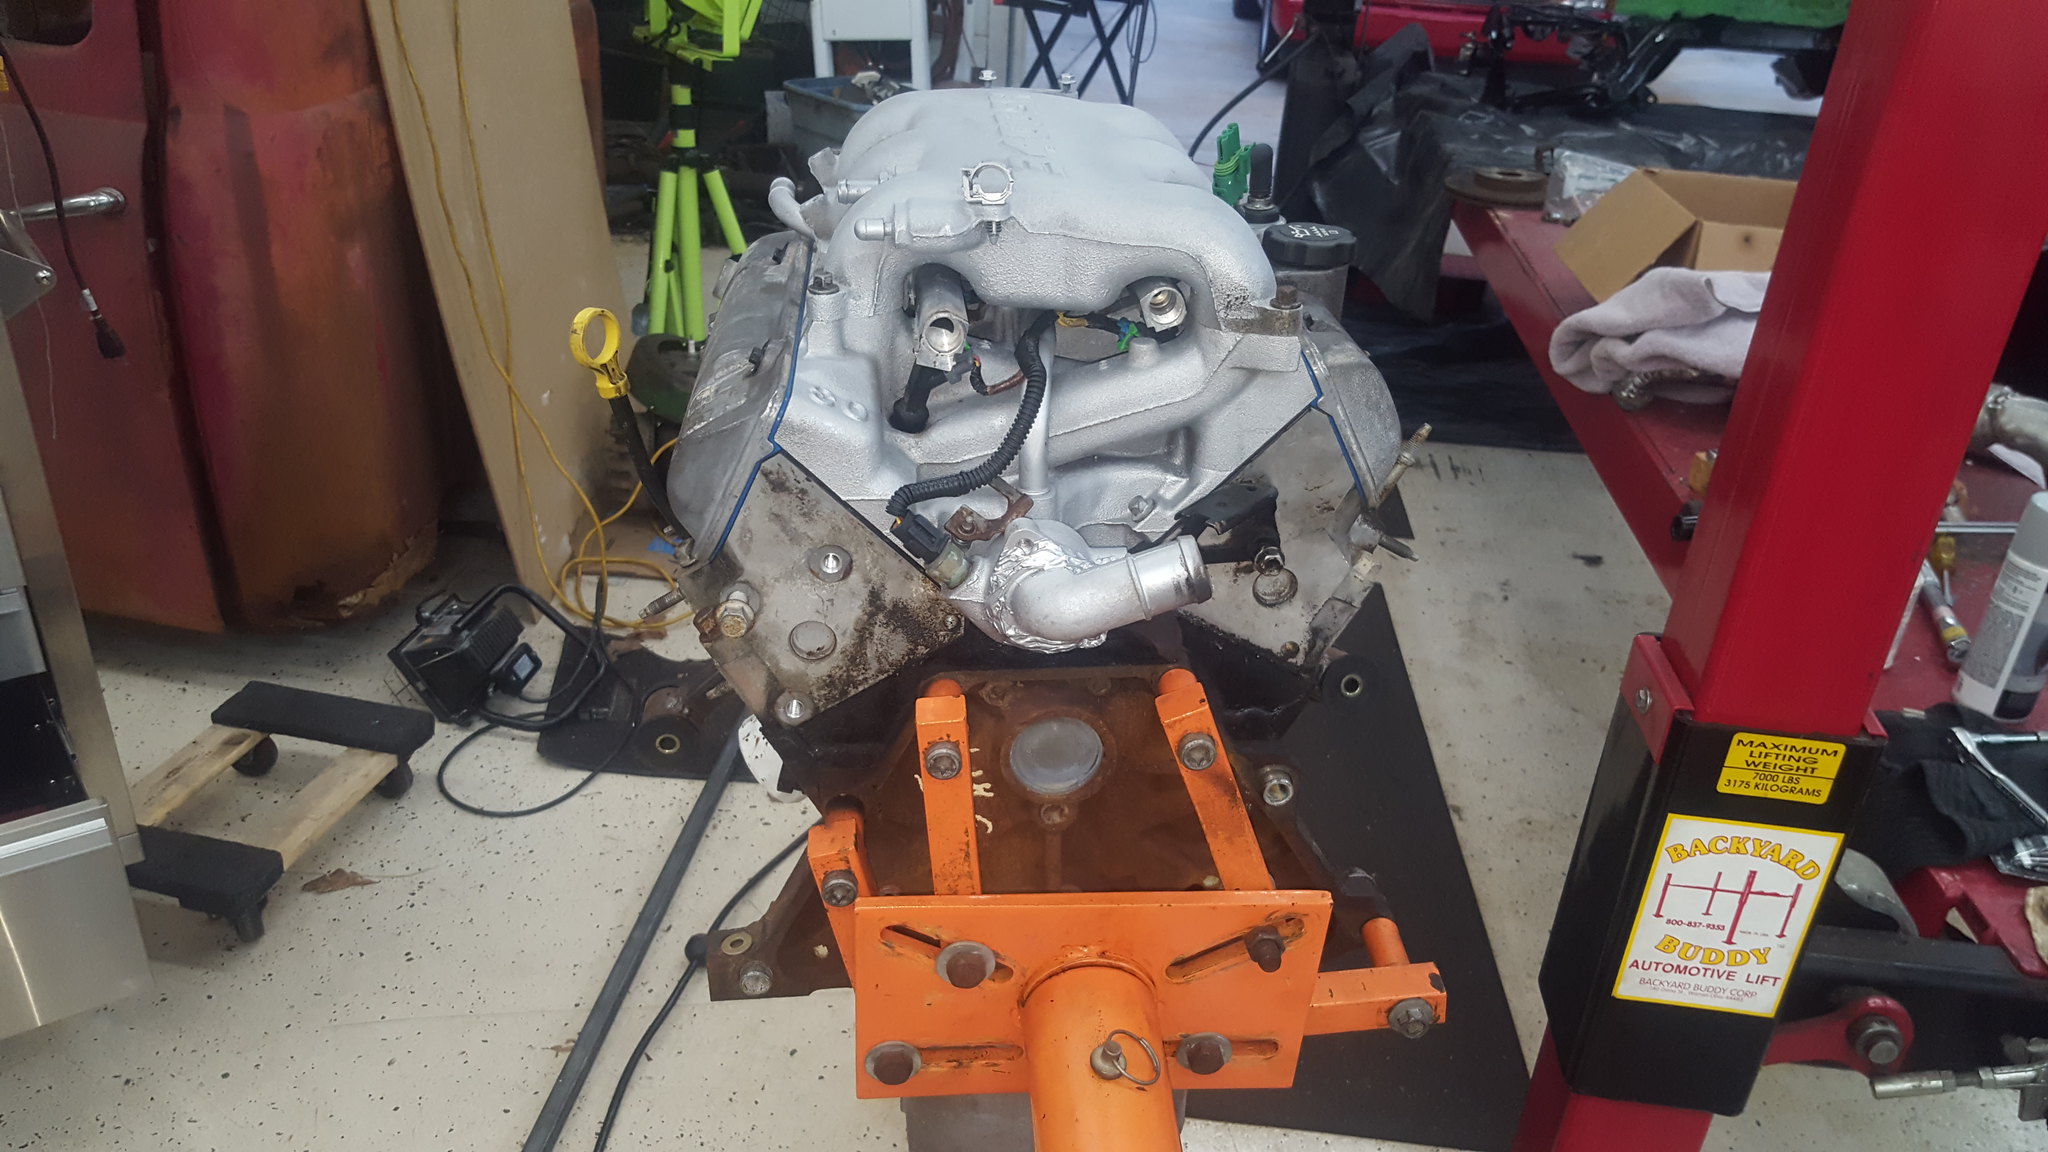
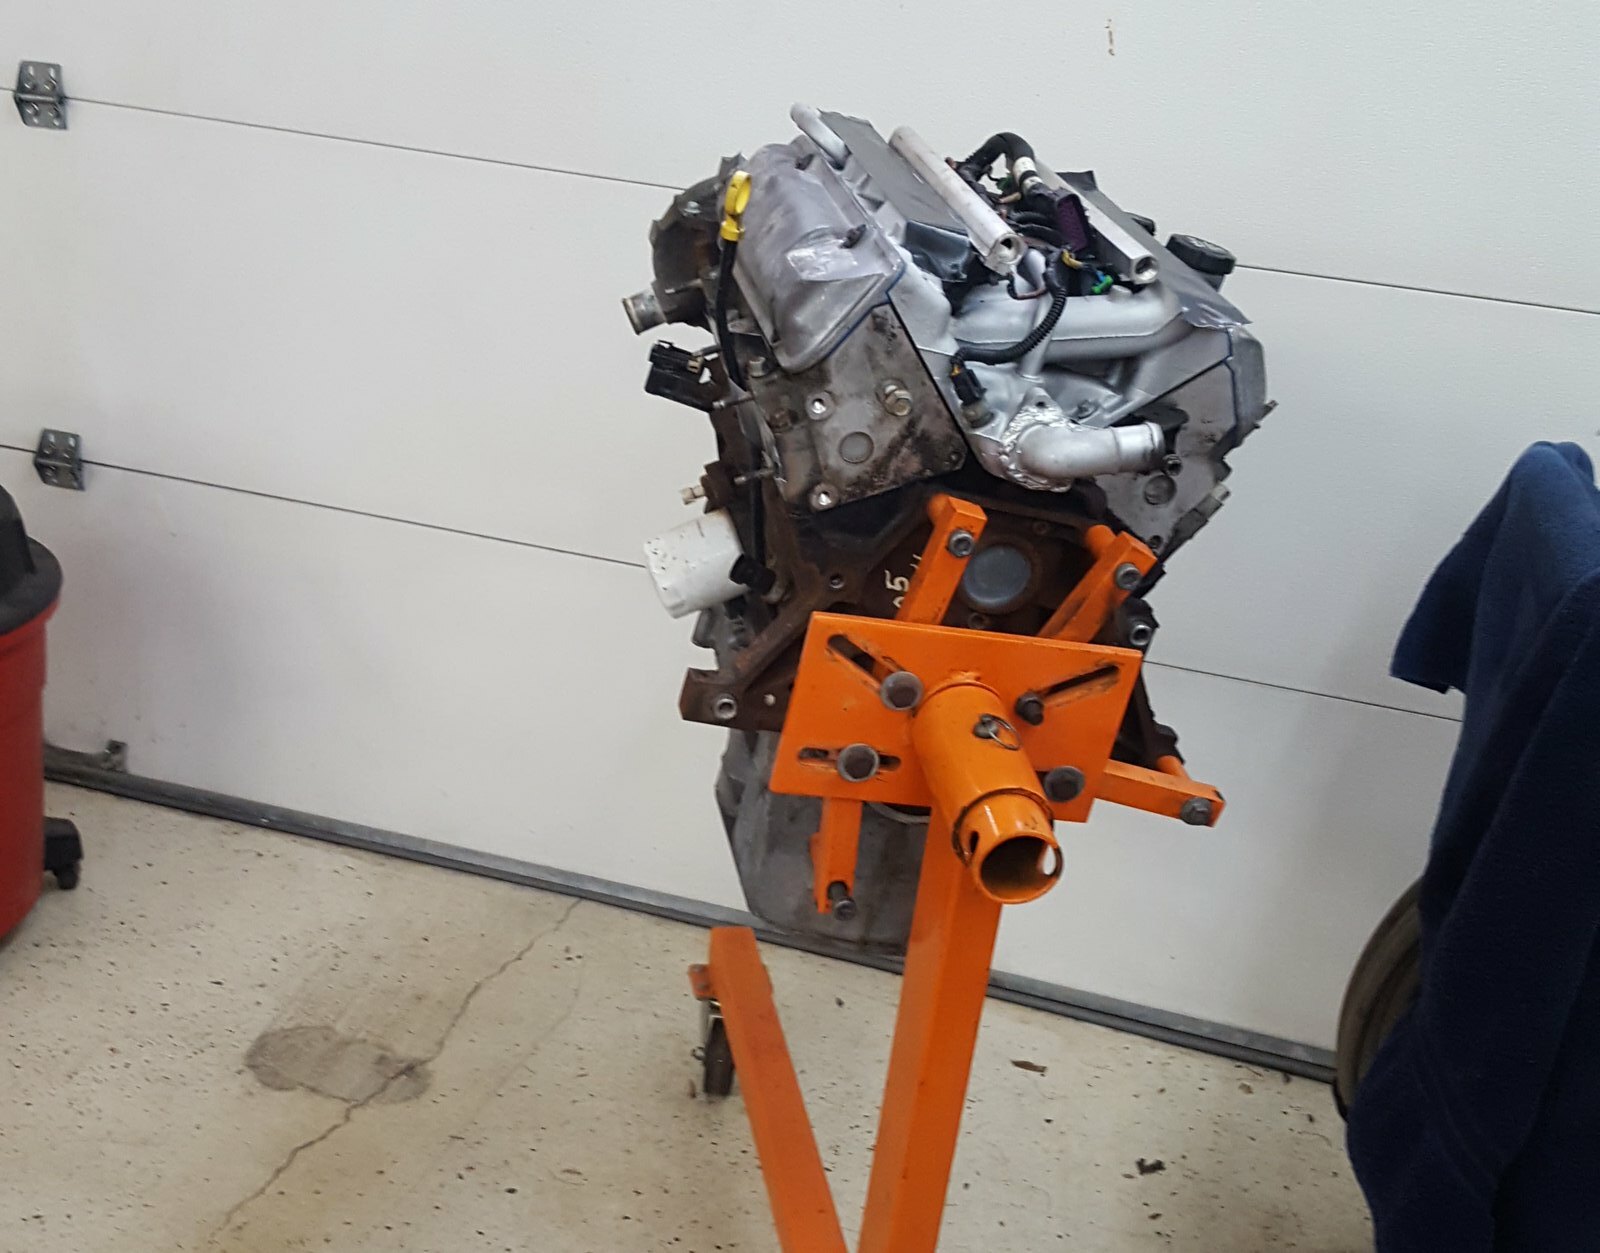
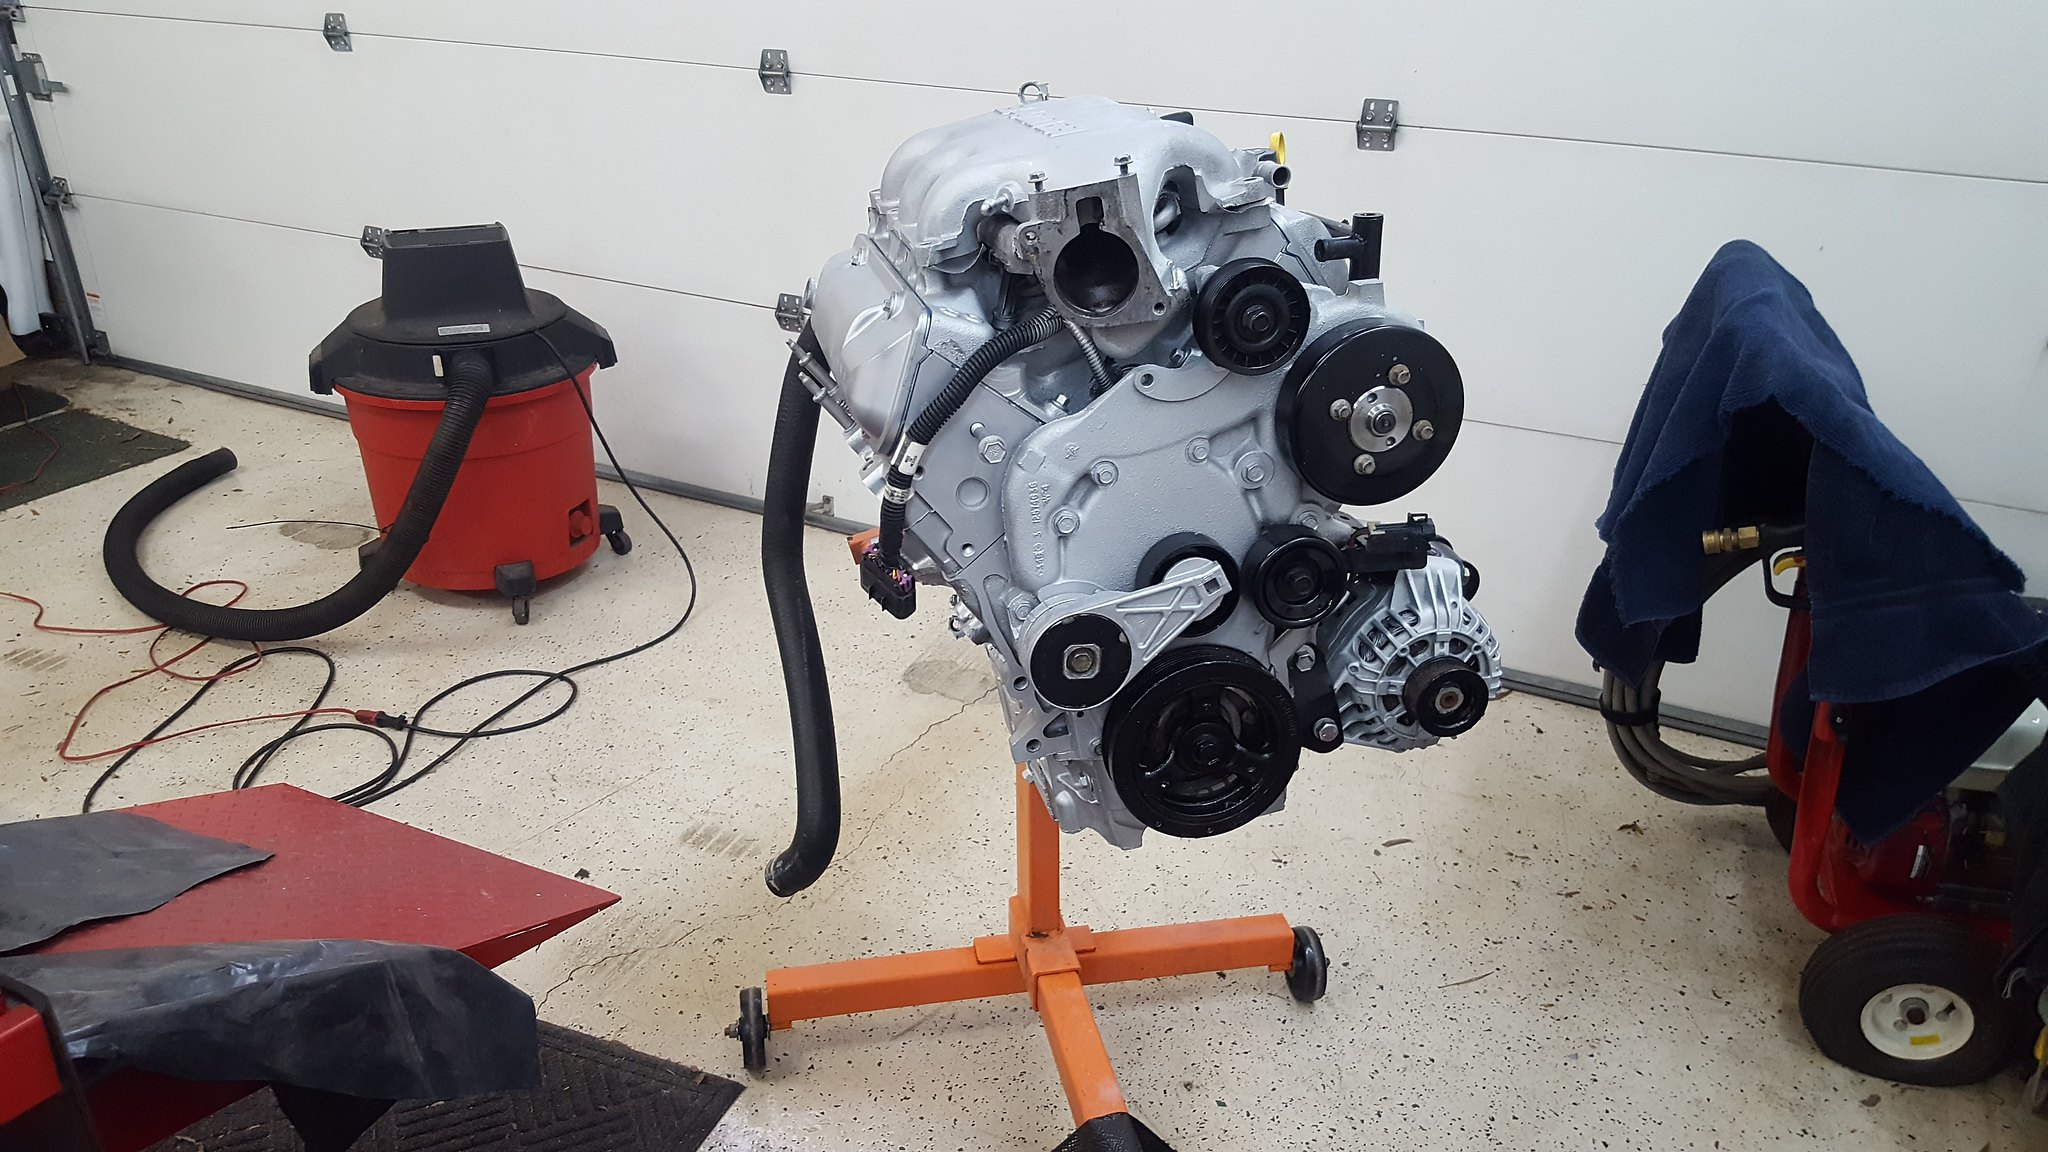
the next step was getting the engine cleaned, taped, and painted. I finally was convinced to take the easy route of painting the whole engine silver. With black accents. So, super clean, wire brush, brake clean, scrapers, etc. then some painters tape.
 20180630_141244 by Michael Crawford, on Flickr
I also used some black valspar on the brackets and lines and such. Pulies as well. The hard lines for the cooling system were all modified to work with the new setup, fuel lines modified, and everything bolted back together. (upper intake not bolted on. But sat there to give you the idea. And so I can see it. Turned out GOOD. I was really nervous about it looking like chrome spray paint at first....)
 20180701_111934 by Michael Crawford, on Flickr
 20180701_153220 by Michael Crawford, on Flickr
 20180701_153228 by Michael Crawford, on Flickr
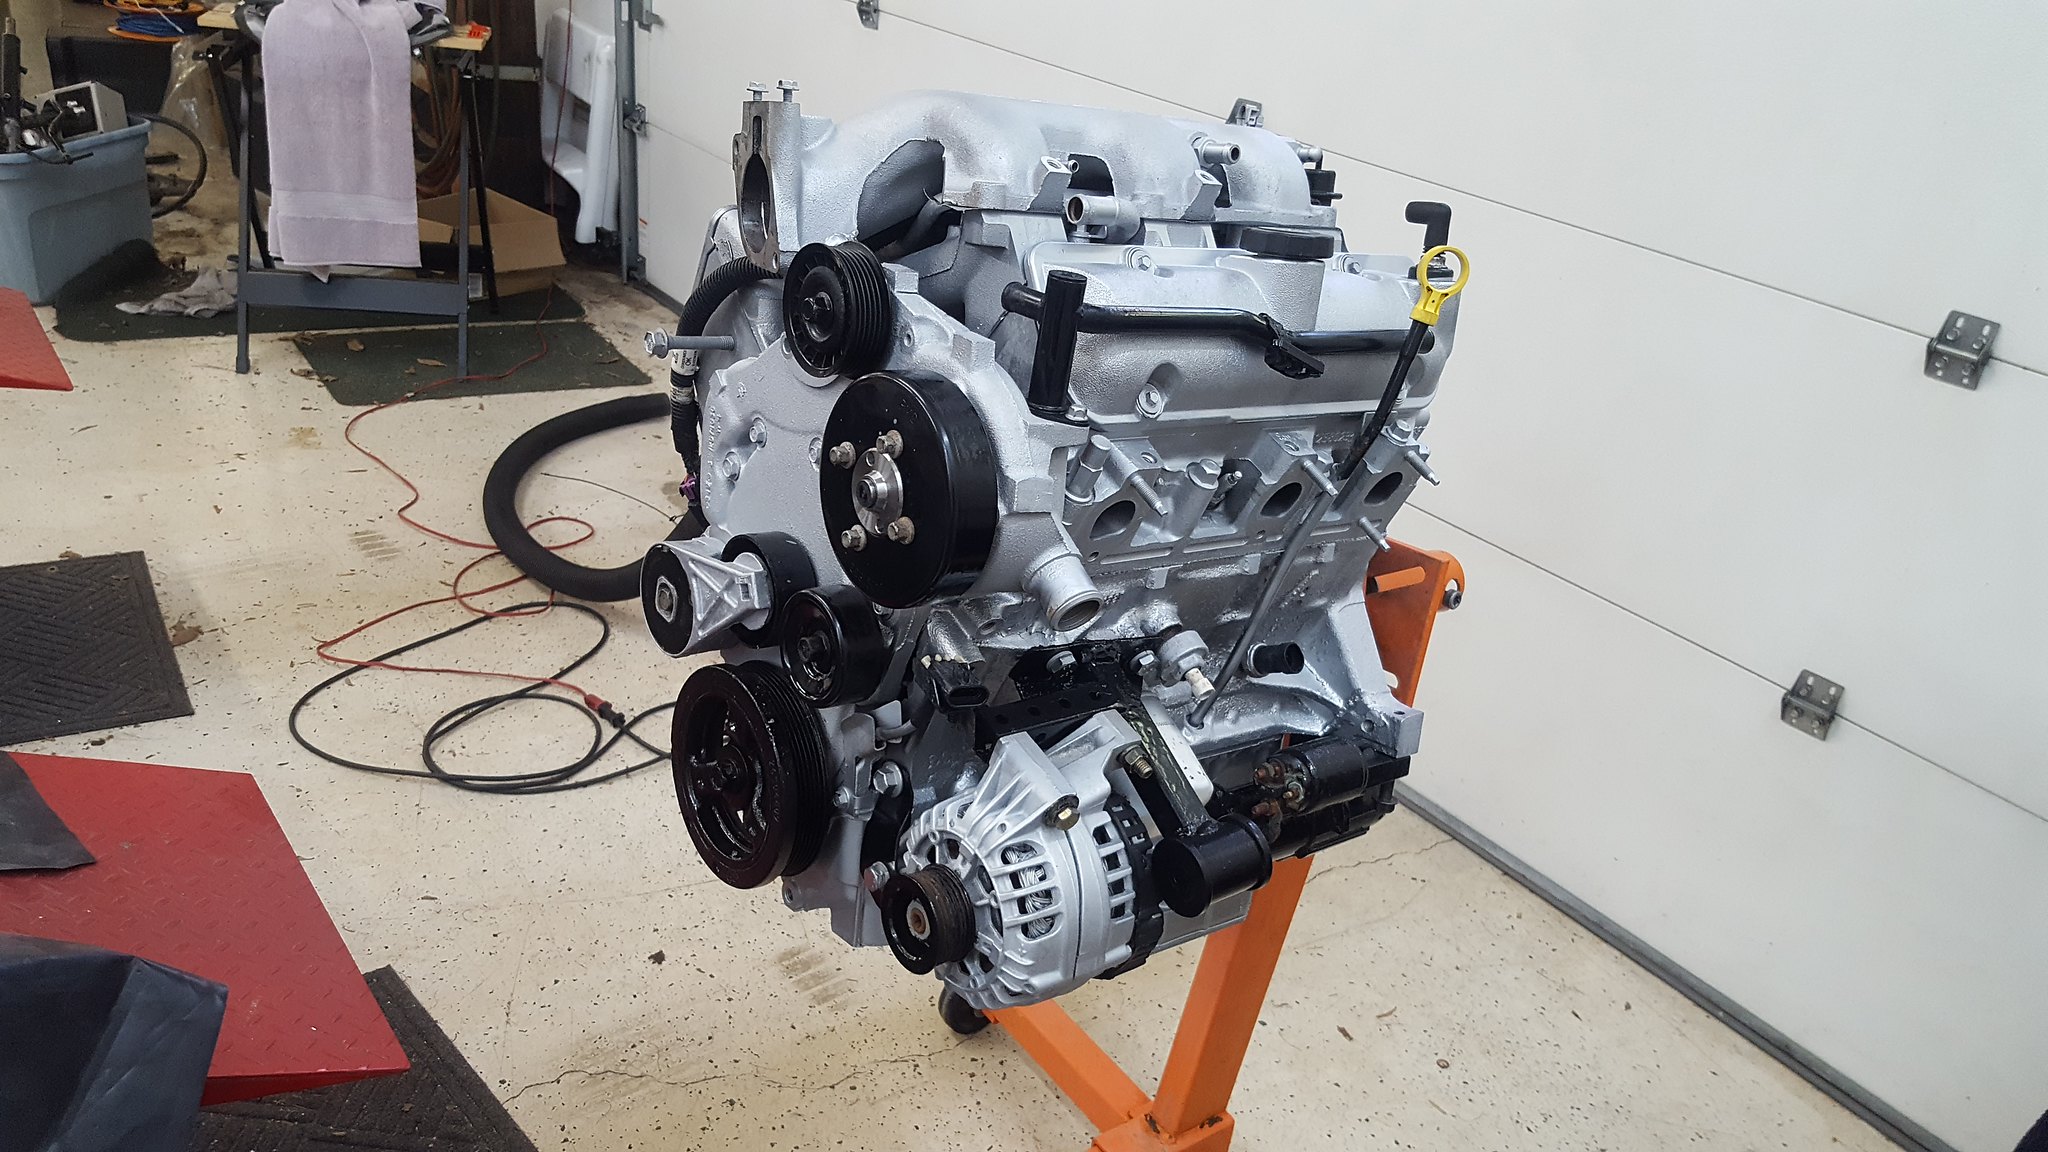 20180701_160407 by Michael Crawford, on Flickr
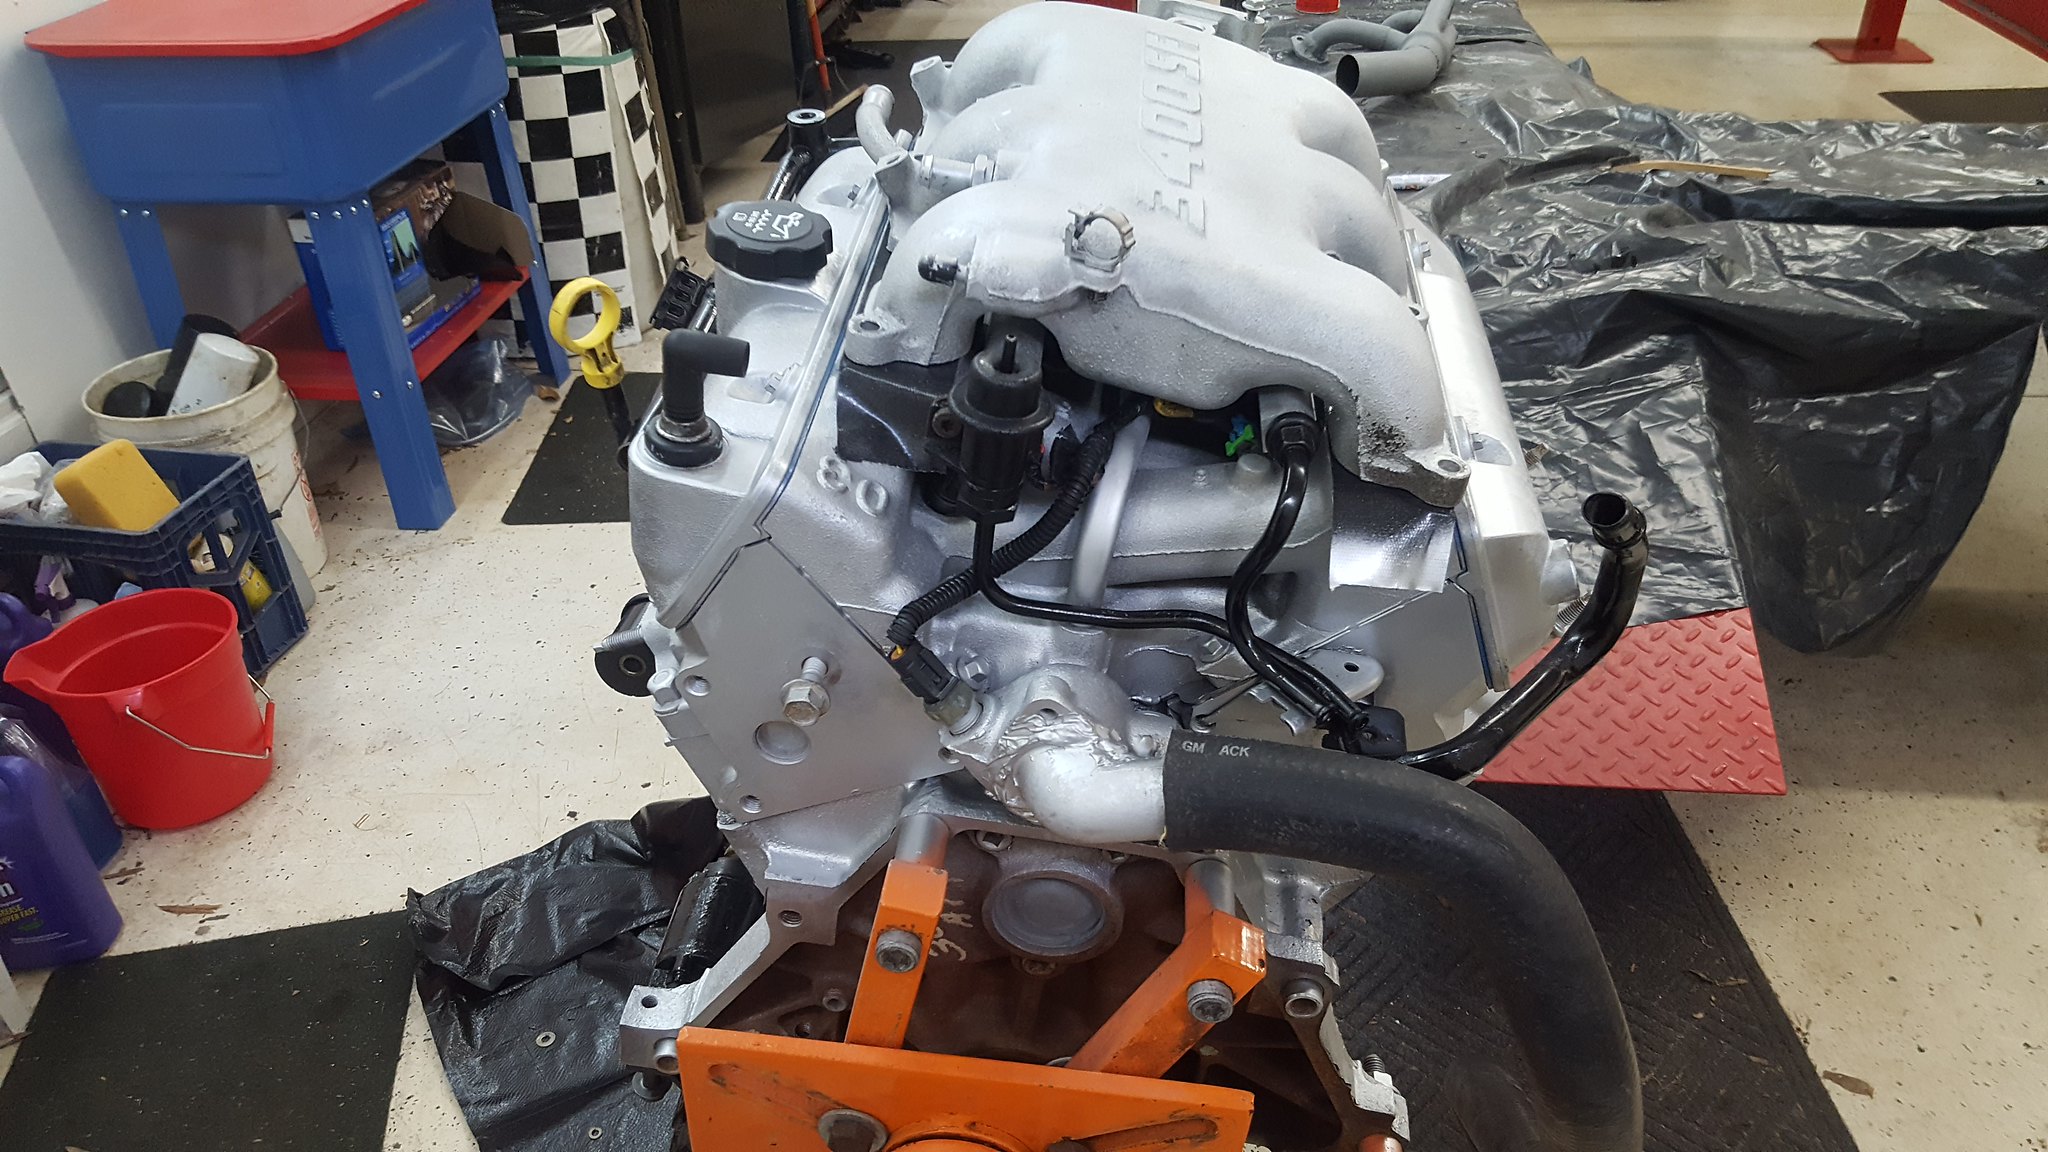 20180701_160412 by Michael Crawford, on Flickr
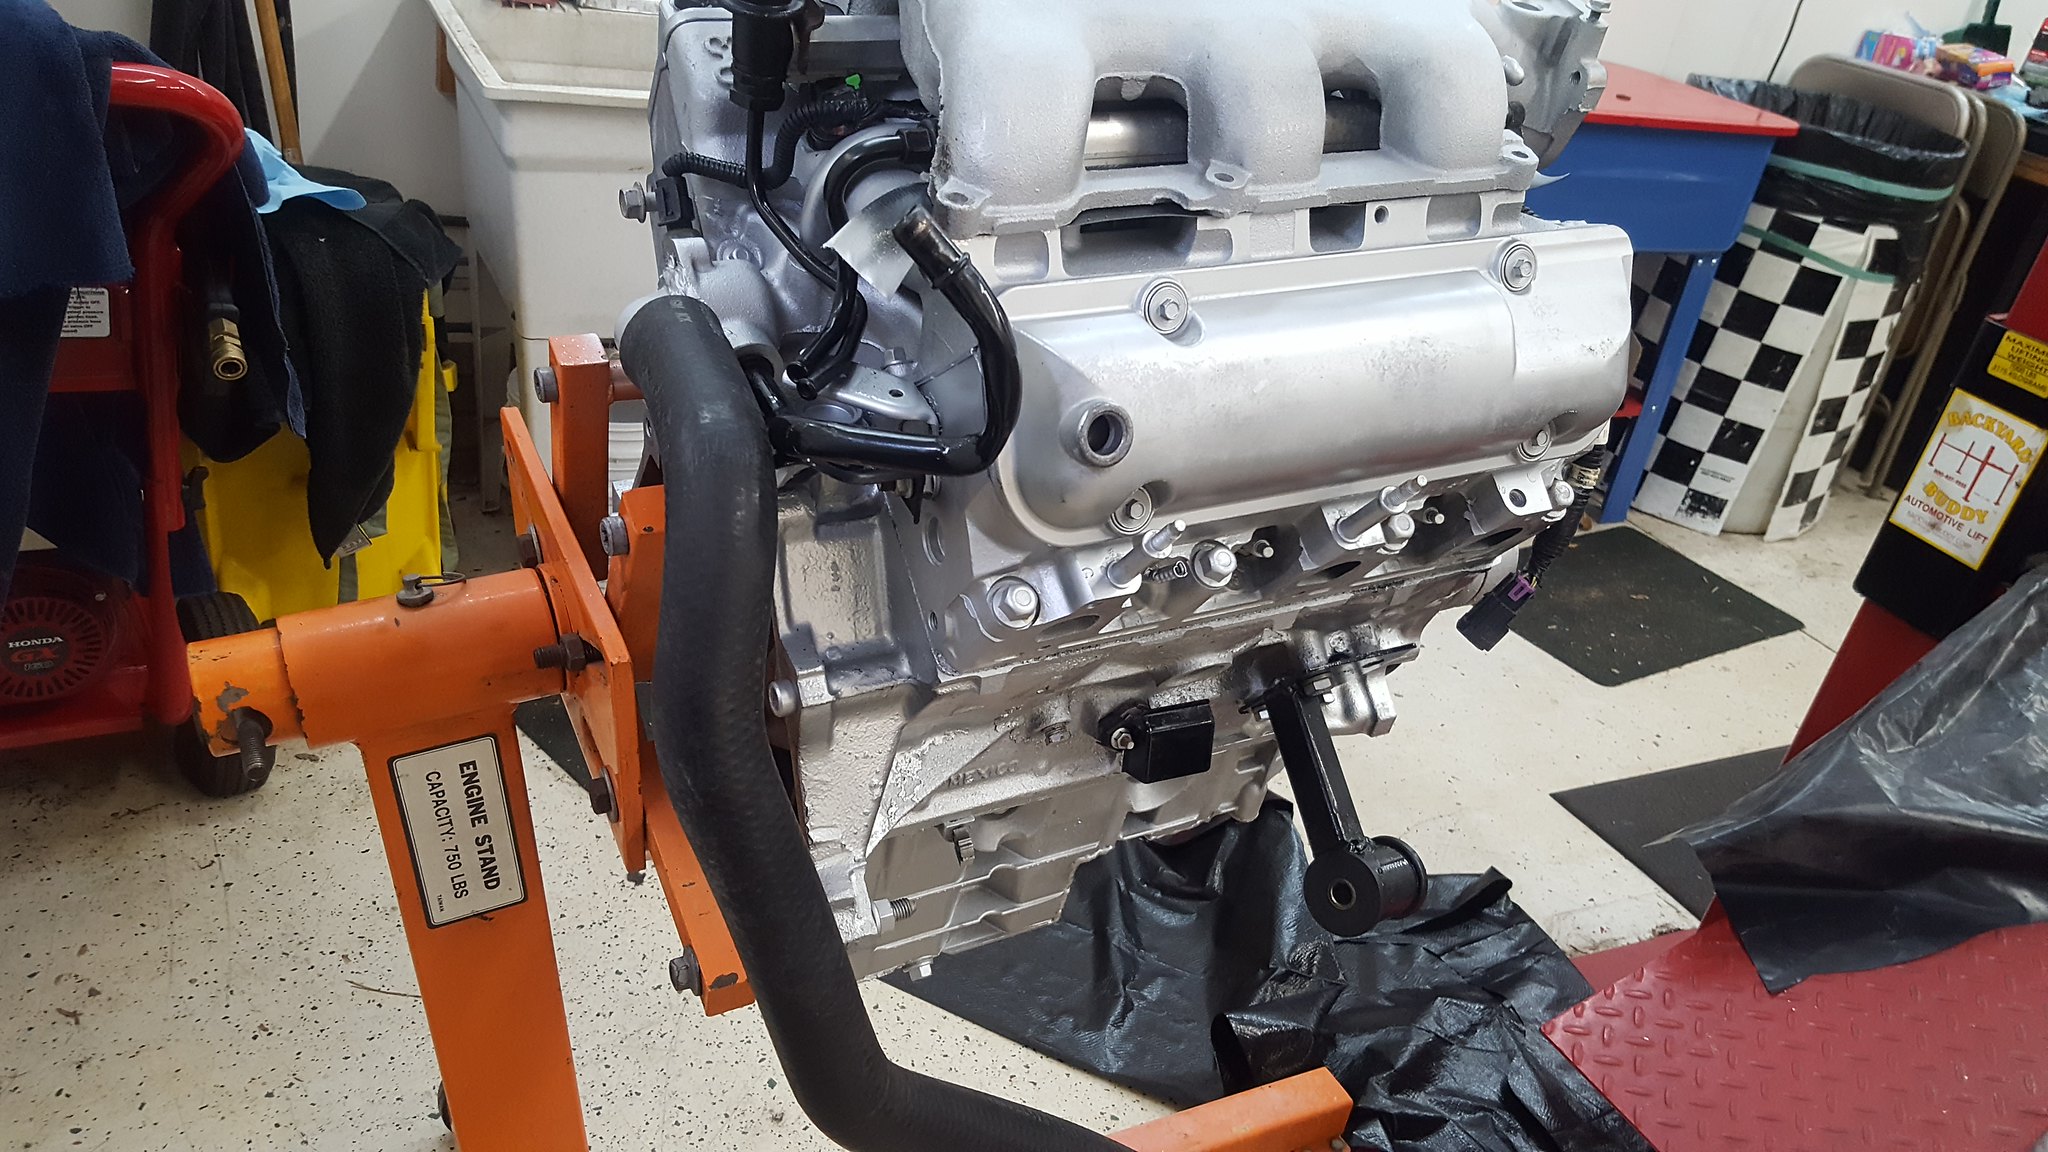 20180701_160418 by Michael Crawford, on Flickr
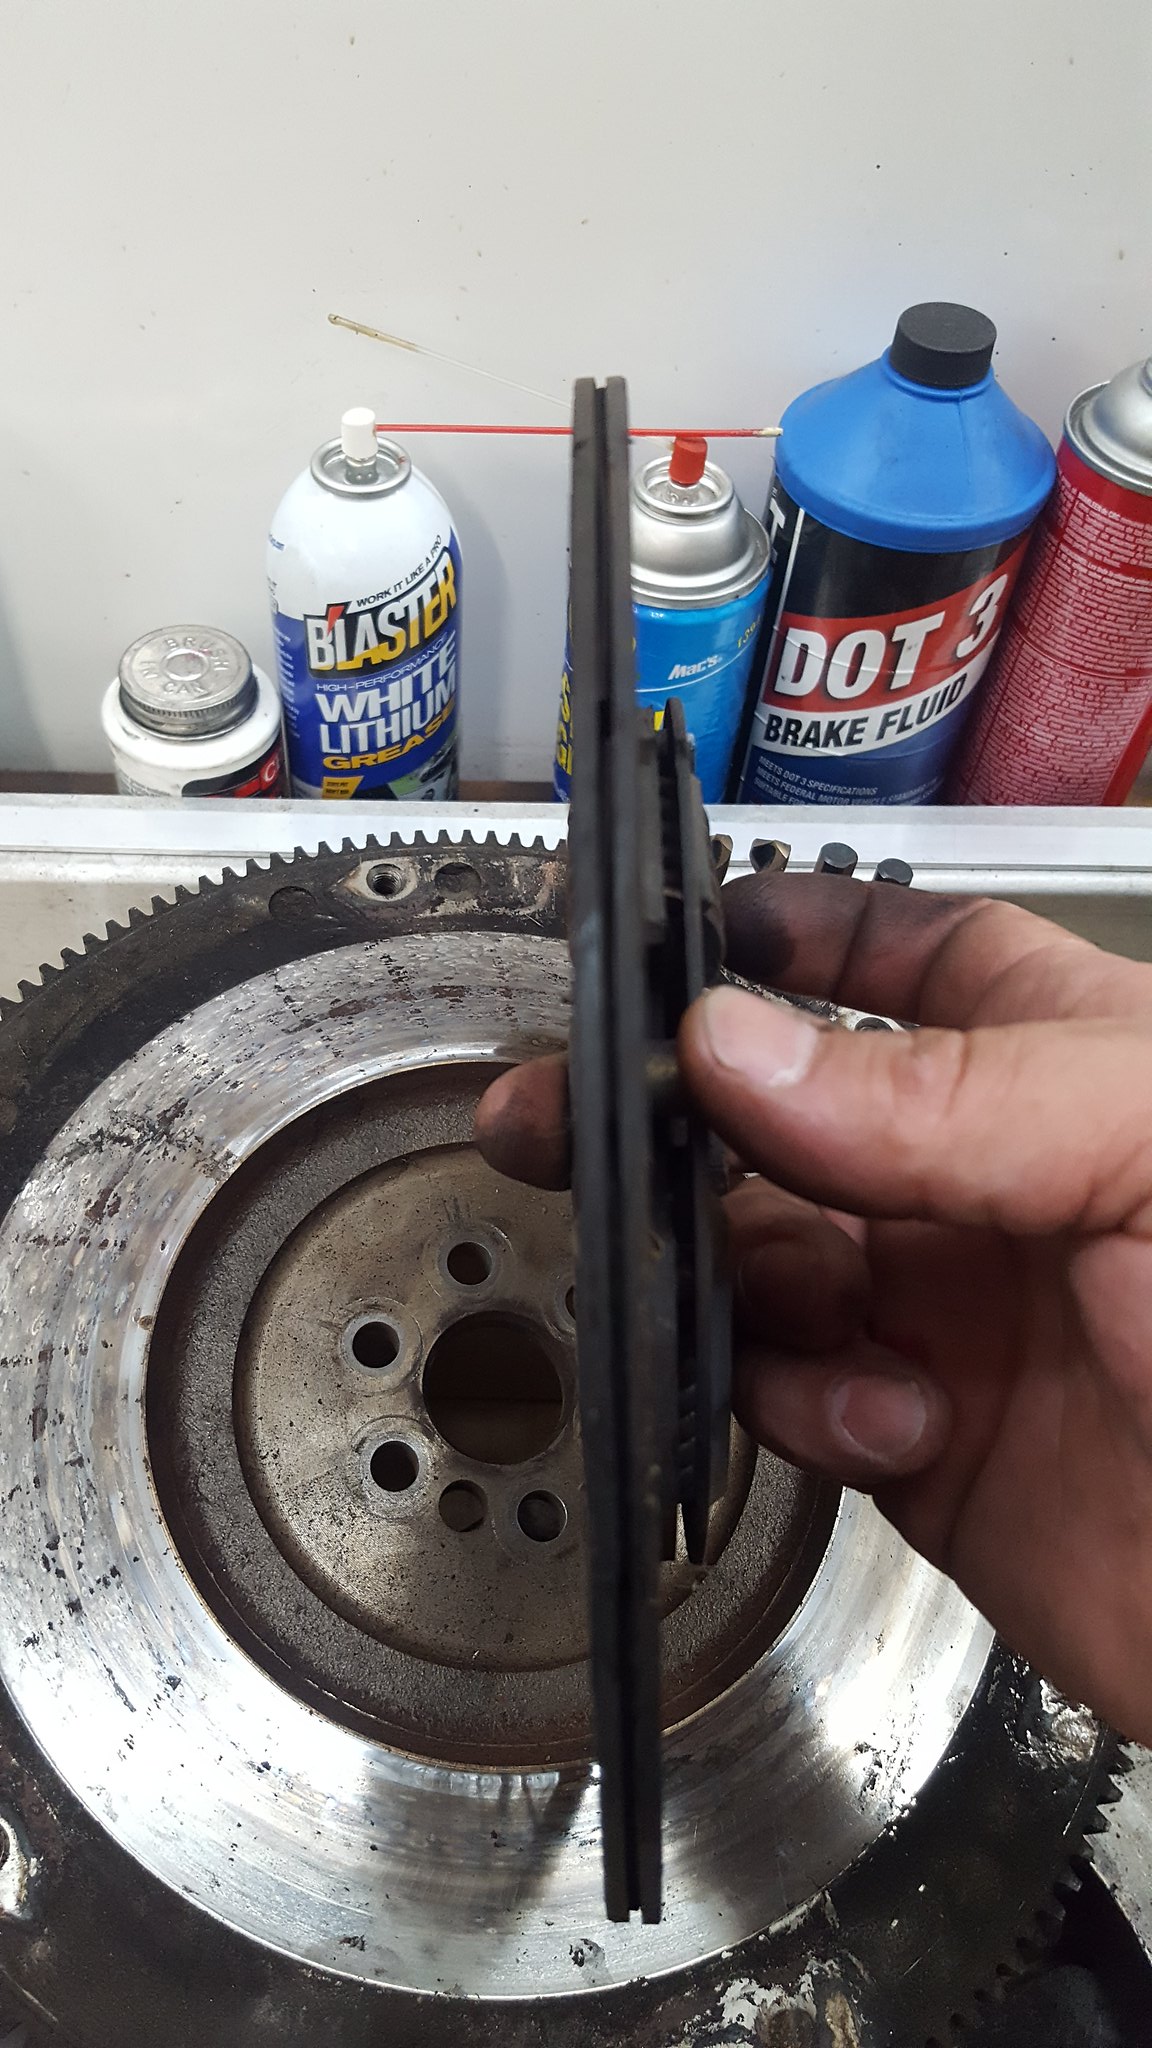
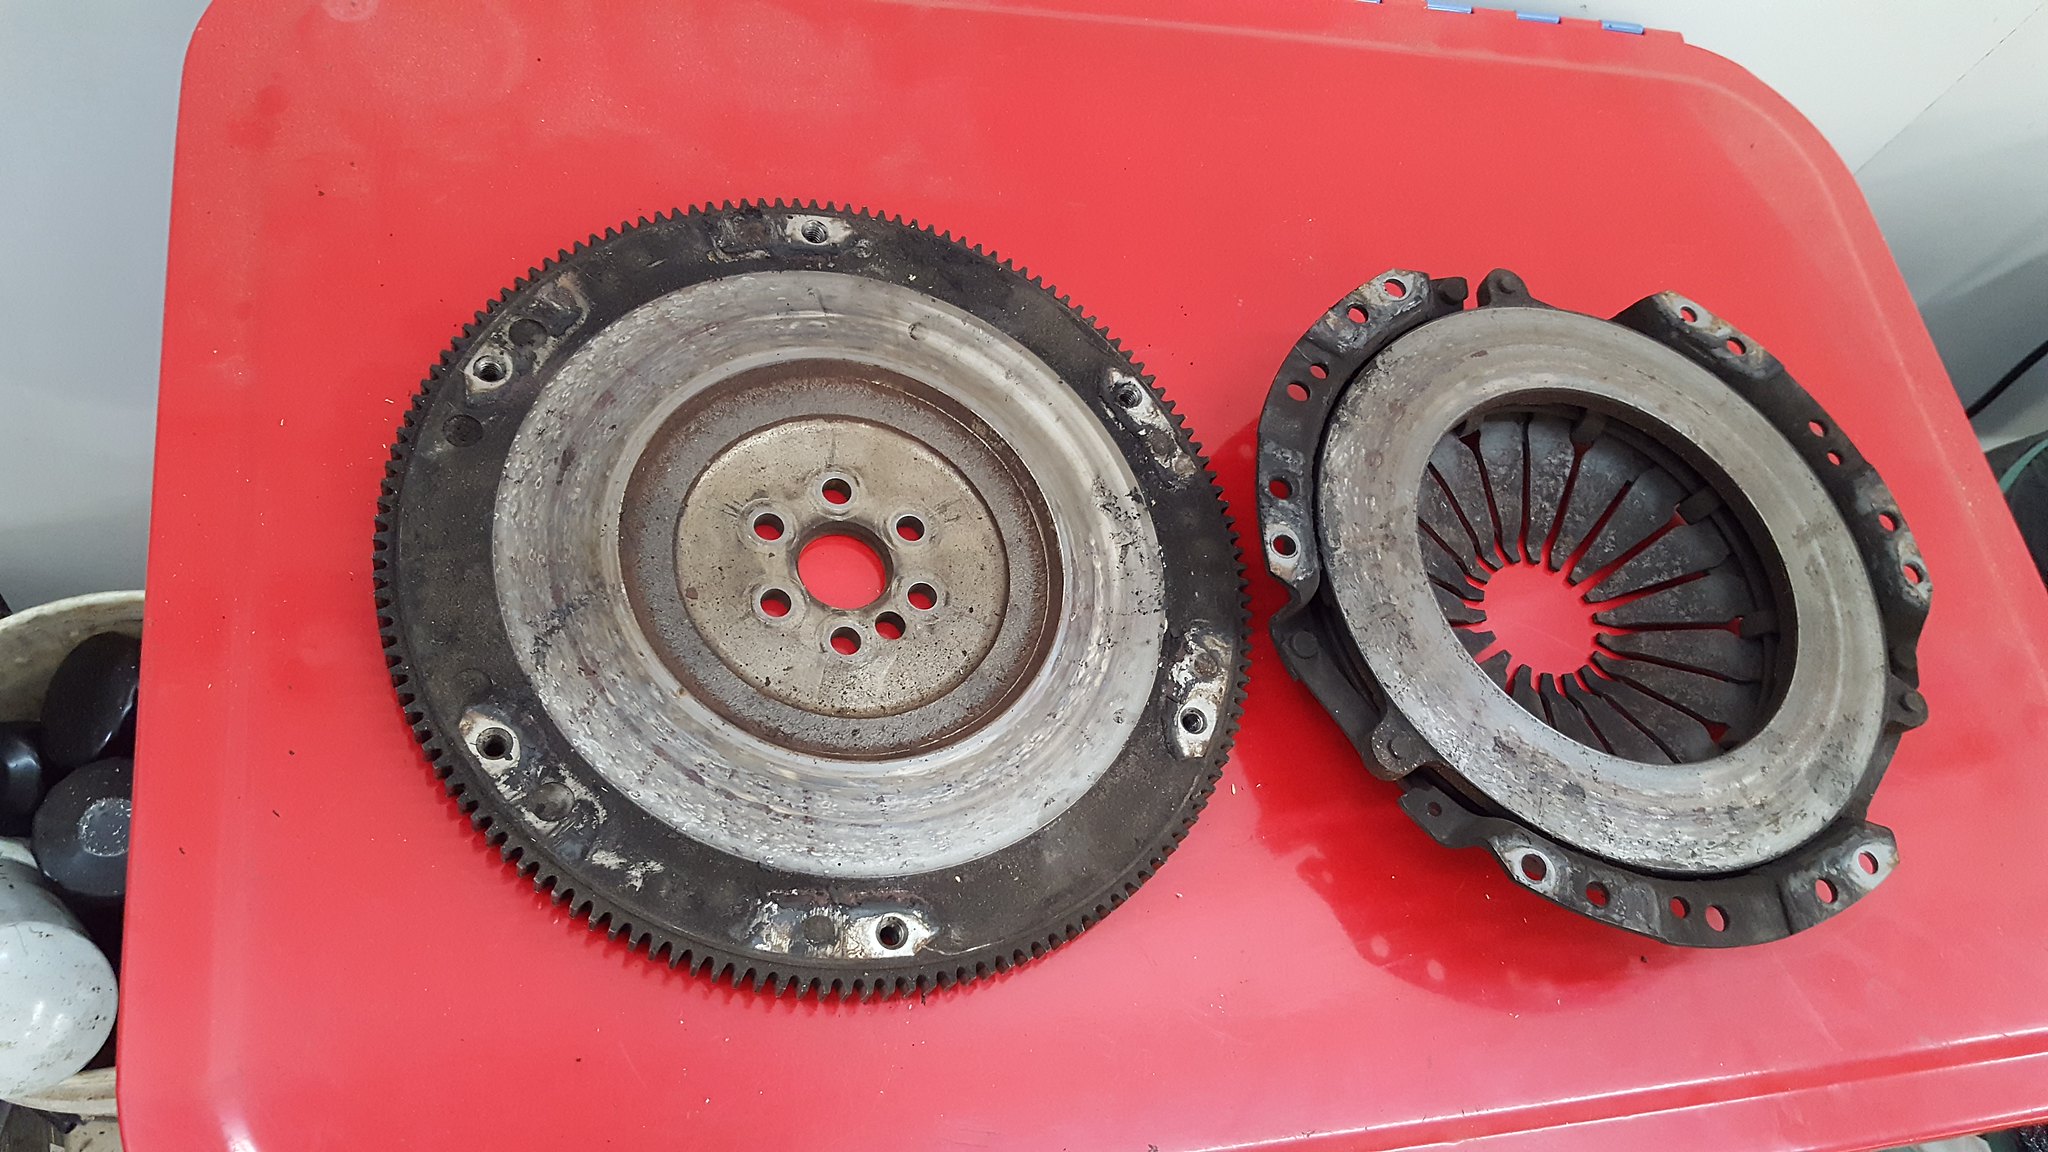
I pulled the used clutch and flywheel out of their box to get ready to assemble that when I realized I don't have a pilot bearing. I'm ashamed to say that this clutch will have to do. Its pretty well worn out, but its what I have, and its paid for. These parts are off a 2.2 s10, which is what the 3400 fiero guys use, and wvtumbler recommended for this swap. Hopefully it doesn't slip. I'm going to dress the pressure plate and flywheel with the zizz wheel and a brown pad and hope for the best.
 20180701_160234 by Michael Crawford, on Flickr
 20180701_111928 by Michael Crawford, on Flickr
hopefully the next post will see the engine in the bay, and all but hooked up!
Happy 4 th y'all. And remember to thank our servicemen (armed forces, police, and firefighters) for the freedoms we all enjoy in this great country.
I would probably Think about using a bit of the budget for a new clutch disc. Iirc, they are around $30 on rockauto.
In reply to wvumtnbkr :
i have a fresh clutch kit on the way for 52.99 or so. however, new clutch means no turbo will ever go on for challenge glory. running too tight to the cap for my tastes at this point. and the current budget total still has tires/mounting/turbo/piping in it. theres room, but i dont want to limit my options yet.....
as a side note: what would FMV be for a set of taylor plug wires that someone cut on, but never terminated be? i think theres enough in the box to do this car, but they sure aint complete. bill gave them to me in one of his fits of throwing crap out at the body shop. theyre red, 8mm, straight boot (i think)
Made the call. Pulling turbo out of the budget for a new clutch. Seems like a good idea for reliability sake.

My first experience with this type of motor was flushing my mom's Equinox to get the heater working. I back flushed everything to clean out what looked like gravel.
Anyway, noting how narrow it was I wondered if it would fit in a Miata easily. I bookmarked this thread as soon as I found it.
I have been lurking for some time but have to say I like how far you have gotten and I look forward to "seat of pants" dyno impressions when you get it rolling.
BTW stop cutting / burning yourself, this project is punishment enough.... ![]()
In reply to Bent-Valve :
Lol. Im sure everyone that wrenches hard does this kind of stuff to themselves. Im just willing to publicly admit it.
I have had a 3400 powered company car before. If the miata runs out like that car did, only 1000+ lbs lighter, I'll be stupid happy. Then, hit it with a 125 shot.
I have found one other miata with a 60 degree swap. It was an na, with a rwd 3.4. And near as i can tell was never documented much or completed. So im really making it up as i go here....
You'll need to log in to post.


