Ooh! Interesting idea....I will read up on that. I had been planning to just sew up some tan slip covers/seat covers after the challenge. (I want to eventually have a proper interior and be street legal.) That is definitely an alternative worth investigating....
I just cut a big chunk of the firewall out of the 810 wagon....all the stuff that the pedals and steering attach to it. I think it will be much easier to use that bit of the wagon than to fabricate all the equivalent parts and install them on my type 11 replica.
I just welded a piece of tube to one side of the bit of firewall to assist in test fitting it to the chassis. Earlier, I forgot to mention that I also pulled the gas pedal/throttle cable and the brake stuss off the firewall. I also got one end of the spedometer cable free....need to go underneath to get the other end of it. I will probably get the handbrake cable while I am down there
I hate adapting seat brackets so you can mount them in a different cars
[Edit: I think I have figured out what to do. It looks like the side of the seat facing the transmission tunnel needs to be approx 3.5 inches higher than theside by the door. I will probably build a raised platform - higher on one side - so that the seat is the right height and level.]
With the recent talk about lowering miata seats I am sad to say that I need to raise my geo seats to see over the cowl/hood/grill shell. (Yes, I know that I should have built it channeled/sectioned like this.
 I didn't, instead going for a car big enough for Dad and I to drive, with near stock proportions. That means it is way too tall.)
I've been working on building an adapter/bracket thingy to mount the driver's seat so I can determine pedal placement. 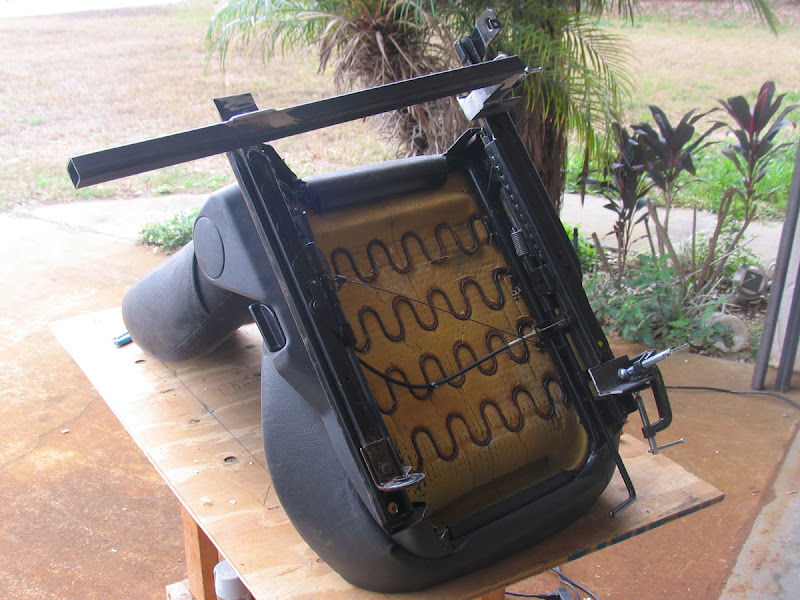
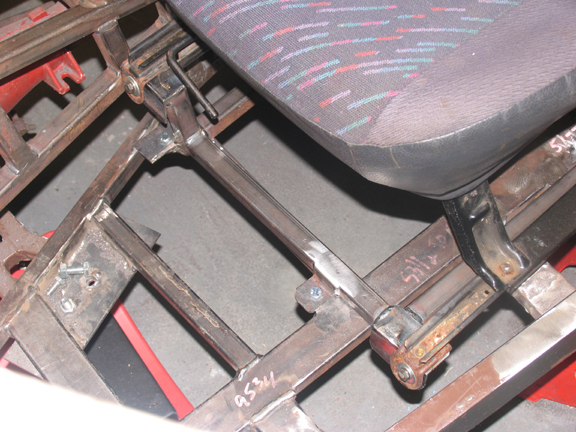
OK, the seat sits level now. I still need to cap some of the tube-ends. I also need to drill holes and weld nuts to the metal tabs so I can mount the seat. Sadly, this is only about a half inch higher than the stock height for the geo tracker.... I may need to actually go a few inches higher than this for my datsun replica.

Not as bad as I thought...I just put the geo seat next to the van seat for a comparison. They are close enough to each other in height - probably differing by an inch or two - that I may try fitting it to the chassis without any more mods.
The firewall fragment is tacked in place
 and for the first time I'm grateful for the slushbox transmission
 There's no room for a clutch pedal
Went to Advanced to pick up some nuts that fit the bolts that held the junkyard geo seats into their original vehicle. I need to drill mounting holes through the tabs on the seat mount and weld the nuts on the back side so I can attach the seat. Then I'll repeat the process to attach the mount to the chassis. (Thus, the whole setup is temporary/removable just in case I decide to switch seats after the challenge.)
The ultimate goal is to turn this into a street legal streetrod that I can drive to local cruise-ins. I'd also like to take it to the occasional local autocross. I don't expect it to be fast, but it will be fun to mess around in something I designed and built myself.
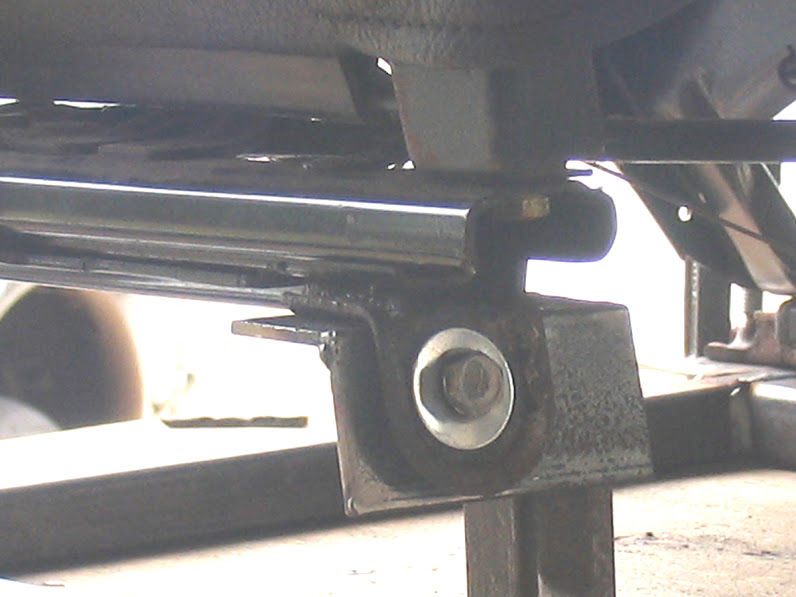
I drilled the holes in the mounting tabs for the driver's seat adapter. Now I need to rig up a way to mount the adapter to the chassis.
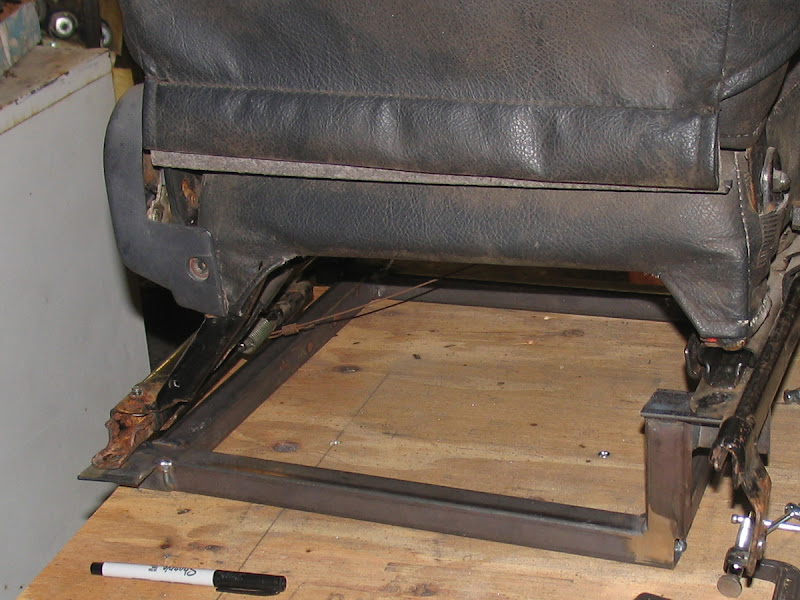
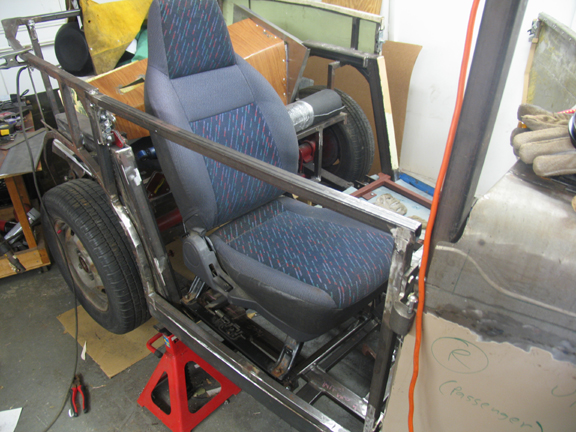
It still needs work, but for the first time, the driver's seat is attached to the chassis. I still need to add two more mount points, but I am pleased with it so far...The geo seat has a good range of motion; i.e. from "as far back as possible" to "I as WAY too close to the pedals."
After I finish mounting the seat, I will go back to worrying about the pedals and steering wheel
stupid annoying junkyard bolts....two of them sheared off yesterday. I was using them to hold the nuts in place for welding...must have gotten spatter on the bolts. The practical upshot is that I had to buy bolts this evening.
Ok...the driver's seat is now attached to the chassis for real...four bolts from the seat to the adapter and four more to fasten the adapter to the chassis
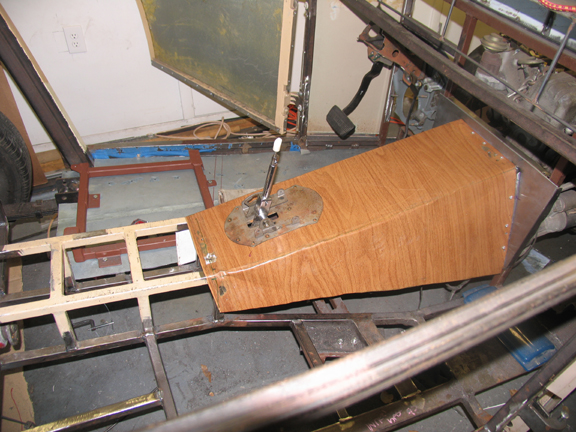
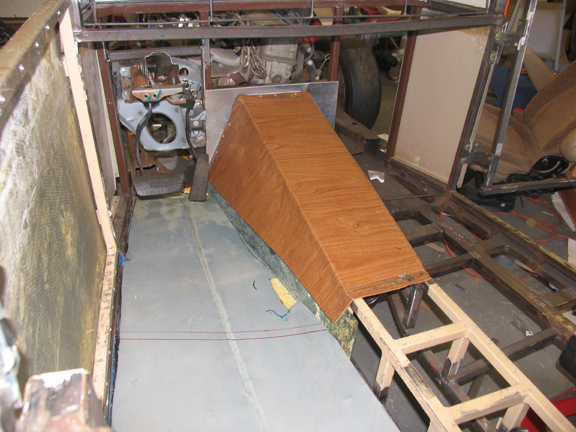
test fitting the driver's side floor. The sheet metal came from the hood of my datsun 810 donor.
The neighbors just threw out a large microwave oven...nice metal sides. Anybody know of a good use for a microwave emmitter?

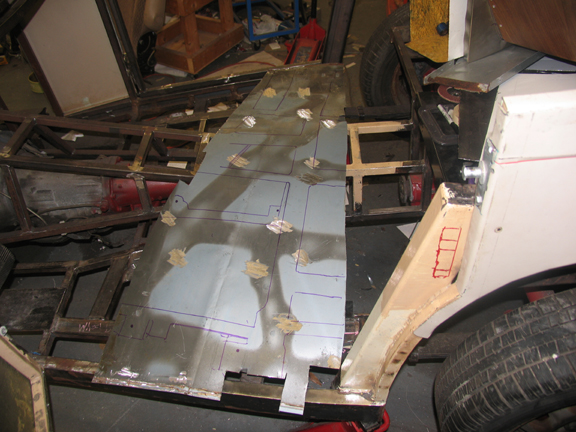
marked the floor so I know where to drill holes for rivets and bolts. In this photo you can clearly see the outline of the hood bracing and the bare spots where I had to grind the adhesive off that used to attach those braces to hood skin (i.e. to my new floor).
I clamped it to the chassis, lay down on a creeper, and crawled under the chassis with some sharpie markers so I could trace the outline of the chassis tubes onto the bottom of the sheet metal. This will let me take the floor over to the work bench and drill holes for rivets knowing that these holes of correctly positioned. Later, I'll put it back in place on the chassis and drill through those holes into the chassis.
The hood skin/floor pan will be held in place with rivets, like most locosts. I'm putting it on top of the chassis tubes, though, where most locost builders put theirs on the bottom. I think this will make the installation easier (my chassis is too heavy to flip like a normal locost) and will give the floor a cleaner look, too.
Just drilled the holes for the seat bolts and a few of the rivet holes.
Running some errands yesterday I saw two big file cabinets on the side of the road. I was going to pick them up on the way home if they were still there for the flares on my monte carlo but someone had beat me too them. I hope they go into something cool and not just holding papers.
Wally wrote:
Running some errands yesterday I saw two big file cabinets on the side of the road. I was going to pick them up on the way home if they were still there for the flares on my monte carlo but someone had beat me too them. I hope they go into something cool and not just holding papers.
The file cabinet flares on the $2011 k-car looked great. I was kind of happy to find out that they were made the same way I made my grill shell and cowl.
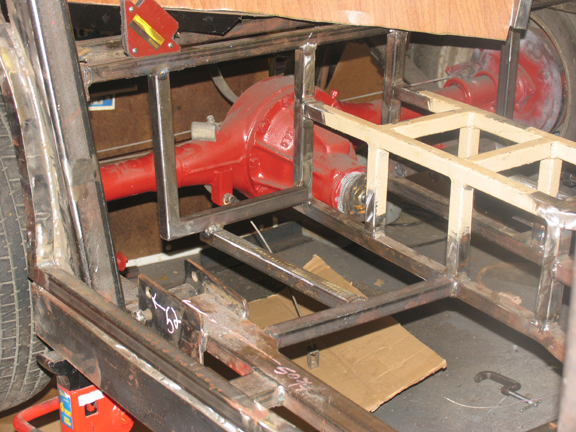
I added some chassis tubes to support the bach of the driver's side floor pan. I also trimmed some sheet metal for the passenger's side floor
passenger's side tubes tacked into place
I hate laying underneath the car and welding stuff above me. Upside down welding sucks. Still, the extra chassis tubes are in place, the seat adapter's tubes are capped, and I feel like I got a fair bit done
I made the adapter for the passenger's seat. It still needs to have the chassis mounting brackets and all the mounting holes and captive nuts.

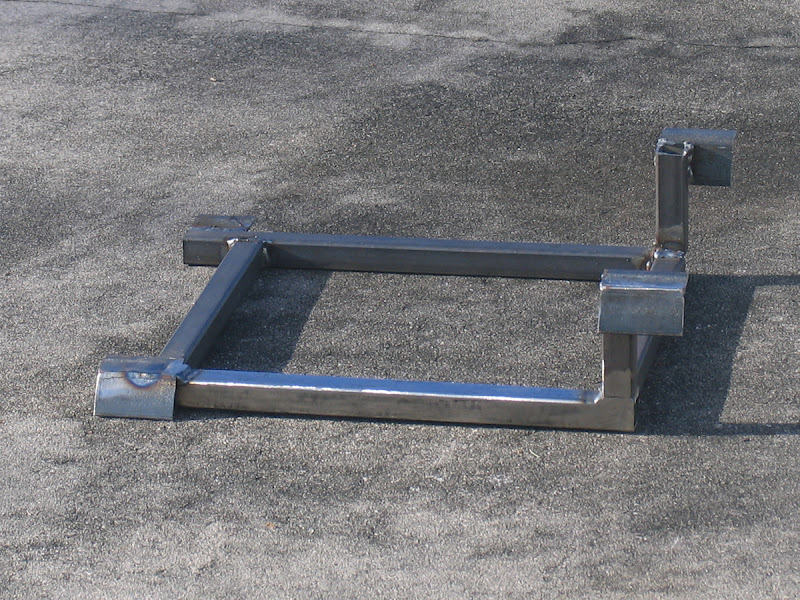
mounting holes drilled and nuts welded in place so the seat mounts to the adapter. Fittting it to the chassis will take a bit of effort; i.e. minor modification of the transmission tunnel
The seat fits, although finding that out was strangely annoying
I also worked on mounting the gear selector to the transmission tunnel