
JoeyM
SuperDork
12/30/11 12:45 a.m.
welded the door frame together, but the fit was less than ideal...cut some slits so I could rebend the arch at the back of the door (...the one along the wheel well). After everything fit better I welded it back together. Then I started on the bracket to mount the door latch
JoeyM
SuperDork
12/30/11 11:09 a.m.
I decided to mount the pin first so I finishined the bracket for it. (I.e. I am doing this door the opposite of the way I did the driver's door.) I still need to cut open the door jamb and weld the bracket in place so I can mount the pin. After that, I need to finish and mount the door latch bracket.

JoeyM
SuperDork
12/30/11 12:12 p.m.
AAARRRGGGHHH! Out of shielding gas, and my local AirGas is, too. No more working on door latches/pins until after New Years.
I may grab some poster board and make a pattern for the door skin

oldtin
Dork
12/30/11 12:14 p.m.
My local airgas supplies a couple of nearby napa stores - might be worth a call or two to see if they can set you up (same price as through airgas).
JoeyM
SuperDork
12/30/11 4:53 p.m.
Thanks for the idea. Unfortunately, none of the area NAPAs carry gas. I talked to the counter guy at our local store, and to the owner of four other area NAPAs. 
JoeyM
SuperDork
12/30/11 8:31 p.m.
Mocking up the door skin in poster board

Loving the updates, keep them coming.
JoeyM
SuperDork
12/31/11 6:01 p.m.
I spent most of the day doing non-car stuff, but took the time to transfer my paper pattern to the sheet metal
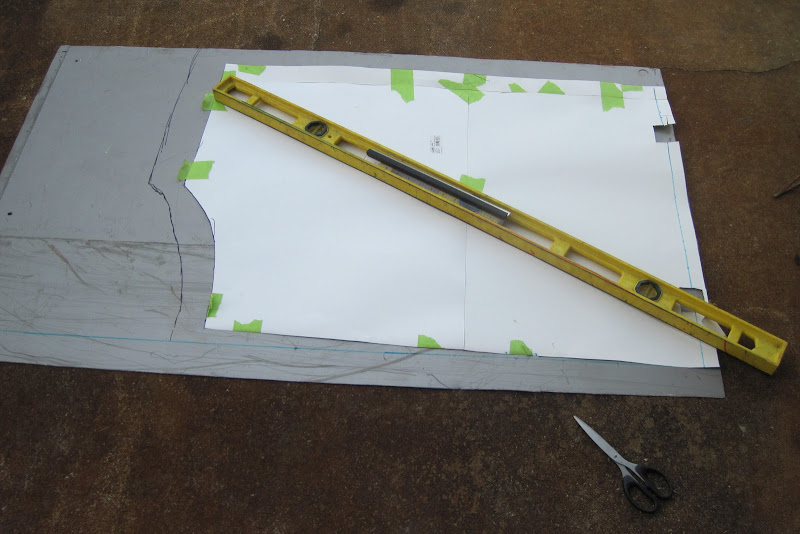
so I could cut it and hold it up to the door frame

Note the extra material I left all around so that the sheet metal can be bent over the tube and riveted on the inside surface of the door frame where it is less visible.
JoeyM
SuperDork
1/1/12 5:57 p.m.
Today I used my new wooden mallet (which I made from a branch the neighbor trimmed off his oak tree)
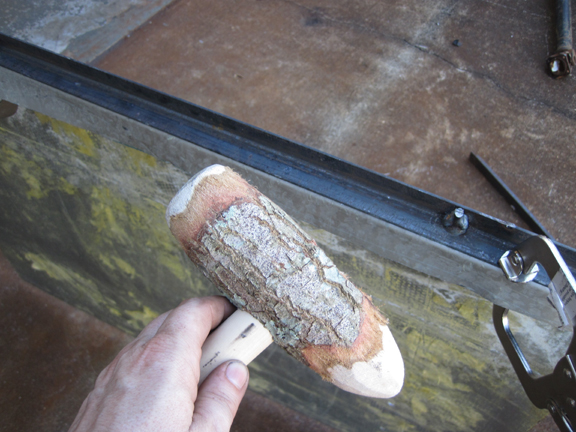
to bend the flange at the bottom of the sheet metal for the door skin. (The entire bending rig was some scrap angle iron, a length of tube, and some clamps.)

It fit's pretty well.
I was especially happy with the way it fit around the door hinge....that's much better than on the first door.

JoeyM
SuperDork
1/1/12 6:27 p.m.
Talk about a small world....I just got some nice thick sheet metal (i.e. a stove) from a former GRM subscriber near my house.
I was driving down a street two blocks over when I spied a stove sitting at the side of the road. I knocked on the door of the house and asked the owner if he was throwing it out, and if so, could I have it.
He said I could, and I thanked him, commenting that it was nice, thick metal. He asked what I was doing with it, and I said, "It would be easier to show you than to explain. Hop in the car. I only live a few minutes away." The guy had a 1970s jag in primer in the drive way next to his pickup, and you could barely see another project car in the garage, so I thought he'd "get" the GRM challenge.
When we got to my house, I handed him a GRM challenge issue (the one with SuperTurd on the cover) to explain, and he said, "I used to subscribe to this." My jaw nearly dropped! When I recovered, I talked about Andy Nelson's yellow volksrod, and the washing machine floor pans, explaining that they were what inspired me to try making the entire body from used appliance metal.
He said he'd rather have me use the metal than let someone take it for scrap. I was planning to walk it to my house on a furniture dolly, but he offered to drive it to my house in his truck.

Oh, and my neighbor across the street from my back yard was throwing out some pegboard
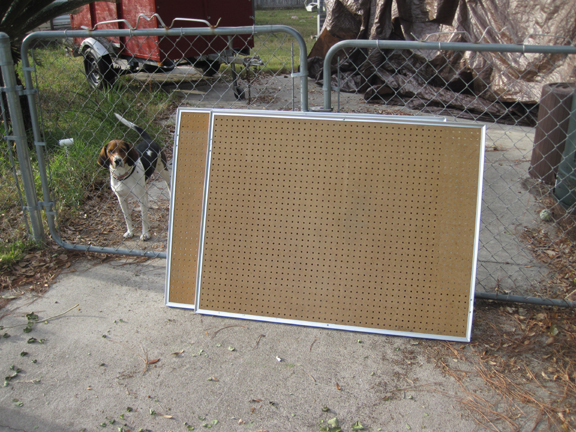
Gertrude and I will hang it up in the shed
JoeyM
SuperDork
1/1/12 6:31 p.m.
I also cut down an oil drip pan to use while figuring out my steering setup. I don't want to mess up my pretty painted firewall by punching unnecessary holes in it as I try different ideas


Oh, yeah. I forgot to mention.....my new garage lights are very bright.

welding at night just got easier.

Luke
SuperDork
1/2/12 5:26 a.m.
JoeyM wrote:
Today I used my new wooden mallet (which I made from a branch the neighbor trimmed off his oak tree)
^^^This is awesome.^^^ Talk about Grassroots!
JoeyM
SuperDork
1/2/12 6:53 a.m.
wheels777 wrote:
I have been enjoying this project JoeyM. Keep on chugging!
Thanks, Andy. I really appreciate it.
JoeyM
SuperDork
1/2/12 7:21 a.m.
Luke wrote:
JoeyM wrote:
Today I used my new wooden mallet (which I made from a branch the neighbor trimmed off his oak tree)
^^^This is awesome.^^^ Talk about Grassroots!
Yeah, I am hoping that the oak is more durable....the one I made from pine didn't hold up so well :-)
JoeyM
SuperDork
1/2/12 11:03 a.m.
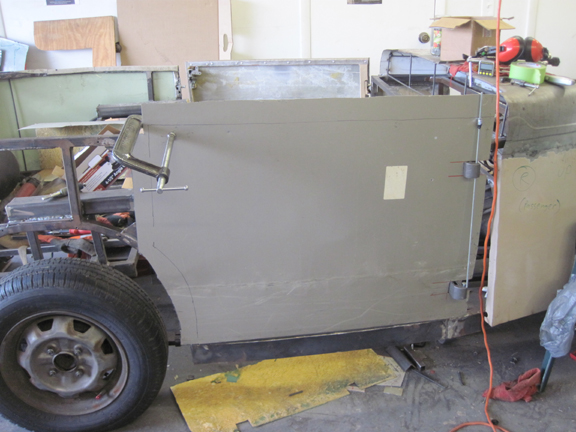
I just trimmed some sheet metal off of the cowl to accommodate the door hinges.

This photo also shows
a) where I cut the tube open, welded nuts to the inside to support the hinge, and welded the tube shut.
b) the fiberglass I used on the inner surface of the cowl after welding the metal from the upright freezer (the top of the cowl) to the metal from the washing machine stand (the side of the cowl.) That weld was pretty weak, so I 'glassed the inside of the cowl to provide more structural integrity.
Now the cowl and rear quarter panel are back in place. This will allow me to lay out the bead that I need to roll on the sheet metal for the door.

JoeyM
SuperDork
1/2/12 1:40 p.m.
Dad came over and helped me roll the bead on the door skin. He turns the bead roller crank, I guide the panel through it....we've done it that way for every panel except the cowl.


This is, BTW, the last major exterior panel....still need to cut and bend the metal for the floor, transmission tunnel, and back seat area. (...and mount the firewall)
JoeyM
SuperDork
1/14/12 6:28 p.m.
I finally got back into the garage....I am trying to mount the door latch mechanism


JoeyM
SuperDork
1/15/12 11:40 a.m.
As you can see ^^, I got the pin mounted on the door jamb last night. This morning I fabbed the bracket that will hold the latch. I am currently hunting for the bolts I was going to use to mount it.
JoeyM wrote:
I was especially happy with the way it fit around the door hinge....that's much better than on the first door.
Practice makes perfect. The first time I installed quarter panels on a car, I did 3....
Wow this is sooooo cool! Way to go! I love it when cars are built with recycled materials, and people donate all kinds of stuff for the project. My project car has a lot of donated stuff on it, and i feel that it makes the car so much more special because every time I look at it I know that some one I know gave me that part because they care about the project and what I am doing. 
Keep up the great work!
JoeyM
SuperDork
1/15/12 6:45 p.m.
thanks for the kind words' deutschman.
JoeyM
SuperDork
1/15/12 6:52 p.m.
The latch is mounted (pictures later) and I can lock the door....I am not happy with the the way it is functioning, though...something is causing friction. I think one of the scews holding the pin assembly is rubbing the head of a srew in the latch assembly.
I'll take a look at it tomorrow.
JoeyM
SuperDork
1/16/12 6:13 p.m.
I think I'm going to need to cut the two horizontal tubes and weld them back together to shorten the door frame about 1/8"...all that to give a little more clearance between the latch assembly and the pin assembly. Frankly, I wasn't in the mood today, so I cut up some appliances and started fitting them to the back end/interior.
Here's the outside of a clothes drier.
 (You can see a hole on the right side from when I cut a piece out to make a grill insert)
Today I used the clothes drier panel seen in the left side of that picture. I cut it in half and used the two bits to make the front of the seat area.
 The black metal at the top - where the bottom of the rear seat will be mounted- is from the sides of the stove I procured on the 1st. The metal coving the transmission tunnel is from a refrigerator....really thin stuff, and I had to put it somewhere that it was supported by LOTS of tubing.
Keen eyes will note that the area for the seat bottom is way too big. This is another one of those cases where I'm deviating from trying to make an exact replica of the 1932 datsun. In the original Type 11, the upright back of the rear seat was directly against the back of the car.
 I plan to scoot the rear seat forward a little so that I can have a bit of storage space behind the rear seat with a little "parcel shelf" over it. I'll probably mount the battery back there, too.
JoeyM
SuperDork
1/17/12 3:51 p.m.
^^^ Gorgeous. I wish I had seen those pics before I had my leaf springs shortened....When I did it I had not yet seen the car from the back. My "pocket car" diecast has the rear fender skirt wrong

The tiny model shows a straight lower edge on the skirt. The real car had a cut out on each side to accommodate the leaf springs.


