In reply to OneSickGNX :
Thanks! Im really happy with how its turning out.
And k1 will make a return for the challenge. With hoosiers.
In reply to OneSickGNX :
Thanks! Im really happy with how its turning out.
And k1 will make a return for the challenge. With hoosiers.
I love how a switch flips on the engine at 4500rpm. Still think I'd rather have a 2.4 turbo build for one. Funny how Lil Stampie reviewed it as that's cool ish but the pause between cool and ish got longer each time.
Thanks for the cheap coilover review. I'll have to do some measuring to see if they'll work on my challenge car, I like the rates!
They would be PERFECT for a challenge neon. Dunno about your application though.
And they are coming off this car. It lost an undefinable "something" when i pulled the koni yellows. Like its no longer my acr, or an acr at all. Just another neon now.
Which is all in my head. But, its my head!
In reply to Dusterbd13-michael (Forum Supporter) :
No, it's definitely not in your head. I'd say it's likely in the seat of your pants. There are reasons that Mopar picked Konis for the car.
 doing the final detail this week. Touching up buffing, ceramicoat, etc. So, probably time for a "final" update with "finished " pictures.

it's time to get this one finished and a wrap up post done. I want to do it before the end of the year.
To do, in no particular order:
nitrous install. Koni install. Kenwood install. Rear mud flaps. Splash shield in engine bay. Center caps on rotas. Chrome lug nuts. Detail. Fix front right turn signal. Alignment. Valve cover leak. Fix air conditioning. Fix oil pressure gauge. Maybe install the msd system. Adjust pass side door glass. Build trunk floor for sub and nitrous bottle.
Thats a hell of a list. Lots of five minute jobs, but a few time consuming and fiddly.
But, detailing is coming along! A few weeks ago, i finished buffing and had my friend brad do ceramicoat on it while i did plugs in his loncoln. Came out nice, but jury is still out on ceramicoat vs mother's California gold paste wax.

Kenwood, oil pressure gauge repair done. Nitrous arm switch and activation switch wired. Center caps on hold.
berkeleying migraines.
Tomorrow is another day. Hopefully konis and valve cover tomorrow. Then back to nitrous and details.
A week later, i can finally do stuff again.
This last week was a nightmare. But we're past it.
Today, i got the konis in. Went to install the mudflaps, and found out that i have one front and one rear. So. No go there.
The ply i cut down for the false floor.in the trunk is too twisted to work. So, im digging there.
Main line run, and confirm nitrous momentary switch operation done
Rear half of car final detailed.
Really doesn't look any different except chrome lug nuts, so herss a picture.

In reply to Justjim75 :
Do it do it do it do it do it do it do it
Also, i found a chunk of 3/4 osb thats big enough to use that was already on hand. Ridiculously heavy, but....
I've got to say that I do rather like the look of the white wheels... nice contrast to the blue! Reminds me of the white steel spoke wheels we all had on our mini-trucks back in the late '70s!
759NRNG (Forum Partidario) said:With your 3/4" trunk false floor are you now 50/50 FR?
Nah. Wood need a lot more ballast.
Legitimate weight estimate, with floor, box, sub, and full bottle is 65lbs added. I should have weighed it before installing, but im not that bright. But, i dig how it turned out. Has all the functionality and purposeful look i had planned!
To finish today, i went hunting parts (which involved cleaning the shop because i couldn'tfind E36 M3), turned the car around, made sure my work was good up until here.
This really shouldn't have taken all day. But it did.
Tomorrow i hope to get valve cover leak fixed, and ac. But i have to fix the daily as well, so we'll see what happens.
Heres an in progress picture of detailing, as this thread is worthless without pictures


This is munchkin. I am writing this while my dad is recuperating from putting on one tire on the neon twice in one day. I got the wet sanding scuzz(aka the white stuff) off the nooks and crannies my dad couldn't get to. Just a note I really dislike that stuff, it gets everywhere! Meanwhile my dad was getting off the same white stuff on the outside of the car. We put on a grommet around the antenna(during that we broke 2 push pins and lost 1 more). My dad lowered the car of the jack stands(yes the car was on jack stands again). 
I found this on the wheel, it is our initials.
(P.S. My dad will do a full update later.)
previously
budget spent: 1972.51
recoup: 1000
new money
found the cam position sensor I lost, so subtract crank position sensor 11.25
blaupunkt died and was removed: -13.98
trunk floor carpet 5 yards 26.74, used 1 5.34
traded LED taillight from amazon and a homemade aluminum seat from the trash to Gumby for a used kenwood head unit. 7.27
scrounged ¾ osb for the trunk floor from the dumpster at the construction site up the road.
Chrome lug nuts: budget free per rules
New total: 1959.89
recoup: 1000
the last real update was when I tested out the coilovers. I've been sorting and tweaking the car since then.
The coilovers, however, got pulled. I felt like it lost all the special-ness of being MY ACR when I pulled them. the koni yellows ride softer, and don't handle quite as good. But it brings back the love and lust that makes it MY acr, not just another neon. Don t know if that makes sense to anyone else, but it doesn't have to.
Anyway, over my two week vacation for Christmas, I made the determination I would completely finish the car. To the point where I could roll it on the trailer and take it to Carlyle and the challenge.
So I did.
Swapping the konis were step one. You've seen them before, so no pictures.
I also cleaned all the suspension and wheelwells, double checked torque on suspension fasteners, etc. then, went ahead and put chrome lug nuts on, and took measurements for having center caps 3d printed for the wheels. And cleaned the wheels. I need suggestions on super low dust pads if any of yall have them. Keeping them clean is driving me buggy.
 20201228_144727 by Michael Crawford, on Flickr
Anyway, we went ahead and finished the wetsanding and buffing and detailing on the whole car. Lots and lots of work there. But all work youve seen before. However, detailing all the swarf and scuzz from the nooks and crannies was a significant effort. Not sure how body shops do it to not have all that work to clean up.
 20201217_075930 by Michael Crawford, on Flickr
 20201217_073535 by Michael Crawford, on Flickr
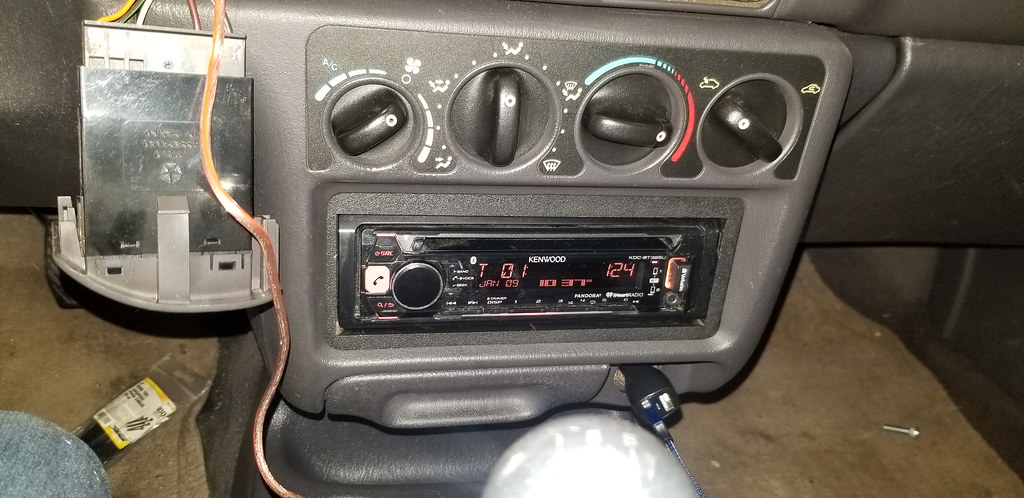
while I had the car oriented in the direction ( the joys of a tight shop), we went ahead and setup the nitrous. Ran the feed line from the trunk down the rocker panel on the interior, then picked up power for the momentary switch on the steering wheel from the defrost switch output. So, system is armed by the defroster switch and activated by the little red button on the steering wheel. Pretty subtle! I also installed the kenwood head unit I horse traded for. I love the kenwood units, and have them in all the other cars. Simple, functional, and lots of setup options. My only complaint is that its a modern deck, and doesn't match the vintage of the rest of the build. But I.m over it.....
 20201221_103856 by Michael Crawford, on Flickr
 20201221_104326 by Michael Crawford, on Flickr
had to mount the bottle next. I looked at the two real options I had. Parallel with the back seat, or parallel with the car. I ultimately chose parallel with the car.
 20201221_102936 by Michael Crawford, on Flickr
to do a no drill install, I decided to build a false floor. This also allowed for a downfiring sub to be put in the spare tire well, and getting rid of the craptstic spare cover I had.
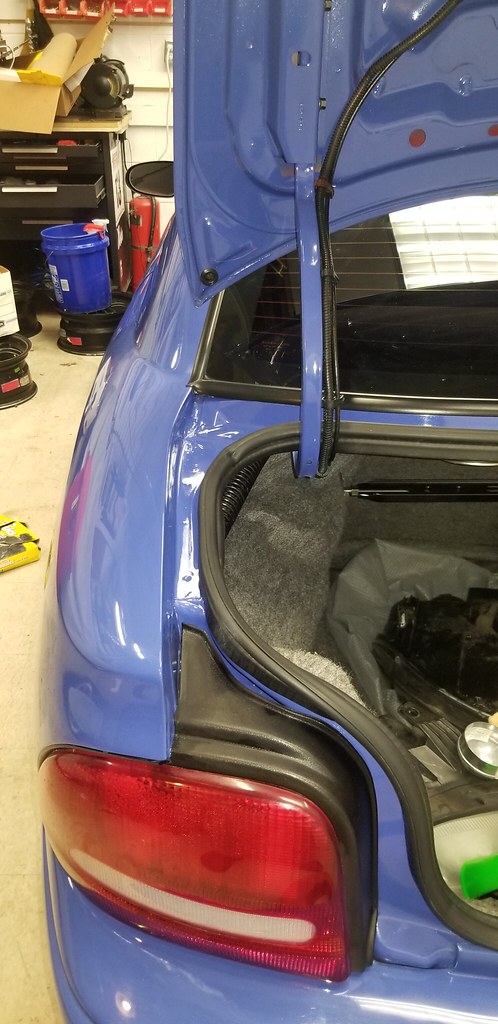
Its a piece of 33x33 osb with 1.5 strips on three sides wrapped by my wife in gray speaker box carpet. The sub box was built out of the same dumpster the osb came from, for a .5 cubic foot volume for the polk db8 sub I put in. I will pull the sub and amp for the challenge, as that's about 30 bucks I don't want to place in the budget if I don't have to. It was also time to clean all the crap and oddities that the trunk collected prior to installing everything. It was amazing how much of it was scrap.
 20201229_112643 by Michael Crawford, on Flickr
 20201229_092401 by Michael Crawford, on Flickr
 20201229_112647 by Michael Crawford, on Flickr
 20201229_113734 by Michael Crawford, on Flickr
we went ahead and turned the car around to take care of stuff up front. Again, torqued bolts, fixed a leak, zip tied stuff out of the way, etc. lots of cleaning.
But before finiched pictures, lets do finished nitrous!
I couldn't find a way to make my cosmetically scruffy trailer park nitrous kit look good. So, I hid it all. I built a bracket to hold the relay and solenoids under the iceman battery tray out of sight. Placed the nozzle upstream in the iceman, and jetted for an incredibly rich 50 shot. Its been so long since I played with this stuff, and not wanting to hurt this engine, im going rich and small to start. Its more of a “i always wanted to” vs an actual nitrous build. If I find I get hooked and want to up my game, I have a full MSD DIS2 and timing retard box here to put in. then may whack it with a 125. at that point I'll also hook up the bottle heater and gauges and such that came with it when bought the setup at the yard sale.
 20201231_160442 by Michael Crawford, on Flickr
 20210101_112128 by Michael Crawford, on Flickr
 20210101_112143 by Michael Crawford, on Flickr
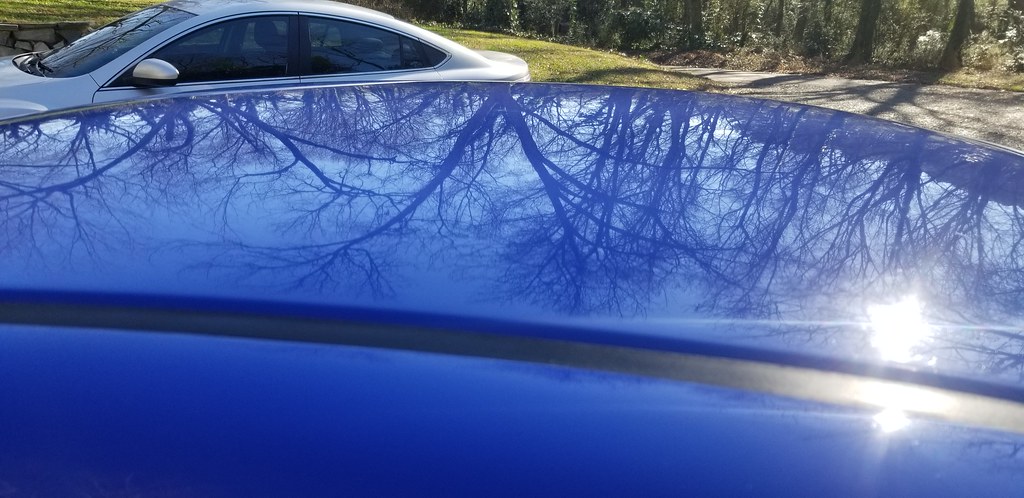
so that brings us up to DONE. Weve finished the ast little bits, and are ready for a summer of cruise nights, drag strips, autocross runs, and challenge preparation. My daughter and I are infatuated with this thing, and I will be its caretaker until its time for her to become that.
That being said, my daughter is beginning to develop an interest in photography. So I asked her to take the pictures to wrap up this “build” portion of the thread. I gave her some magazine articles on photographing cars, and made some suggestions about light and framing and backgrounds.
Some of these pictures are of doing the final detailing, some are in our driveway, some in the shop. A few from morrow mountain state park where we went today for a “we need to get out of the house and somewhere pretty to walk” trip.
 20201229_130050 by Michael Crawford, on Flickr
 20201229_130057 by Michael Crawford, on Flickr
 20210102_121214 by Michael Crawford, on Flickr
 20210102_123726 by Michael Crawford, on Flickr
 20210102_124333 by Michael Crawford, on Flickr
 20210102_124745(0) by Michael Crawford, on Flickr
 20210103_141653(0) by Michael Crawford, on Flickr
 20210103_144621 by Michael Crawford, on Flickr
 20210103_144724 by Michael Crawford, on Flickr
 20210103_145143(0) by Michael Crawford, on Flickr
 20210103_145228 by Michael Crawford, on Flickr
I like this thing. Perhaps only because I like Saturns which are equally hated domestic 90s E36 M3boxes.
All it needs is 15x9s with some fat purple crack.
Pro-darwin: im looking for free 225/50/15 or so for the kosei k1s.
Scott: maybe my favorite picture in the whole thread is that Last one. So proud of her.
You'll need to log in to post.