Yep my boots were very hard to slip over the tie rod ball joints. I was worried about tearing them, but they made it. I have also heard of people using thinner grease or even oil. I have no frame of reference for how it's supposed to feel though. I cannot turn the pinion by hand without pliers.
There was a guy in Maryland way back in the 80s who loved MGTDs and TR6s. His name was Len Renkenberger. He was one of the founders of 6-Pack and was their technical expert. This guy daily drove a TR6 and knew how to keep them on the road. In his opinion, the steering rack needed heavy gear oil and the trunnions grease. The theory is that the grease will dry out and not properly lubricate the rack bushings. A few squirts of oil from a grease gun will flow to the ends of the rack. Works great so long as your rack boots are in good shape.
I typically rebuild the steering rack with moly grease and give it a few pumps of 140w gear oil every year or two.
I'm guessing we both breezed through this section of the workshop manual:
http://lotus-europa.com/manuals/s2work/h/index.htm#fig10
The manual says to install the cap nut just until the end float is taken out, then shim it so it tightens into that position. I simply torqued mine on using the original washer stack for the "cap nut". Since I used a thick lithium grease (Lucas Red N Tacky) instead of oil, the required pad pressure will probably be different and therefore require a different washer stack. This manual also says the effort goal is 2 lbs at an arm length of 8 inches from the pinion (roughly the length of vice grips attached to the pinion shaft...) With my thicker grease, I would be okay with a little more effort than the book calls for, but right now mine is definitely way too tight. If I can't get under 10lbs @ 8 inches with shimming, I may try to de-grease (again) and switch to gear oil.
Thanks for the instructions, I'll admit that I just jumped in and didn't do any research. Glad to have caught it now. I'm going to pull it down completely, clean it up again and be a little more careful.
Current state: rack fully assembled. Shims in the same place as before rebuild, spring installed, big ass nut: torqued till grunt. Tie rods installed in knuckles.
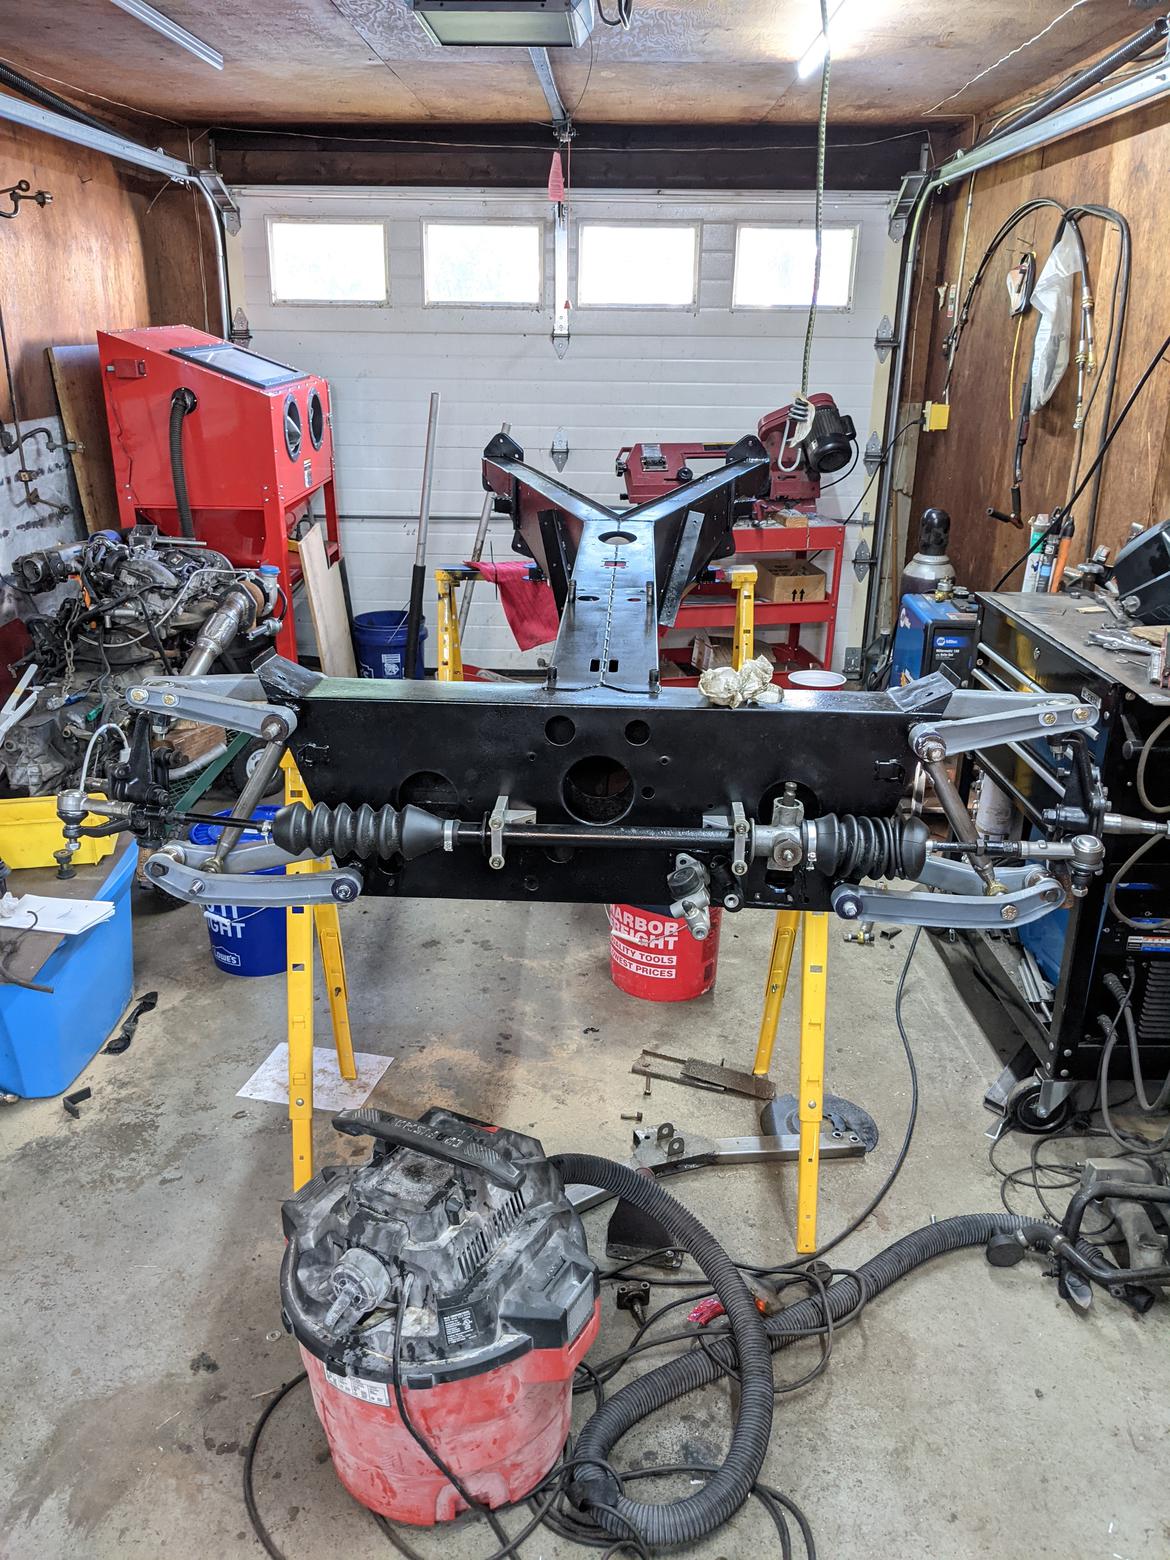
PPE: safety socks and sandals.
Test setup: 8" precision calibrated
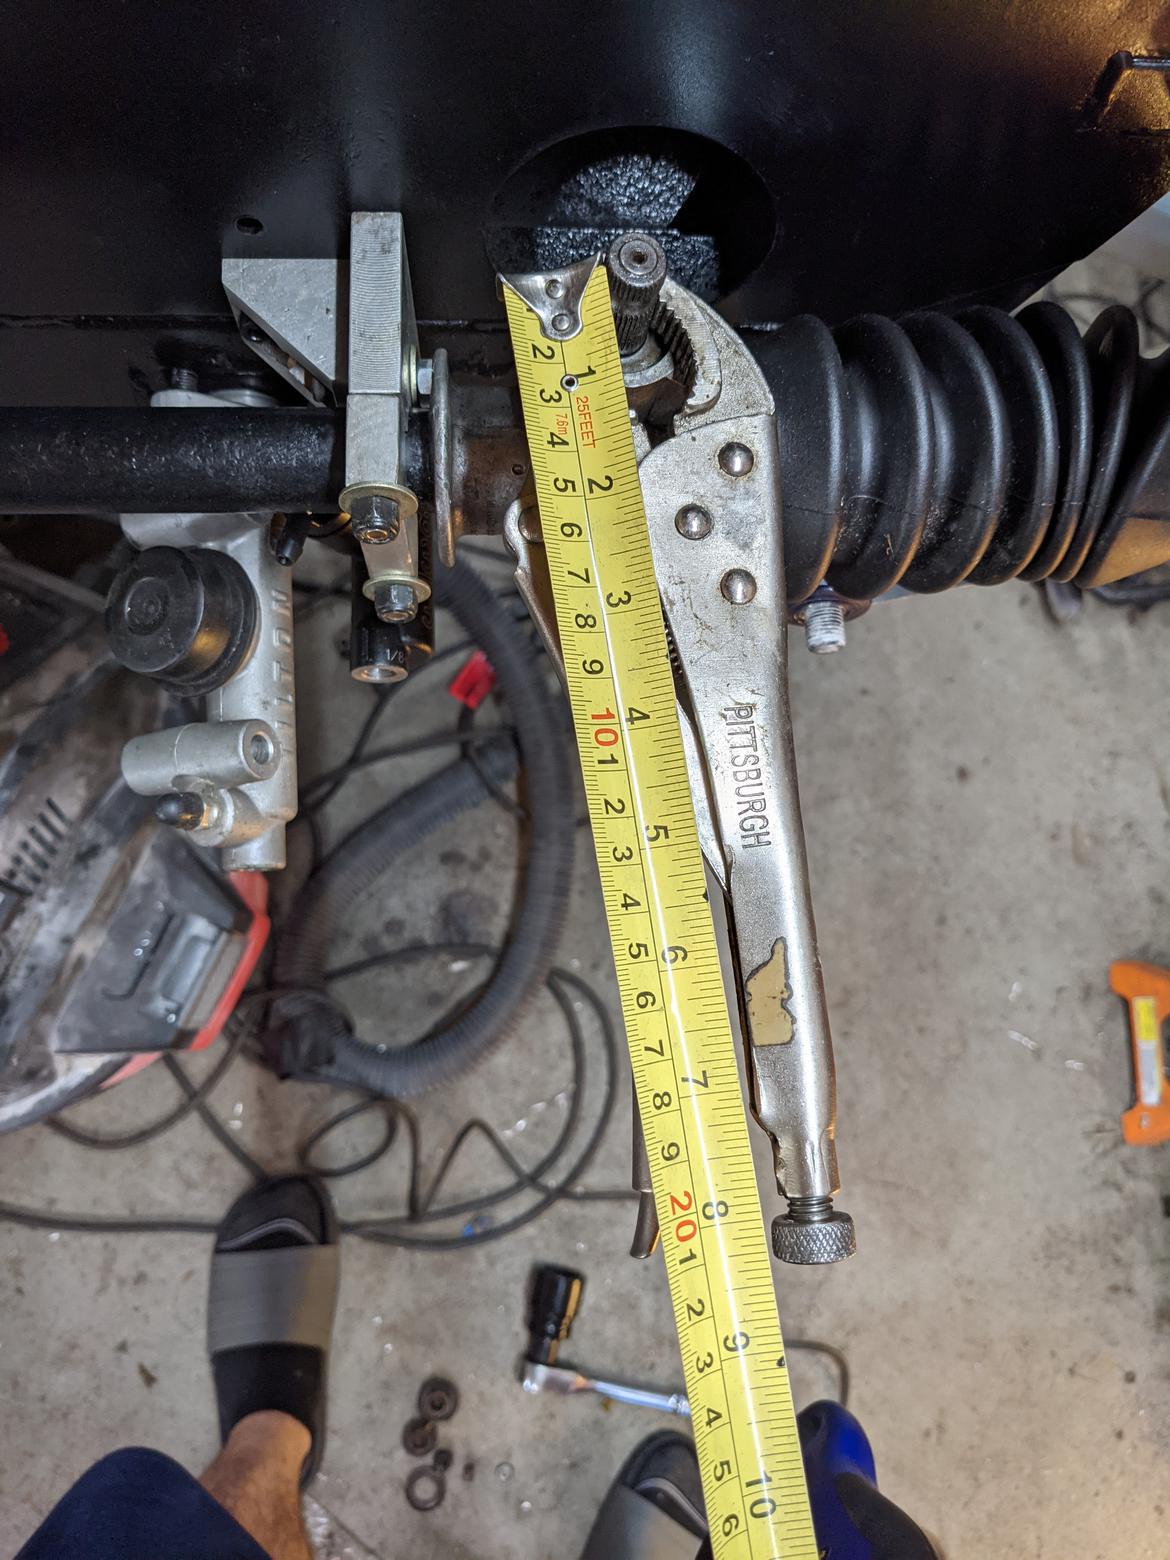
Hypothesis: if I'm near 2lbs, maybe I didn't Berkeley it up too bad.
Results:
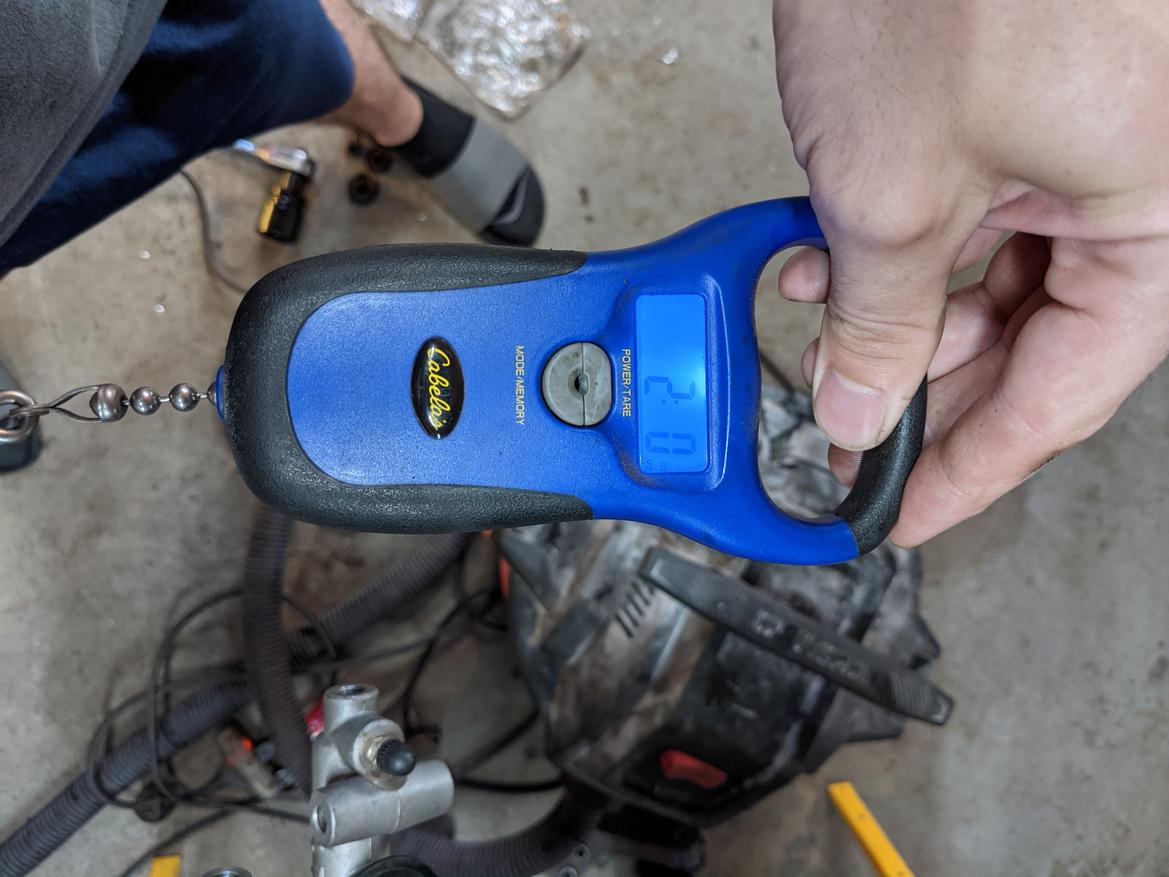
Cracking load was about 1 lb 14oz to 2 lb. Hot damn!
It still feels really draggy to me and I don't like it, but... It's within spec. I may pull it down, clean it up and see what it's like with a just a dab of flowable grease or 140w.
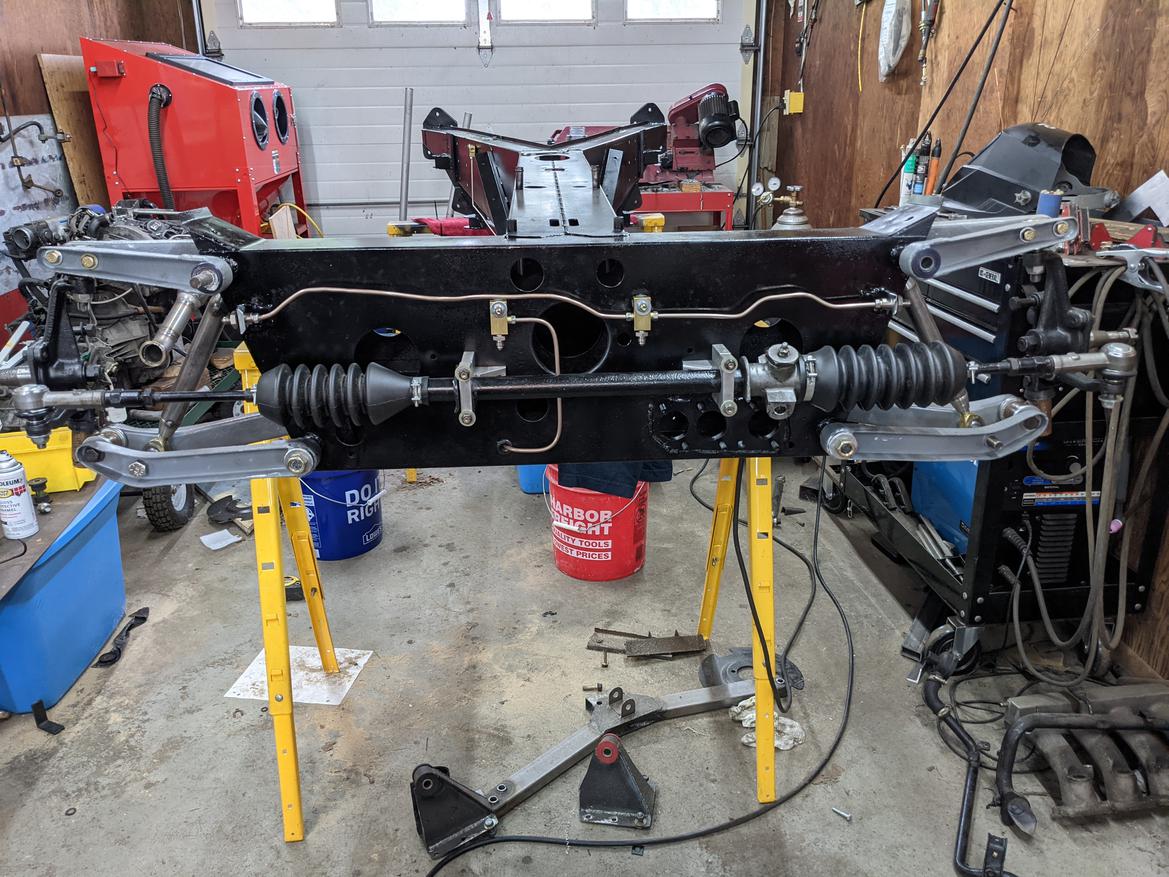
Pressing onward. Today was pretty productive. Quick helicoil on the pass side steering rack mount to gain some clearance and allow the rack to sit where it needs.
Next up, made some new brake line mounts, then zapped in the front mounts. After that, bent up front and rear brake lines. My fancy Eastwood flare tool is always a treat to use. Couple years ago, I got fed up with my crappy flare tool after a couple failed flares while fixing my truck.
Maybe I can get some time tonight to clean and paint the coolant tubes. Hopefully I'll zap in the rear brake line mounts tomorrow and bend up the rear hard lines.
Obligatory progress picture.

Clifton
New Reader
9/23/21 4:11 p.m.
On the tight rack. I had a spring in mine under the nut with the shims that put too much pressure and added drag. I removed it and one thin shim, I think .005". With the wheel straight there is a little play but full left and right lock, it is zero. Check full lock play if you re shim. The spring related drag makes the self centering horrible too. The front is so light with only a little caster mine would keep turning.
In reply to Clifton :
Luckily the steering rack is pretty easy to get to if I my car also has poor return. I'm hoping it'll be OK, but we'll see.

I made a mess again. Kind of all over the place.
Rear brake lines: I'm waiting on a couple of fittings before I finish the drivers rear brake line. Maybe tomorrow?
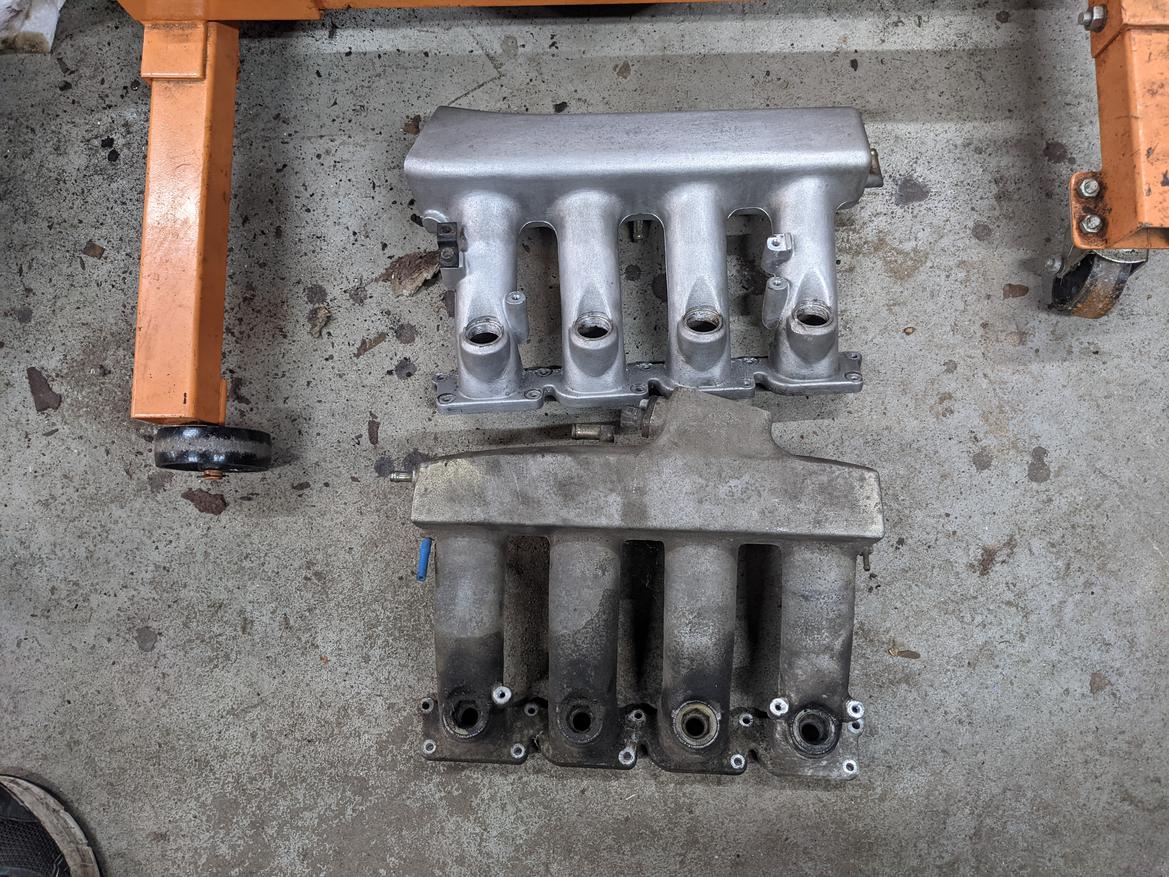
Intake manifold: I'm using an Audi TT 225 intake and an aftermarket fuel rail. VAG, in their infinite wisdom used different injectors for the 225 and I didn't notice when I snagged the intake from the junkyard. My primary thought at the time was to leave the stinky gas filled rail behind so I don't stink up my car. Whoops. The different injectors appear to need different injector cups in the manifold because of different o ring size. The cups are removable, no biggie, just swap from old to new.... Wrong! Apparently they bond the cups in, and I had to break them apart to remove. There's probably an easier way, but it's done and I only damaged the threads a little. Feeling the need to do something non-destructive - I cleaned the new manifold and it looks good!
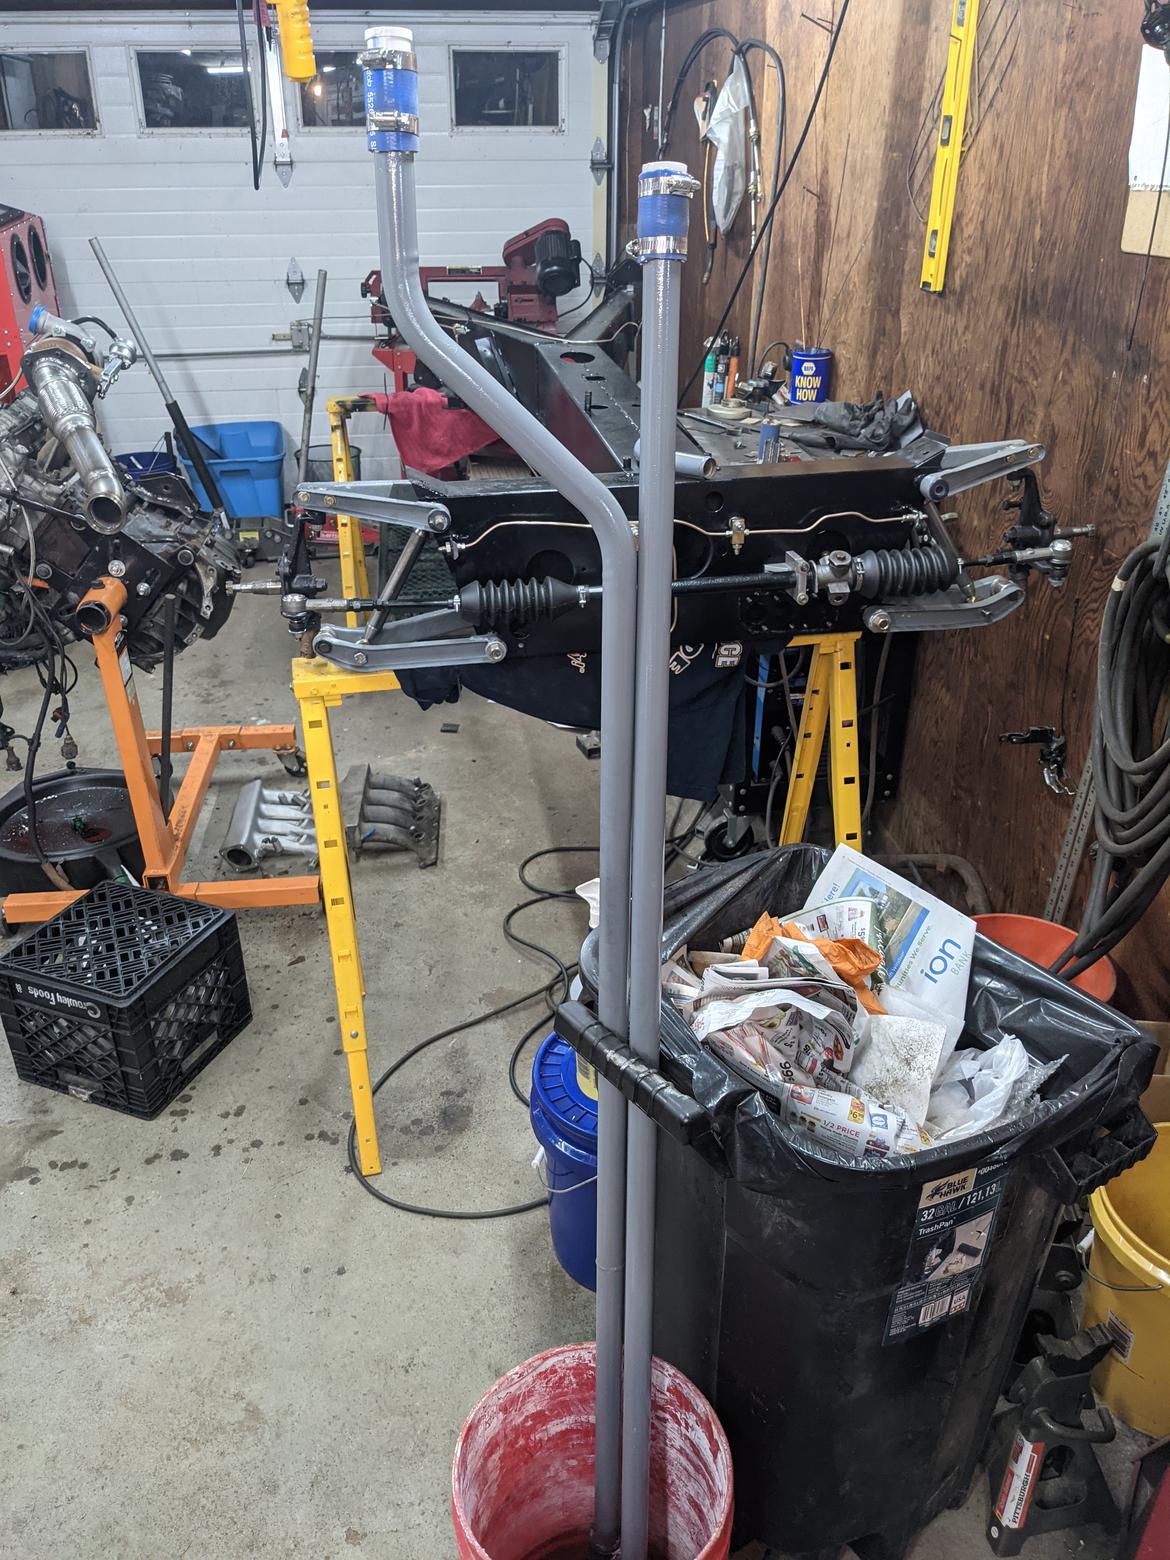
Coolant tubes: I posted a question on the main forum to see how best to clean them and a bunch of folks gave ideas. I ended up using nuts and bolts, chain, and a wire tube brush on a string to clean out as much muck as I could. It almost looked like permatex ultra copper? Except still wet after 20 years? Now the tubes are filled with Evaporust to finish the job.
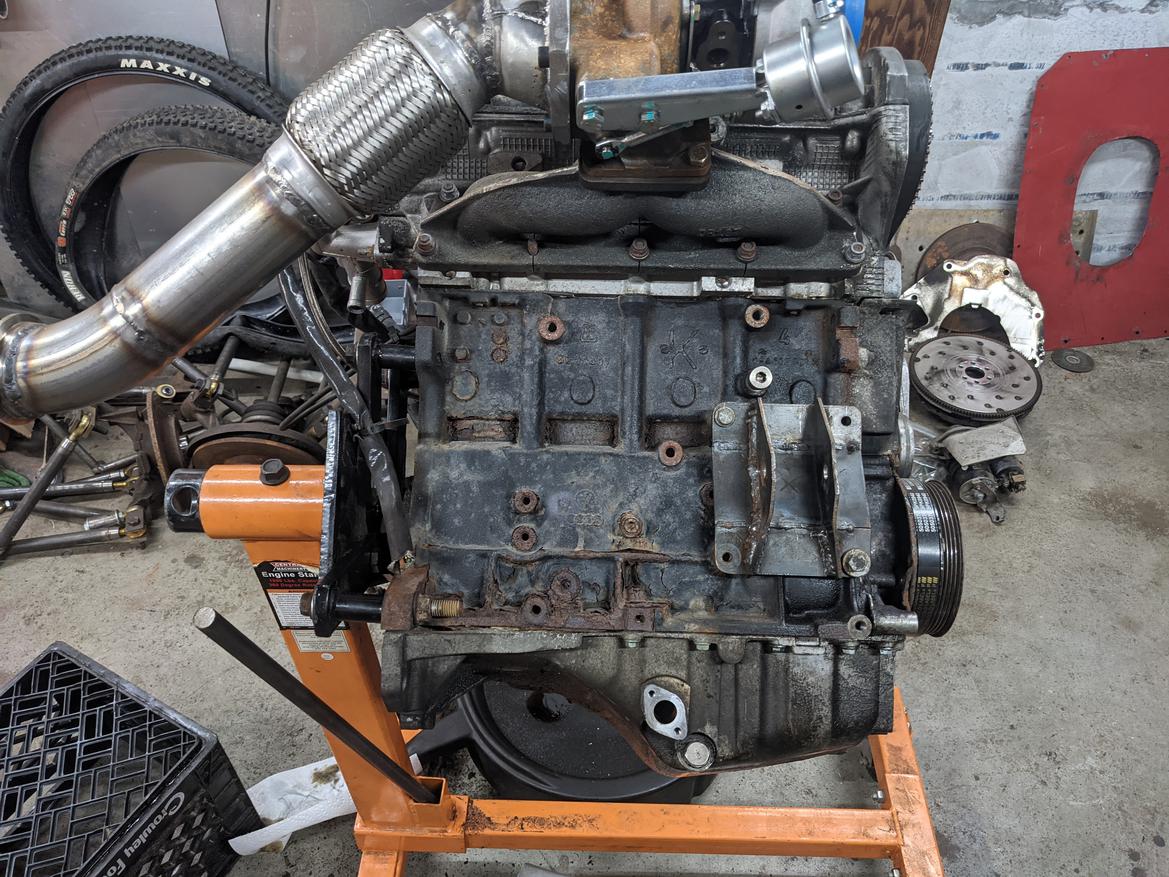
Engine/trans: I was always planning on replacing timing belt and water pump, but I also need to tap the oil pan for the turbo oil drain. If I'm doing the timing set, I may as well do the front main seal... If I'm doing the front main, I really should do the rear too. I should probably drop the oil pan to tap the threads and see if the engine is sludged. Welp, time to put it on the stand. Hey, I'll at least see the clutch and maybe reuse it?
New England is not nice to cars.
So, that clutch?
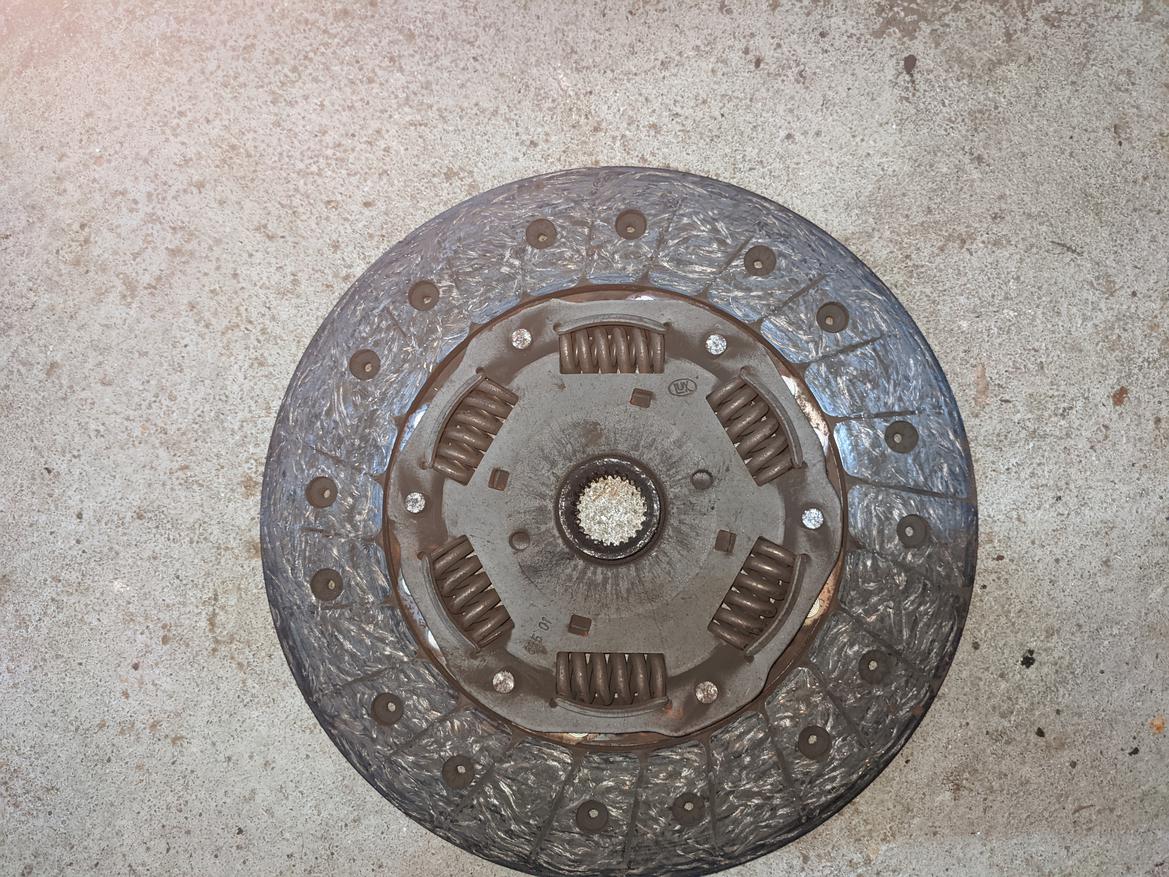
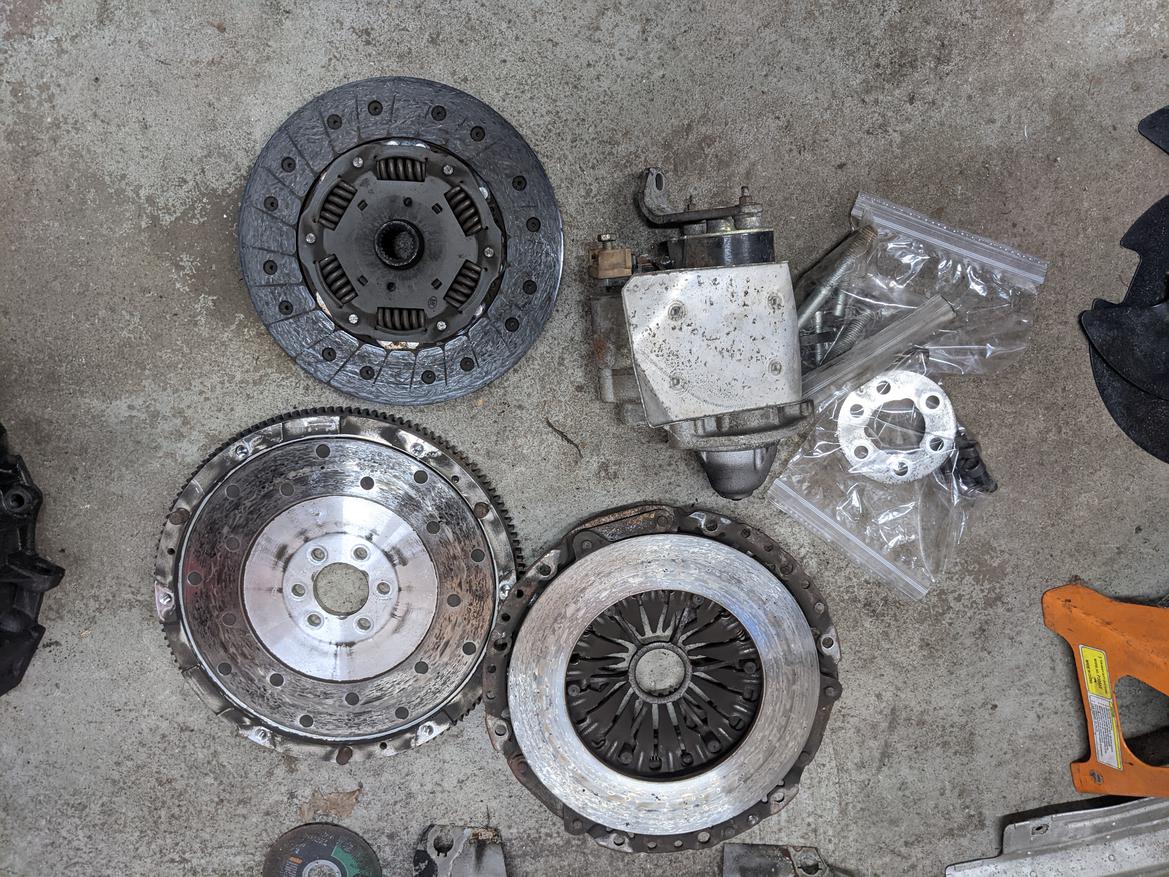
Junk. Ugh, do I throw a stock clutch kit at it, or get rid of the dual mass flywheel and go single mass? Gotta price out the difference.
Time to make a shopping list!
Upon further inspection, that's an aftermarket clutch with an aluminum flywheel. It wasn't until I started looking for replacements that I noticed it looks different from the OE dual mass units. Wonder if I can resurface the flywheel? Time to figure out what one it is.
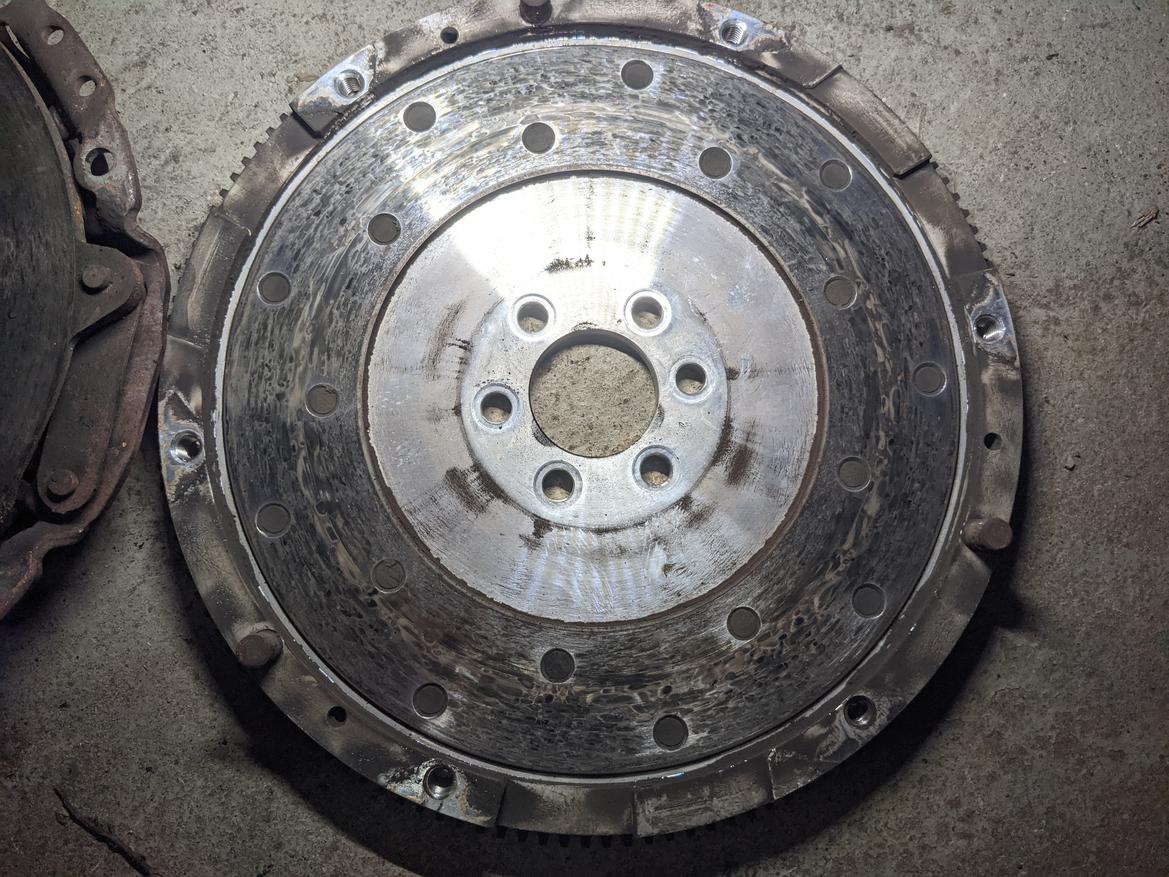
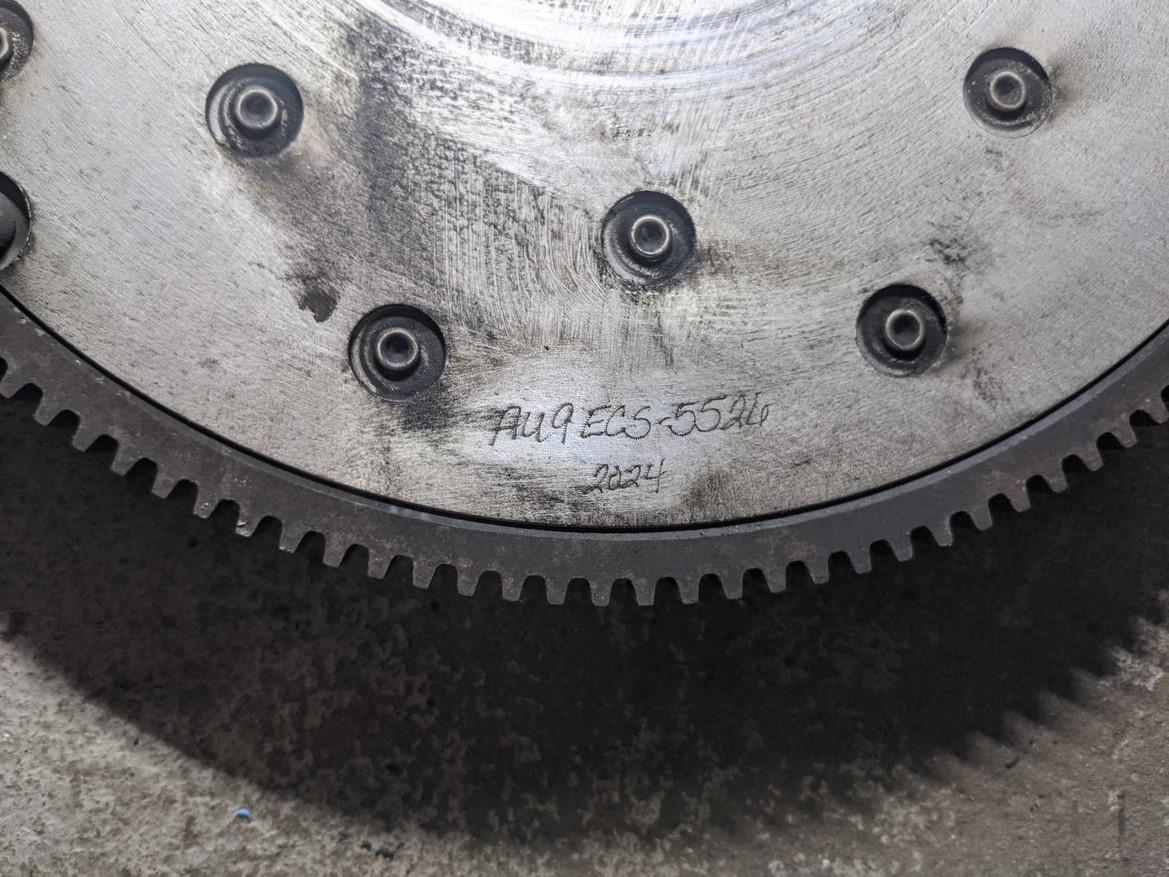
The pressure plate is pretty unique looking.
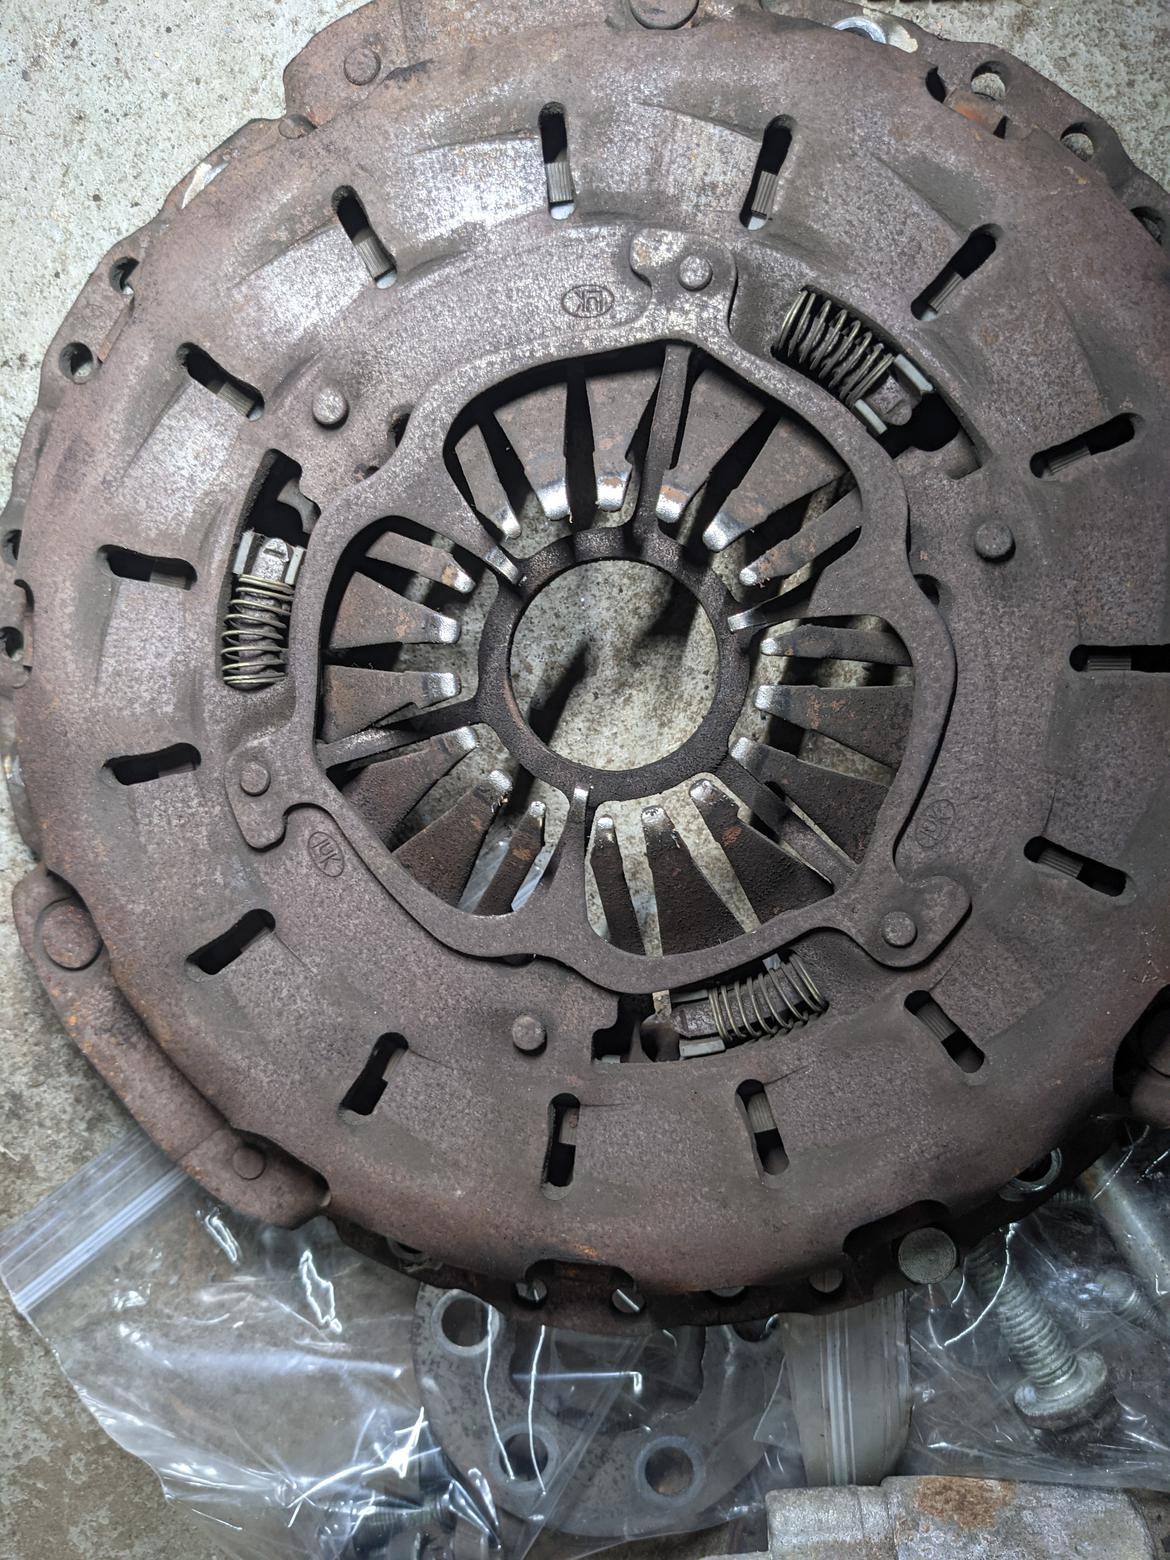
Maybe it's this guy?
https://www.urotuning.com/products/stage-1-ra4-240mm-clutch-conversion-kit-vw-audi-1-8t-b5-b6-a4-b5-passat?variant=40543986483393
Which leads me here: https://store.034motorsport.com/flywheel-1-8t-w-b7-rs4-clutch.html
And finally to a new friction surface here: https://store.034motorsport.com/replacement-friction-surface-standard.html
Marry that to an S4 cluch and Bob's my uncle?
So fly! I knew it was light, but 7lbs is LIGHT!
Local machine shop reground it for $60, much better than buying a replacement.
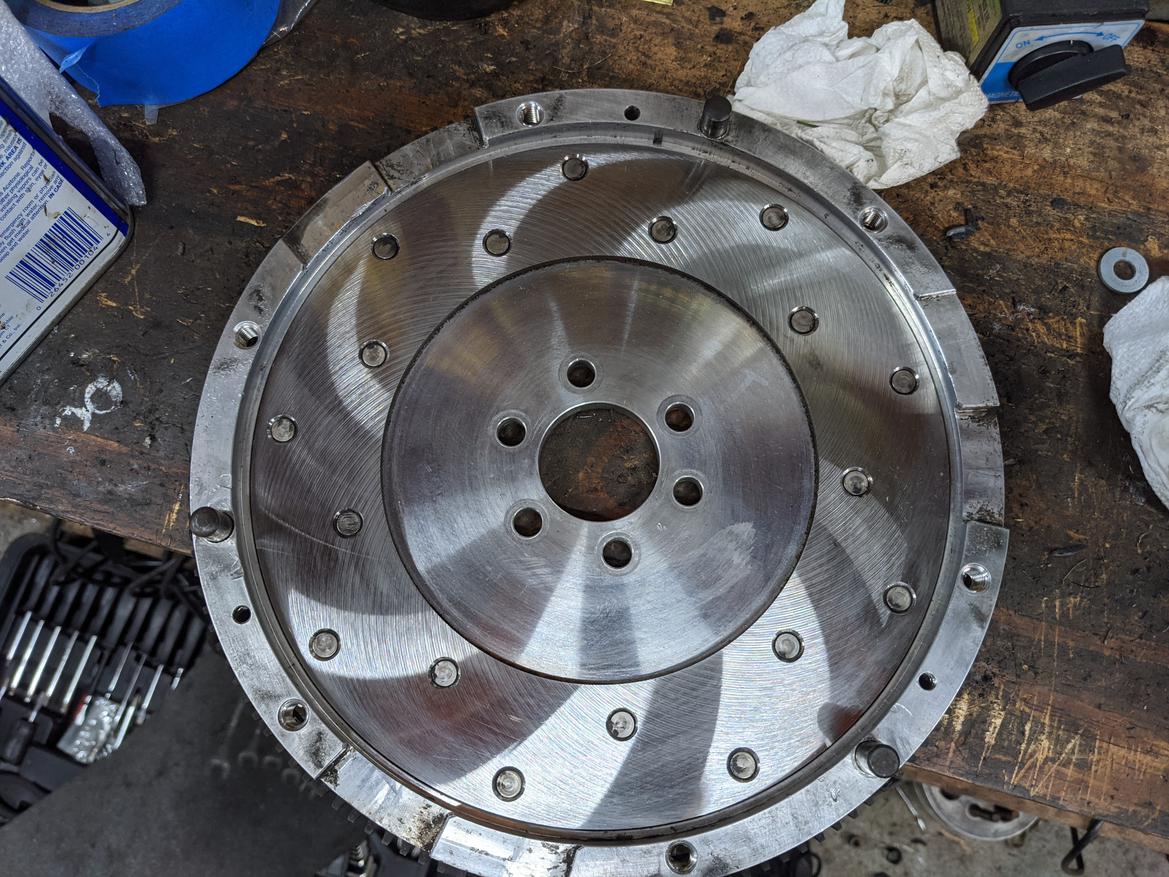
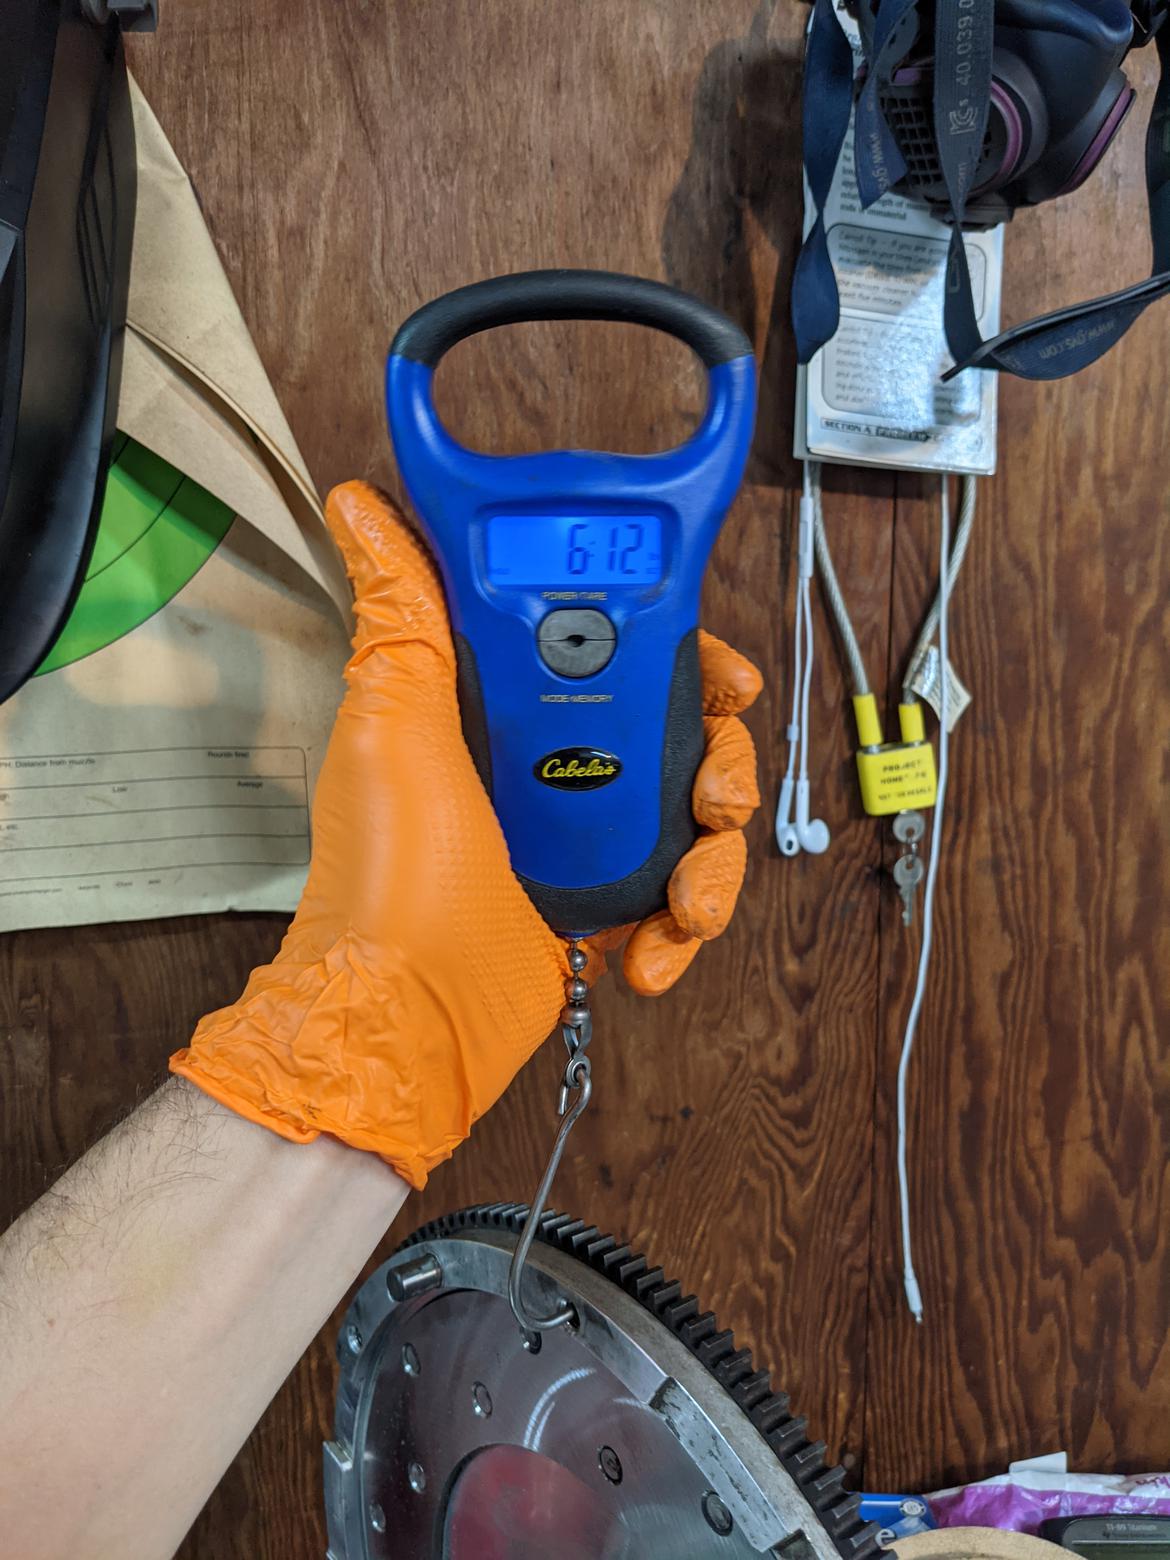

I've spent some time working on various Igor things, inching towards reuniting the chassis and body.
Coolant tubes: cleaned, painted, installed. The rubber frame grommets were a pain, but it's done.
Brake hard lines: complete. Picked up a rivnut tool and it's wonderful, if only the instructions were any good. I snapped the 10-24 tool post before I learned that I need to either stop when it gets hard, or back the tool off some. Replacement was only $9. I've started writing down the settings that work for the couple sizes I've used already.
Intake manifold: cleaned, injector cup threads chased with a homemade tap. I couldn't justify spending $40 on a single crappy tap to chase the threads, so I got a $5 bung and cut some grooves in it.... Worked a treat!
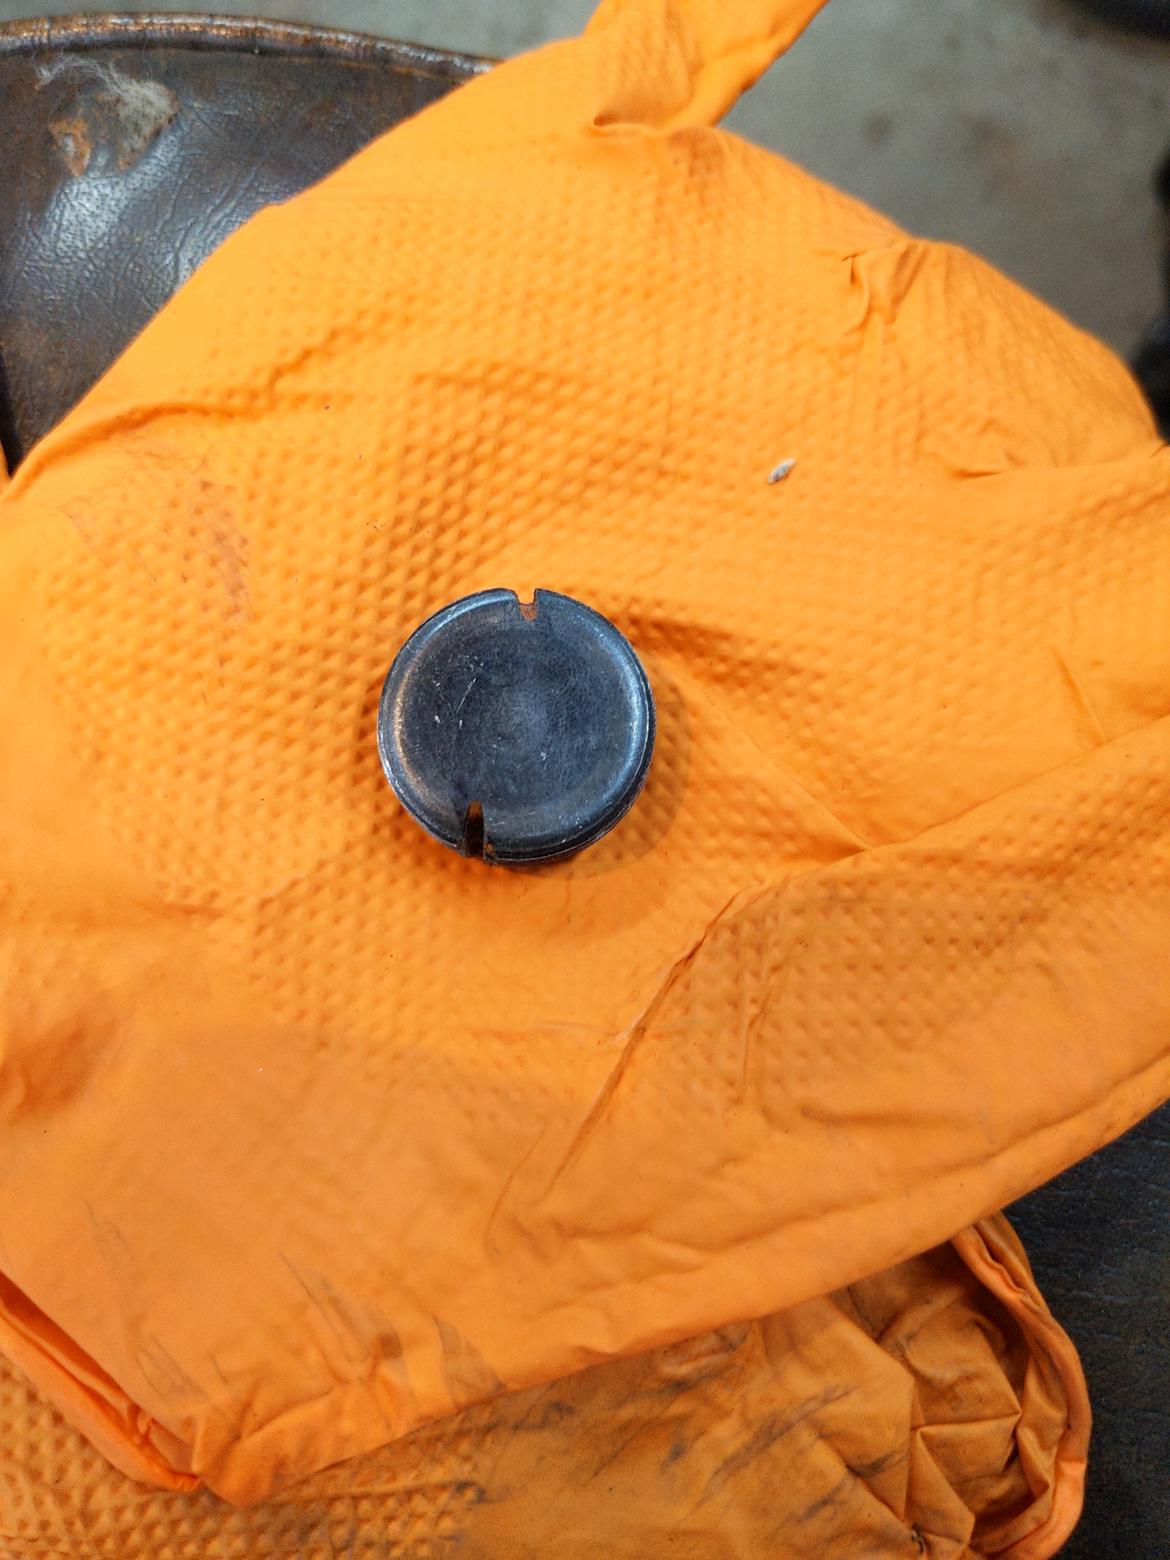
Timing belt and water pump: replaced. I'll need to replace the Allen head crank bolts since I had to drill one out... Friggin rust.
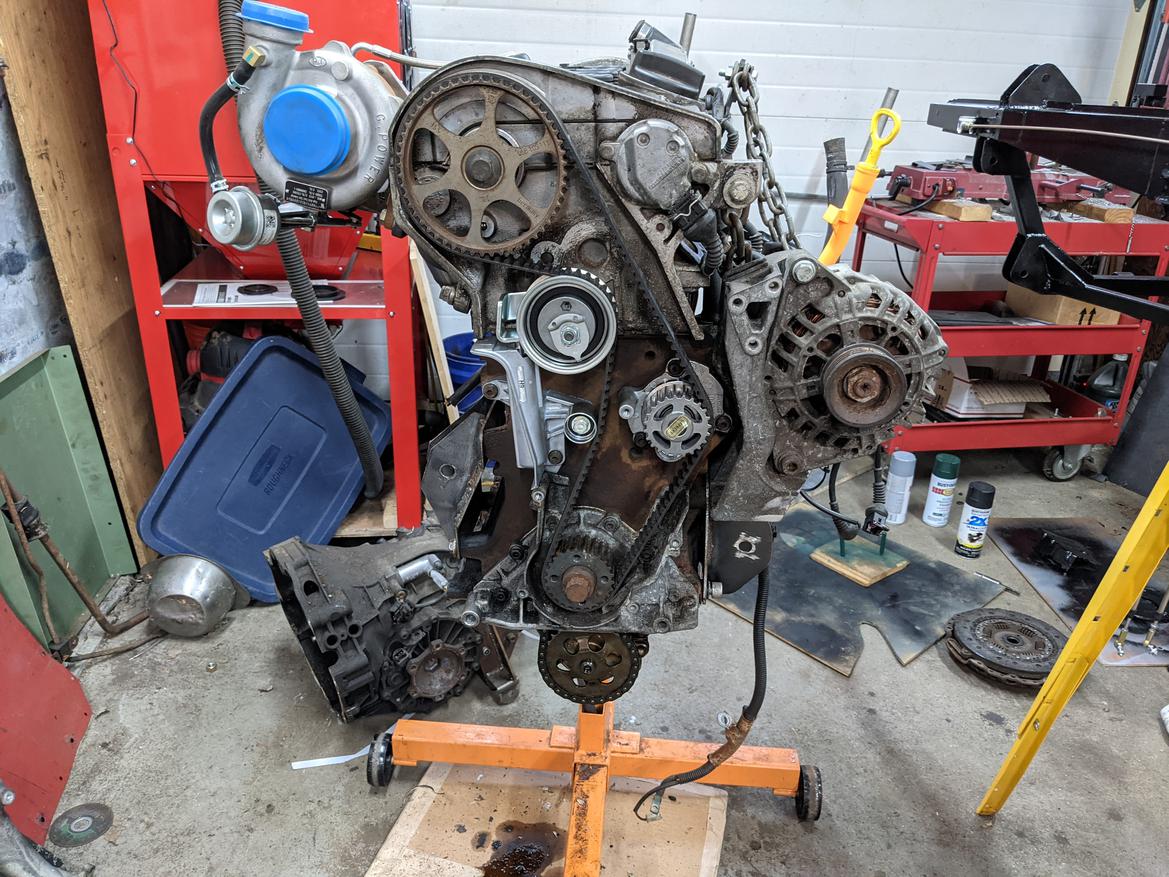
Oil pan: cleaned. Machined up a flange for a 1/2 NPT to AN10 adapter. I didn't have the right drill bit on hand, nor do I have a 2 deg tapered endmill small enough, so I bored a straight hole to size with a boring head.... I've never cut AN threads with a tap before, wow.. was pretty worried about snapping the tap. Pretty happy with the end result, although it's kind of beefy.
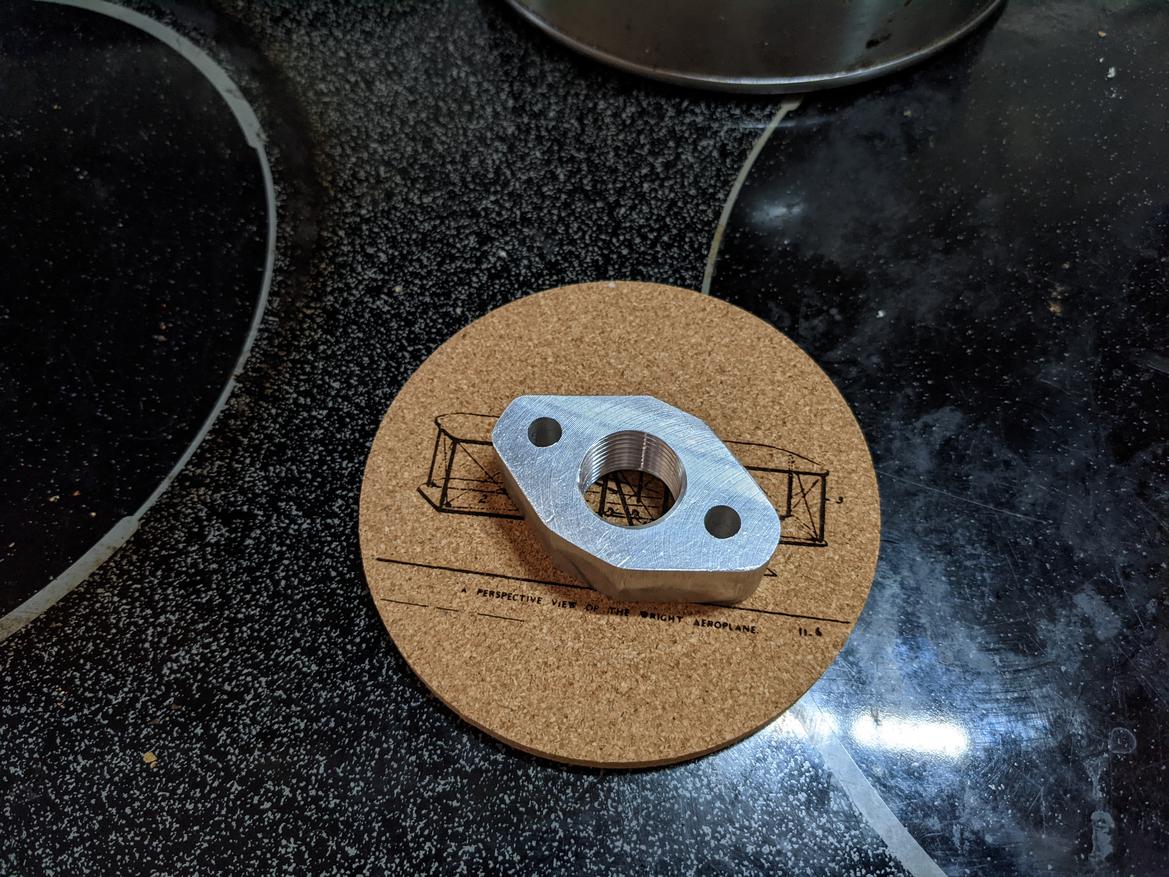
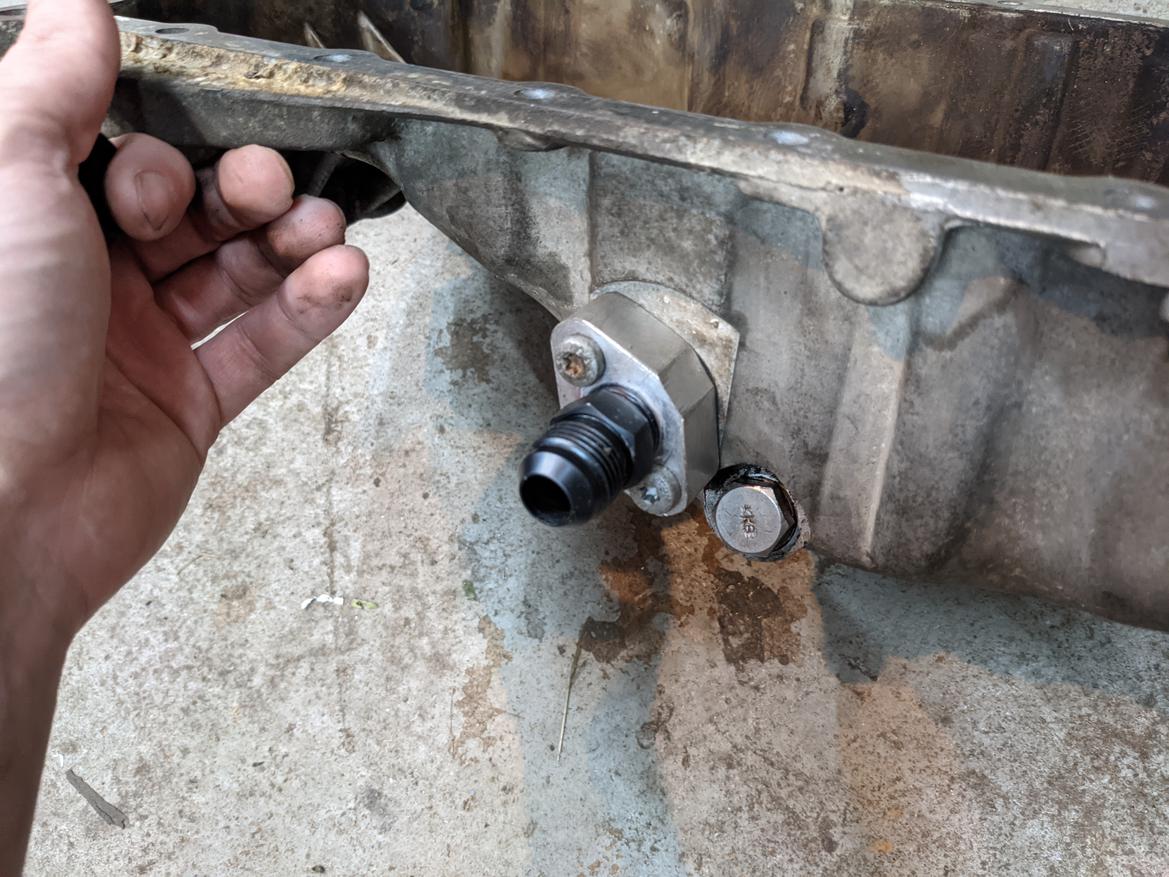
Tomorrow: hopefully Amazon delivers my closed cell neoprene foam so I can wrap the chassis. With that, I think it's time to mount the body?
I'm planning on finishing up the engine work on the stand and then drop it in since I'm waiting on some parts. Namely the oil pickup o ring and crank bolts.
Link to the foam you're using? Let me know how you like it.
I'm going to give 2 a shot. The 17" one doesn't show up till late this week. Ideally, I want 24" wide, but I couldn't find any reasonably priced and showing up this week. I think I'm going to take the second one and cut sections and run them over the backbone like a saddle, held onto the chassis by contact cement.
This: Exhibit A
Or this (ordered 2x): Exhibit B
Huh, what?
closed cell neoprene foam so I can wrap the chassis
Not certain what you are saying. Trapped moisture has been death to many Europa chassis.

Not certain what you are saying. Trapped moisture has been death to many Europa chassis.
Hence the closed cell foam, the original was a horsehair/jute type pad that held moisture. You need the pad in place to keep things from rattling/vibrating. The chassis isn't a close fit to the body, so some sort of padding is required.
Brotus,
I think you might find the 3/8" is a bit snug, is used that thickness and found it somewhat difficult to force the bodytub down over the chassis. I bought closed cell from a local supplier and trimmed it so that that the sides of the chassis were separate from the top. And from what I recall, the pad across the T is a bit thicker. I would suggest trying a small bit on either side of the backbone, then lower the body down on to the chassis just to see what the "squish" is, provided you have an easy way to lower the body on (or have friendly helpers).
Rod
Edit: I looked at my build log and I used 1/4" foam, so I would definitely test to see if the 3/8 will squish enough to get the body on.
Thanks Rod, I just ordered up some 1/4" just in case.
Richard: As Rod said, Lotus originally used a fibrous mat between the body and chassis that was notorious for holding water. The closed cell foam won't absorb water. Best as I can tell, the mat/foam isn't really required, but it damps vibration from backbone drum.
I think the word "Wrap" was most of my concern.
Pretty certain you will not be closing the bottom side?
Let it drain as much as possible.
More of an upside down taco than a burrito :) Bottom is unwrapped.
I love seeing the chassis in daylight.
Body reunification gas commenced!
1/4" foam fit snug and perfect.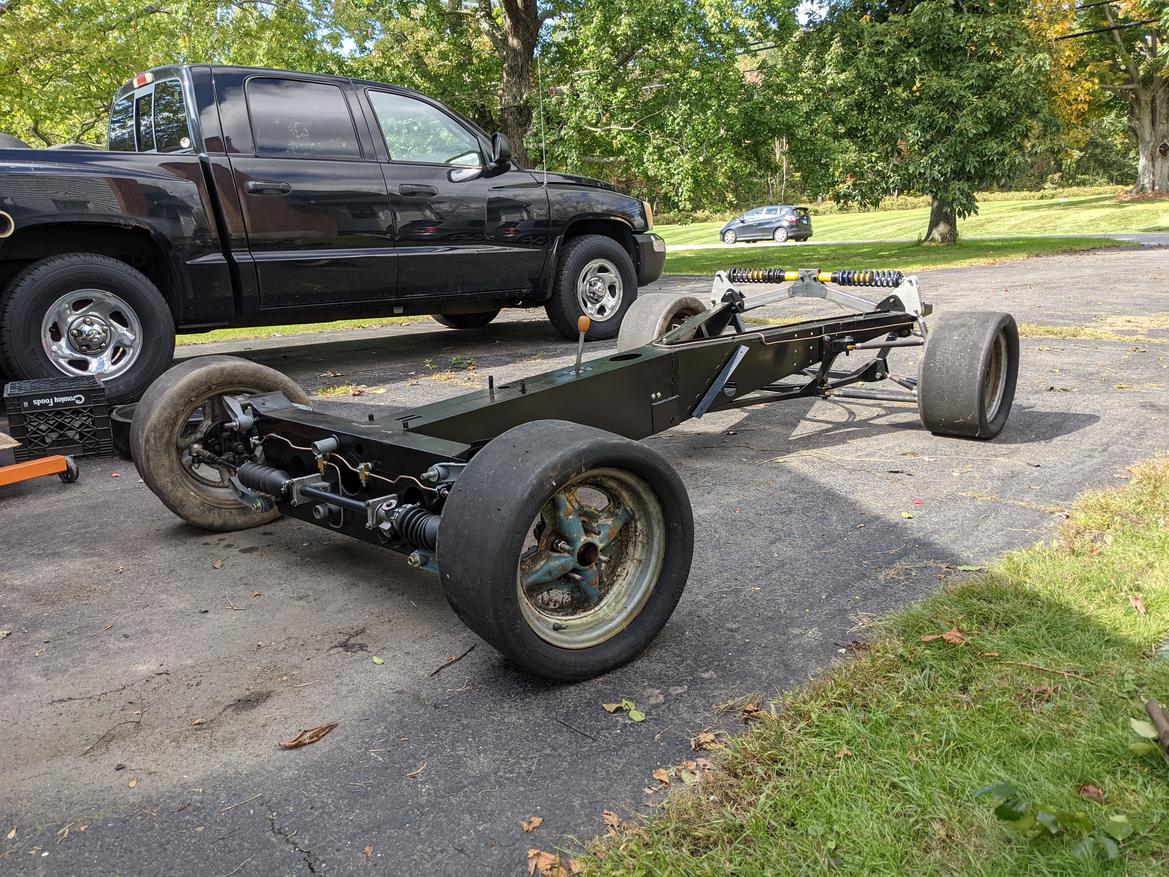

It was pretty exciting to see it cleaned up and in the sun.
Today I was on a mission: get the body on the chassis so I can return my buddies trailer that I borrowed 2 years ago... After a couple hours of cleaning, Amazon delivered the 1/4" foam, just in time for a test fit.
I used a heat gun to help mold it to the chassis and some industrial contact cement to glue it on after the test fit.
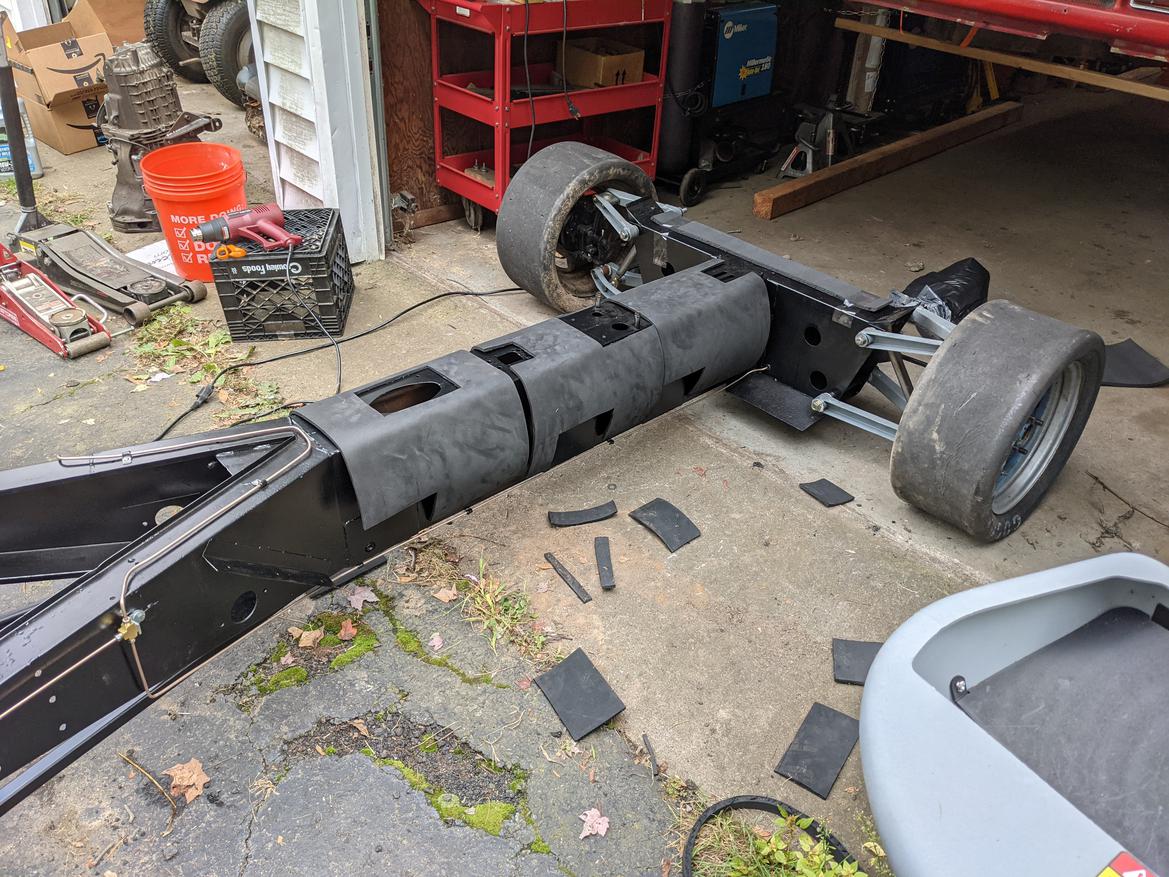
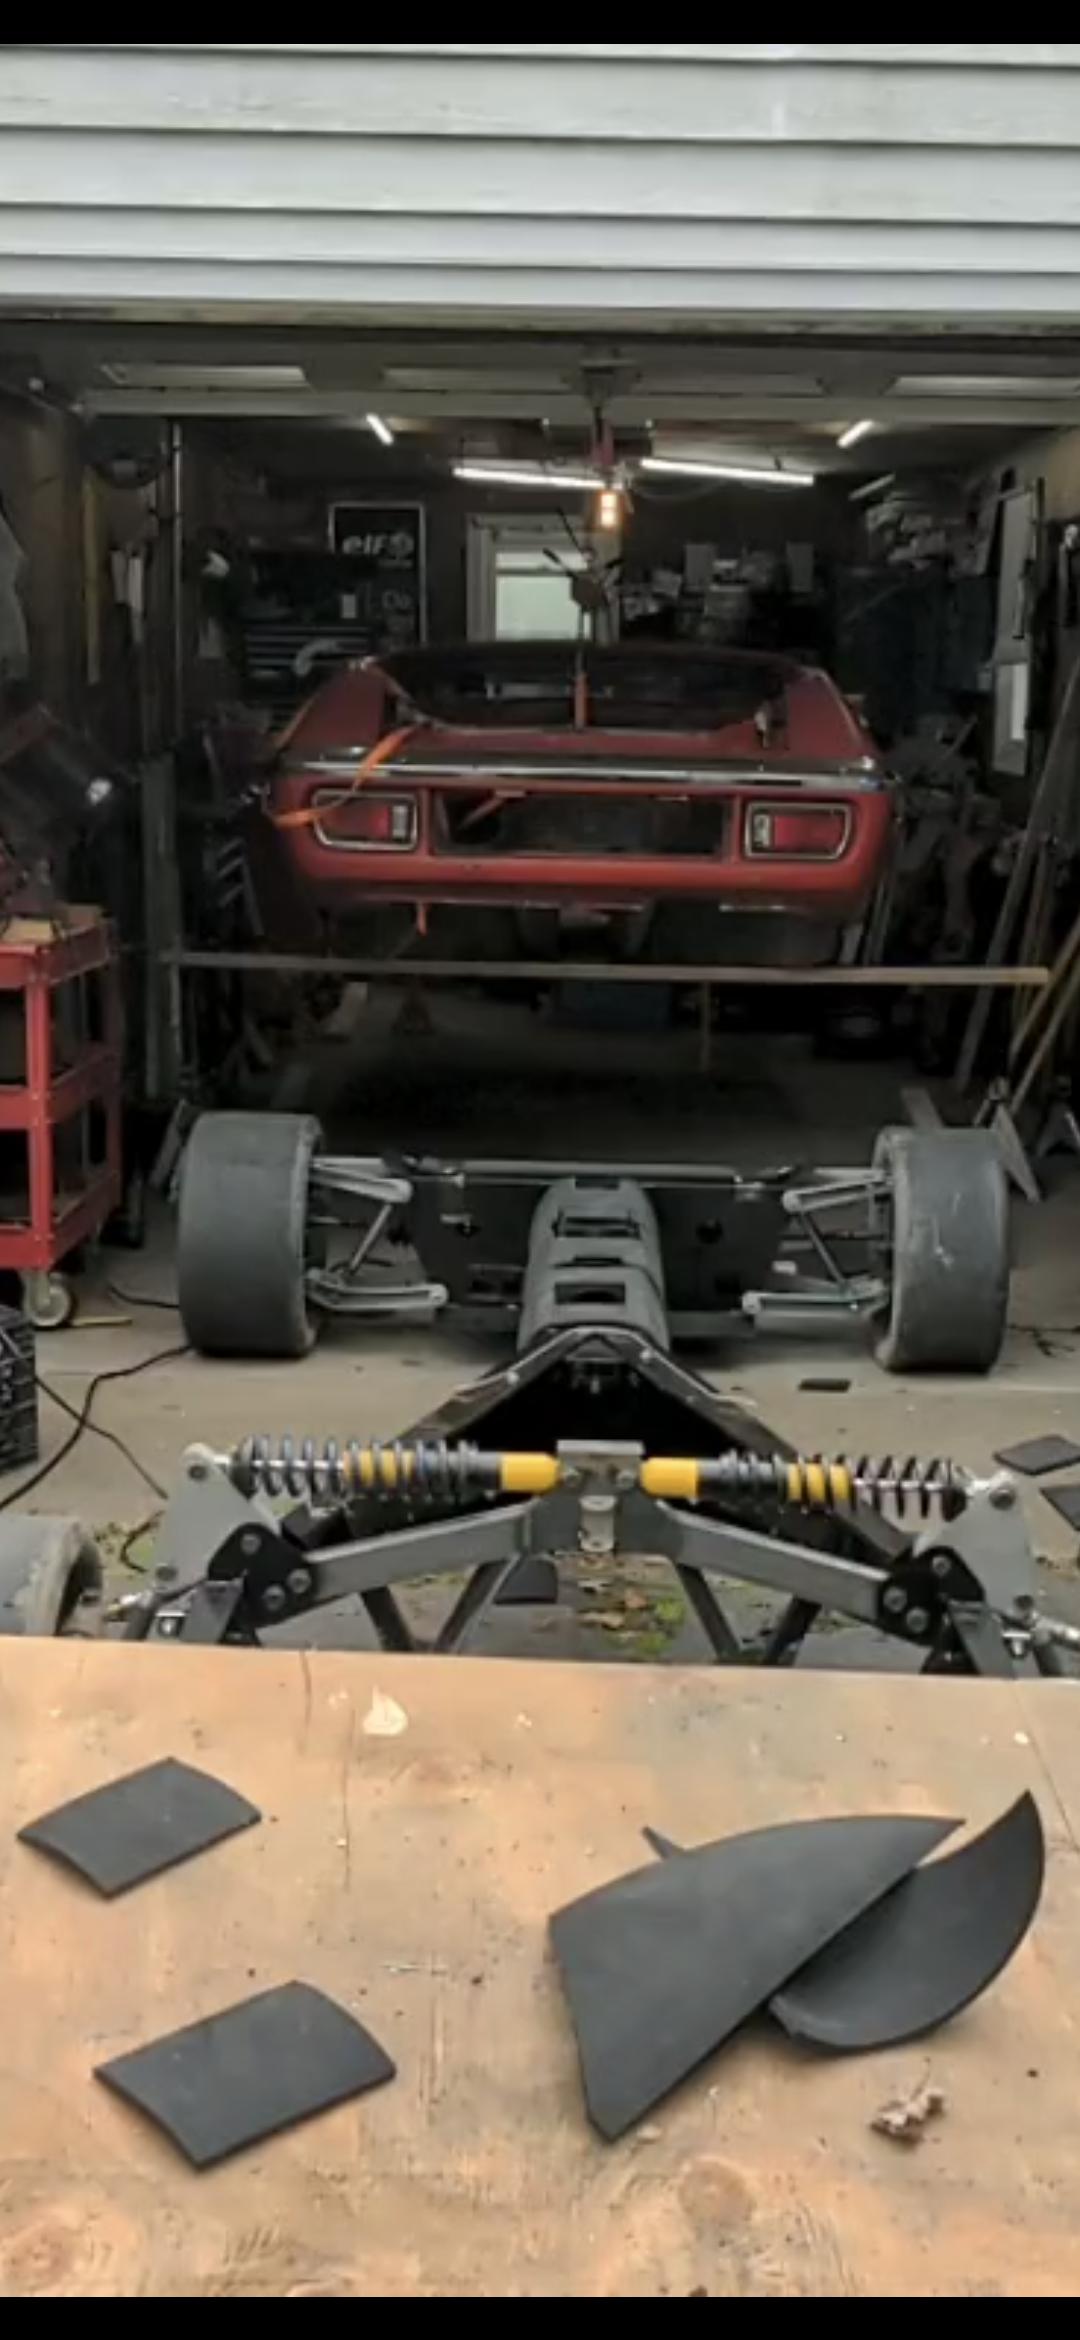
I ran into a snag when I went for the final body installation... Well, a comedy of errors..
Error the first. I used my 13" wheels since the tires are 3" shorter than the 15s so I don't need to lift the body as high. Problem: it's so low I can't get my floor jack out, or more importantly... Back in.
Error the second: I didn't verify the chassis was sitting all the way down during the test fit.
Error the third, but arguably the first.... When I welded the chassis cracks and gussetted the portion of the floor where the pedals mount - I must not have welded it at the right angle. That's contacting the floor of the body before it's fully seated. In trying to lift the body back up, I struggled to get a floor jack under the body to lift it up enough to slide a piece of wood in for the overhead lift. Before I do something dumb, I called it a night so I can figure out what to do now. Body has to come up, I need to slice the gusset and bend the chassis down, and figure out a way to weld it back together without catching my garage on fire.
I need a beer.
Good call to sleep on it. I'm pulling for you. This is such a good build.


