


In reply to JThw8:
What caused the crackle finish? I'm not going for the lizard skin look on my chassis, so hopefully I can learn from your mistake...er...stroke of luck. ![]()

In reply to JThw8:
What caused the crackle finish? I'm not going for the lizard skin look on my chassis, so hopefully I can learn from your mistake...er...stroke of luck. ![]()

bgkast wrote: In reply to JThw8: What caused the crackle finish? I'm not going for the lizard skin look on my chassis, so hopefully I can learn from your mistake...er...stroke of luck.
Mostly temperature and cure time. I gave the base coat 24 hours but because of the temps the base still wasn't fully cured in spots. In the areas where it wasn't fully cured it crackled when the top coat hit it. I'm also not entirely convinced the base and top coats were compatible even though they were both from the same supplier.
I actually do love the way it turned out with the Lot Lizard theme but yeah, you don't want that to happen if you can avoid it :)
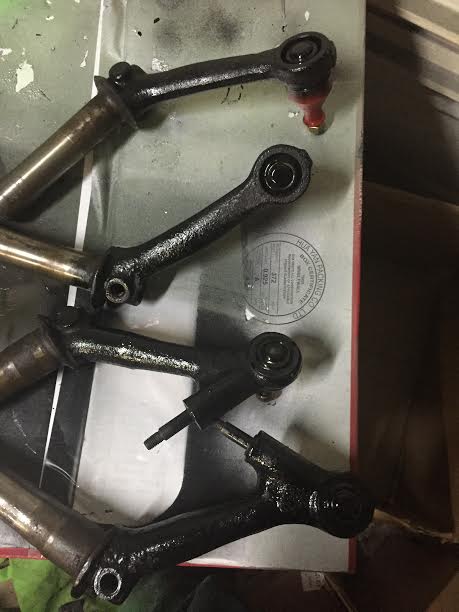
The aforementioned control arms, now with a fresh coat of paint.
And now we are at the beginning of the installation is the reverse of removal phase. First up, transmission goes in with a solid mount kit and support straps.
![]()
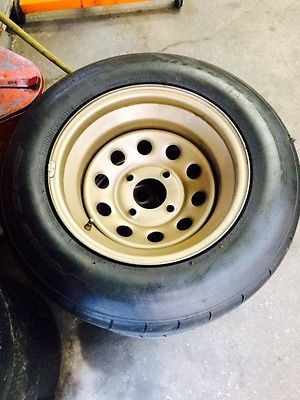
I kept alluding to another set of wheels and tires I was trying to get for autox use and Yea! Today I won the auction on them. $375 for a set of Diamond Racing 15x10 rear 15x8 front with 225/45/15 Nittos (front) and 275/50/15 Nittos rear. Overall not a terrible deal.
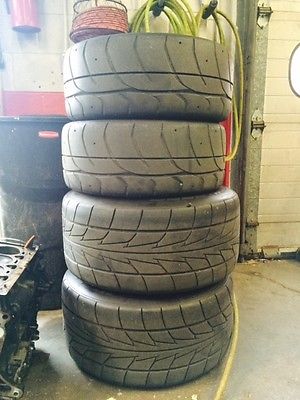
Still looking forward to mounting up the big old goodyears for the skidpad though :)
Slow progress this week, wife has the flu, been on sick duty. Today she got to stay in bed since I was home all day so after feeding the herd I snuck off to the garage to accomplish things before she needed me again. Got a good 4 hours in so I can't complain.
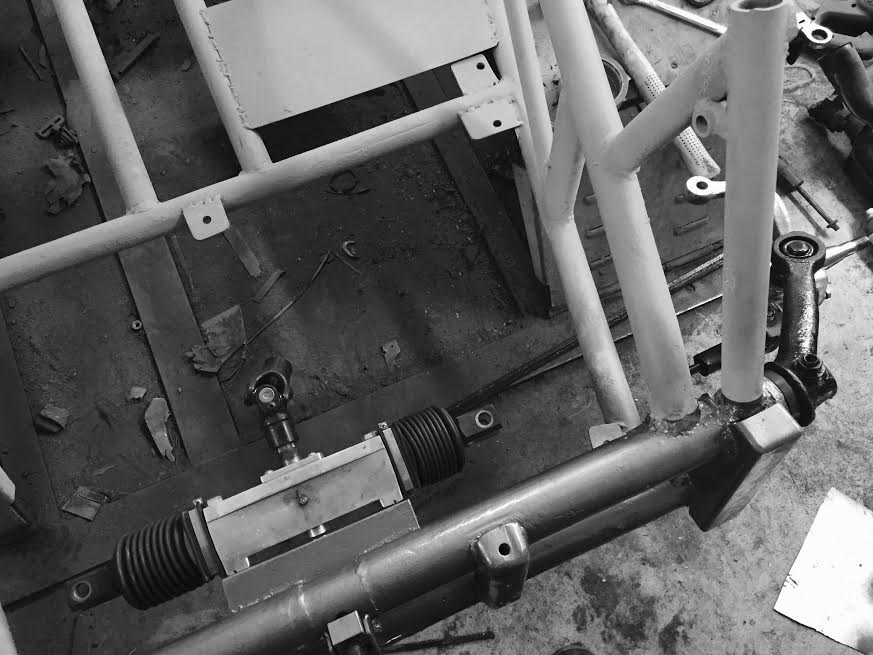
Heading out of town for a couple weeks and one of the last things I need are tie rods. Talked with one of my parts suppliers and they'll make a set to my specs for the same price as their stock ones which really don't cost much more than if I bought all the parts and fabbed them myself and time is of the essence so I decided to get the front suspension together so I could measure for the new tie rods. Then they can be built and shipped by the time I get home.
The lower arms connect to the through rod which is acting as a swaybar, sorry no step by step on all this as this is a really greasy job so my hands weren't clean enough for camera work. Feed the bar through the tube and put it in one control arm. The control arms have grub screws which keep the spring packs in place so you have to drill the swaybar for the grub screw and tighten it down, they feed the other end into the other control arm, it has a bolt welded to the end which comes through the arm, this gets a washer and nut and tightened down to give .020-.030 play in the assembly. Then drill and grub screw that too. Easy peasy.
The top bar...if you've never threaded a VW spring pack back into a torsion beam its kinda like trying to get 5 pounds of puppies into a 2 pound box. from bottom to top you have 1 narrow spring - 2 narrow springs side by side - 4 wide springs - 2 narrow springs side by side - 1 narrow spring
gratuitous hotlink of spring pack

Now all of that needs to fit through a piece in the middle of the beam which is that exact shape and no larger. And they are all greased up and slick. Some folks swear by loading them into one control arm to use that as a handle then taping them together and pushing them through (the tape just tears off after it hits the center piece, its that tight of a fit) I've never had luck with that. I feed the springs one at a time, its tedious but it works. It goes easy right up to the 4th wide spring then it gets tough. I keep one of the center wide springs out get the other 3 in then bevel the edges of the 4th one and slide it between 2 of the others so they can guide it through. Similar for the 3 small ones on top, bevel the edges and use them to guide each other.
All that said and done, its together and I mounted, temporarily, the steering rack so I can get the tie rod arms built while I'm out of town.
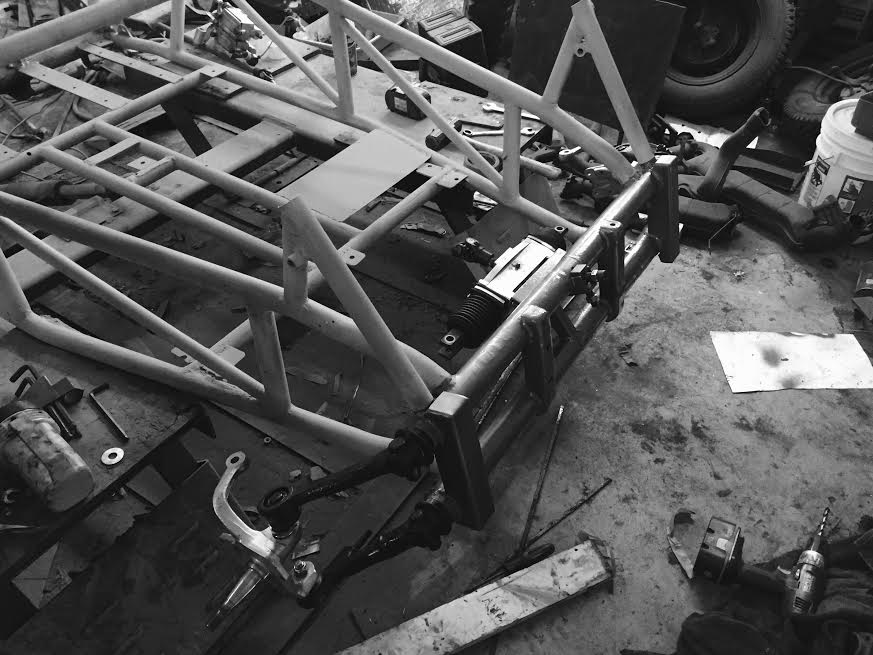
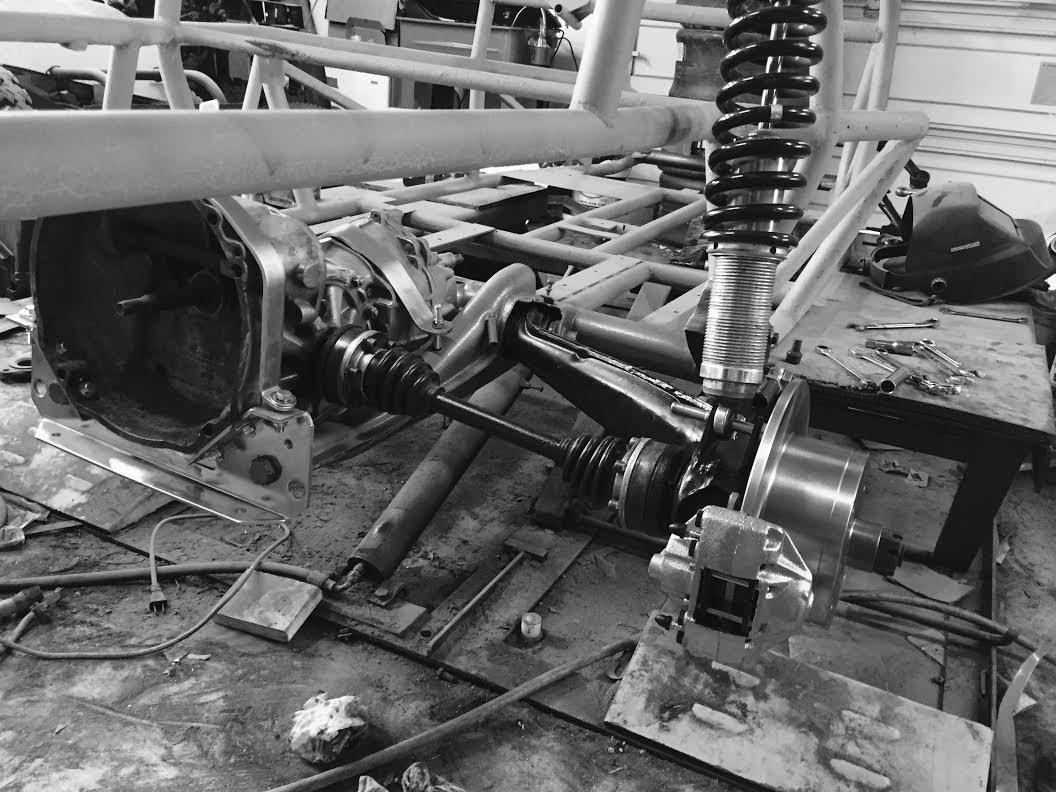
Today it's on to rear suspension. Y'all got to see most of this in mock up so nothing much exciting an new here. I may have to give away the paint job soon, because it does all look really pretty in color.
Of course as I was taking the picture I realized I was still using temporary hardware for the shocks so I'll have to pull the brakes off to get the lower bolt out. Doh.
I can't wait till this is on wheels again so I can roll it outside, move the lift and clean all the accumulated crud from under it. Most of that is rust that flaked off this thing.

JThw8 wrote: I can't wait till this is on wheels again so I can roll it outside, plop a milk crate in it and make engine noises.
FTFY ![]()
The_Jed wrote:JThw8 wrote: I can't wait till this is on wheels again so I can roll it outside, plop a milk crate in it and make engine noises.FTFY
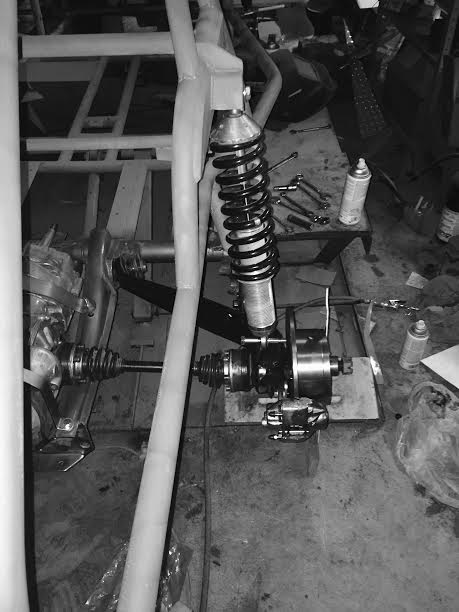
By the time its on wheels it will have seats in it :) Now that the rear is done (minus shock hardware) I just need to mount brakes on the front and I'll start re-installing the floor and seats.
Sometimes in the evenings I sit and look at photos from the day, making plans, going over what I've done and looking for the inevitable mistakes I made. Tonight was one of those nights. I was looking at that suspension photo up there and suddenly....

Can you spot the problem...probably not. Would it help if I mentioned the 15x10 wheels going on the back have a 5" backspace? See it now? FFFFFFFUUUUUUUUU.... berkeley.
I'm tempted to just order a second set of 15x10s from Diamond with a 2" backspace and then I'll have a square wheel setup for the Goodyear slicks. Of course I don't know if I can get away with the 5" backspace up front either, actually I'm reasonably sure I can't. I guess I'm off to look for some spacers and long wheel bolts....sigh.
I'm vastly open to other ideas here.

Based on how it looks like you've got maybe 5" tops between the wheel flange and coilover, I think I see the problem now.
Kenny_McCormic wrote: Based on how it looks like you've got maybe 5" tops between the wheel flange and coilover, I think I see the problem now.
4" max and that's not accounting for any tire bulge. I need at least a 2" spacer.
Some of the problem solvers following this on Facebook thought a full view would help so I thought I'd share here as well. No I don't really see a viable way to move the coil over but I'm open to ideas.

Mount it inside the cage. We did this in our off road racing days so they didn't get whacked.

Bellcrank? Seems like you could mount a bracket below the frame to hold the bellcrank, and position the shock assembly so it's basically level horizontally, but mounted at an angle to follow the control arm. The fab brackets for the "upper" shock mount in front of the transmission/above the pivot for the control arms. Does that make sense? I know it would be quite a bit of fab work, and you're on a time-crunch.
Iusedtobefast wrote: Mount it inside the cage. We did this in our off road racing days so they didn't get whacked.
Where did you put your lower mount? Remember this is not just a shock, there are no torsions so this bears all the weight of the vehicle, the mounts have to be pretty sturdy.
I appreciate all the suggestions of how to rework the suspension but as I said over on the FB thread I'm already in a lot deeper than the "slap big tires on it and hit the skidpad" plan I started with and need to avoid going deeper.
Due to work travel I won't be getting back to this until late this month or early March, there's still an engine to put together, fuel, brake, electrical, clutch, well...everything. Redesigning and building a whole new suspension seems unlikely.
This is not a long term car, you'll see it up for sale shortly after the skidpad challenge. I don't want to get too much deeper in it. I'm also trying to keep it adaptable to take back to offroad since there will be a limited market to sell it as an autocross car.
Something else to keep in mind as you view the above image. That is the suspension at full drop. So going inboard with the shock (which I keep noodling on) would require a huge angle at ride height and full compression. I anticipate the wheel center line will move up by about 3" once loaded and at ride height.
Put a "U" in the outboard frame rail, move the upper mount to the inboard side and call it done? Yeah, it's completely redneck, but it looks like you've already encountered worse.
Is the upper eye mount on the shock removable? If so replace it with a post mount and mount the shock through the frame tube.
MrJoshua wrote: Is the upper eye mount on the shock removable? If so replace it with a post mount and mount the shock through the frame tube.
That would either lower or raise the entire suspension depending on which frame tube you are referring to. Neither would be optimal nor gain much space I'm afraid.
John Brown over on FB suggested turning the lower mount 90 deg and angling the shock inboard with new mount points made and triangulated which is really the quick path to success if I were to modify the suspension. I would run a cross bar of 1.5" square tube from one side to the other then I could notch a hole in the bottom and make a double sheer mount out of the square. Then triangulate the hell out of it to the existing frame. I'm just not sure I can get a good enough angle to clear the frame at compression, I need to look at it tonite but I still think I'm just gonna go with new wheels.
Besides, changing the offset by 3 inches per side will increase track width by 6 inches, that's gotta be a good thing on the skid pad :)

Moving the upper shock mount location inboard will affect the suspension motion ratio...maybe the bellcrank idea could work if you mount it above the lower frame tube? This lets you choose your motion ratio and even make it adjustable.
Unless you want to run some really wacky setup I think it's either pushrod & bellcrank or you'll have to go for those 2" backspace wheels. Which isn't a bad idea, just maybe not good for the budget.
GameboyRMH wrote: Moving the upper shock mount location inboard will affect the suspension motion ratio...maybe the bellcrank idea could work if you mount it above the lower frame tube? This lets you choose your motion ratio and even make it adjustable. Unless you want to run some really wacky setup I think it's either pushrod & bellcrank or you'll have to go for those 2" backspace wheels. Which isn't a bad idea, just maybe not good for the budget.
There's no real budget concerns as the Skid Pad challenge isnt like the $2015. I may take it to the $2015 as well but it would be in exhibition either way. The wheels aren't a terrible budget hit though, really, Diamond has some surprisingly affordable options. I can get a 15x10 2" backspace off the shelf from any sandrail supplier, because there's only so much space in a VW its pretty common, but it costs at least double what the diamond wheel does and it's not as good of a product.
While you are correct moving the shock inboard will effect the motion ratio it's not like any more thought other than "I have these coil overs" and "they seem to fit here" went into this suspension so it's not like I'd be effecting the perfect geometry, I'd just need to adjust. Before I order the wheels I'm going to put the suspension at full compression and see what that would mean for an inboard shock location to work. I fear it would need too severe an angle to clear the frame, if it could clear at all. But if it can work I have come up with a simple design to move it so I may go that way...we'll see.

In reply to JThw8:
Find a pair of type 2 axles and widen the trailing arms.

You could find someone who owns a cnc machine shop and ask him to make you some adapters to space the wheels out.
How thick would the spacers need to be?
If they are thick enough they can bolt to the rotors using countersunk lug nuts and have studs for the wheels to bolt to.
Let me know if you are interested and I might be able to machine them for you.

I buy that kind of spacer in hubcentric form from evay all the time.
You'll need to log in to post.


