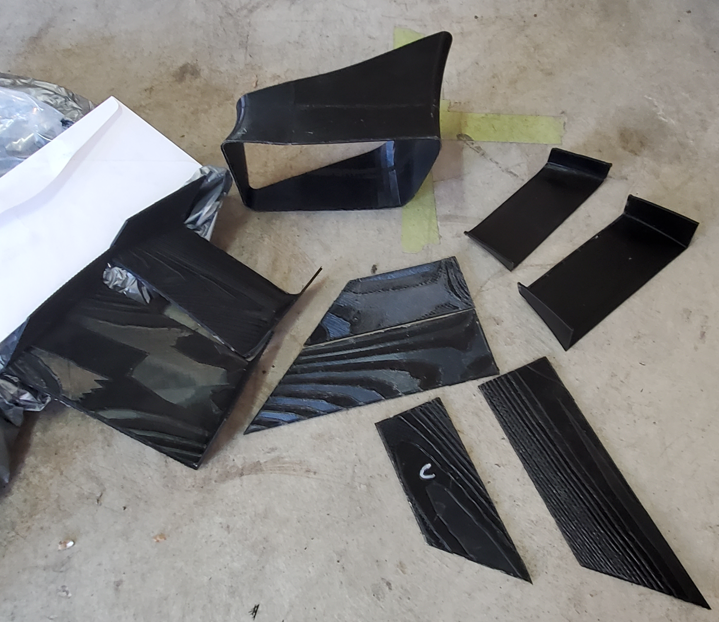
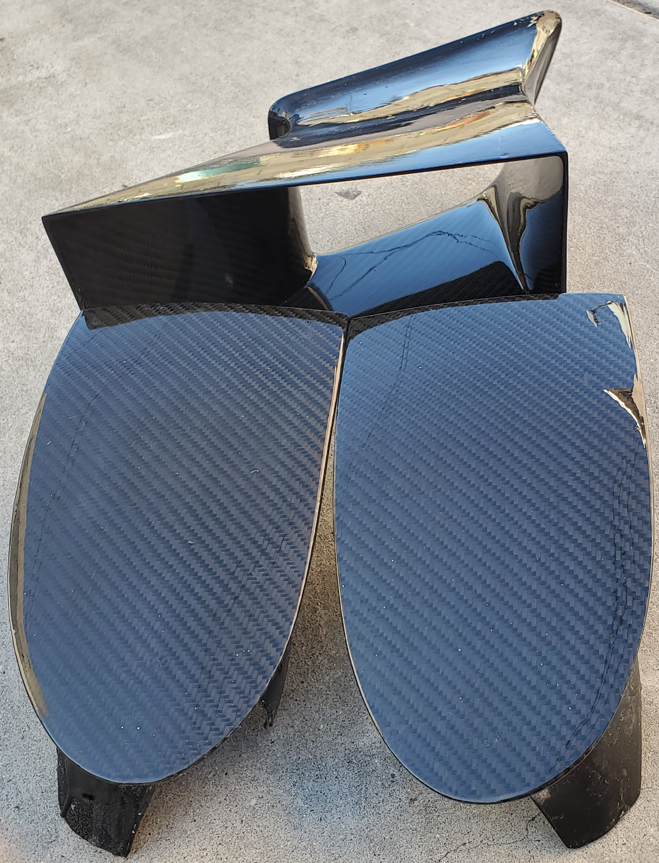
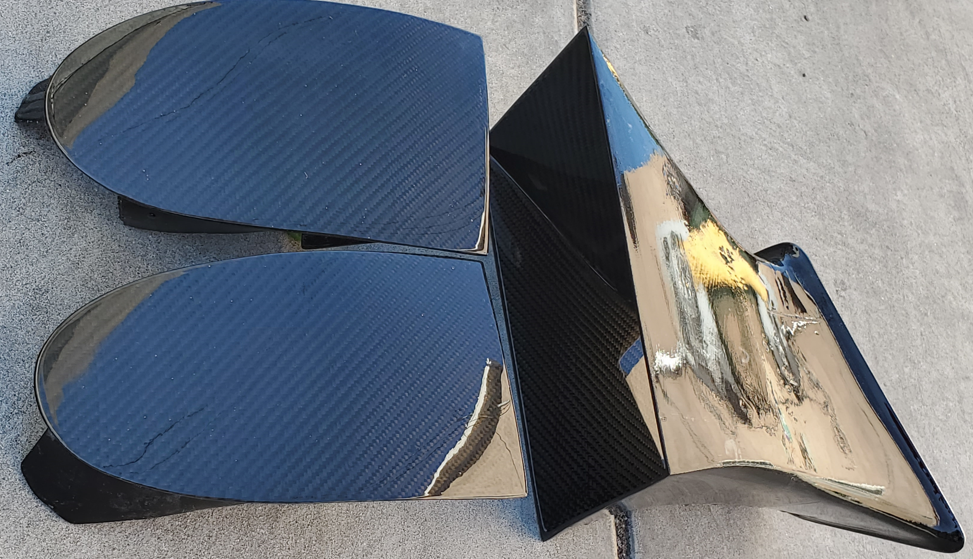
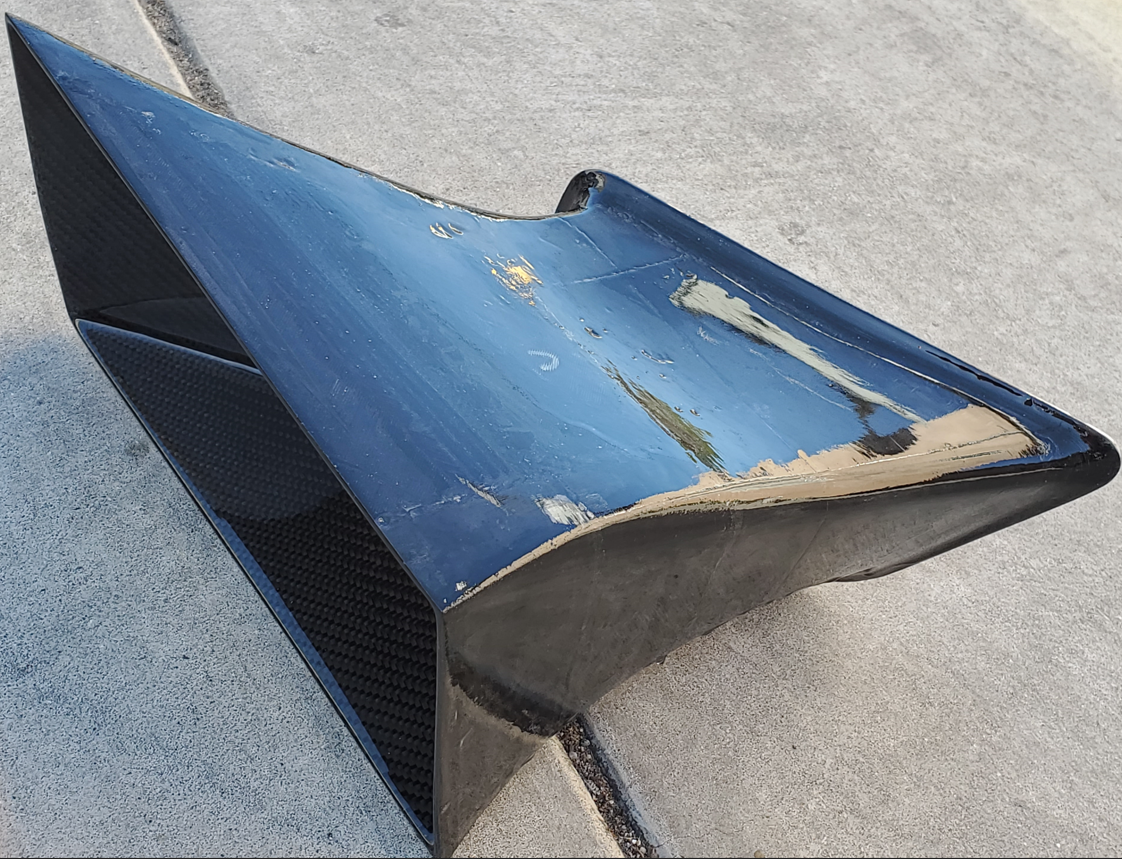
Finally, I finished making the oil cooler duct, and the 2 fog light delete panels.
Here's how they ended up.

Finally, I finished making the oil cooler duct, and the 2 fog light delete panels.
Here's how they ended up.
Last Post (Continued)...
Overall, I'm pleased with the way they came out. However, they did take me a lot more time to make than I ever wanted to. Looking at them, there's no indication of how much work went in to making them lol
I'm going to document the process in case if anyone is curious.
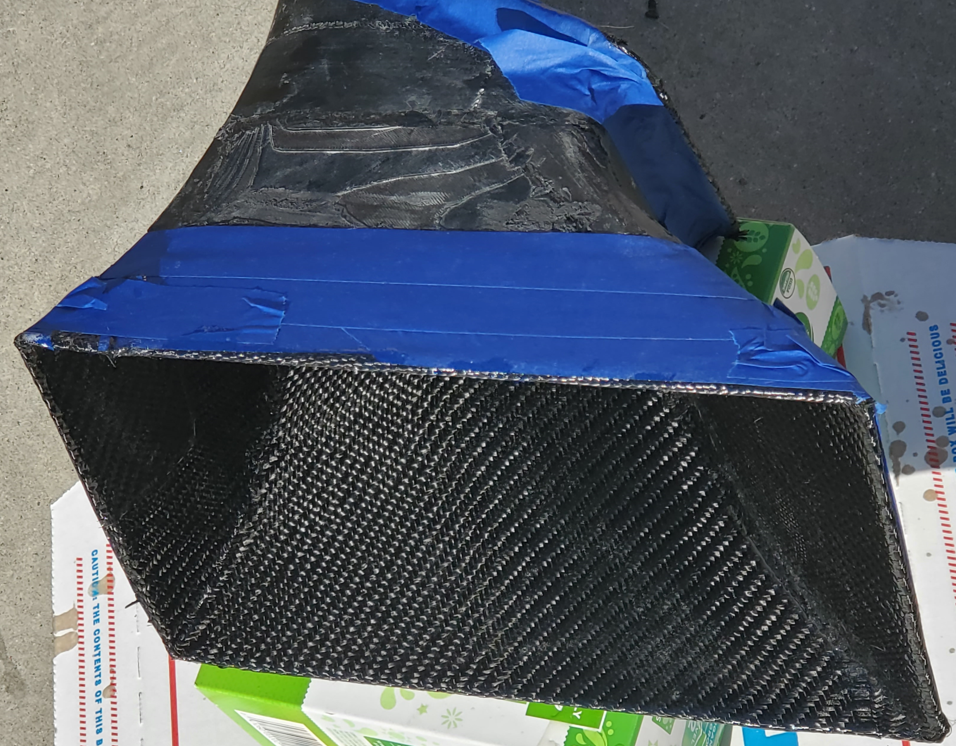
After I designed the oil cooler duct, I proceeded to 3d printing that. Since I have a hobbyist printer, with enough bed surface to print small things, I had to break my print to 10 different prints...
Took 2 weeks to print...
What a nightmare!
Then, I had to line them all up (correctly if I might add) then weld them together. Using only 2 hands here!
After I was all done, I went to test fit, I realized I made a mistake on the CAD and my outlet was 7" high instead of 6"....... AAAAAAAAAAAAAAAAAAAAAAAAAAAAAAAAAAAAAAAAAAAAAAAAAAAAAAAAAAH
I know I wanted to check that dimension before printing... Just got side tracked by something ( I blame my kids)...
I fixed the error and repeated the process... this time it fit.
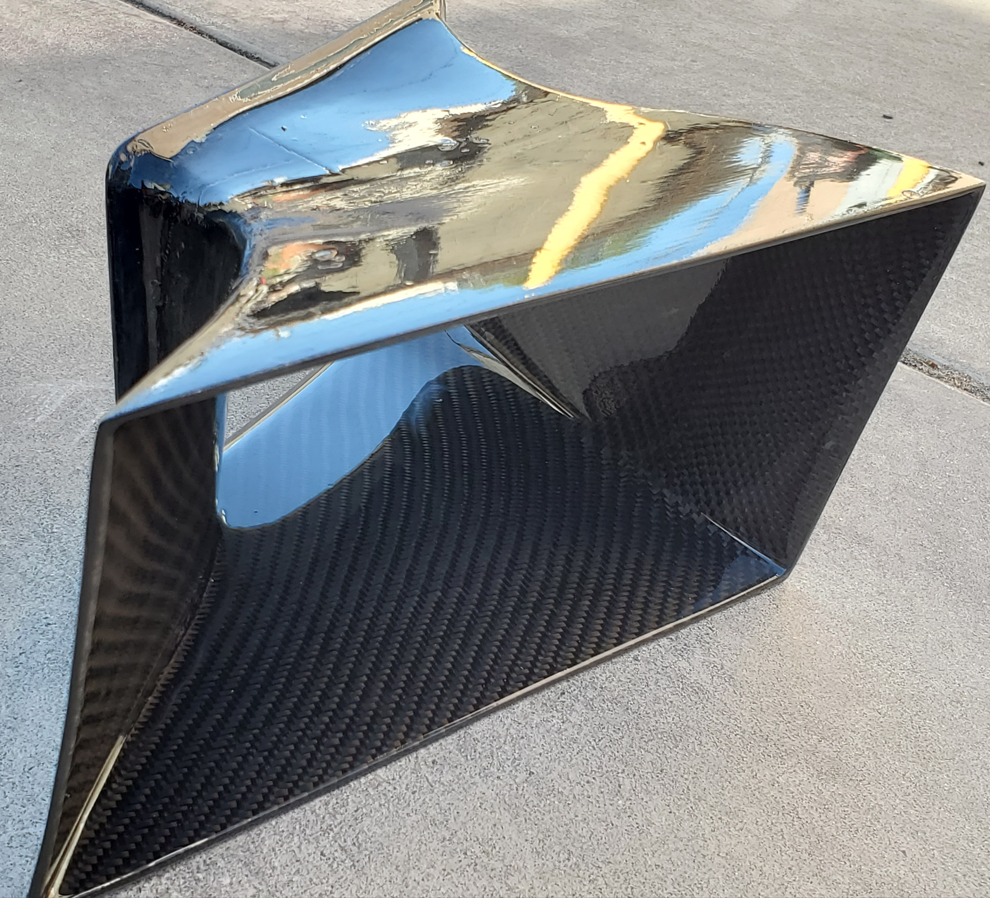
I also added a funnel shaped entry to facilitate bumper cover installation.
How it looks on the bumper cover.
Now it's time for reinforcement.
Fitting a continuous fabric to this shape is not the easiest.
Then wet-layup...
Wet layup is the worst method to make any composite part. I really didn't wanna make a mold then vacuum-bag it. But I think I lost a lot more time doing it the wet-layup method.
Then came sanding...
Then DURATEC sunshield clearcoat, then more sanding, and more sanding.... Then more sanding...Then clearcoat...
Continued...
I have to wait a couple of days for the clear coat to cure a bit more.
I can't wait to try it on the oil cooler and put the bumper on.
I plan on putting a weather seal on the edges against the cooler. I'm thinking of hard mounting the duct to the oil cooler instead of leaving it floating... OR... wait till I make the exit duct then connecting the 2, and essentially sandwiching the cooler. TBD
Continued
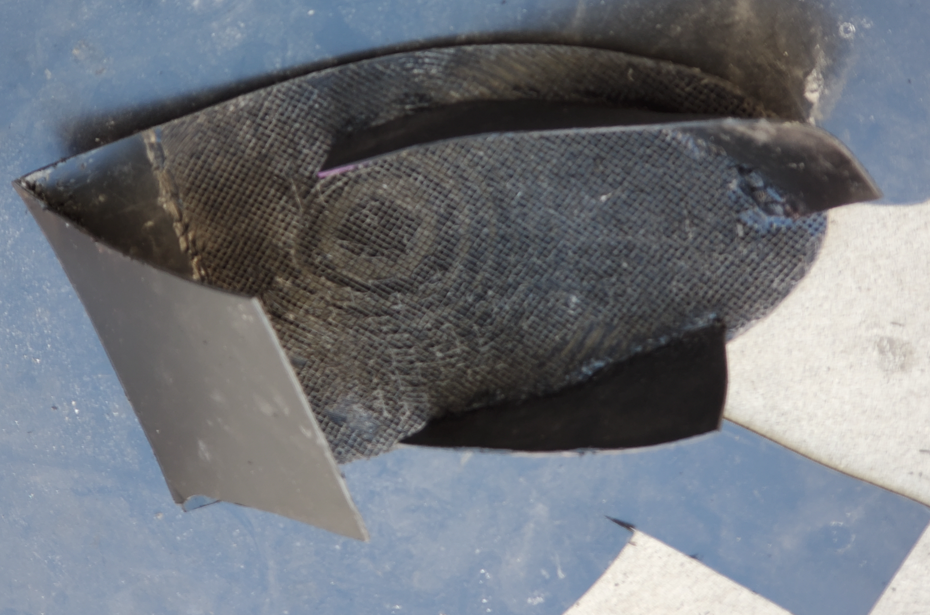
Now for the fog light delete panels...
I initially designed it in CAD, printed the design, tried on the bumper, then realized extending it will better seal the air going to the oil cooler. It essentially prevents the air from backing up and escaping from the fog light hole.
You can see the extension here.
You can see where air would escape here... More work to be done..
I needed to add another piece to block that escape route.
Took a few tries to get it just right... 3 failed attempts.
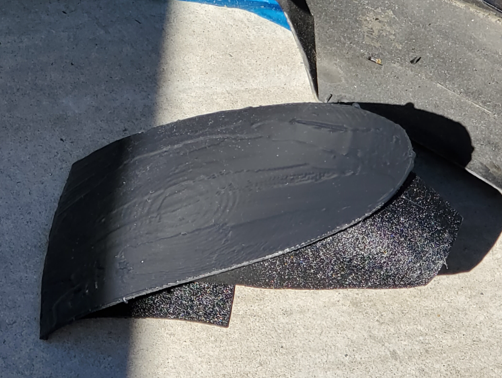
Then I added 2 more pieces to mount the panel to the inside of the bumper. A lot of trial and error here.
It looked like this:
Time to level the surface. Body filler and black die.
Curing
Can You guess what's coming?
You guessed it... SANDING
To be continued...
Continued...
Reinforcement...
Wet layup.... Unfortunately...
Right side... I opted to replicate the process I followed with the driver side.
More sanding
Measuring up fabric
Wet layup..
Excess resin...
Continued...
High spots.. I can see sanding in the near future...
Then came DURATEC, sanding, more sanding, then clear coat...
This has to be the quickest turnover forum I've ever been on. Not even a couple of hours after I posted a project update, my thread was already on the bottom of the page lol Now I wonder who even sees anythig posted here...

your work is very impressive,dang! Keep on, I swear I'm lurking and reading, haha. I just have nothing of value to add.
This is fantastic. Thanks for sharing the whole process.
an oil cooler duct is on my list of winter projects already so this a good motivator.
-Jordie
In reply to golfduke :
Thanks brother.

Dood!
With your brake ducts and fog lamp delete covers, are you just carbon skinning your plastic 3D printed parts? If yes, are you using a laminating epoxy resin?
In reply to freedomgli :
Yes, 3D printed the part then skinned it with carbon. You could plan to separate them, but that pretty difficult considering the design and extra steps you have to take. Most likely it won't work with the current design. Laminating epoxy is used.
In reply to R32Jordie :
Thanks for the feedback.
I've never made ducts like this before, so this was a learning experience for me. I still have to make the exit duct for this cooler, then the ducts for the cooler on the passenger side lol one down, 3 to go.
In reply to madmax98 :
were are you plannig on having the duct exit? into the wheel well or do you have the option to have it exit out the side of the bumper infront of the wheel? (as seen on something like a R34 GTR)

Curious as to why you didn't use the outer duct for piping to cool the front brake rotors? Other than that carry on as this is cool as heck.
In reply to R32Jordie :
Great question! I'm planning on having them exit into the suspension area. That's the safest option from aero prespective. diffusing into the wheels or to the outside can get tricky and costly in terms of drag.
In reply to brad131a4 (Forum Supporter) :
Thank you for the kind words!
I'm planning on running brake ducts from the front splitter diffuser (not yet made). This may take advantage of the high pressure area ahead of the tires. I have to run some sims to optimize this setup. All in effort of reducing drag and having efficient ducting.
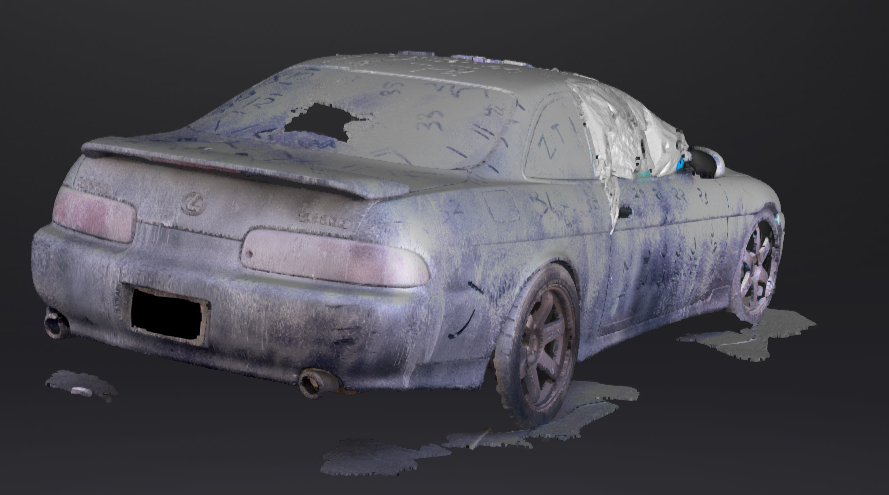
Started to plan my winter projects. Mainly indoor stuff due to the weather. One of the things I want to tackle is a tightened CFD model with more accuracy. The CAD model I did before was based off of pictures and measured dimensions. So, it's probably a bit off, which would affect the CFD results.
Now that I have a scanner that can scan stuff bigger than an orange (LOL), I decided to scan the car and re-do the CAD model, AND re-do the CFD simulation...
I'm still in the process of scanning and fixing the mesh. Here's what I've finished so far...

Awesome work. Thanks for updating.
Probably my last update for the year.
Since my last update, I've been battling with 3D scan data and how to take advantage of it. What a journey that was! I spent tens of hours on endless number of software tools. I kept bouncing between Solidworks, CATIA, Meshmixer, Meshlab, Fusion 360, and countless others, on 3 different computers lol... Nothing worked.
I'll spare you all the details! After all the trial and error, and frustration, I've concluded that 3D scan data can be used only as a reference. For anything significant, say a car, modeling from scratch is the only way.
Enter surfacing and 3d modeling. I hadn't done surfacing in a while, so I had to refresh my memory a bit. The learning curve was quick and I was well on my way. however, this was a time consuming task. Modeling the front 20 inches of the car took 90% of the time lol. My objective, most of the time, was to model as much details as possible. I can always defeature details, but it's harder to add them in.
One of the main things I plan on doing is to include the intercooler and radiator in the CFD simulation (including the ducting and hood vents).
Here's some progress shots...
Mesh data overlayed on the CAD model (not final model)
Great progress. I know how much of a pain working wish scan data is. If only it was as easy as people think. Surface modeling is the worst, in solidworks, especially. At least ive never got the hang of it to any great degree.
We use an Artec Leo scanner at work and they new Artec Studio 18 software allows you to turn can data into a useable surface (kind of).

You can see all the the little sections of the surface that is created. I was able to convert and export a section of my sideskirt to a surface and then use it to cut a solid body for a test piece of the extension I want to make. the fitment was spot on.

Thanks for pushing me to get started on my ducting as well.
-Jordie
R32Jordie said:Great progress. I know how much of a pain working wish scan data is. If only it was as easy as people think. Surface modeling is the worst, in solidworks, especially. At least ive never got the hang of it to any great degree.
We use an Artec Leo scanner at work and they new Artec Studio 18 software allows you to turn can data into a useable surface (kind of).
You can see all the the little sections of the surface that is created. I was able to convert and export a section of my sideskirt to a surface and then use it to cut a solid body for a test piece of the extension I want to make. the fitment was spot on.
Thanks for pushing me to get started on my ducting as well.
-Jordie
Haha I was definitely one of these people thinking 3D scanning is the be-all and end-all trick in cad-ing a car.
That Artec scanner looks impressive. I looked at the price and collapsed in my chair lol I like how they developed the software for the purpose of reverse engineering as well.
I came close to having similar results like yours; converting mesh data to surfaces. It worked well for small parts and areas, but failed when producing large areas like the whole car. It required a lot of editing, processing and waiting.
In the end, I thought modeling using surfacing was actually a bit quicker. So as soon as I made that conclusion, I started the modeling process so I can at least start during my Christmas break.
I'm no expert in surfacing either. We strictly use solid modeling at work since we don't really develop large panels and such. The only surfacing experience I had was modeling this car previously, from pictures (not scan data), in 2019. This was definitely a learning experience. Once you get the hang of it, it's pretty straight forward, and sorta monotonous.
I'm still pursuing alternative methods of post-processing mesh data though. There might be other instances where other methods are more efficient.
As always, Thank you for the encouragement and peeking in.
Any recommendations on where to get CF / general composites supplies? I've got a few little carbon fiber projects in the backlog of my brain that I'd like to tackle soon.
Also, this thing is Rad

In reply to Nukem :
I happened across this website awhile ago. They seem to be a one stop shop.
This project is bad ass by the way
You'll need to log in to post.