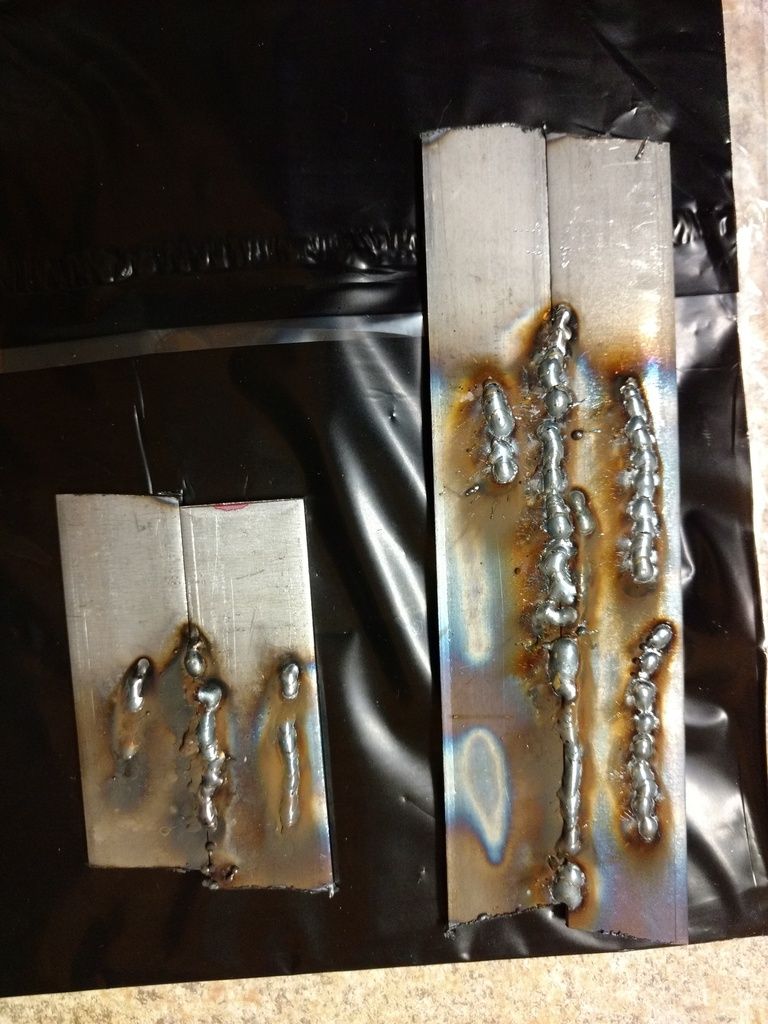
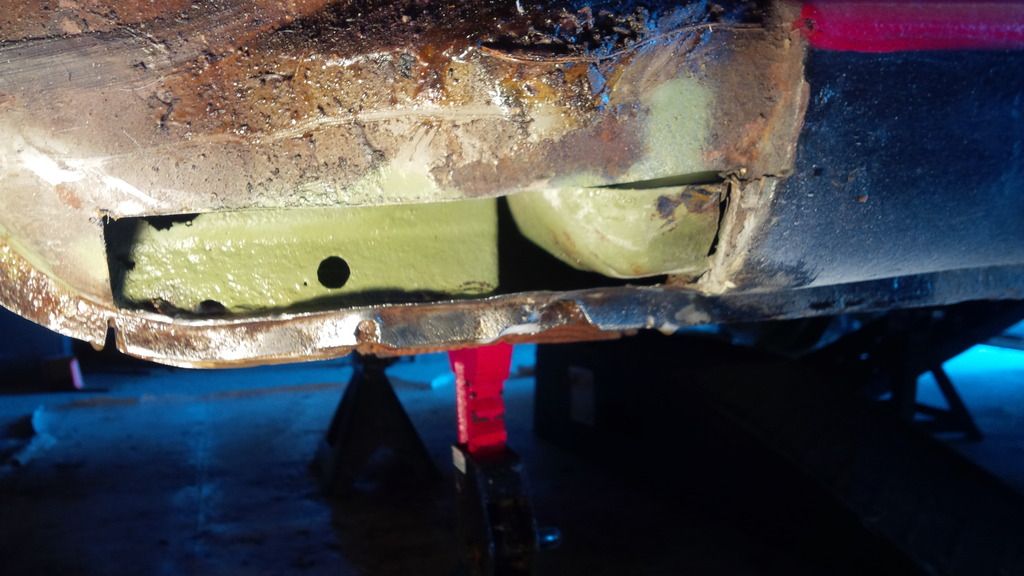
I need to patch some holes behind the fender and I need some welding tips. I'm using a mig welder that a friend has but I don't know anyone who welds so I'm on my own. The picture shows my first 'decent' weld, this is on 16ga. The welder was set on Max and 1 with a wire speed of 5. How does it look? What can I do to improve? Also does anyone know the gauge size of the metal behind the fender on a NA Miata? I want to practice with the right metal size before I start welding on the actual car.

Without looking closely and just an observation, burn it. Let er rip.
You will want to do a whole series of single tacks to join panels together. Moving around, to minimize heat.
I'd say your wire feed is too high, and/or your welder heat is too low.
And the biggest rookie mistake is moving too fast, but then again - you don't want to run "beads" per se in stitching panels together.
Also, the fender panels will be way thinner than 16ga steel. Probably 22 or 24ga?
I have a Lincoln 140 MIG, and for body panels I have it on the lowest heat setting, with the wire feed just fast enough to not blow holes in the metal.
Garage Journal - welding in patch panels
Borrow or buy an auto darkening helmet. That'll help vastly. Also, get the area you are working on lit brightly. My biggest problem is seeing where I'm going.
And as mentioned, for sheet metal you will be tacking around the panel, not running a bead.

JoeTR6
Reader
4/2/16 7:05 a.m.
The thing I keep forgetting is that it's really hard to do decent welds if you are not comfortable. Hunching over the piece with a leg sticking out always makes me rush to finish. You don't want to be in a hurry. For when you do blow a hole in the weld, get a small piece of copper sheet with a handle (e.g., vise grips) to cover the back of the hole and help absorb some heat. This helps keep the hole from getting bigger. NOHOME and Burrito have great examples of doing patches in their build threads.
Make sure what you are welding is as clean as possible. The thinner the metal, the thinner the wire, the lower the heat the slower the speed. Try zig zagging or small circles. You want to keep a constant puddle and hear a smooth consistent crackle as you go. On thinner material, weld for a few seconds and let go of the trigger for a few seconds to allow it to cool, the weld again, then cool. You will get some blow thru on panels. Let them cool and go back and touch them up. If your wire melts back away from the material then feeds, sparks, and then melts away again, you have too much heat. If the weld sucks, go back and smooth it out with a grinder. There will be some extra material left by the first pass, and the second pass will weld much nicer. Thicker material that you won't burn thru can handle a long pass with minimal cooling between welds. Sheet metal should be done with little dots and dabs so the panel doesn't distort. Go watch some Youtube vids.
With thin sheet metal try to do "spot" welds. If you can overlap the patch, drill a hole in the patch where it overlaps the "old" metal. Then hit the old metal and move the torch in a small circle and try to fill the hole. The hole should be no more then 1/4-5/16 of inch. Since the patch is not in a exterior panel I see no reason to "run a bead" to weld the patch panel in. Just cover the patch seams with seam sealer or such to keep out water.
I was recently taught to leave a little gap between the panels when making a butt joint. This allows the weld to 'flow' between them and get better penetration. This was on thicker metal though, 14ga to 1/8th inch. The 'many small tacks' theroy is sound.

NOHOME
PowerDork
4/2/16 5:42 p.m.
Head to the bottom of this thread:
https://grassrootsmotorsports.com/forum/grm/best-way-for-inexperienced-welder-to-weld-in-replacement-floor-pans/111784/page1/
I posted a process that does not require you to have a clue what you are doing as long as you do what you are told. I tend to butt-weld everything.
Thanks for all the good advice... I'm going to print this off and take it with me for the next time I'm practicing
This is what I have to fix...


jere
HalfDork
4/3/16 6:54 p.m.
I think you might need ~19ga,i use hot rolled and a flap disk to take off the scale. It is cheaper than cold rolled and has a little more rust resistance.
Like everyone says lots of waiting and small tacks. Lots of youtube vids but there is one British guy that has the best instruction on body work.(not sure if this is a resto or a nothing special fix but...) the British guy suggests lap joints on nothing special cars, then filler. Or the butt welds on restorations.
Harbor freight has some butt weld clamps really cheap that are great for sheet work like this. (You need access to the back to get the piece of square stock out). They leave just the right gap to keep distortion down
This is a nothing special car, well it is to me but ya know....
My end result is a solid repair that will last so I can pass the car down to my kid, so a long term project.
In reply to jere:

jere
HalfDork
4/3/16 9:13 p.m.
In reply to mj_wils1970:
I would suggest the restoration method then. Its more of a timeless method. If it was an un-sentimental appliance the car would go to the crusher before anyone would care.

NOHOME
PowerDork
4/4/16 7:50 a.m.

Here is how I do that repair:
first, might as well finish drilling out the spot-welds that hold the lower flange.
Clean the area to be welded. I like 1" minimum either side of the weld bead. Fumes from burning paint and sealer will contaminate the weld pool and the shielding gas making this much harder than it needs to me. That means that the backside of the weld also has to be clean; that is the fun part.
Next, get out the tape and cover the hole you need to fill. Run your fingers around the edge to mark the perimeter.
Trim the tape to match the hole.
Slap tape on 19 gauge tin (good luck finding, you will end up with 18)and cut to make a nice tight fit.
Weld in as per the instructions I wrote up.
Grind smooth on the front.
If you want it to last forever, you need to attend to the backside of the weld as it is oxydized from the MIG process. POR at a minimum if you cant grind and paint.
If I were restoring an MGB doing this repair, I would be using a donor rocker panel to get the tin. I would extend your cut rearward past the swage. Also, dont fall for trying to remove as little metal as possible, if you need to make that hole bigger to get rid of all the rust, do so as it is easier to weld on solid metal.
I really like this forum... lots of great advice.

JBasham
New Reader
4/4/16 3:21 p.m.
In my experience the process NOHOME described in the cross-referenced post will get anybody pretty far along actually fixing their car in the minimum time.
But I would (1) first practice doing the same thing off the car for at least a set of seams as long as the ones I would have to do on the car. It took me some time to get the settings and feel down so I consistently never burned through. Filling in burn-throughs can get frustrating for a new welder, because they often lead to even more burn-throughs. (2) That metal looks like it's not 100% rust free along the seams where you will be welding. I find stuff that's part rusted, even a little bit, seems to burn through really easily on a butt joint. After I clean the rust off, the metal that's left is even thinner, so it's burn-prone. I would either cut back to 100% clean metal, or if I didn't have the option, I would overlap the patch 1/2" around all edges and then use the same dot-dot method previously described for the lap joint.

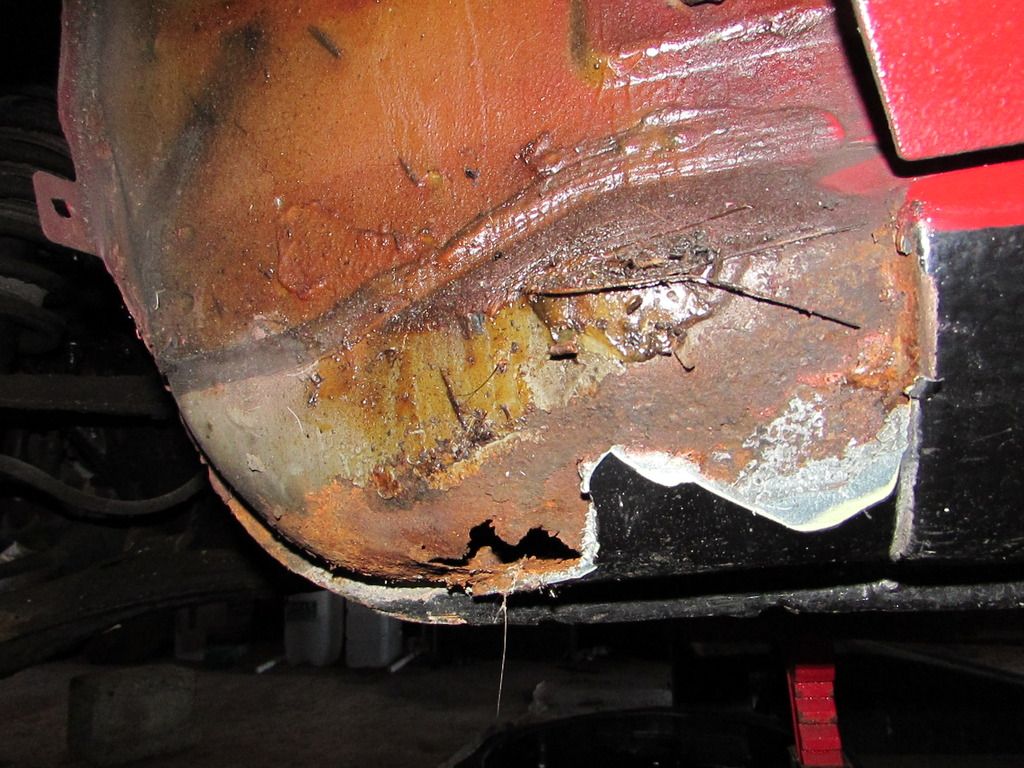
This is what I found when I removed the fender. At some point a PO had fixed the bottom of the fender with bondo.

44Dwarf
UltraDork
4/5/16 10:04 a.m.
I had a nice long reply but it got lost in space....
As your fixing an inner fender panel as a beginner you would be better off buying the HF flanger and punch unit flange the upper section of the patch to fit in up behind the door post. Punch holes in the car body. This will make a nice repair and you will be filling holes that are backed with good metal making for an easier time


