I love the wheels. I have a few sets of stock steel wheels for my TR6, so will play around with doing something similar. Reading this with interest.
I love the wheels. I have a few sets of stock steel wheels for my TR6, so will play around with doing something similar. Reading this with interest.
I've been working on the camber plates a bit over the last few days and have enough progress to make a worthwhile post. I looked at a lot of commercially available plates for a variety of vehicles (none for the 128, obviously) and I settled on a design.
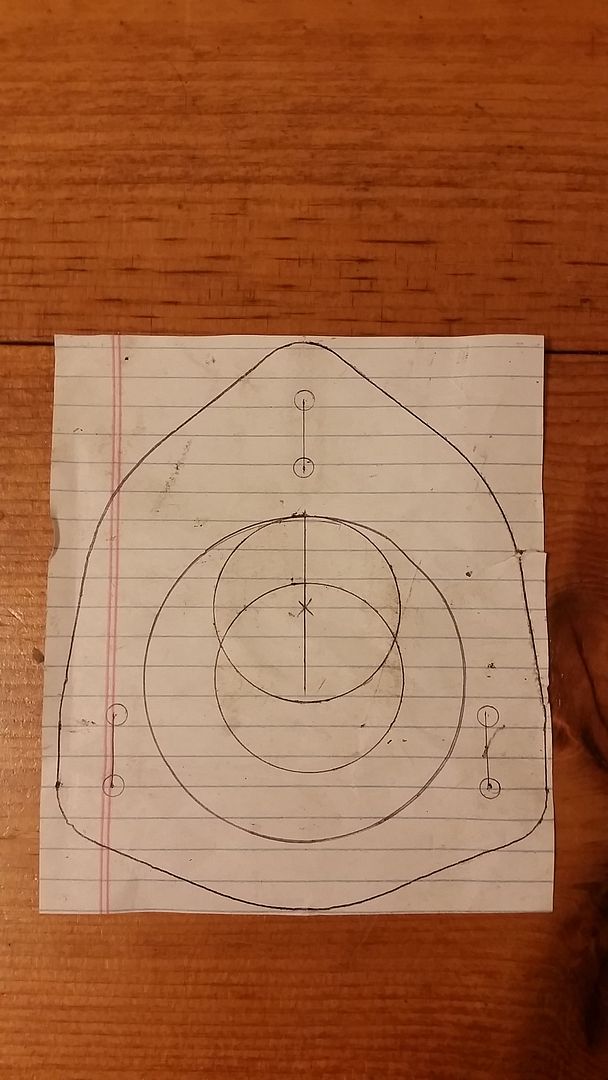
And, as you may remember, I ordered a few parts to make these possible.
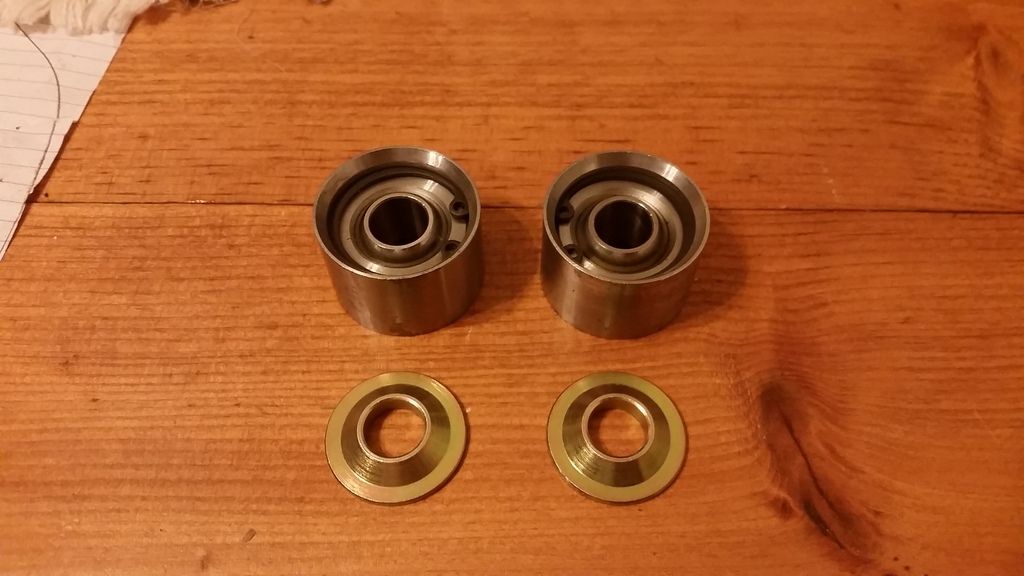
14mm ID spherical bearings and weld cups from Steinjager and safety / misalignment washers from Pegasus.
Two offcuts of 4" x 3/16" hot rolled steel found there way into the Fisher Price mill drill after a short battle with some bar napkin mathematics.
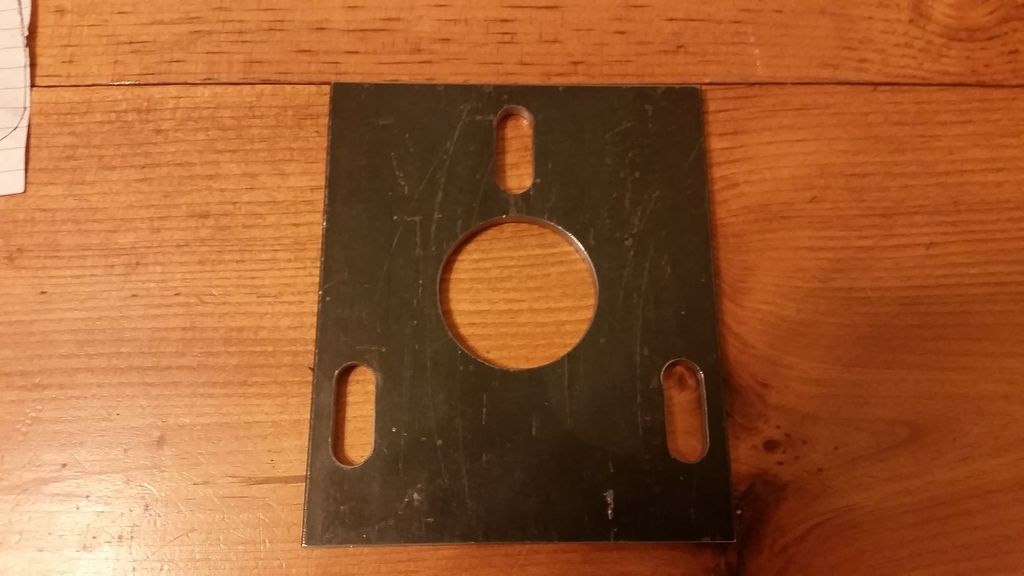
Yes, the outer perimeter has yet to be cut. No they will not be square when I'm done. ![]()
They match up to the, umm, proof of concept drawing.
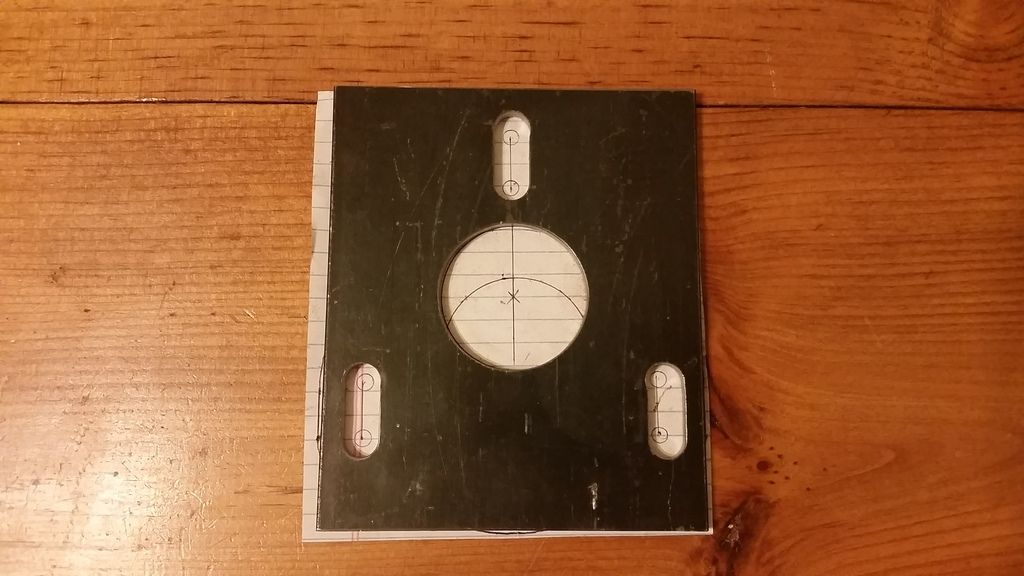
After some lovin' with a 2-3/4" hole saw (which is the same diameter as the opening in the strut tower) the stock strut mounts are once again useful.
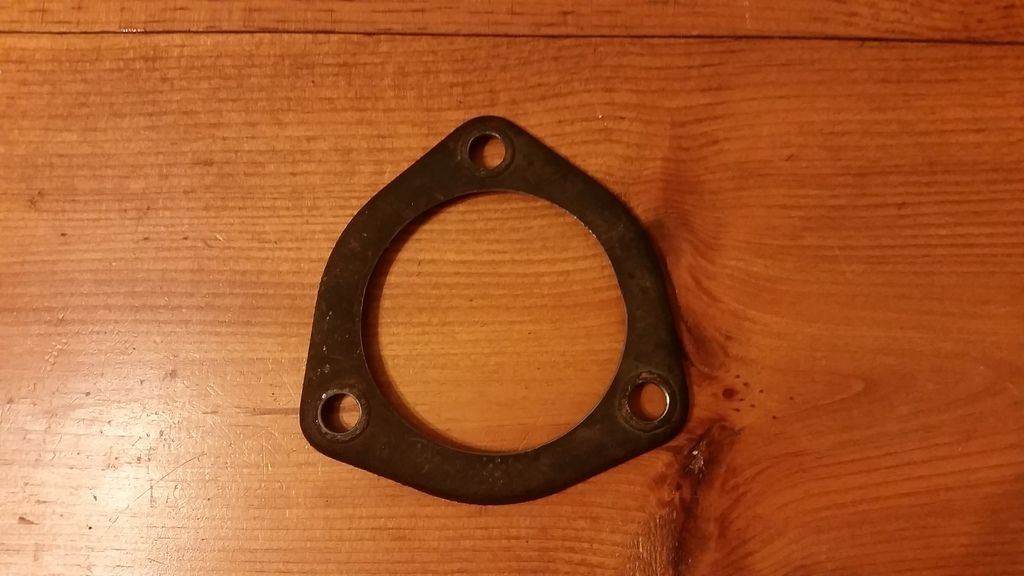
These will be the bottom-most piece of this puzzle.
So, what's the deal with the unfinished parts on the dining table? I need to figure out the appropriate stack height for this mess so I can properly locate the weld cup vertically in the slotted plate. I'm hoping to maximize suspension travel and minimize two things trying to exist in the same physical space.
Here's some loosely "assembled" photos for further explanation of the goings ons.
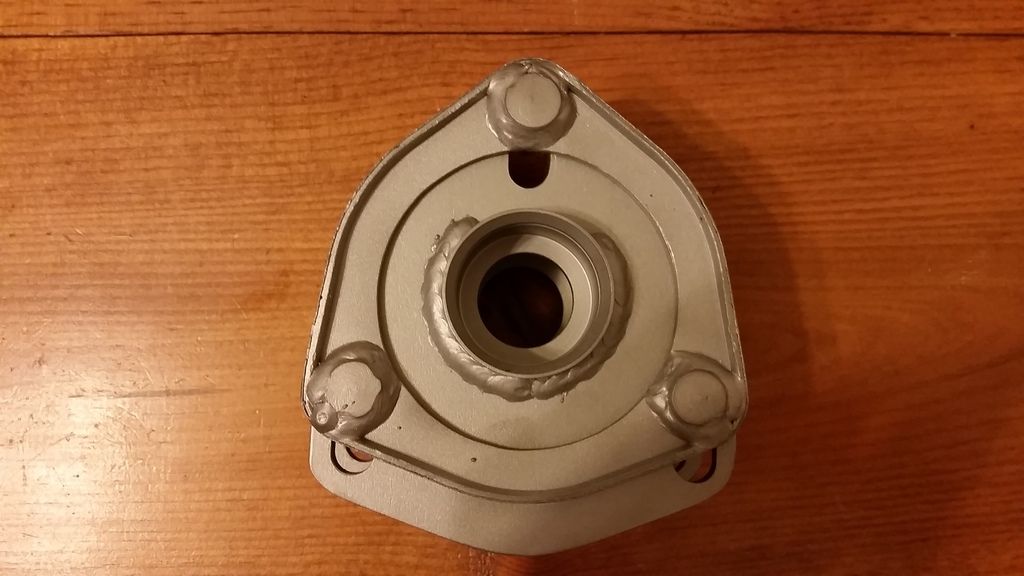
Here we are in the stock, 0 degrees (or very close to it) camber position, as seen from the top.
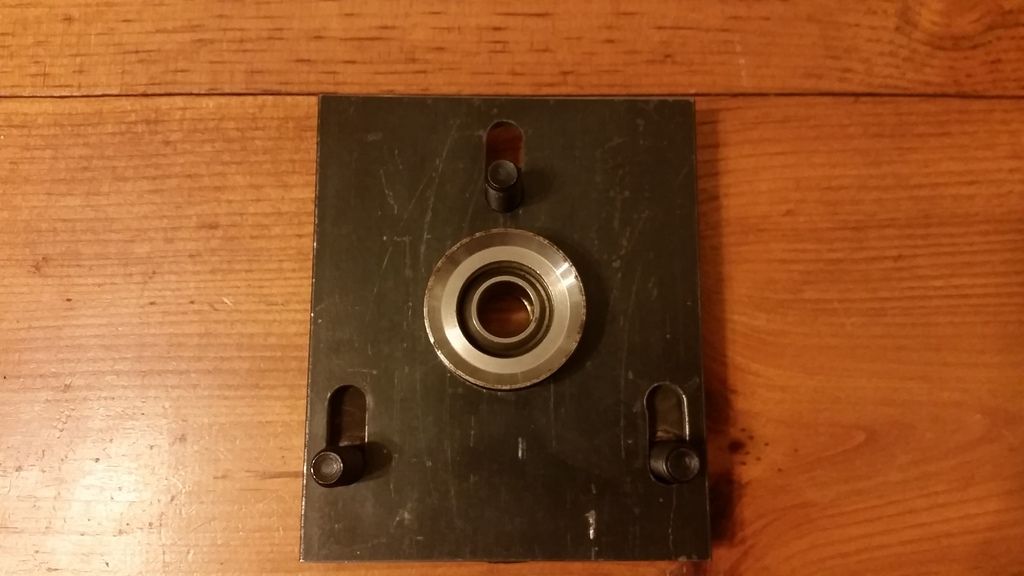
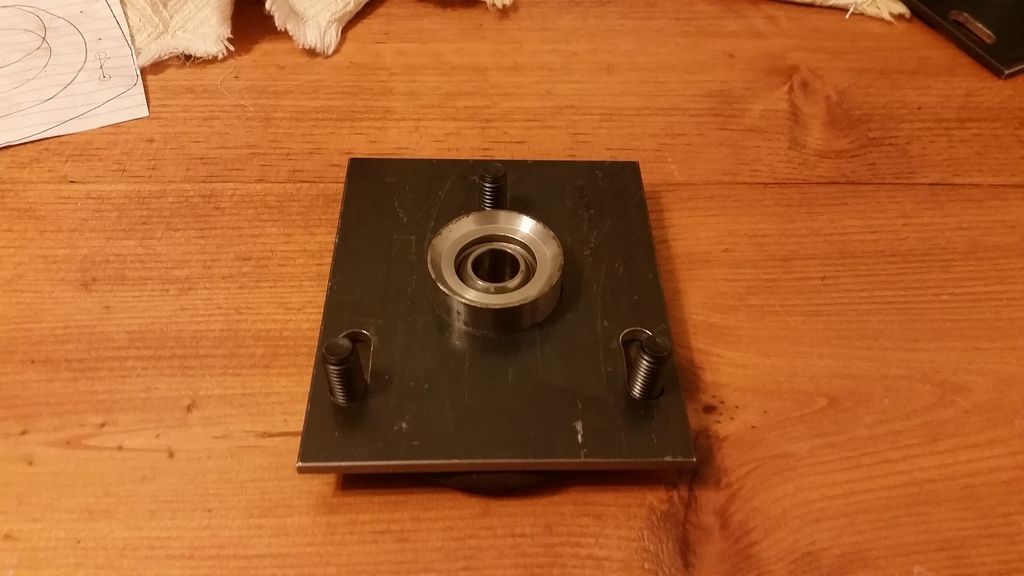
0 degrees, from the bottom.
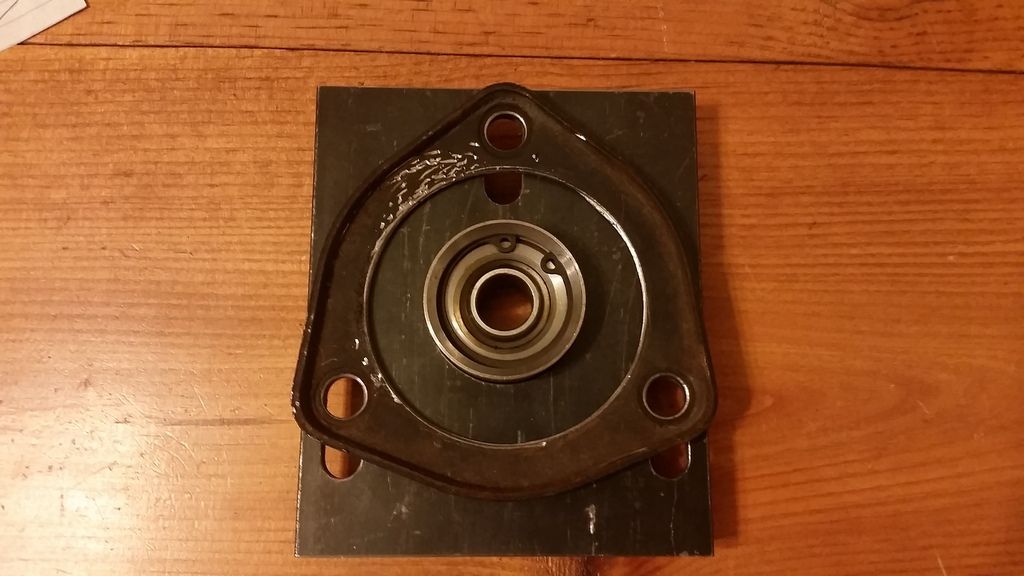
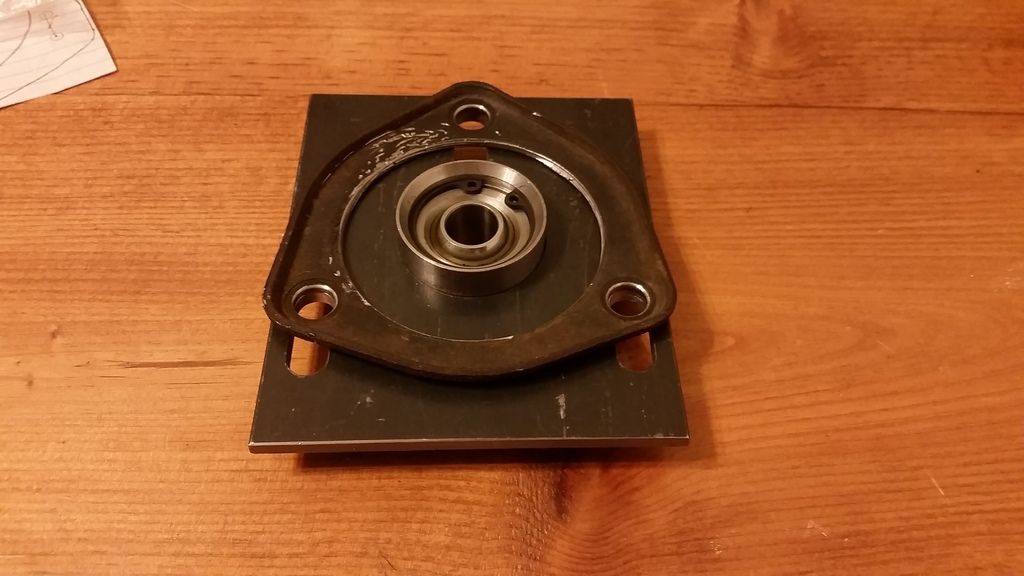
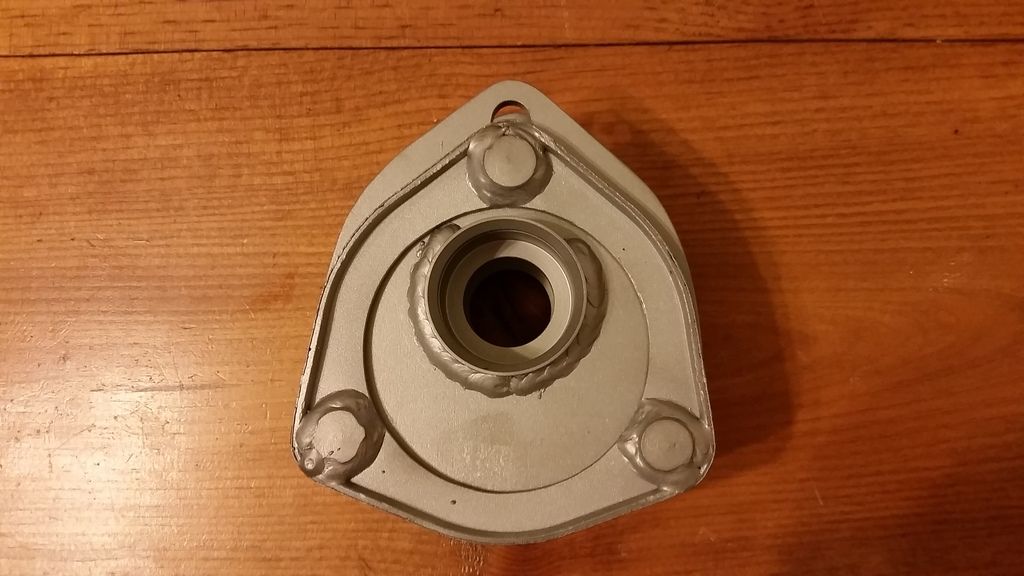
Max camber, from the top.


And maximum camber from the bottom.
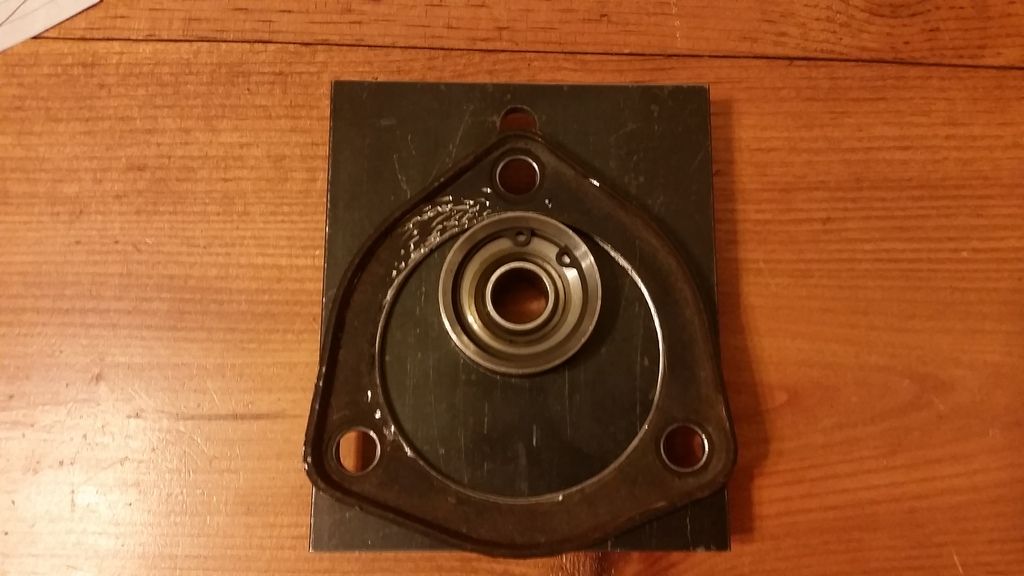
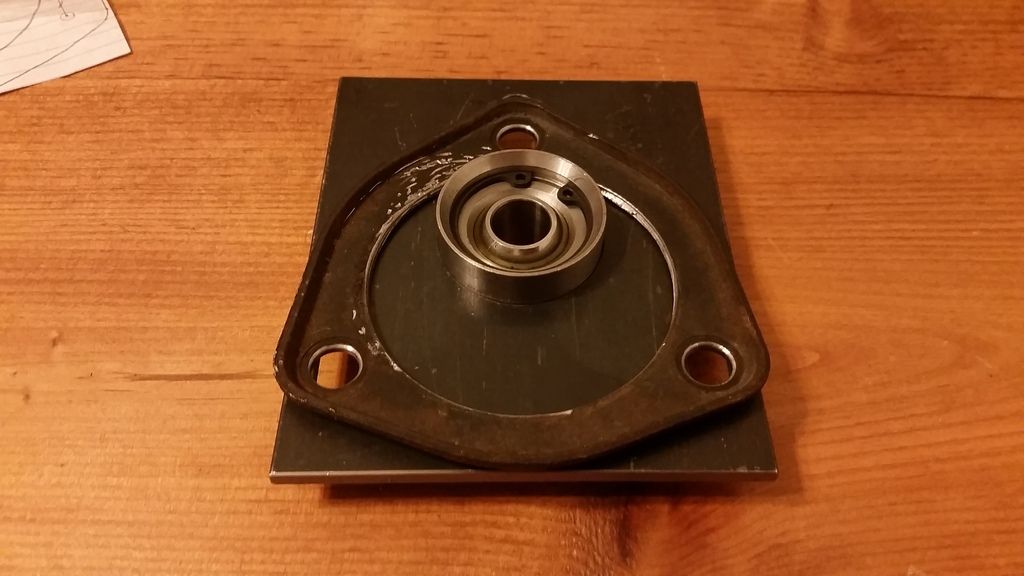
So, apart from having to open up the factory holes in the strut towers to 3/8", these should bolt in to the factory location nicely. I am hoping that the much higher available torque spec of the 3/8" hardware, up from 6mm, will be enough to keep them planted securely in their set locations.
Thoughts, concerns, criticisms? Or perchance a hell yeah, buddy?
In reply to Dusterbd13: He is going to cut it out like the drawing he has done so they will be contoured to fit in the towers
Ah. Makes sense now.
And get welded to the top of the strut towe for locating and reinfocement.
Thanks. Should have seen that.
In reply to Dusterbd13:
Not quite, no. The rectangular plate gets cut out like Lomax suggested, but it doesn't get welded to the strut tower. The slotted plate will go on the bottom side of the strut tower with the modified stock strut mount beneath that.
All will become clear soon enough.
This is what I get for being a muscle car guy I think.
I was suprised when I discovered that if I rotated the factory strut mounts on my mazda it changed alignment.
Please continue, and I'll keep learning.
Burrito wrote: Made it about halfway to work before the fuel pump crapped the bed. Pulled both lines off of it and beat on it with a screwdriver handle until it started purring again. Car is back at home and I was only 30 minutes "late" to work (I'm on a choose your own adventure schedule this week. As long as 2nd shift gets coverage they're happy). Current plan is to replace all the rubber in the fuel system, blow out the hardlines, and throw the fuel pump from the Spider at it. It was running *really* good until it fell flat on its face, though.
If you take the pump apart, you'll probably find the anti-drainback flapper running free inside the pump. It clogs the output port inevitably so it kills pump output until the valve decides it's tortured you enough and moves somewhere else. It runs fine without the drainback anyway so you could crutch the car by removing the offending bit and remounting the pump until the new one arrives.
Hopefully this clears up any remaining questions on the camber plates.
Here they are assembled, top side.
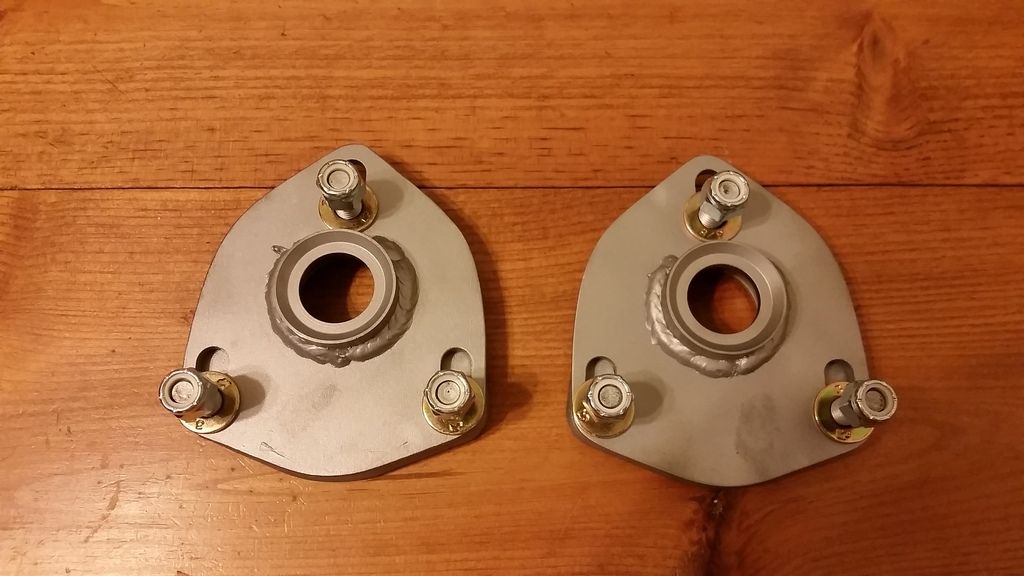
Disassembled, top side.
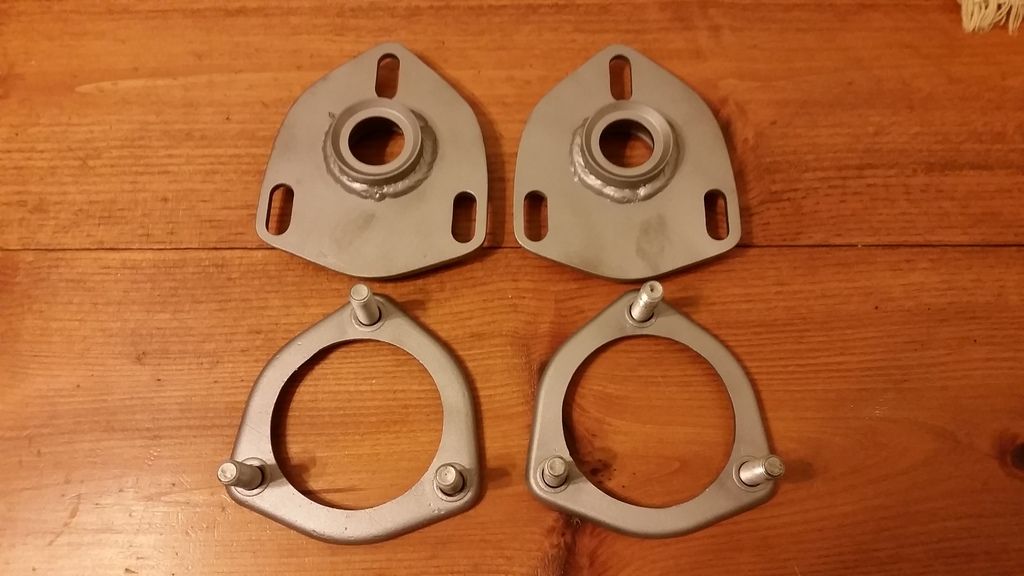
Disassembled, bottom side.
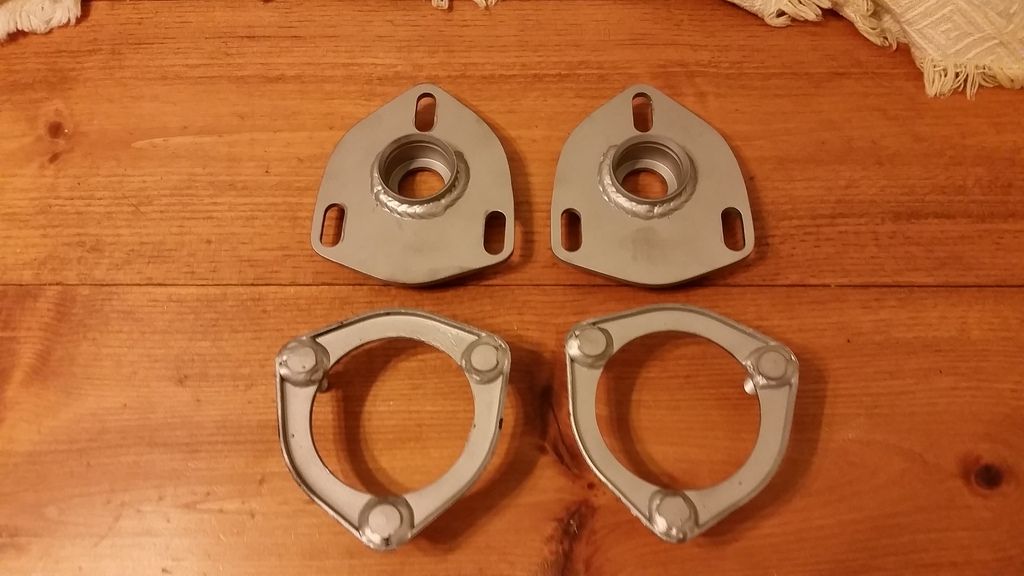
Assembled, bottom side, zero camber.
Assembled, bottom side, full camber.
Next step is a test fit to make sure everything lines up, then powder coat and final assembly/installation.
I'm excited to see how much travel and camber this will gain us.
Any trouble keeping the cup true while welding? I hear you sometimes need to make a brass plug as a heat sink.
In reply to bgkast:
I stuffed a tight fitting socket in there when welding, but it did warp a little. Nothing a little love from the die-grinder can't fix.
When yiu say no camber are you just referring to the stock position, cause if so that doesn't necessarily mean no camber, especially when lowered. Just saying yiu may want to add a little adjustment in the other direction, just in case you know.
I snuck away for a few minutes tonight to play around with the strut mounts.
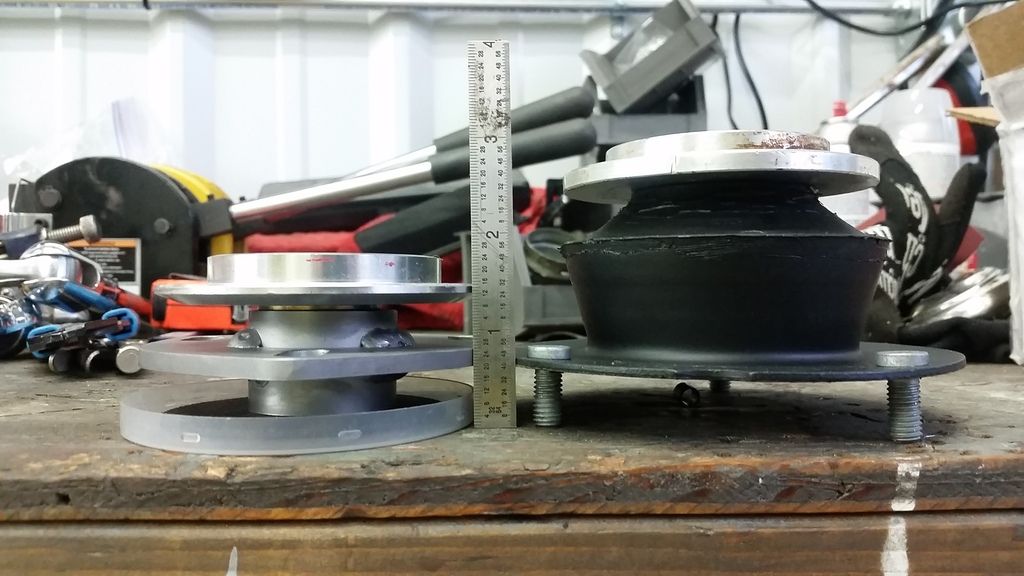
Here's the E30 unit lined up next to the one I made. From mounting face to spring perch on the E30 piece is 2.125", the same measurement on the new one is .875". So that's 1.25" of travel regained!
It's not all smiles and sunshine, though. It looks like due to lack of space on the bottom of the strut tower, I'll have to mount the slotted piece on top of the strut tower ala Subrew.
I had a feeling that this was going to happen, which (besides laziness) is why I reused the old strut mount in the new design. So, instead of gaining 1.25" of travel, I'll be gaining 1.5625" of travel, since we will now be mounting off the other side of the 3/16ths plate.
Oh no, extra suspension travel, what a horrible thing in an Italian car. ![]()
Is the stock coil mounted in the front of the engine bay too? That's so weird. I feel like it would get a bunch of road spray sitting there.
Got a chance to pull the one of the old strut mounts off, grind the lip flush, and test fit one of the new adjustable units tonight.
Bottom. Zero camber, then full camber.
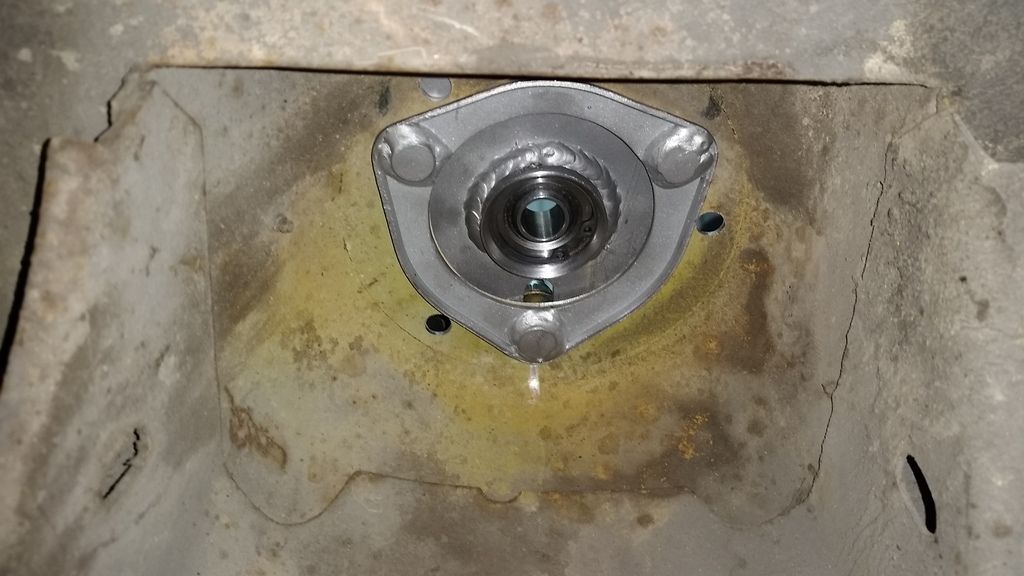
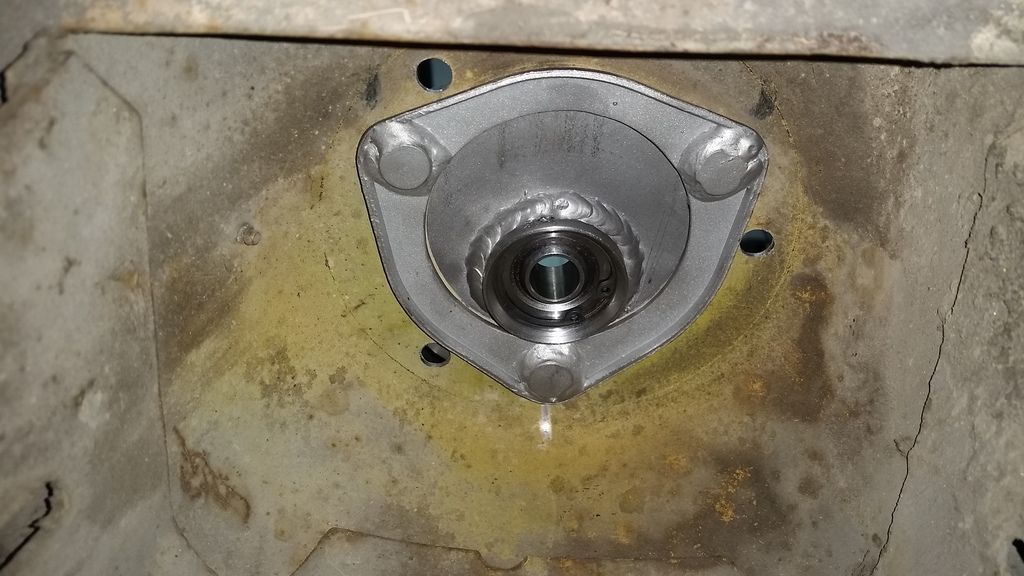
Top. Zero camber, then full camber.
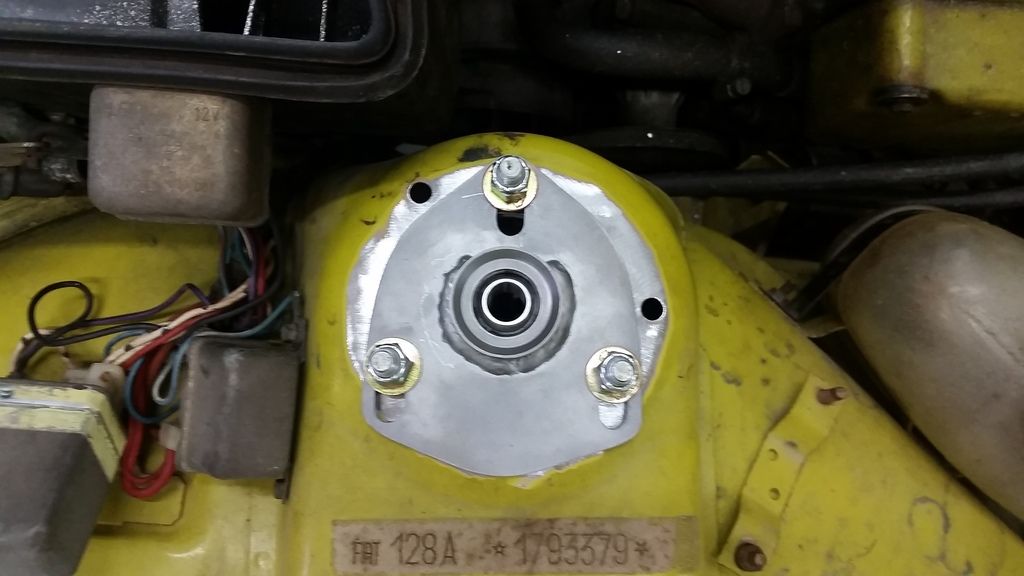
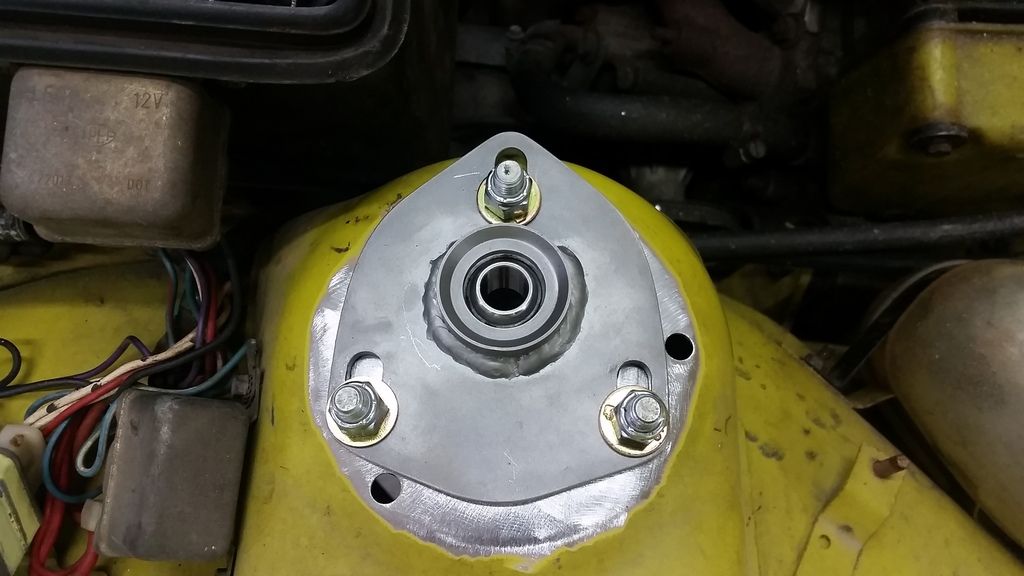
Everything lines up fits very well. I'm quite pleased with the way it's all worked out. I'll need to modify the top nut or find a thinner misalignment washer.
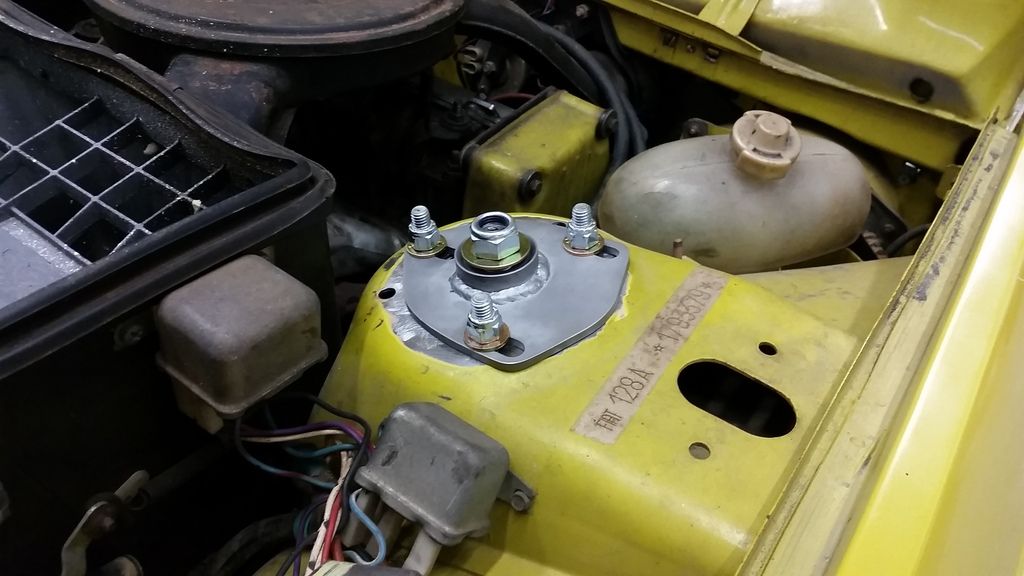
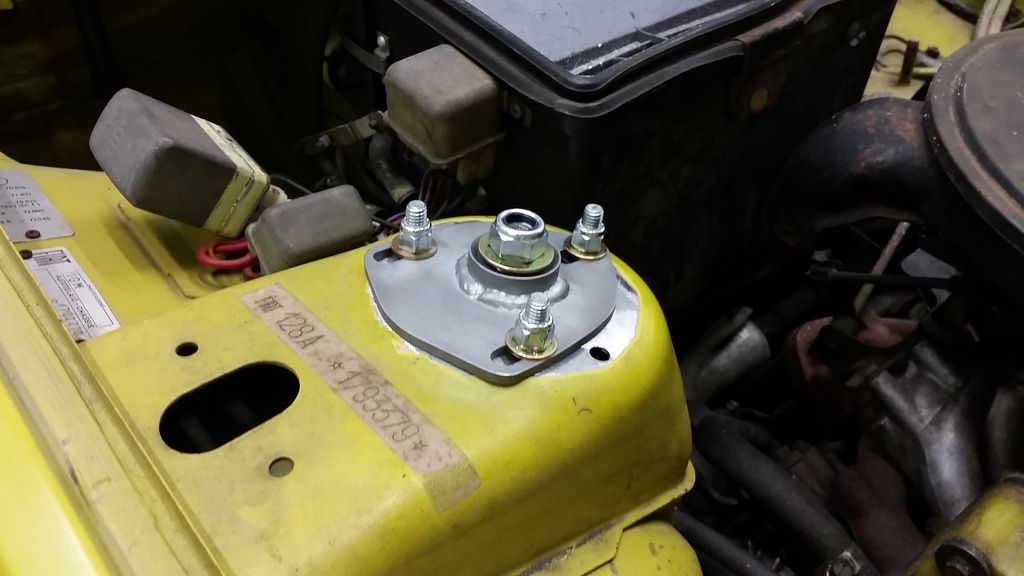
But how many mad tyte camberz did we get?
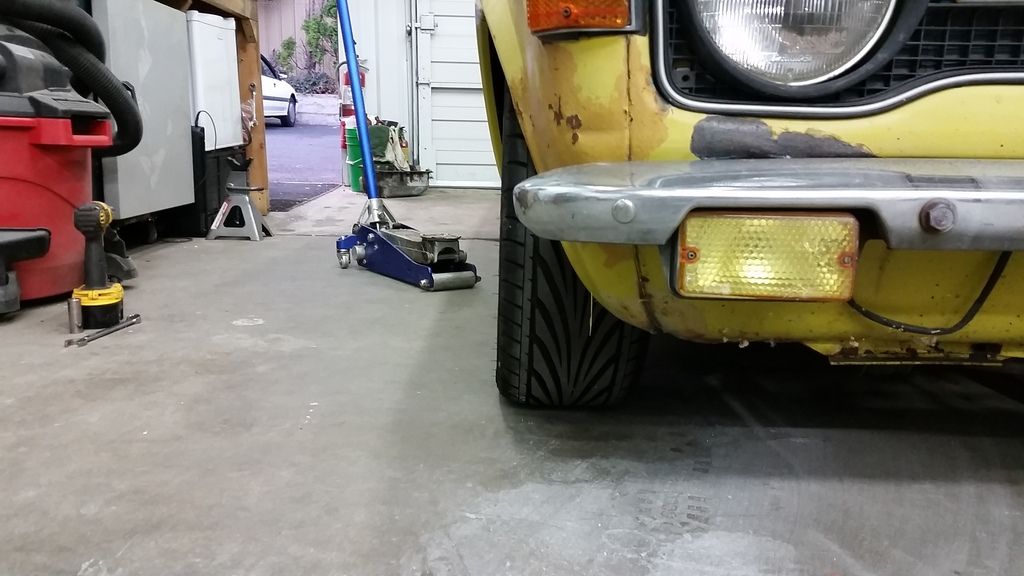
We got 3 more camberz. Enough camberz to satiate a dorifto kid. (Tire moves in .3125" at 20.5" off the ground. A little math says that is about 3 degrees. Plenty o' camberz. I've done math a few times during this build. Somewhere there's a High School math teacher going "I TOLD YOU SO. I berkeleyING TOLD YOU SO!")
But, how many lows did we get?
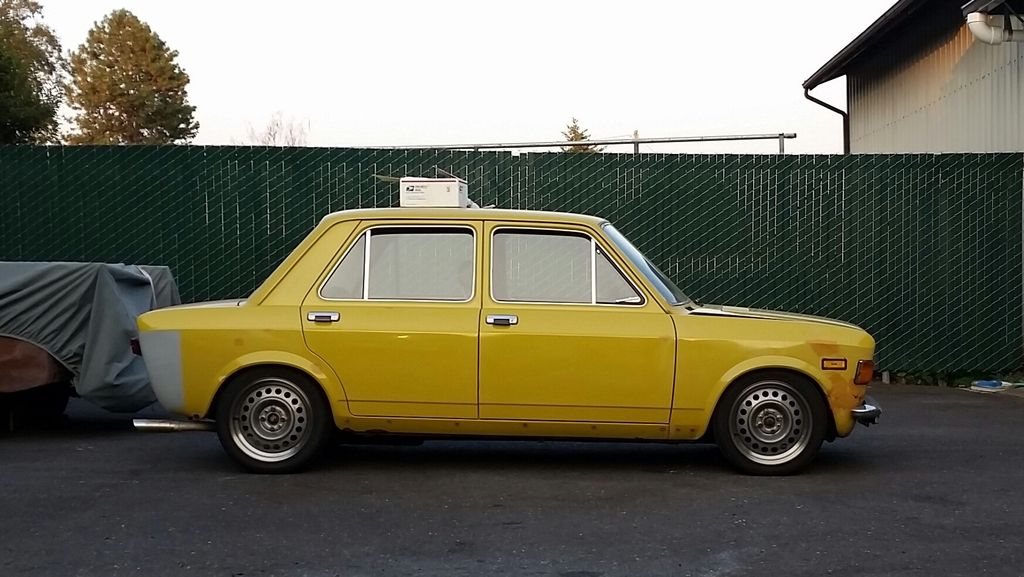
Enough lows to satiate a Eurotrash kid such as myself.
Next step is powder coat, then final assembly. I need to order some fresh tie rod ends too so I can get this turd aligned.
Are you going to make the front side marker go away like the rear one did?
Two weeks should see it in paint![]()
That's some nice camber right there, I tell you what.
This car is near perfect even without the paint, I can't believe how nice all the brightwork is after this much time.
In reply to brad131a4:
Nope. Still her car. I'm justifying the camber plates as an increase in travel, thus improving ride comfort. I have the Scirocco and the other Fiat project to keep me occupied for the time being. The Scirocco is likely to go away before too long so I can import a Lada or something equally as silly. We might be a Fiat only household before too long.
NOHOME, two weeks should be plenty. I'm not worrying too much about the front fenders right now as they are both pretty hammered. NOS ones are available and are cheap, but the shipping is a little steep. Cosmetics have taken a back seat to getting it sorted mechanically. But, yes, the side markers will get shaved before paint.
An 80s Fiat Panda 4x4 should be legal for import to the US by now, shouldn't it?
You can get some of that Steyr-Puch drivetrain goodness.
This is probably a photoshop but whatever:

ssswitch wrote: That's some nice camber right there, I tell you what. This car is near perfect even without the paint, I can't believe how nice all the brightwork is after this much time.
It's a lot more adjustment than we will ever need, but what's done is done. Kinda wish I had built in some caster adjustment, but there's always version 2.0.
The car should be a real heartbreaker once it's in paint and the brightwork is all polished back up. Stainless steel sure is amazing stuff.
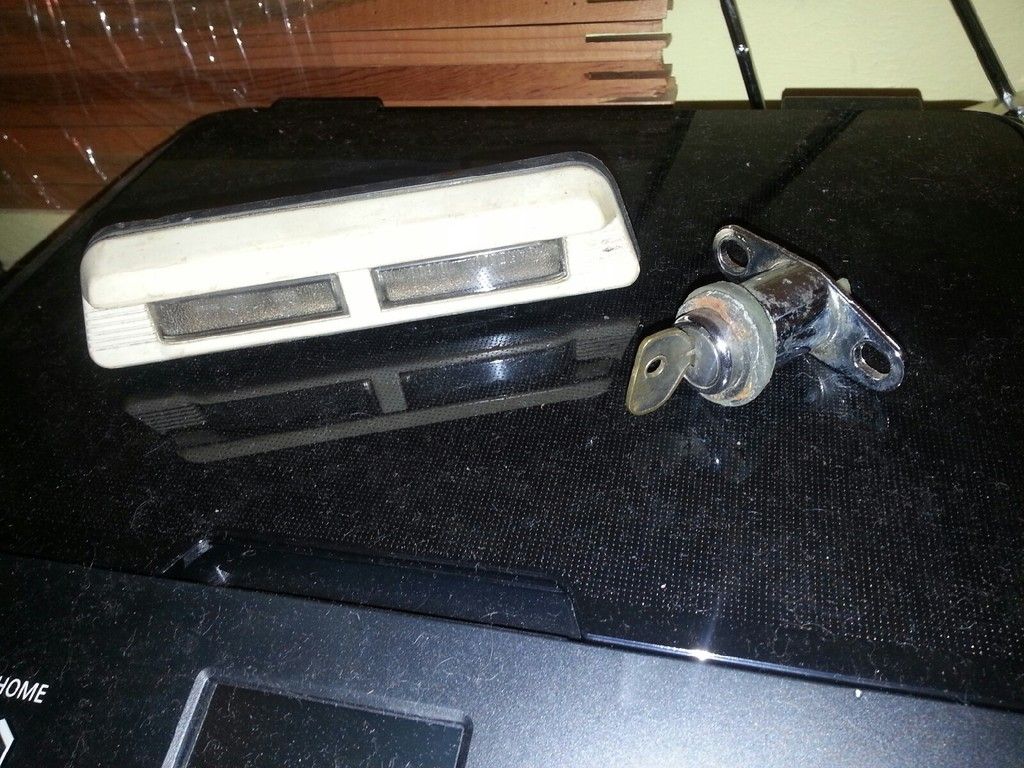
Oh, the PO managed to dig up the license plate light and trunk latch.
You'll need to log in to post.