I had Taylor-Made laser cut some mounts for the rocker arms and welded those on today. The suspension is pretty cushy when on the outer most holes but stiffens up a lot as I move the pushrod in-perfect.
[URL=http://smg.photobucket.com/user/loosecannon/media/MGB-GT/IMG_3227_zpstun8o4hv.jpg.html]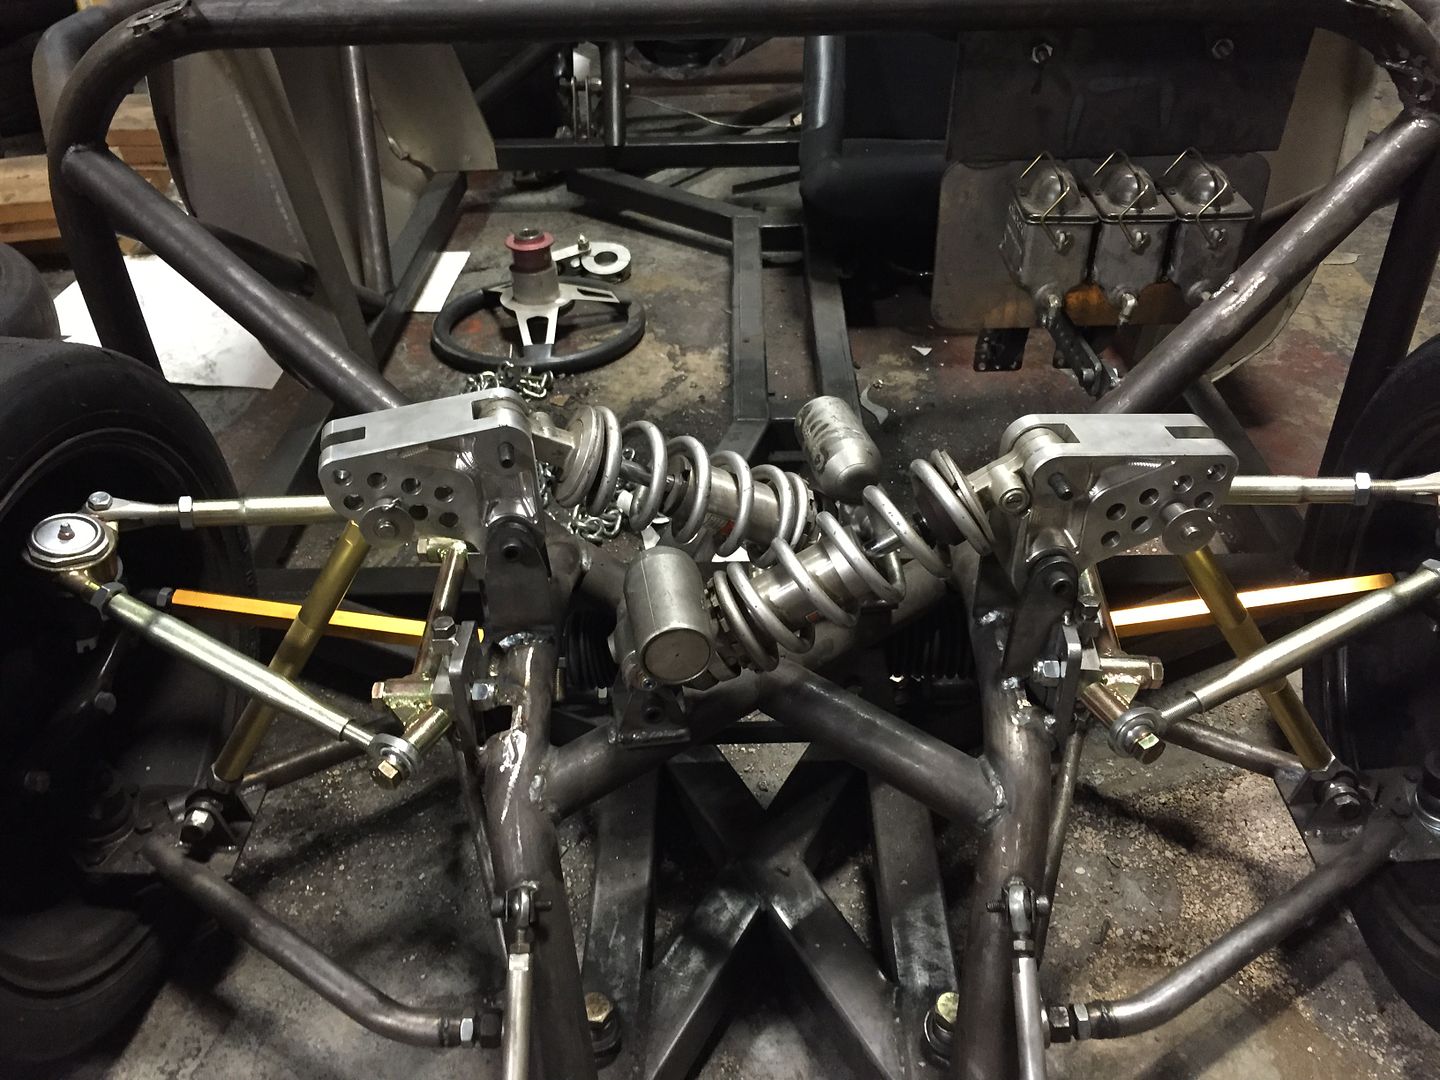 [/URL]

I wanted a need a tidy install of the electric power steering and after getting it all positioned, there was a noticeable difference in what the steering wheel was doing and how the wheels were turning left and right. The rate that the wheels would turn would speed up and slow down as I turned the steering wheel and I'm certain this would lead to unpredictable steering feel. I remember seeing a video on this and realized that I needed to make some changes. Here's the video for you to check out https://www.youtube.com/watch?v=NNcIlgRuHTc
I moved the power steering box over so the angles of the shafts is not quite so severe.
[URL=http://smg.photobucket.com/user/loosecannon/media/MGB-GT/IMG_3400_zps18v6r9hx.jpg.html]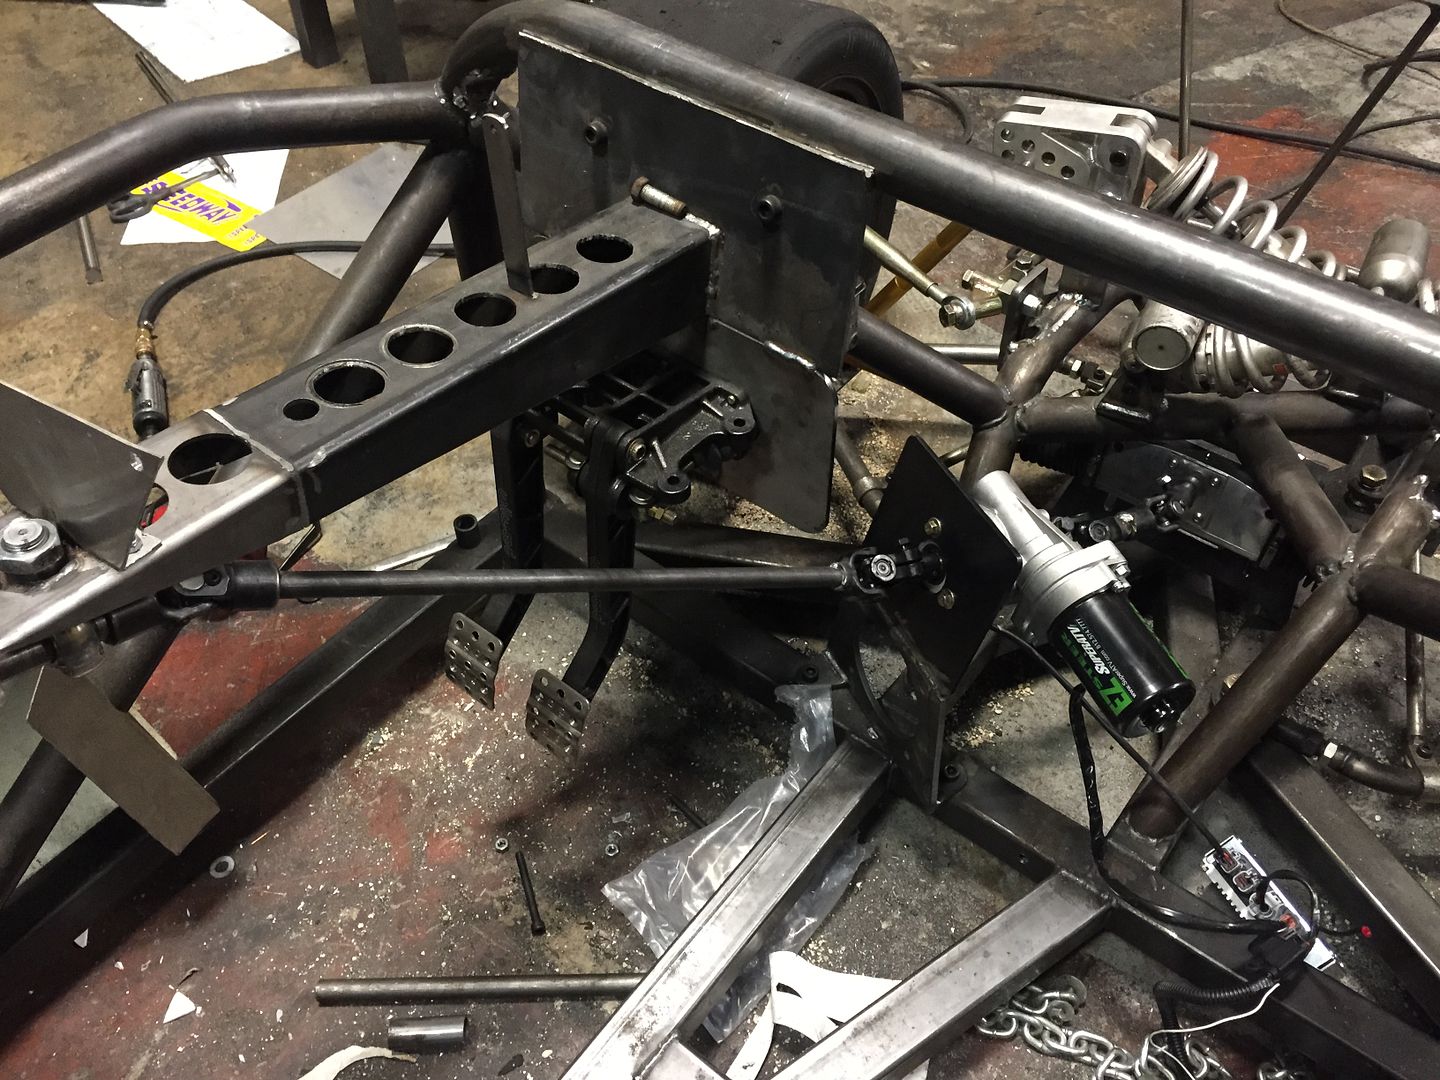 [/URL]
Once all that was in place, I tackled the problem of the car not turning sharp enough. I had no choice but to shorten the steering arms so I got a reaming tool, flat bar and thick wall DOM tubing and fabricated new arms from scratch. Instead of an effective length of 5" long, they are now 3.5" long. It worked great, now at full lock the wheels almost touch the lower control arms and the turning circle is about 15'. Once they are cleaned up, they will look nice.
[URL=http://smg.photobucket.com/user/loosecannon/media/MGB-GT/IMG_3398_zpsbvbbrajb.jpg.html]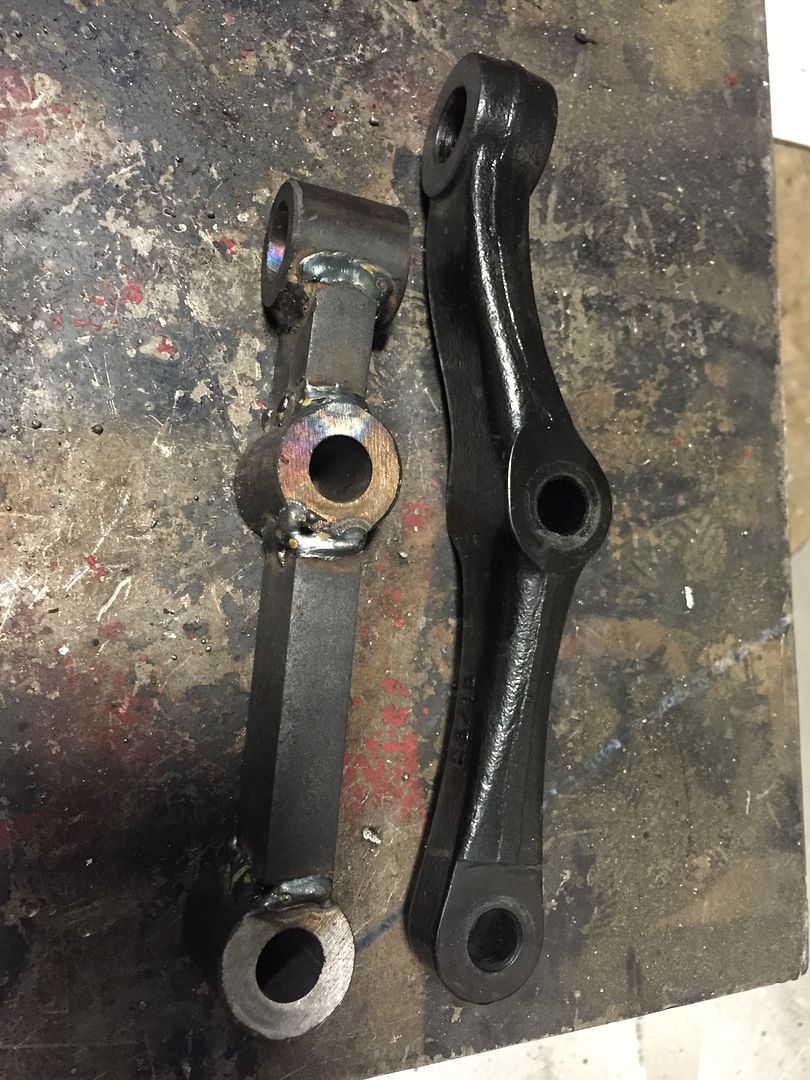 [/URL]
All bolted back together, I plugged in the electric power steering and it works! Video below.
https://youtu.be/t2zUZ6ozJlc

NOHOME
UberDork
9/15/15 6:23 p.m.
I only ask because I just finished doing some reading on Ackerman as it pertains to my project. (stretched a Miata wheelbase 7") How did the Ackeman calculations for this chassis work out?
Since poor Ackerman design will induce scrub when going around corners, it would seem critical to this build. And since I see you building new steering arms, was wondering if and how you had factored this parameter into the build?
The empirical upshot for my case was "Invite some buddies over for a beer and ask them to push the car while you make a sharp turn. If they don't accuse you of putting the brakes on, its good enough"
NOHOME wrote:
I only ask because I just finished doing some reading on Ackerman as it pertains to my project. (stretched a Miata wheelbase 7") How did the Ackeman calculations for this chassis work out?
Since poor Ackerman design will induce scrub when going around corners, it would seem critical to this build. And since I see you building new steering arms, was wondering if and how you had factored this parameter into the build?
The empirical upshot for my case was "Invite some buddies over for a beer and ask them to push the car while you make a sharp turn. If they don't accuse you of putting the brakes on, its good enough"
I am using the Performance Trends computer program and it includes an "Ackerman Error" setting, which compares ideal Ackerman for my wheelbase with what the actual Ackerman is at various steering angles. At the steering angles that my car will typically see, the error for my suspension is only .78 degree from perfect. It's only 1.4 degrees error at full lock and I can make that zero degrees error with some toe-out.

loosecannon wrote:
NOHOME wrote:
I only ask because I just finished doing some reading on Ackerman as it pertains to my project. (stretched a Miata wheelbase 7") How did the Ackeman calculations for this chassis work out?
Since poor Ackerman design will induce scrub when going around corners, it would seem critical to this build. And since I see you building new steering arms, was wondering if and how you had factored this parameter into the build?
The empirical upshot for my case was "Invite some buddies over for a beer and ask them to push the car while you make a sharp turn. If they don't accuse you of putting the brakes on, its good enough"
I am using the Performance Trends computer program and it includes an "Ackerman Error" setting, which compares ideal Ackerman for my wheelbase with what the actual Ackerman is at various steering angles. At the steering angles that my car will typically see, the error for my suspension is only .78 degree from perfect. It's only 1.4 degrees error at full lock and I can make that zero degrees error with some toe-out.
I'm working with the same software and trying to determine ackerman as well. I don't quite get the ackerman error measurement. Would you mind taking a peek at my thread and chiming in?
https://grassrootsmotorsports.com/forum/build-projects-and-project-cars/1981-camaro-c-prepared-build/59501/page13/
I tackled the front sway bar today. It's actually a Porsche 911 torsion bar and works perfectly in this application. I made mounts by taking a block of aluminum, drilling holes in it then cutting it down the middle.
[URL=http://smg.photobucket.com/user/loosecannon/media/MGB-GT/IMG_3411_zpsooeb6g4g.jpg.html]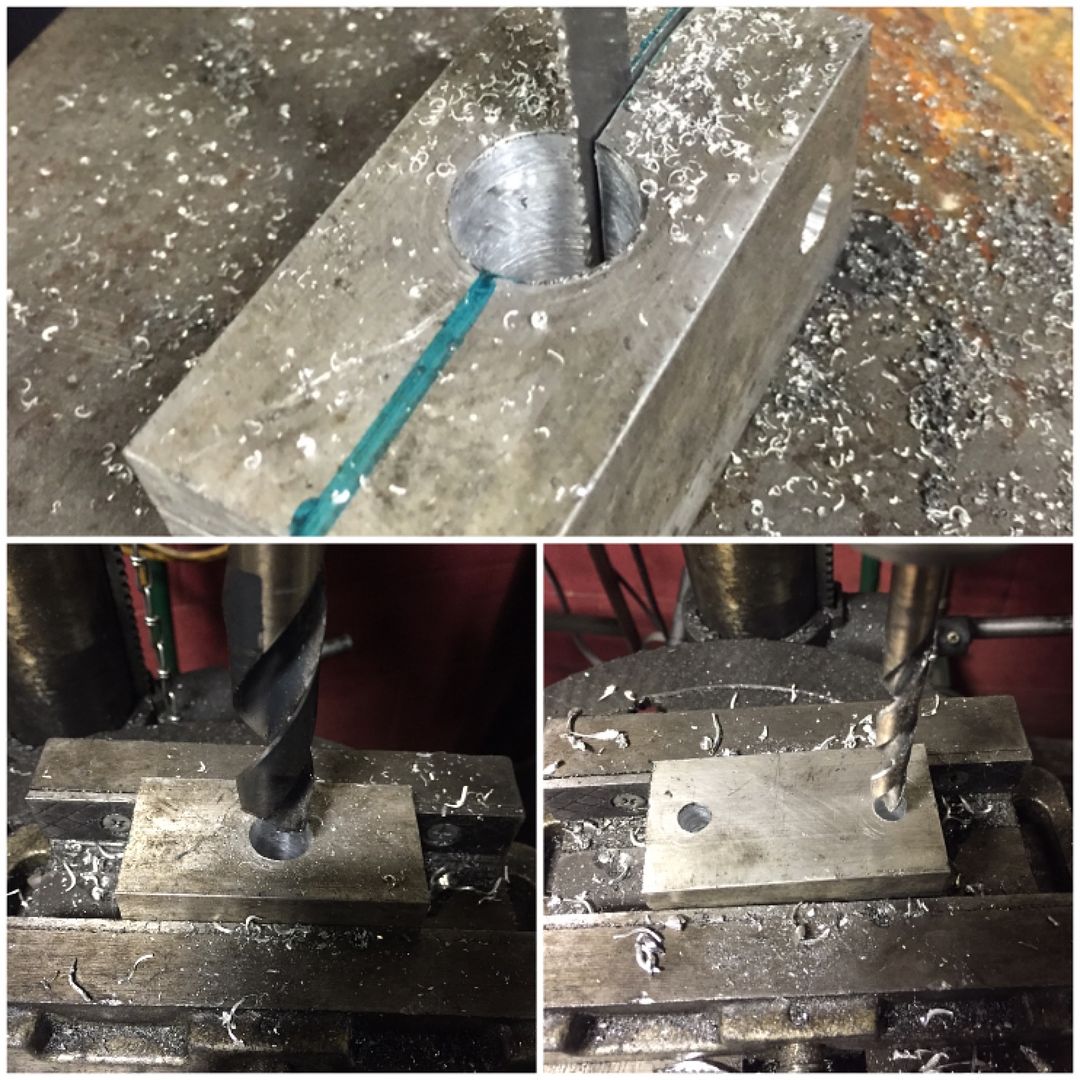 [/URL]
I welded flat bar mounts on either side of the front framework and bolted the sway bar on. BTW, the splined end caps are actually Porsche adjustable torsion bar ends with a piece of flat bar welded on to make them into arms. They cost $50 and work great.
[URL=http://smg.photobucket.com/user/loosecannon/media/MGB-GT/IMG_3408_zpstu19ea0k.jpg.html]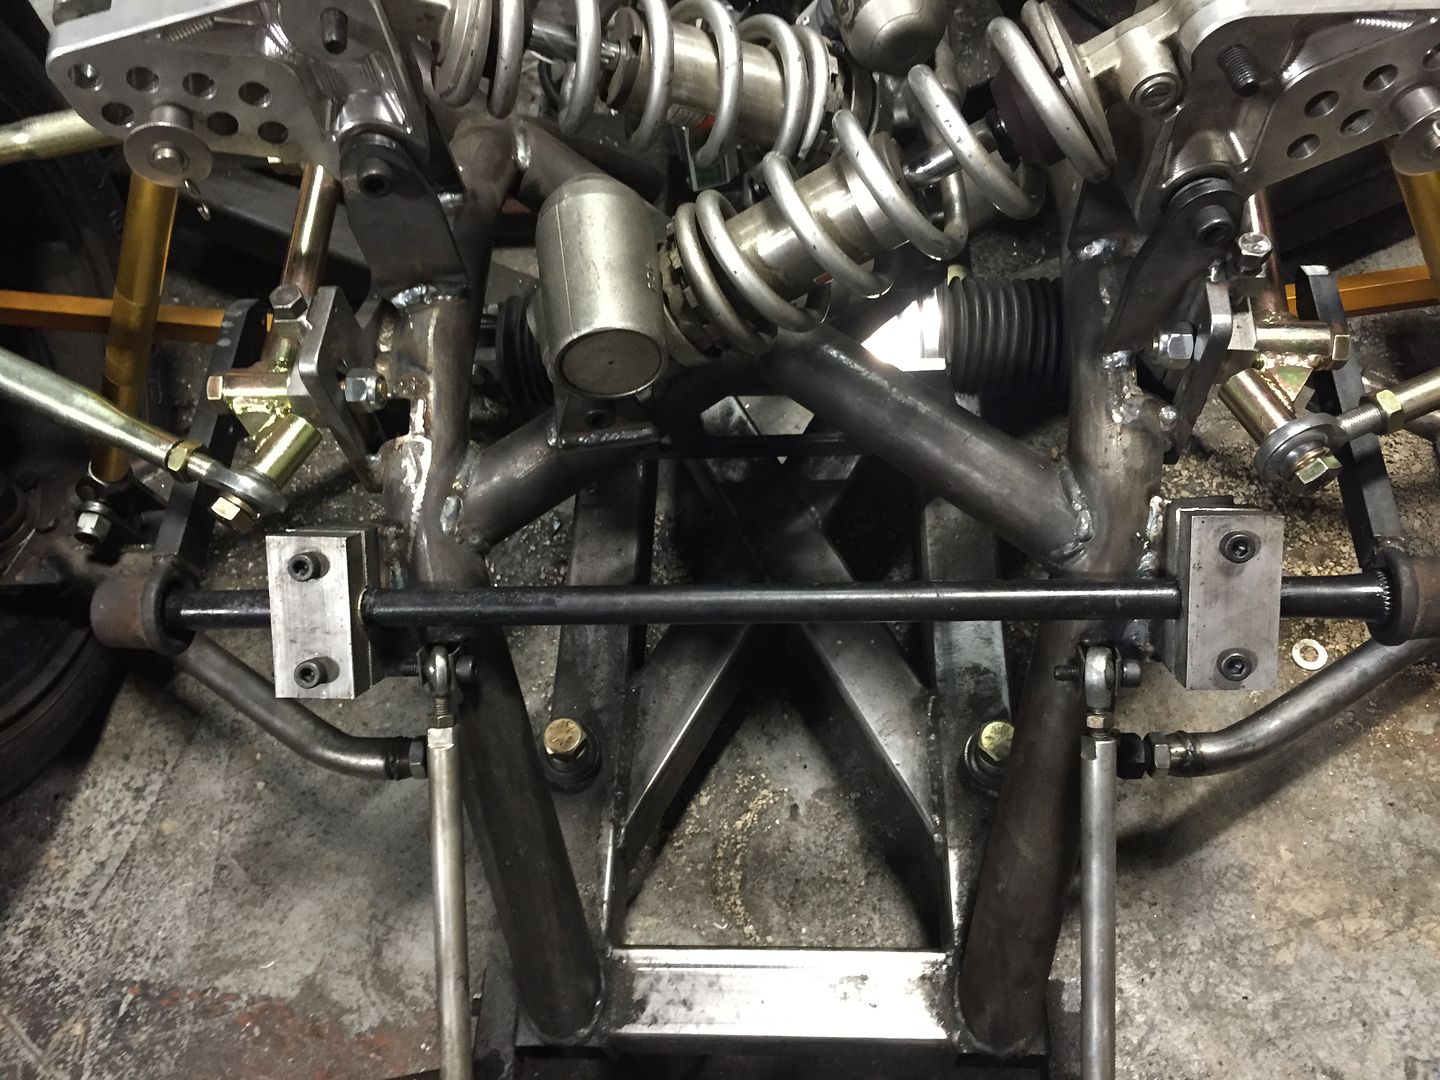 [/URL]
Here is a shot of one of the arms. I still have to attach the link to the lower control arm.
[URL=http://smg.photobucket.com/user/loosecannon/media/MGB-GT/IMG_3410_zpslh0a2rty.jpg.html]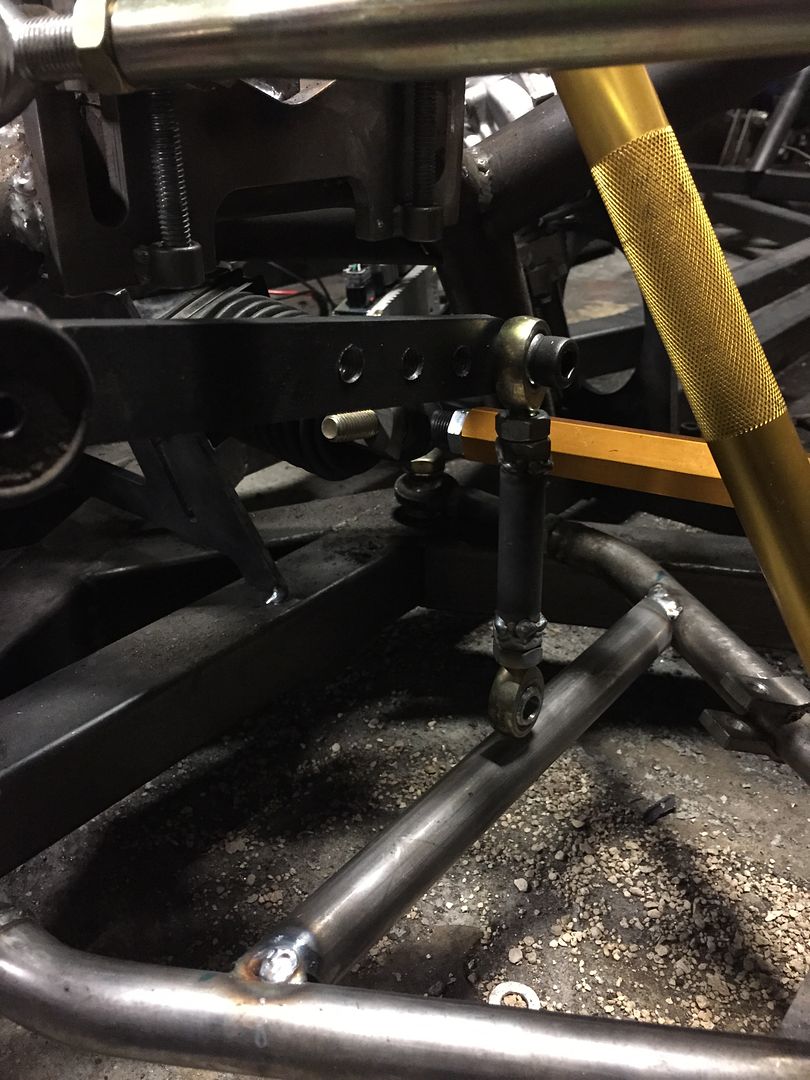 [/URL]
Rather than a single point on the control arm, go ahead and make that a series of holes too. Much less end link drama that way.

Ian F
MegaDork
9/17/15 6:47 a.m.
Are you planning to install some sort of Delrin bushing at the chassis mount? It seems like a metal-to-metal mount as shown could bind and/or squeak like hell.
Ian F wrote:
Are you planning to install some sort of Delrin bushing at the chassis mount? It seems like a metal-to-metal mount as shown could bind and/or squeak like hell.
No, I used this same style of mount front and rear on the car before and it worked great. With the noise level these cars make, you would never hear a squeak from a sway bar
I hate re-doing things but I'm determined to do everything to the best of my abilities on this car, so when it was suggested to me that I could have made the steering arms out of one solid piece of steel, I decided to do it. I purchased some cold rolled steel (it's much stronger than hot rolled) and started drilling, grinding, reaming and sanding until they looked like steering arms.
The raw steel
[URL=http://smg.photobucket.com/user/loosecannon/media/MGB-GT/IMG_3413_zpsxctb93by.jpg.html]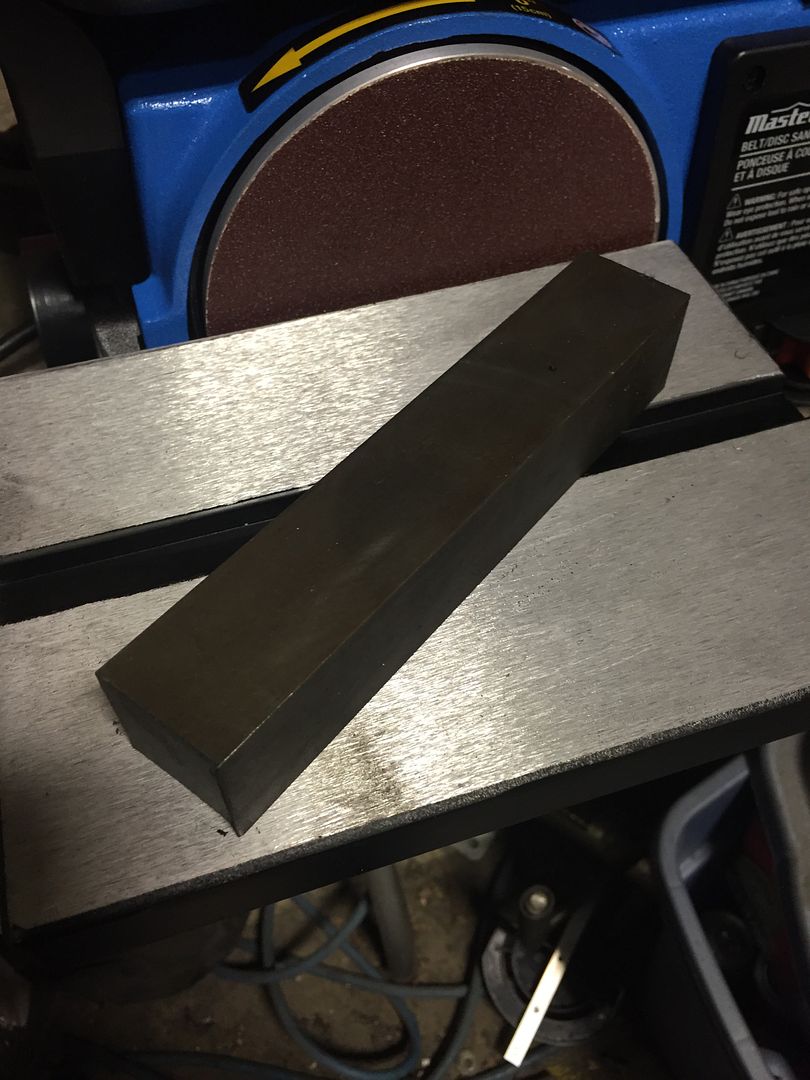 [/URL]
Almost finished
[URL=http://smg.photobucket.com/user/loosecannon/media/MGB-GT/IMG_3418_zpss2fq4hak.jpg.html]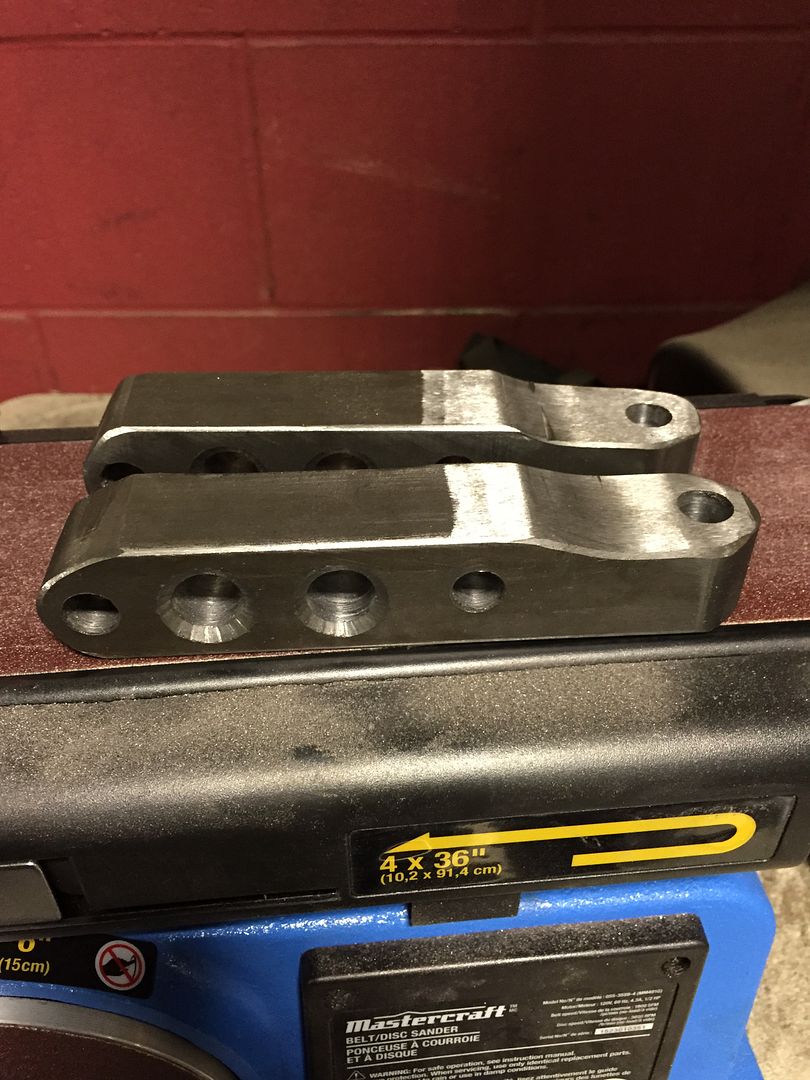 [/URL]
Installed but still unpainted
[URL=http://smg.photobucket.com/user/loosecannon/media/MGB-GT/IMG_3419_zps6a9q2mbl.jpg.html]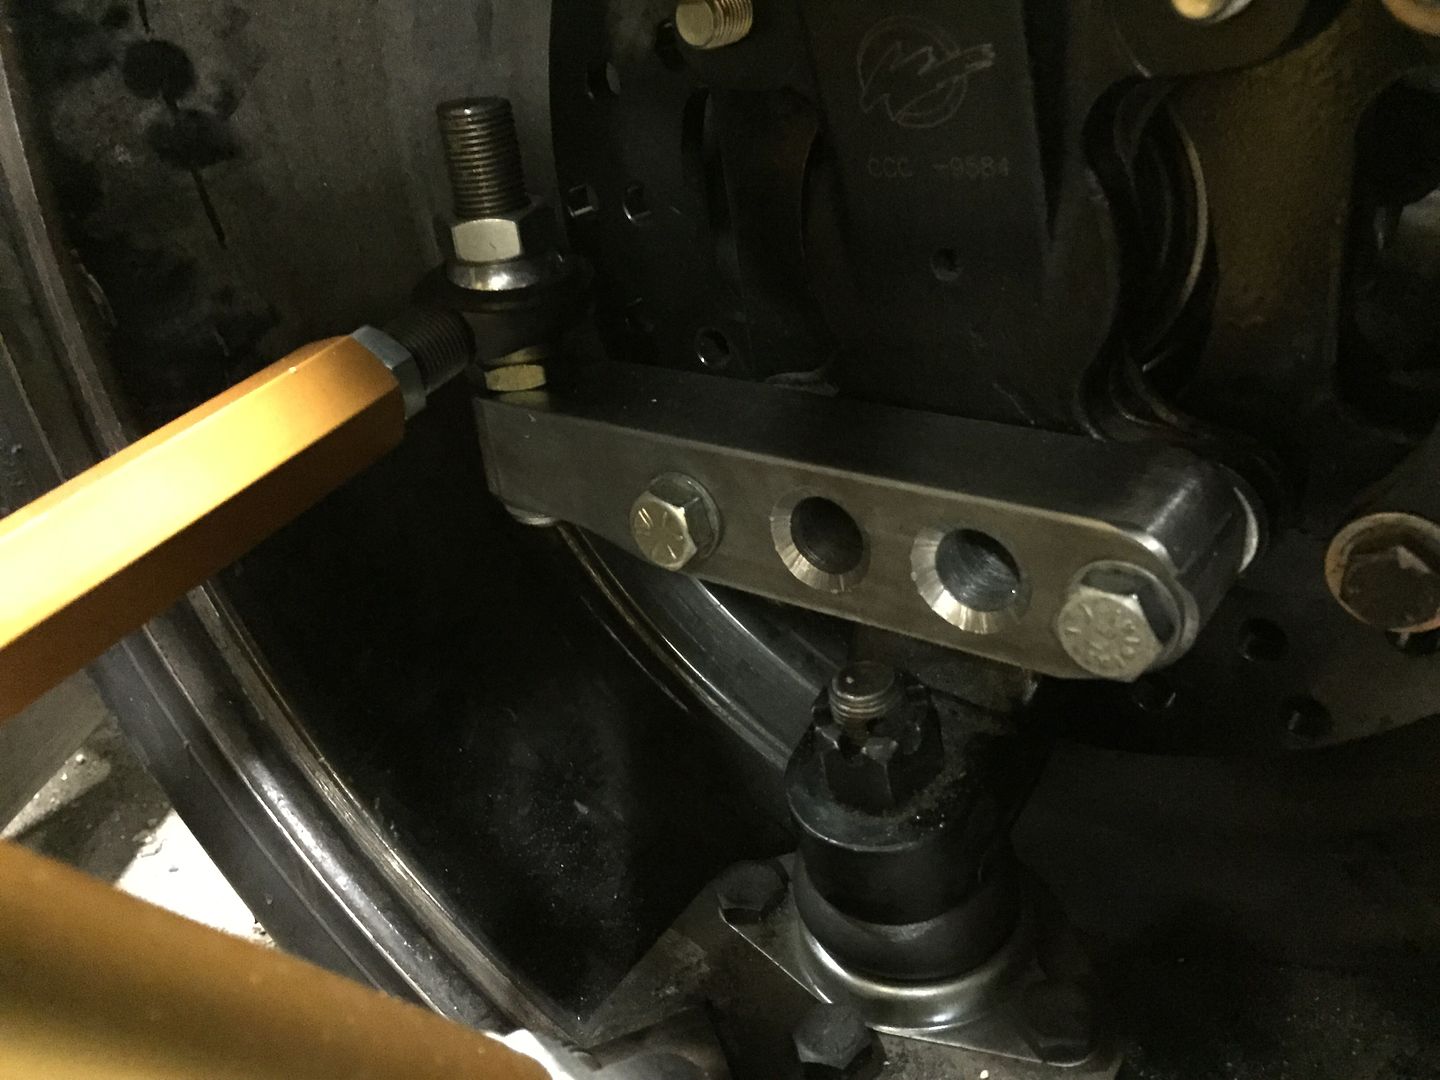 [/URL]
Very nice. I like that better.
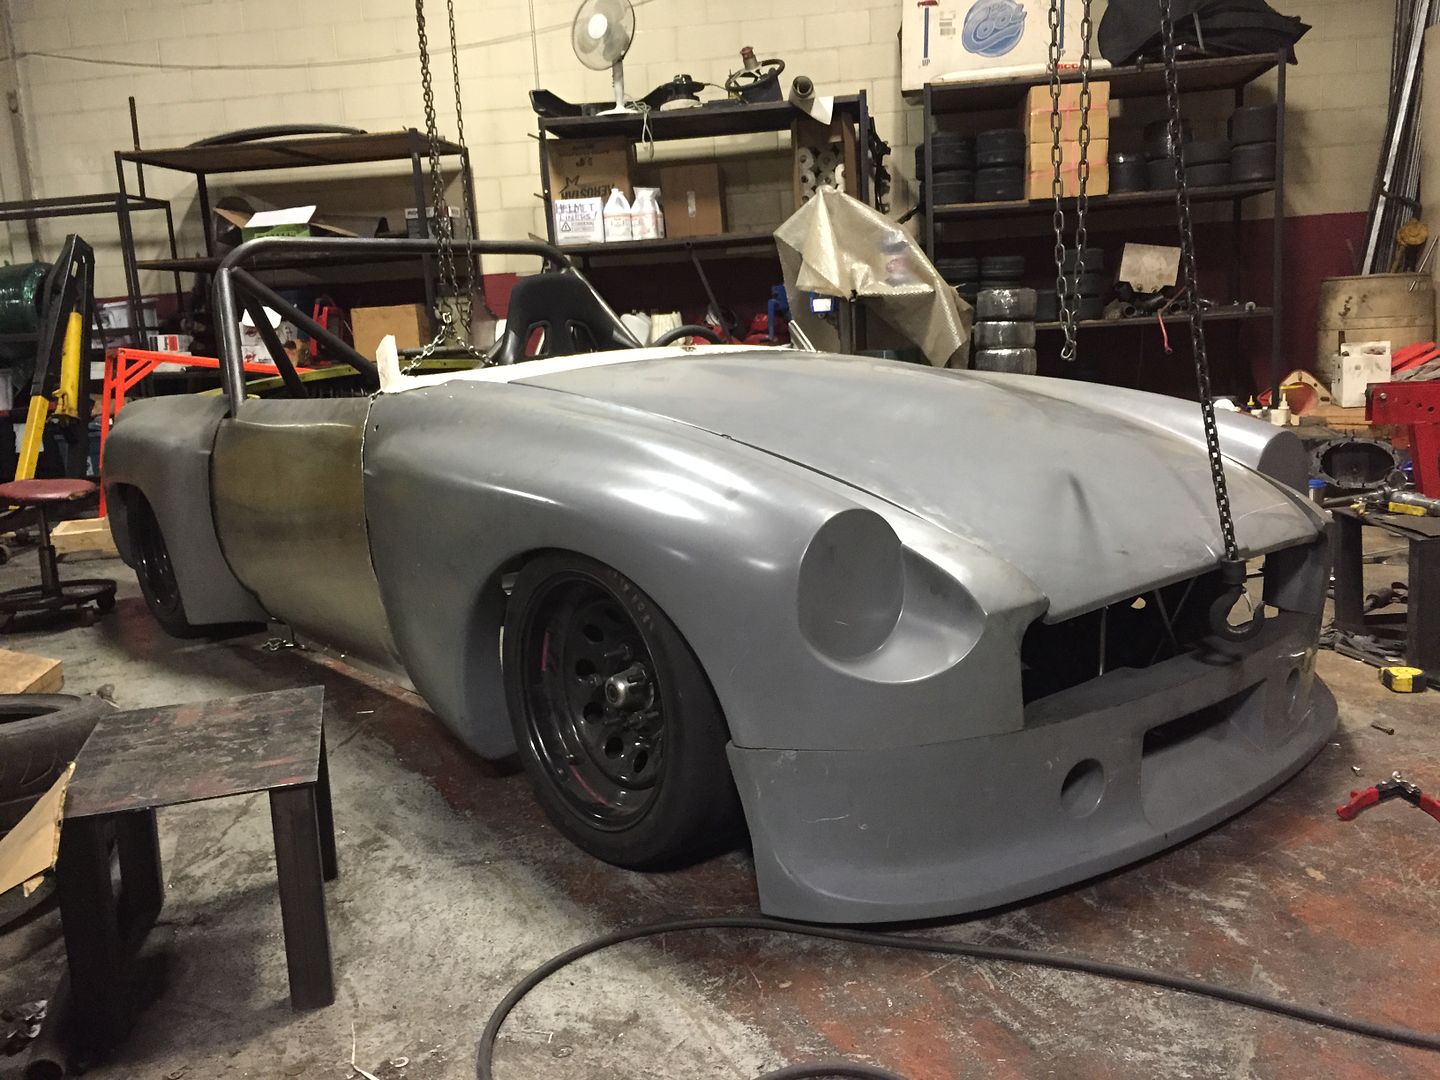
I was working the course when the Kieselmobile came blazing through and noticed that the spoiler was almost touching the ground under braking and in some turns, and realized that I needed to lower my spoiler. I have to allow for the bumpy site we autocross on locally but I think I'll just raise up the front ride height for those events.
[URL=http://smg.photobucket.com/user/loosecannon/media/MGB-GT/img_3806-2_zpsdaparlfp.jpg.html] [/URL]
Here it is after I lowered it but it will actually be 1.5" lower than this at it's proper ride height
[URL=http://smg.photobucket.com/user/loosecannon/media/MGB-GT/IMG_3421_zps1zqpms6i.jpg.html]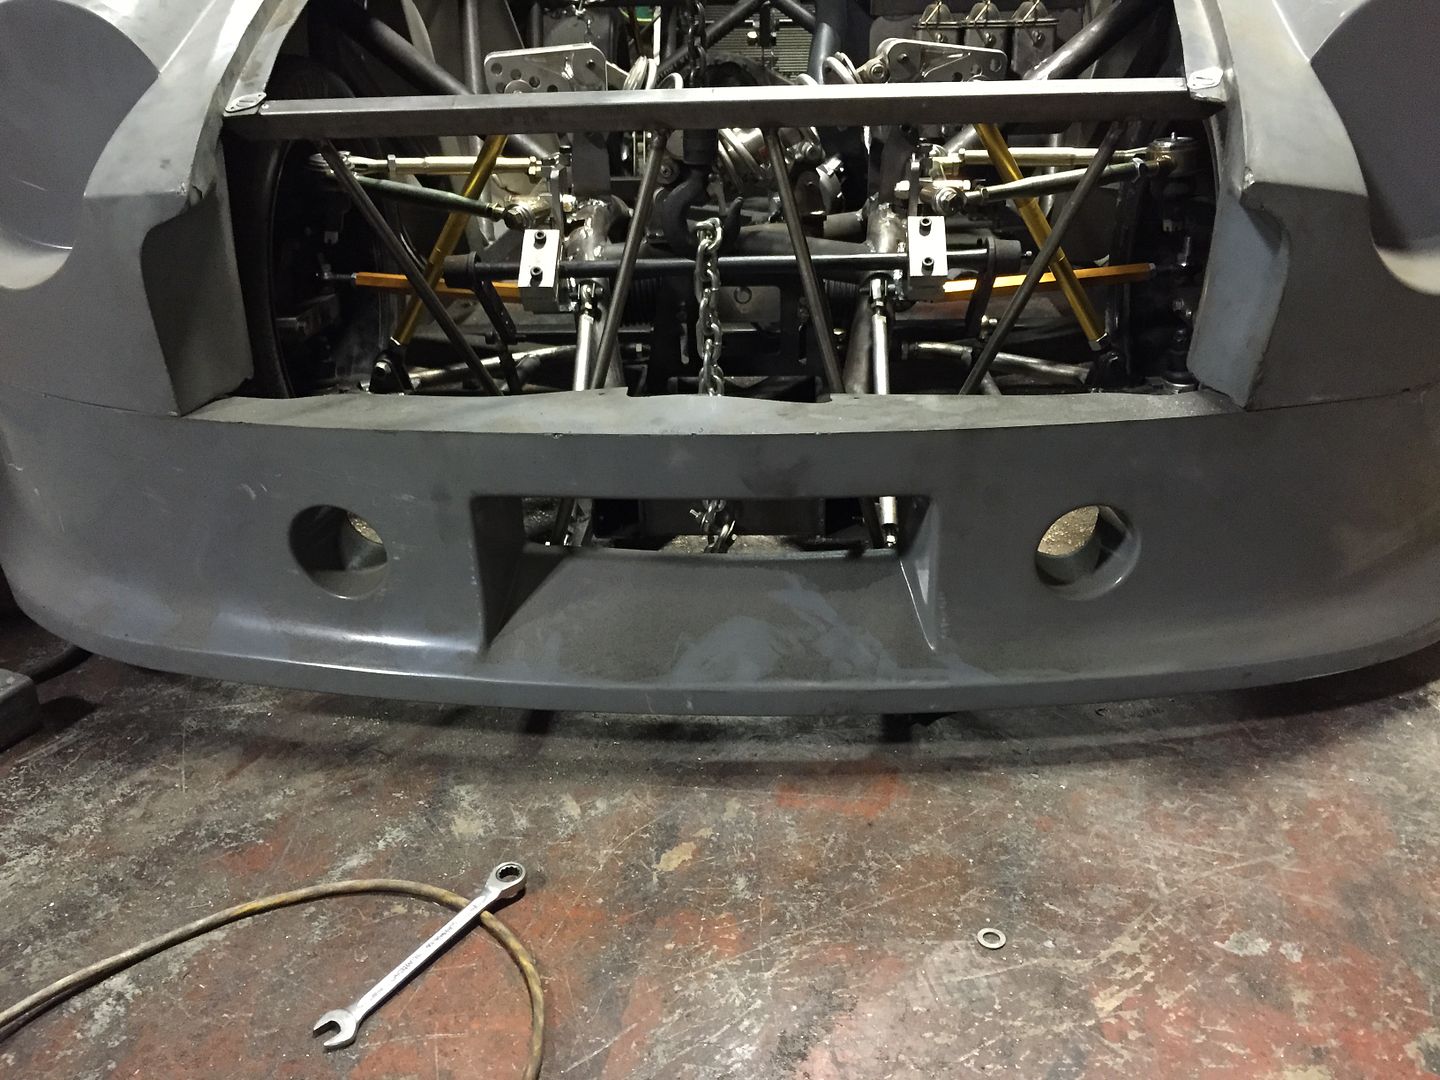 [/URL]
If you are running with a splitter hanging off the front fascia, you do not want it to make contact with the ground. It would be best to stay just clear of the ground, with a hint of air gap being better than dragging. Both mechanical and aero will benefit.
How about a good old fashion rubber "skirt" beneath the splitter/spoiler?
A length of that 3 or 4 inch wide black rubber stuff (from Home Depot) that you use to find under lower cabinets where the wall meets the linoleum?
http://www.homedepot.com/p/ROPPE-Rubber-Black-4-in-x-1-8-in-x-48-in-Wall-Cove-Base-30-Pieces-H40CR1P100/100148418
Running a skirt/valance does need to run right at ground surface to make the most downforce. It also folds back if it does not wear quickly enough to provide zero clearance. A splitter on the other hand stops the car from traveling and effectively unloads the tires on that side/end.
TeamEvil wrote:
How about a good old fashion rubber "skirt" beneath the splitter/spoiler?
A length of that 3 or 4 inch wide black rubber stuff (from Home Depot) that you use to find under lower cabinets where the wall meets the linoleum?
http://www.homedepot.com/p/ROPPE-Rubber-Black-4-in-x-1-8-in-x-48-in-Wall-Cove-Base-30-Pieces-H40CR1P100/100148418
Funny you should mention this, I had a skirt on Pink Panther 1.0 and here it is
[URL=http://smg.photobucket.com/user/loosecannon/media/MGB-GT/IMG_5349.jpg.html]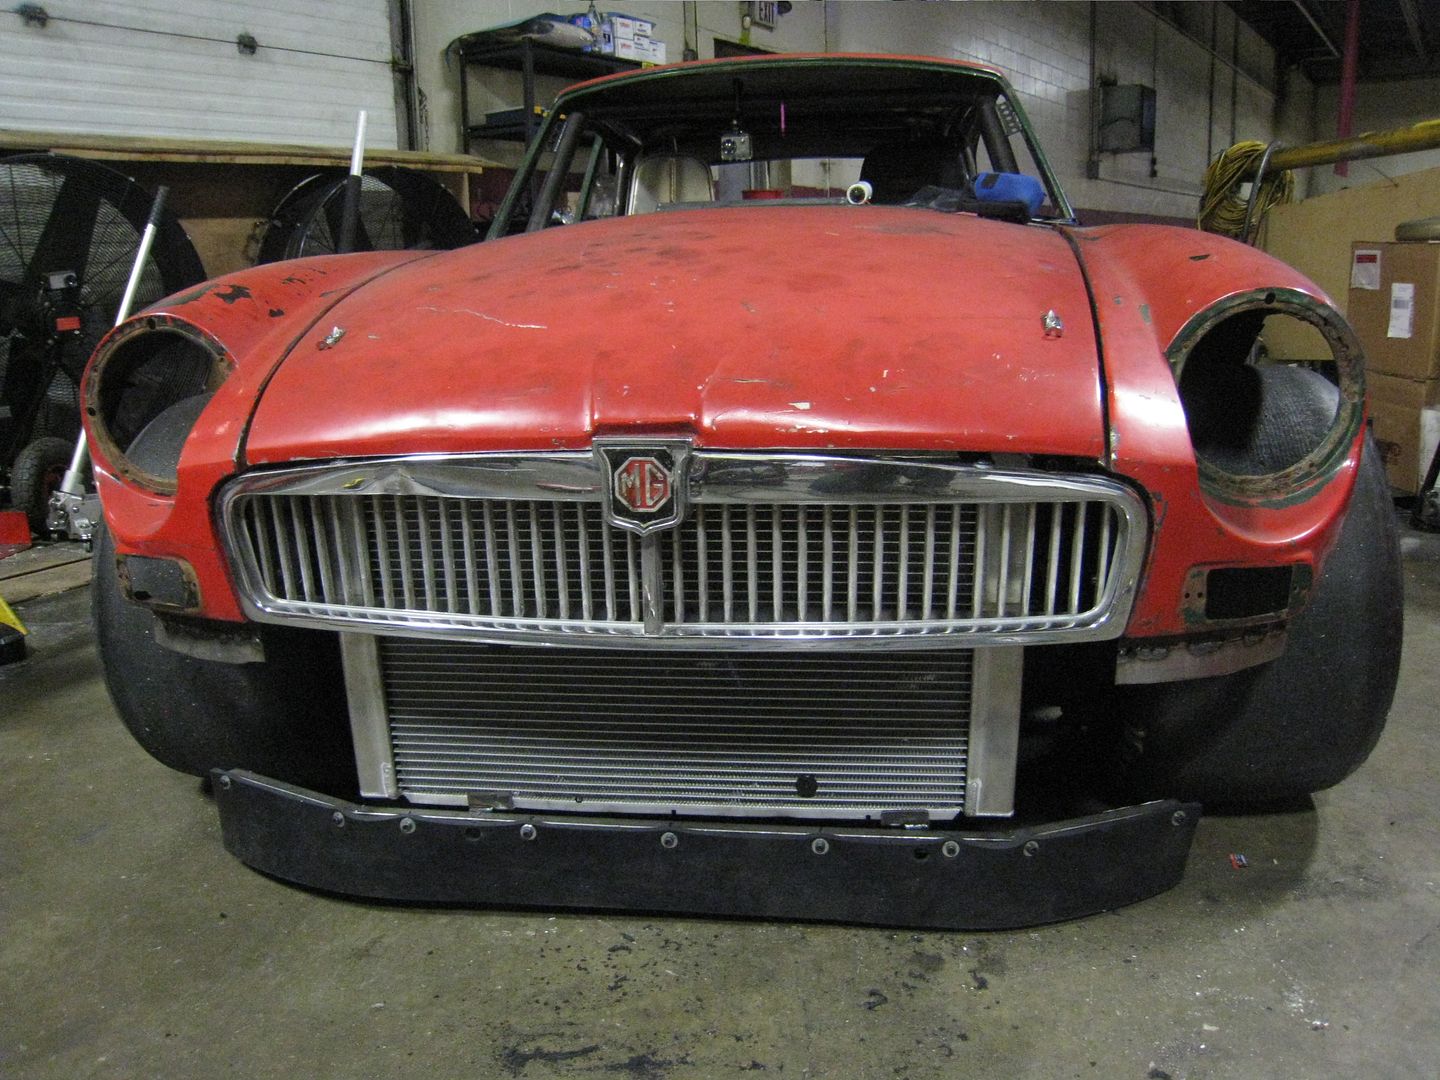 [/URL]
Started on the bellypan today and got the drivers side done. I have to make a front section, rear section and engine side pan.
[URL=http://smg.photobucket.com/user/loosecannon/media/MGB-GT/IMG_3430_zpsccp7aihk.jpg.html]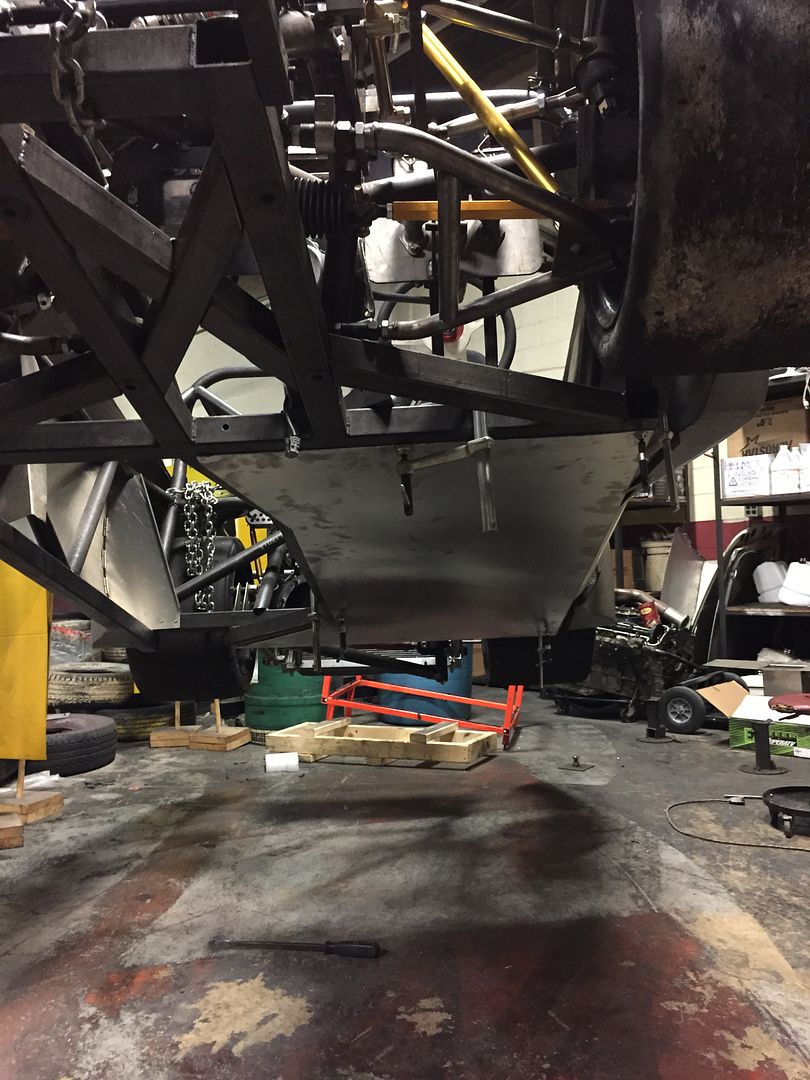 [/URL]
[URL=http://smg.photobucket.com/user/loosecannon/media/MGB-GT/IMG_3441_zpsxeiyv03n.jpg.html]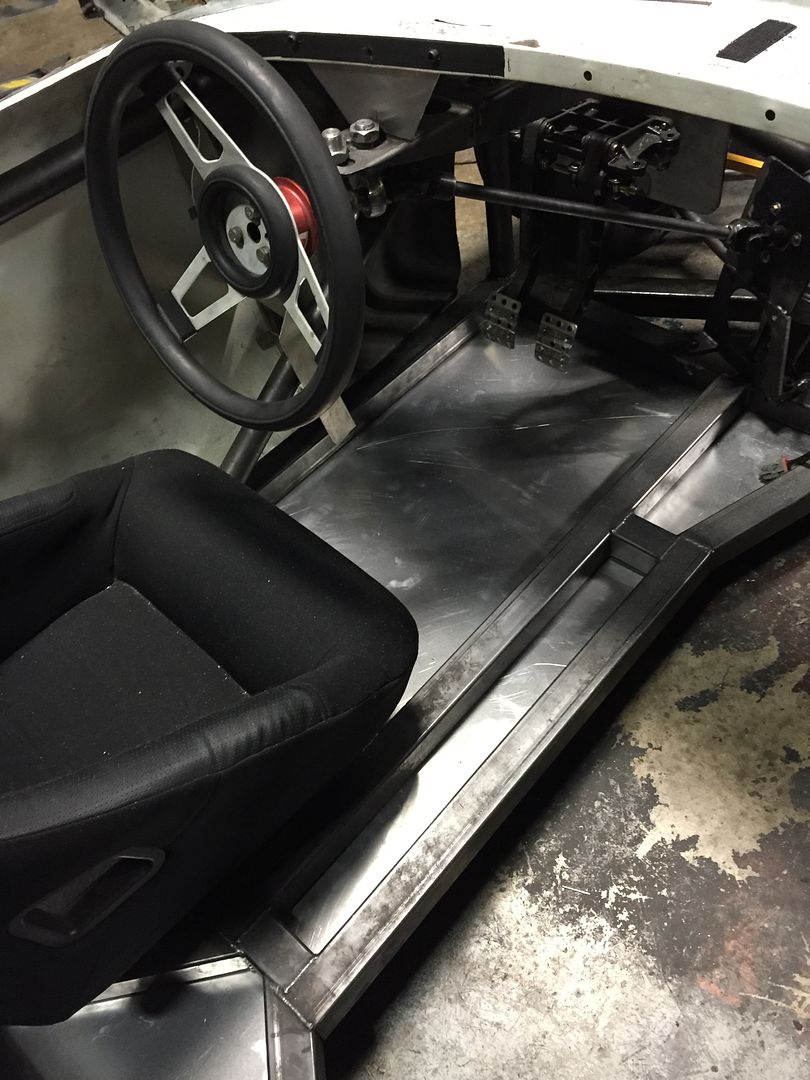 [/URL]
I also completed the sway bar install with mounts on the LCA
[URL=http://smg.photobucket.com/user/loosecannon/media/MGB-GT/43ee7a98-0744-4624-865d-06e64ad0d7f8_zpstcjv3srf.jpg.html]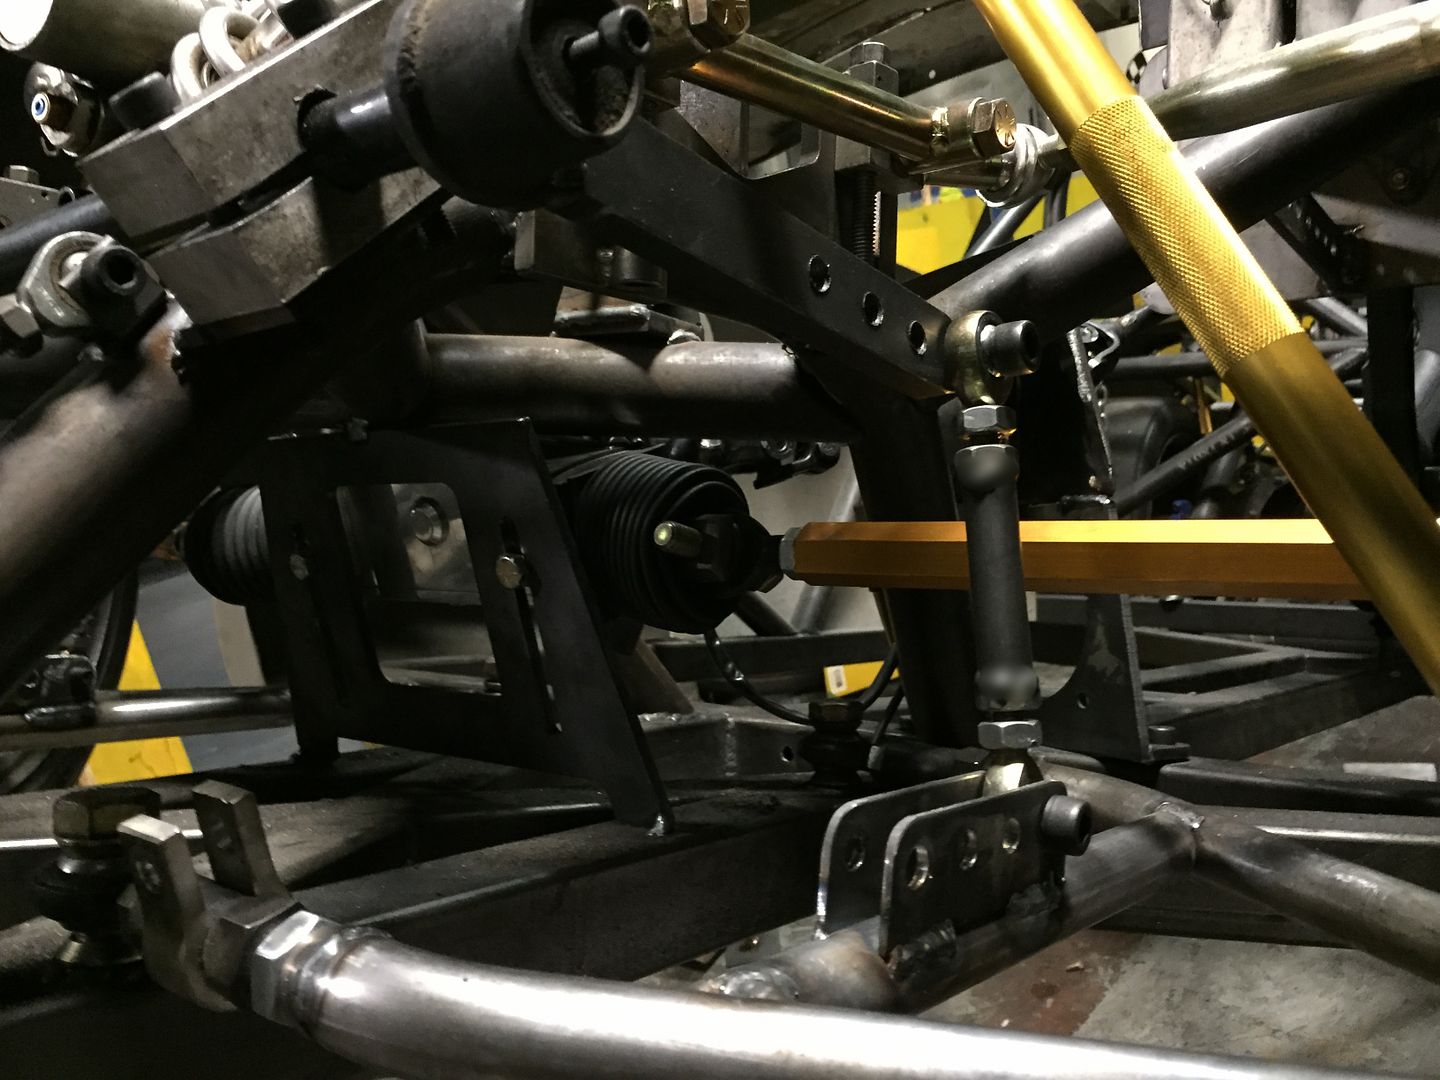 [/URL]
I've lost track.....what engine is going in this time?.
Yes, I bought a 2013 Buick Regal Turbo from a salvage auction. The engine is all aluminum, DOHC, direct injected, turbocharged and intercooled. Plus it is set up for running E85 which means it has oversize injectors and can run big boost. All in a 300lb package that fits in a 2 foot cube.
This project began on a bizarre path since it's inception. I've been watching and admiring your perseverance & creativity.
Outside the box thinking produced a cool toy that made sweet noises.
Not fast enough and heavy, no problem see this SBF? Ka Chunk..
Dang these guys with 4 bangers are spanking me!
Ok Ok I see where this needs to go, Hold my beer, Watch this!!!
Shouldn't have asked me to hold your beer, now you need another!
I do have one question,
Is there anything left of the original car?
I think that if you do not get FTOD it will come in the next iteration. The SCCA top dogs should be sharpening their slide rules!
There's so little of the original car that I should have just kept that one as a museum piece when I started building the new one. The white part that holds the windshield is from the original car, as is the radiator, shocks, wheels, rear brakes and seat. I think my original goal was just to build something cool but that wasn't enough, it needed to be competitive, too.


 [/URL]
[URL=http://smg.photobucket.com/user/loosecannon/media/MGB-GT/IMG_3450_zpsx8gtgllo.jpg.html]
[/URL]
[URL=http://smg.photobucket.com/user/loosecannon/media/MGB-GT/IMG_3450_zpsx8gtgllo.jpg.html]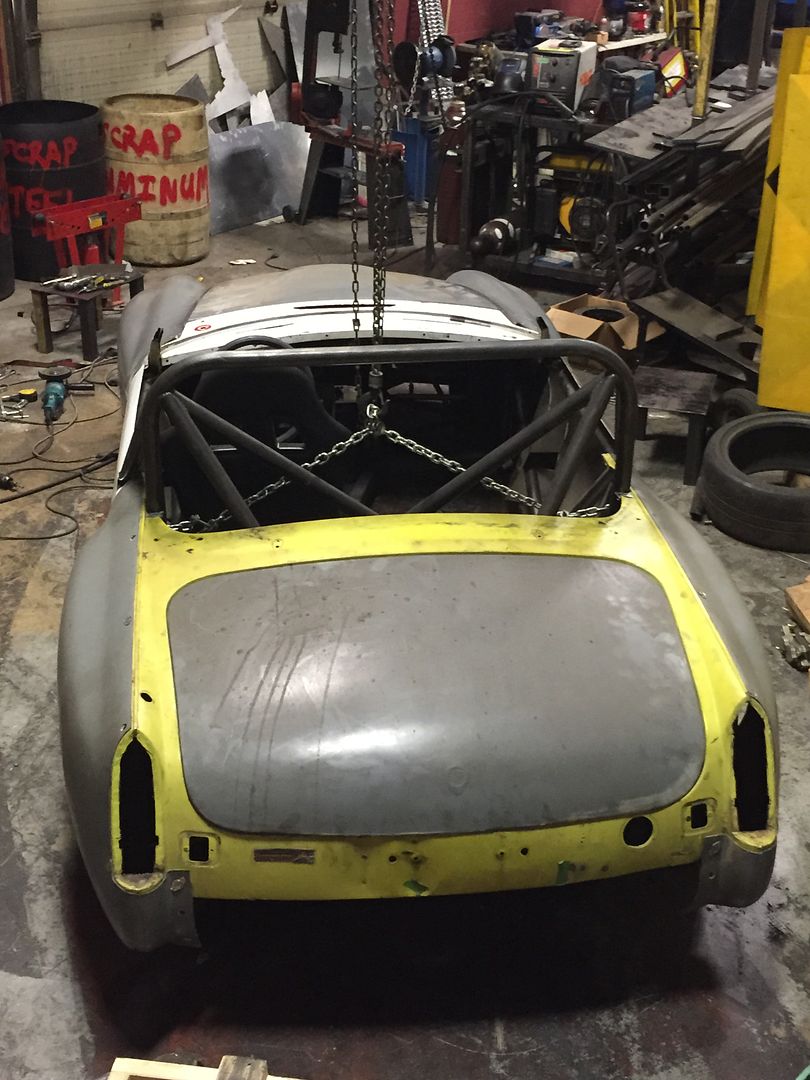 [/URL]
[URL=http://smg.photobucket.com/user/loosecannon/media/MGB-GT/IMG_3449_zpsag3nuvaw.jpg.html]
[/URL]
[URL=http://smg.photobucket.com/user/loosecannon/media/MGB-GT/IMG_3449_zpsag3nuvaw.jpg.html]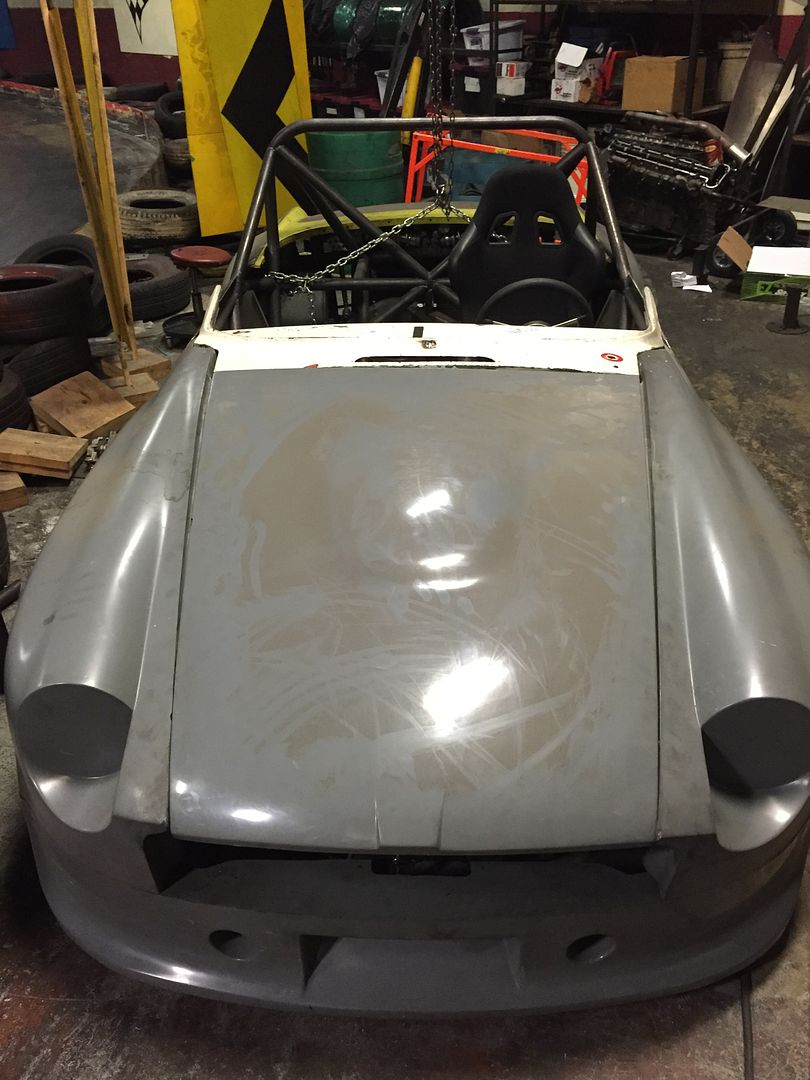 [/URL]
[URL=http://smg.photobucket.com/user/loosecannon/media/MGB-GT/IMG_3448_zpsjafnniyc.jpg.html]
[/URL]
[URL=http://smg.photobucket.com/user/loosecannon/media/MGB-GT/IMG_3448_zpsjafnniyc.jpg.html]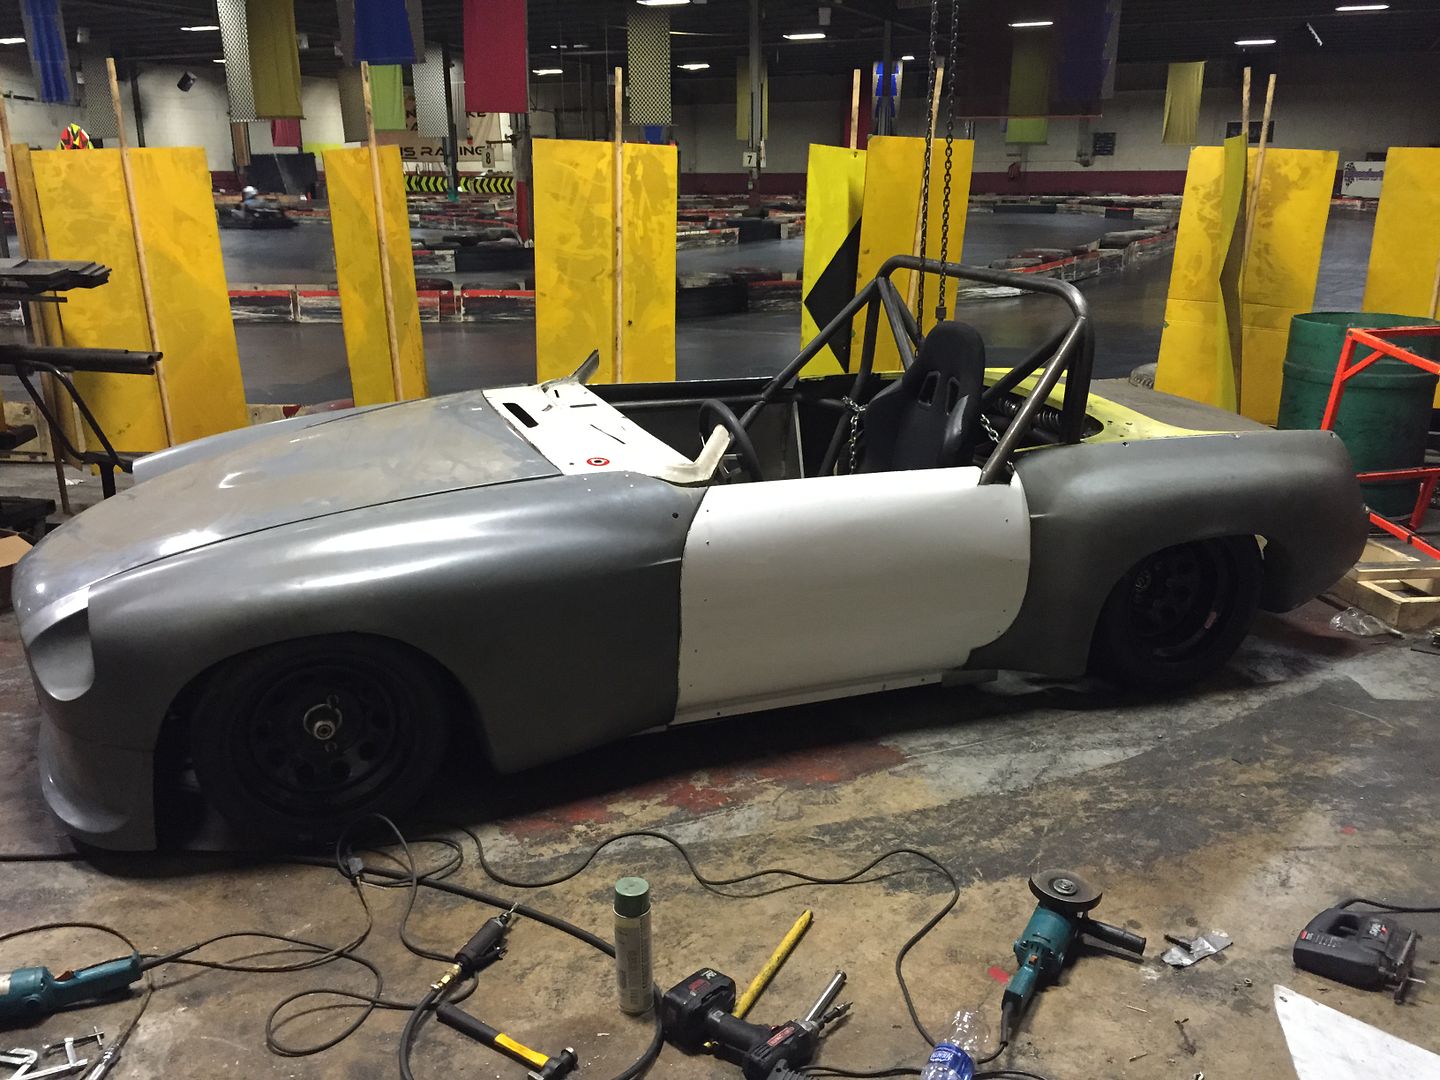 [/URL]


